

Bloodcurse is the best overall status infusion in Mortal Shell 2, with Stasis joining it in S tier, Lightning and Frost in A tier, Curse and Phantom in B tier, Burn and Poison in C tier, and Trauma in D tier.
The strongest infusions either convert rapid applications into immediate damage or control enemies long enough to create safe openings. Lower-tier choices tend to depend on one specialized Shell, lose their stacks too quickly, or occupy slow weapons that have stronger alternatives.
- Mortal Shell 2 status infusion tier list
- How these status infusions were ranked
- Bloodcurse is the best S-tier infusion
- Stasis provides S-tier control
- Lightning delivers A-tier burst and crowd pressure
- Frost has A-tier flexibility despite S-tier strength
- Curse reaches its highest ceiling with Sariel
- Phantom offers B-tier delayed damage and stagger
- Burn is a niche C-tier exploration infusion
- Poison depends on Tiel to escape C tier
- Trauma has the weakest overall payoff
Mortal Shell 2 status infusion tier list
| Tier | Infusion | Strongest pairing |
|---|---|---|
| S | Bloodcurse | Axe and Dagger with Duality Stone |
| S | Stasis | Genessa, the Wayward with a Torpor Stone Axatana |
| A | Lightning | Proxima, the Broodseeker with a Voltaic Crown Axatana |
| A | Frost | Eredrim the Venerable with Great Martyr’s Blade |
| B | Curse | Sariel, the Endless with Accursed Stone |
| B | Phantom | Salvaged Trebuchaxe with Monarch’s Vestige |
| C | Burn | Veteran’s Battle Axe with Inflamed Clawstone |
| C | Poison | Tiel the Acolyte with Serpent Stone |
| D | Trauma | Hammer with Wretchcaller’s Stone |
Key The pairing column highlights the strongest supported route for each infusion; it does not mean that the effect is restricted to that exact setup.
How these status infusions were ranked
Placement weighs effect strength, application speed, compatible weapon availability, Shell synergy, boss reliability, crowd control, and late-game usefulness. An exceptional effect loses ground when it is confined to awkward weapons, while a specialist infusion can rank modestly overall even if one Shell pushes it several tiers higher.

Stacks also behave differently between infusions. Depending on the status, additional applications can increase the effect’s intensity, extend its duration, or build toward a delayed burst, so raw stack counts do not offer a direct comparison between two effects.
Match an infusion to your weapon’s hit pattern before investing in it. A fast multi-hit weapon can make a strong status proc reliably, while a slow applicator may leave its stacks unfinished.
Bloodcurse is the best S-tier infusion
Bloodcurse builds toward a large burst that removes a substantial portion of an enemy’s health when fully applied. That payoff remains valuable against bosses, where steady chip damage matters less than reliably converting an opening into a sharp health-bar drop. Arbiter’s Prize provides the infusion needed to build around that burst.
Axe and Dagger is the strongest general pairing because its quick attacks already accumulate status efficiently. Adding Duality Stone allows attacks to strike twice, accelerating Bloodcurse application without forcing the player into long animations.

Clockwork Scythe offers an equally dangerous specialist setup. Activating Scholar’s Wormstone turns its multi-hit attack into a rapid Bloodcurse applicator, allowing the weapon to build and trigger the effect during a concentrated attack window.
Sidearms broaden its usefulness further. Critical-hit variants reward builds capable of landing repeated critical strikes, while non-critical application offers greater consistency when crit chance is not the focus. Between those ranged options and two excellent fast melee weapons, Bloodcurse combines high boss damage, quick application, and broad build access better than any other infusion.
Stasis provides S-tier control

Stasis applies an increasingly severe slow as its stacks rise. Slower attacks are easier to dodge, positioning becomes less demanding, and backstab-focused Shells receive far safer access to an enemy’s rear. Against many bosses, enough Stasis can disrupt the normal pace of their attack patterns and create unusually long offensive windows.
Torpor Stone supplies the core infusion for Axatana and Hammer setups. Axatana is the superior applicator because its fast moveset and multi-hit potential build stacks quickly, while the Hammer’s slower swings make the process more cumbersome despite benefiting greatly once the enemy has been slowed to its pace.
Genessa, the Wayward raises Stasis further through her clones. With Distraction upgraded, a clone applies Stasis when attacked, letting Genessa bait an enemy into building the status while she stays outside the immediate exchange. This supplements rather than replaces weapon application, and other Shells still gain enormous defensive value from a Torpor Stone build.
A few encounters resist or ignore Stasis, preventing it from being the only infusion a build carries. Everywhere else, its combination of stacking control, defensive safety, easier backstabs, and boss suppression places it beside Bloodcurse in S tier.
Lightning delivers A-tier burst and crowd pressure
Lightning mixes direct burst with area damage. Once sufficient stacks are applied, lightning bolts strike the target and can pressure nearby enemies through chained effects, making the infusion valuable in crowded encounters without sacrificing all of its single-target usefulness. Voltaic Crown supports melee application, while Voltaic Amber extends that pressure to sidearms and ranged engagements.
Axatana and Clockwork Scythe are excellent carriers because both can apply stacks through rapid hits. Axatana benefits from repeated strikes, while Scholar’s Wormstone lets the scythe’s spinning attack build Lightning quickly. This weapon availability makes Lightning effective on any Shell rather than confining it to one character.
Proxima, the Broodseeker supplies its highest ceiling by doubling shock damage and its radius, turning procs into wider crowd-clearing storms. Lightning therefore excels when exploration involves groups or ranged enemies, but Bloodcurse remains the stronger pure-damage default when the only objective is removing one boss’s health as efficiently as possible.
Frost has A-tier flexibility despite S-tier strength
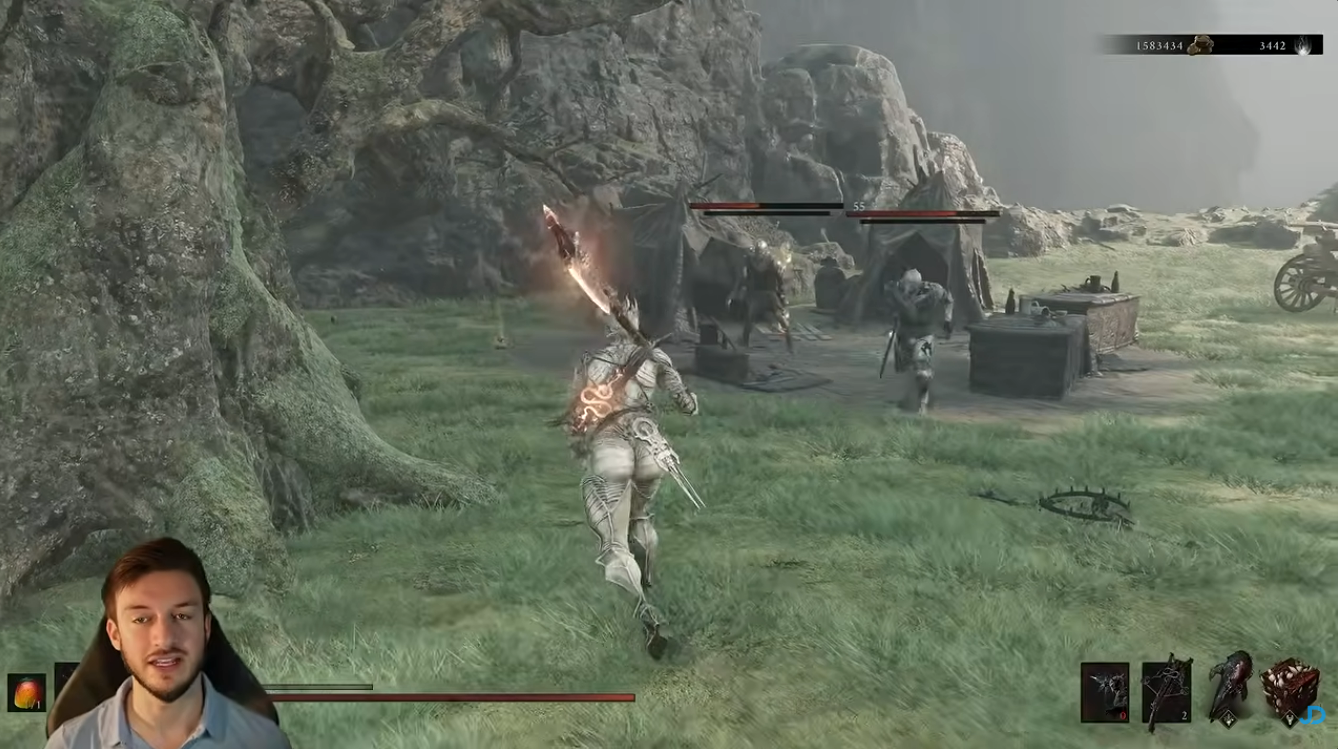
Frost is powerful enough to compete with the S-tier effects once it is active, providing both control and a major opening for follow-up damage. Its A-tier placement comes from restrictive practical weapon choices rather than a weak effect.
Great Martyr’s Blade is the main melee route. Its slow default swings are awkward, but the sprinting heavy attack delivers a sweeping strike followed by a stab, can transition between targets, and provides the safest way to apply Frost with the weapon. Repeater Triarch offers ranged application through critical hits, although committing to the heavy sidearm means giving up the flexibility available from other ranged setups.
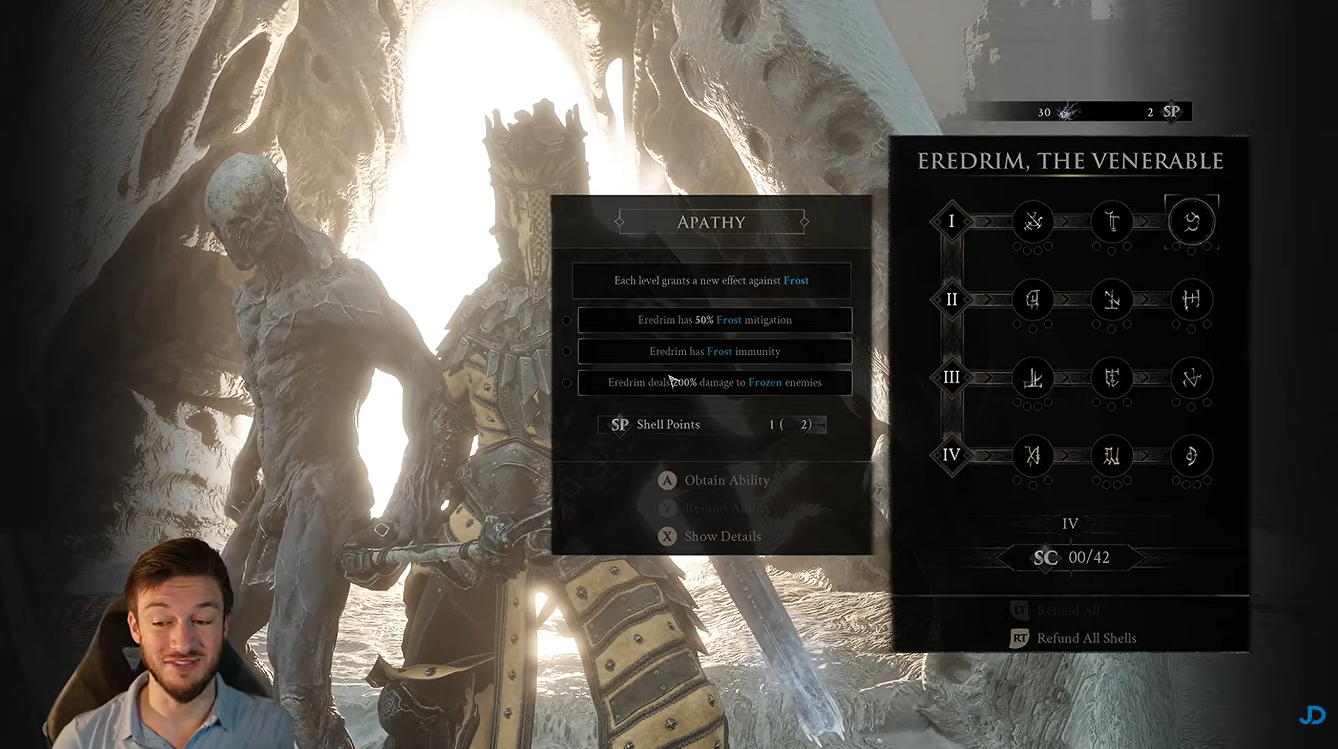
Eredrim the Venerable turns Frost into a specialized S-tier option through Apathy, which increases damage against frozen enemies by 200%. That enormous payoff cannot fully erase the infusion’s narrow weapon selection for every other Shell, leaving Frost as an exceptionally strong but less adaptable A-tier choice.
Curse reaches its highest ceiling with Sariel
Curse is primarily defensive: applying it nullifies the target’s next melee attack and redirects that damage back to the attacker. Accursed Stone enables the infusion, but its baseline application can be inconsistent when ordinary enemies die before Curse has time to influence the fight.
Sariel, the Endless transforms it into a crowd-build centerpiece. His upgraded Scourge keeps Curse active for 30 seconds, while Affliction causes damage dealt to one cursed enemy to spread 50% of that damage to other cursed targets. Spreading Curse across a clustered pack before striking the most centrally positioned enemy can therefore produce reflected and shared damage across the group.

This Sariel setup has an S-tier ceiling, especially when ranged attacks chain Curse through several enemies. Its general value remains lower because most Shells cannot exploit the shared-damage engine, and applying the status across a full group is less dependable than rapidly triggering Bloodcurse, Stasis, or Lightning.
Phantom offers B-tier delayed damage and stagger

Phantom stores accumulated damage before detonating after a delay. A strong detonation deals splash damage around the target and can stagger enemies out of attack animations, giving the infusion both crowd pressure and interrupt utility.
Black Needle applies Phantom consistently through its quick attacks, but its individual stacks produce modest results unless enough applications survive until detonation. The stronger setup combines Monarch’s Vestige with Salvaged Trebuchaxe, whose multi-hit projectile can remain on a target and build a much larger detonation from range.
The setup is entertaining and can erase grouped enemies when it comes together, but the charge time creates a persistent problem. Dangerous enemies may close the distance before enough stacks accumulate, while weaker enemies often die before Phantom detonates. That uneven payoff keeps it in B tier despite its impressive splash potential.
Burn is a niche C-tier exploration infusion
Burn deals damage over time and can stagger weaker enemies while they remain ignited. Inflamed Clawstone gives Veteran’s Battle Axe a melee Burn setup, while Emberseed Stone provides ranged application for starting the effect before entering close combat.
Its best use is clearing ordinary enemies during exploration, where the stagger can interrupt less resilient targets. Burn stacks expire quickly, apply limited pressure to bosses and elites, and compete with much stronger infusions on the same weapons. The result is a visually satisfying but narrow C-tier option.
Poison depends on Tiel to escape C tier

Poison is weak when judged by its standalone damage, dealing only one damage per second even as additional stacks accumulate. That low output becomes increasingly irrelevant during late-game and New Game Plus encounters, where enemies have enough health to outlast its passive pressure.
Tiel the Acolyte gives those stacks a meaningful purpose. He can detonate them for burst damage, create poison clouds, build Poison through clones, and use poison-related interactions for healing. His shadow attacks turn the status into an active resource rather than leaving it as a weak damage-over-time effect.
Serpent Stone supports melee application, while Hag Stone brings Poison to a sidearm setup. Splitting Stone creates multiple projectiles for faster stacking, and Strange Remnant chains pressure across several enemies. Those tools can lift a dedicated Tiel build into higher tiers, but Poison remains C tier for general play because other Shells receive little value from the stacks themselves.
Trauma has the weakest overall payoff
Break Damage and ordinary stagger serve different purposes. Stagger interrupts an enemy’s current action, while Break Damage fills the yellow bar beneath its health and eventually creates a riposte opportunity. Trauma contributes Break Damage gradually rather than immediately interrupting the target.
Wretchcaller’s Stone and Weeping Stone bring Trauma to Hammer and Balistazooka setups. The accumulated Break Damage remains on the enemy instead of draining over time, but Trauma applies it so slowly that its damage-over-time behavior rarely creates a meaningful advantage. Hammer attacks are cumbersome, and the Balistazooka’s slow handling makes repeated applications difficult during boss fights.
Critical-hit Break Damage and parries create riposte opportunities more efficiently without dedicating an infusion slot to such a weak payoff. With slow application, limited weapon choices, and no specialized Shell capable of rescuing it, Trauma belongs alone in D tier.
Video help
Related Mortal Shell 2 guides




Leave a Reply