
For years, Windows has been touting its host of new features and improvements claiming they’re just a click of the Start menu away. But what if the Start menu stops opening for you? Well, it can happen that the Start menu on Windows 11 suddenly stopped working for you, thereby making doing regular tasks a bit taxing.
If the Start Menu is not opening for you on Windows 11, then there are as many fixes as we could think of to help you solve the problem.
Related: How to Uninstall Apps on Windows 11
NOTE: If the 17(!) regular fixes given below fail for you, then do try Fix #18 given below under the ‘Last Resorts’ section which talks about creating a new user via command line. This helps you create a new user using CMD, thus without needing to access the Settings app or the Start menu, which may not be working for you. That said, the Fix #1 about the issue caused by ‘Windows Update KB5004300’ is a new addittion, so maybe check this first.
We have included a total 20 (!) fixes to solve the problem with Start Menu on Windows 11 below. 3 of them are general fixes that should to be tried only after you are sure that the 17 primary fixes are not of help.
17 Primary Fixes
Try these fixes first before trying the 3 general fixes (also given below).
Fix #1: Uninstall and reinstall Windows Update KB5004300
A recent fix discovered by eagle-eyed users seems to easily fix the start menu on new Windows 11 upgrades. The Windows Update released under the name KB5004300 seems to be causing this issue. Uninstalling and reinstalling the same on your PC will fix the Start menu and Taskbar for you. Follow the guide below to get you started.
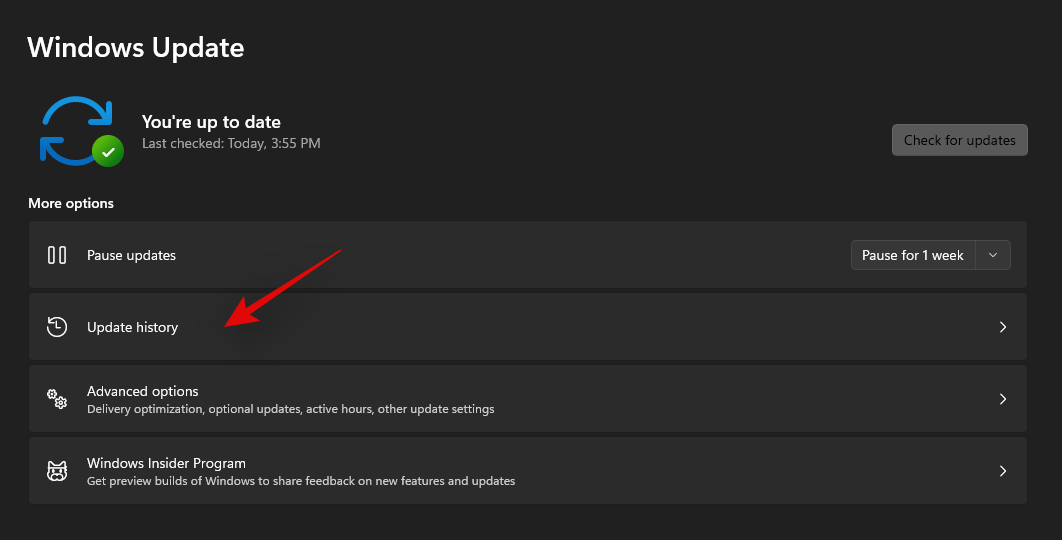
Press Windows + i on your keyboard to open the Settings app. Click on ‘Windows Update’ on your left.

Now click on ‘Update History’.
Click on ‘Uninstall Updates’.

You will now be redirected to the Control Center. Find the concerned KB5004300 update in the list and click and select it.

Now click on ‘Uninstall’ at the top.

Follow the on-screen instructions to remove the update from your PC. Once updated, restart your PC for good measure.
Now press Windows + i again once your PC restarts and select Windows Update again.
Check for updates and you should now have the option to install Windows Update KB 5004300 on your PC again.

Download and install the update and Taskbar & Start menu functionality should now be restored within Windows 11.
Fix #2: Force restart Iris Service
A recent update to the insider builds from Microsoft has caused major issues with the taskbar and Start menu for many users. If you too are subscribed to the Insider channel and have been facing issues upon updating to build number 22449 or higher then you can use the fix mentioned below.
This method will delete the registry value for the Iris Service which should force reinstall it upon a restart. A reinstall seems to help fix this issue for most users. Even if you are not on the same builds, this fix is worth a shot. Follow the guide below to get you started.
Note: This command will immediately restart your PC. If you have any ongoing work in the background, ensure that you save it before proceeding with this guide.
Press Windows + S on your keyboard and search for CMD. Click on ‘Run as administrator’ or press Ctrl + Shift + Enter on your keyboard.

Enter the following command and press Enter on your keyboard.
reg delete HKCU\SOFTWARE\Microsoft\Windows\CurrentVersion\IrisService /f && shutdown -r -t 0

Your PC will now reboot. Login to your PC as usual and the Start menu functionality should now be restored on your system.
Fix #3: Restart your PC
This is by far the most straightforward method that comes to mind while trying to fix most problems on a Windows 11 PC. Normally, when you do a system restart, you essentially force all the processes, Windows including, to restart all their services and processes. This also restarts the Start menu’s process that shall help fix the issue with it.
If it isn’t obvious, here are the steps to restart your PC.
Make sure that all your apps and files are closed. Or, simply go to the Desktop screen by pressing Windows key + D together. Now, press the Alt + F4 keys together on your keyboard to get the “Shut Down Windows” screen.

Click on the dropdown, select ‘Restart’, and press the ‘OK’ button.

Once your PC restarts, you should be able to use the Start menu back again. If you still can’t, try the next method.
Fix #4: Restart Windows Explorer using Task Manager
The next easy fix for a frozen Start menu uses Task Manager. The Task Manager can be the perfect tool to manage any running process on a Windows PC.
If you have a Start menu that doesn’t want to respond to your clicks, follow the steps mentioned below to see if it fixes your problem.
Press the Ctrl + Shift + Esc keys to trigger Task Manager. If your Task Manager looks like this, click on the ‘More details’ button to get access to the detailed view.

Once inside the Task Manager, scroll through the Processes list to find the ‘Windows Explorer’ process. Right-click on the process and click on the ‘Restart’ option.

Once clicked, Windows should restart the Windows Explorer process in an instant, and that should fix your start menu.
Restarting the Windows Explorer process is pretty similar to restarting your PC. The only difference is that here, you’re only restarting a single process, whereas, with a restart, you restart all the processes. Plus, a lot of people in the past have had success fixing their Start menu with this method, which makes this worth a try.
Fix #5: Check for updates to Windows
If you still can’t get the Start menu to open, you should give Windows Update a try. The problem may be more widespread than you think and Microsoft may have released a hotfix to patch the unresponsive Start menu.
Here’s how you can do that.
Open the Settings app with Win key + i keys together. Once opened, click on the ‘Windows Update’ option.

Click on the big ‘Check for updates’ button to start checking for any available updates to Windows for your PC. If available, let Windows install all the updates.

When Windows is done updating your PC, simply give it a restart and try opening the Start menu. If you still can’t open the Start menu, we think it’s time to go for the more advanced fixes.
Fix #6: Run DISM and SFC
DISM (Deployment Image Servicing and Management) and SFC (System File Checker) are two of the most potent tools for identifying and repairing corrupt Windows installations. These tools can be used with either Command Prompt or Windows PowerShell. For this guide, we’ll be using them with Command Prompt.
Let’s start with DISM. DISM can be used to grab fresh copies of corrupted Windows files.
Press Win key + r to open the Run box, type in cmd and then press Ctrl + Shift + Enter together (instead of pressing enter) to open an elevated Command Prompt.

Once you’re inside Command Prompt, paste the below code and hit enter.
DISM /Online /Cleanup-Image /RestoreHealthDISM will now try to restore the corrupted files (if any) from your current installation by requesting a fresh copy of that file from Windows update. The entire process will take some ~15-20 minutes. Here’s how the command looks in action.

Once the command has restored all the damaged files, you should see something like this.

Once you’re done with this step, keep the Command Prompt window open to run the next command.
The next step is to verify the integrity of all your Windows 11 files to make sure they’re in good shape. For this, we’ll use the SFC tool.
Here’s how.
Paste the below code in the Command Prompt window, and hit enter.
sfc /scannowHere’s how the command looks like.

The above command will only take a couple of minutes to finish scanning the integrity of your Windows files. Once done, the result should look like this.

Tip: Make sure your PC has a stable internet connection for this method to work.
It’s now time for a reboot.
Still stuck with a broken Start menu, it’s time to try the next method.
Related: 6 Ways to Update Drivers on Windows 11
Fix #7: Rebuild Search Index
The Start menu and Windows Search are closely integrated. Issues with search and indexing may have crept into the Start menu and affected it. So, let’s rule out this possibility as well.
Let’s take a look at the steps to do it.
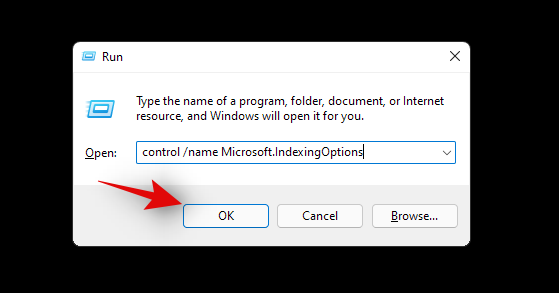
Open the Run box by pressing Win key + r. Then paste the below text in the Run box and hit enter.
control /name Microsoft.IndexingOptions
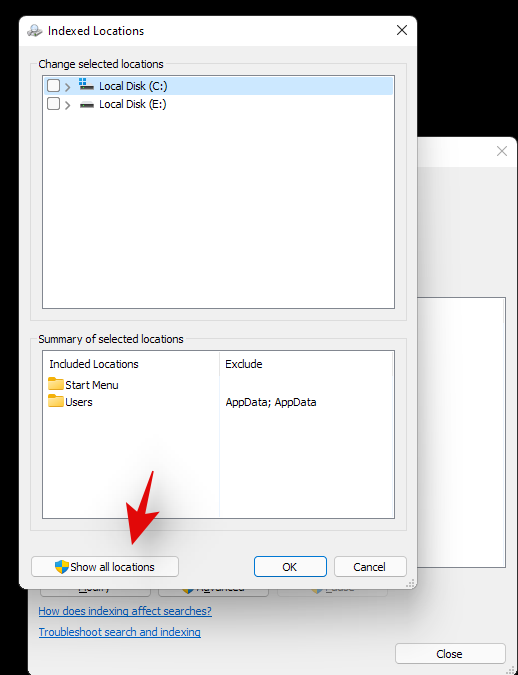
You should see a popup titled ‘Indexing Options’ open up. Click on the ‘Modify’ button.

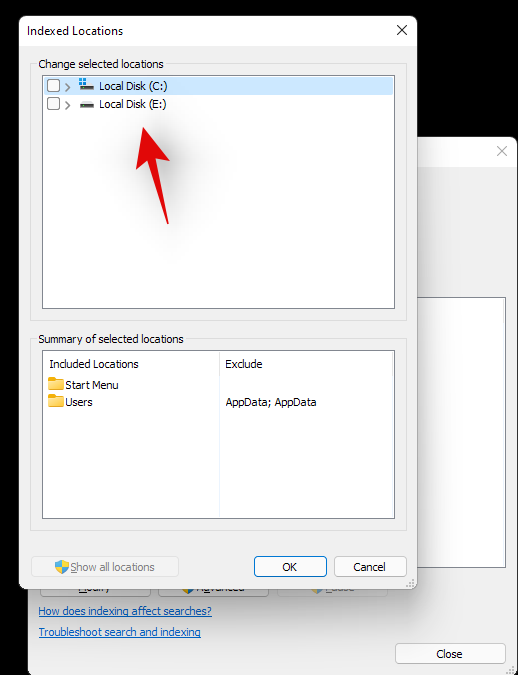
Click on the ‘Show all locations’ button.

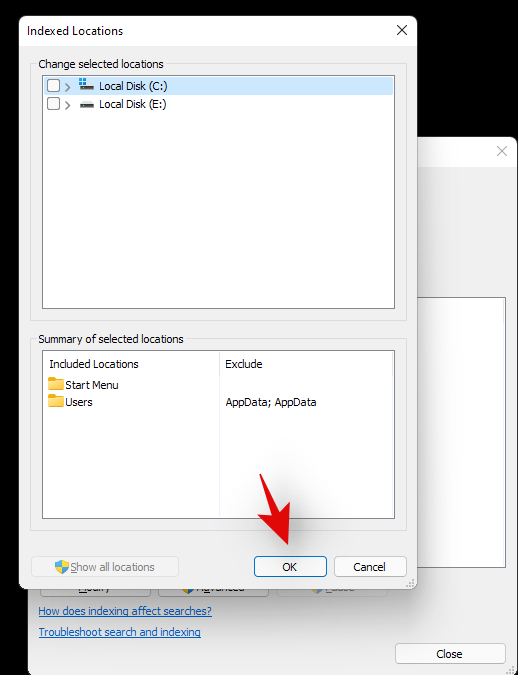
On this screen, uncheck all the locations and click on the ‘OK’ button. Ours had only one location ticked, so we unticked just one location on this list.

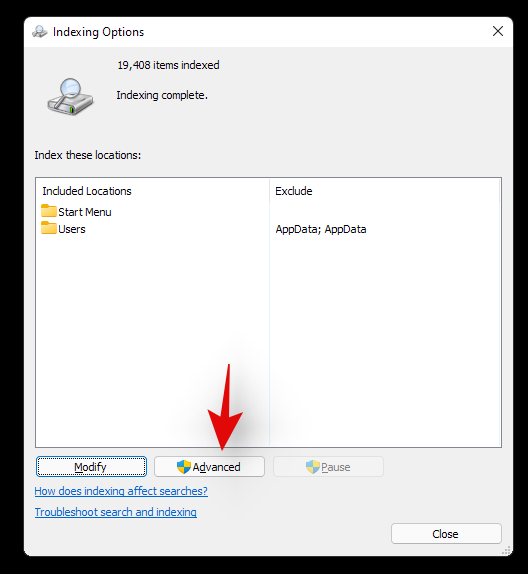
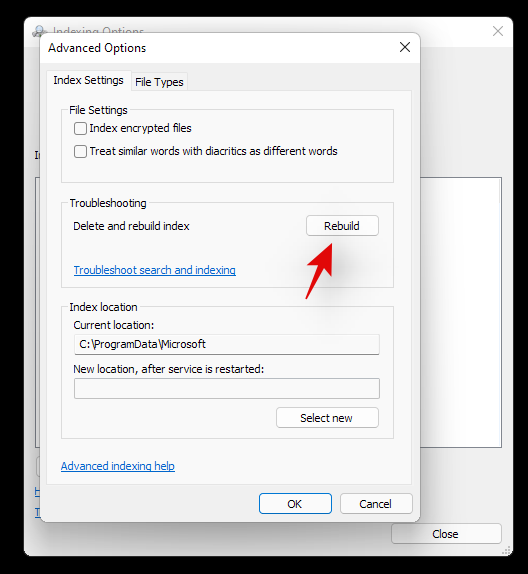
Click on the ‘Advanced’ button.

Click on the ‘Rebuild’ button.

Windows will now start rebuilding the Search Index. Rest assured, the entire process will now be handled by Windows and doesn’t really require any user input, although it does take quite a bit of time to complete.
When Windows has rebuilt your Search Index, restart your PC. Once you’re inside Windows again, try opening the Start menu. If it still doesn’t work, we think it’s time to opt for a more resilient method.
Fix #8: Remove third-party programs that modify the start menu
If you have installed any third-party programs to modify the look or functions of your start menu then we recommend removing all such programs. Likely, one of these programs is not compatible with the new Windows 11 start menu which is why you are facing issues with your system. If you have one of the following apps mentioned below, then we recommend you revert their settings and uninstall them as soon as possible. Most of these apps were designed for Windows 10 and are incompatible with the Windows 11 Start menu code to a certain extent. A recent Windows 11 update likely broke their compatibility causing the start menu to glitch out on your system.
- Open Shell
- Classic Start
- WinAero Tasbar
- TaskbarX
And more. If removing a third-party app that modifies your start menu helps restore its functionality then you can wait for a compatible update to use the app again.
Fix #9: Revert registry changes used to get the older start menu
Did you use a registry hack to get the older Windows 10 start menu on Windows 11? If so then it is likely that this registry hack’s functionality broke with a recent Windows 11 update. In such cases, you can use the guide below to revert the changes on your system.
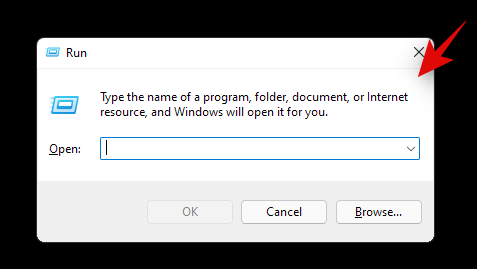
Press Windows + R on your keyboard and type in the following in the Run dialog box.
regedit
Press Enter on your keyboard once you are done to launch the registry editor. You can also click on ‘Ok’ instead.
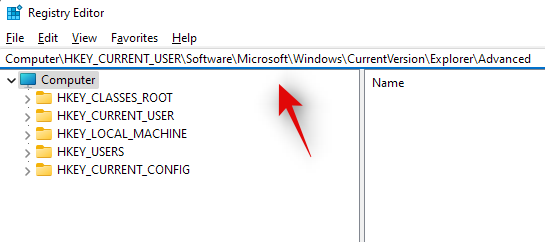
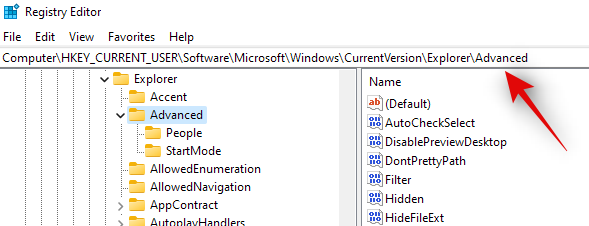
Now copy and paste the address given below in the address bar at the top of the registry editor and press ‘Enter’ on your keyboard.
Computer\HKEY_CURRENT_USER\Software\Microsoft\Windows\CurrentVersion\Explorer\Advanced
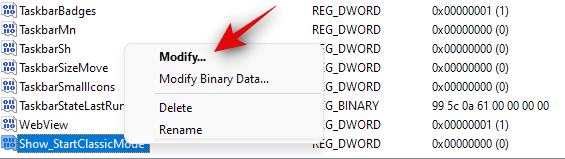
Look for ‘Show_StartClassicMode’ on your right and right-click on it.
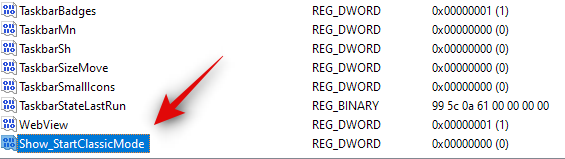
Select ‘Modify’.
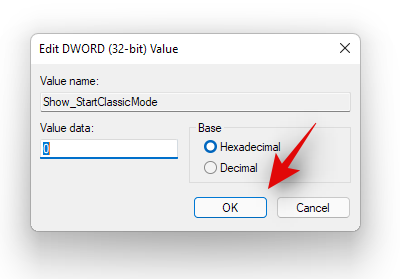
Change its value data to ‘0’ and click on ‘Ok’. Do not close the registry editor just yet.
Press Ctrl + Shift + Esc on your keyboard to launch the Task Manager. Now click and switch to the ‘Details’ tab at the top.

Click and select Explorrer.exe from the list and press Delete on your keyboard.

Confirm your choice by clicking on ‘End Process’.

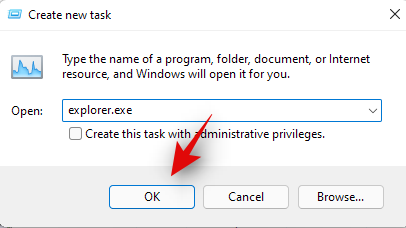
Now click on ‘File’ in the top left corner and select ‘Run new task’.
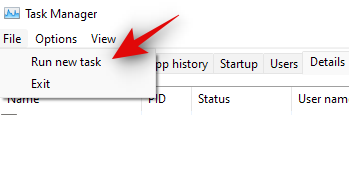
Type in ‘Explorer.exe’ and press Enter on your keyboard. You can also click on ‘Ok’ instead.
Explorer will now be restarted on your system. Switch back to the registry editor and click and select ‘Start_ShowClassicMode’.
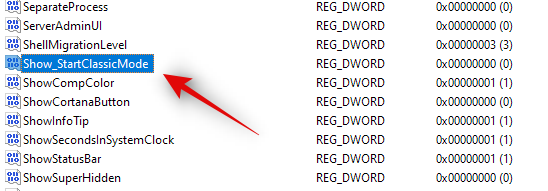
Press Delete on your keyboard and confirm your choice to delete the registry value.
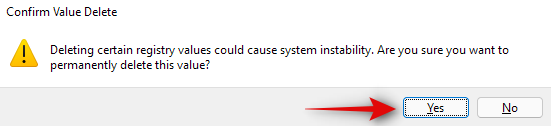
Restart your system for good measure now.
If your Start menu wasn’t working due to a registry hack to get the older start menu then it should be fixed by now. You can check for the same by clicking on the Start menu icon in your taskbar.
Fix #10: Use PowerShell to reinstall basic apps including the start menu
Windows 11 has come a long way when compared to its predecessors. Background processes, tasks, and apps are more streamlined now and various features and elements seem to have their own dedicated packages. These dedicated packages make it easier for you to troubleshoot problems with certain features of Windows and even reinstall them in worst-case scenarios. If the start menu is still not working for you then you can reinstall basic elements of Windows 11 which will also reinstall the Start menu module on your system. This should help fix any background conflicts and get the Start menu back up and running on your system. Follow the guide below to get you started.
Press Windows + S on your keyboard and search for PowerShell. Click on ‘Run as administrator’ once the app shows up in your search results.

Now type in the following command and press ‘Enter’ on your keyboard.
Get-appxpackage -all *shellexperience* -packagetype bundle |% {add-appxpackage -register -disabledevelopmentmode ($_.installlocation + “\appxmetadata\appxbundlemanifest.xml”)}

Ignore any warnings that you get and continue with the process. Once complete, restart your system for good measure.
Now that the Start menu and other basic features have been reinstalled on your system, let’s rebuild your system’s index to get everything back up and running again. Press Windows + R on your keyboard to open the Run dialog box.

Type in the following command and press Enter on your keyboard.
control /name Microsoft.IndexingOptions
Click on ‘Modify’ and select ‘Show all locations’.
Uncheck all the boxes in the current list.
Click on ‘Ok’.
Click on ‘Advanced’ now.
Select ‘Rebuild’ under troubleshooting.
Click on ‘Ok’ once the warning pops up on your screen.
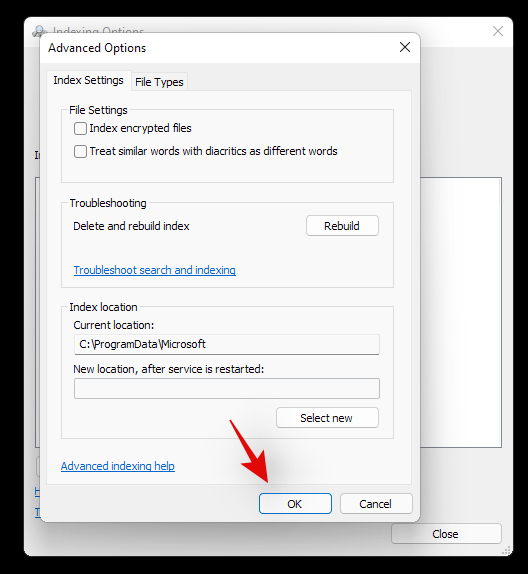
Once the process finishes, we highly recommend you restart your system.
You can now try clicking on the Start icon once your system restarts. Reinstalling the Start menu should help fix any issues with the Start menu on most systems.
Fix #11: Install any pending driver and Windows updates
This might be a bit obvious but you should definitely install any pending driver updates or Windows update on your system. This will help get you up and running on the latest drivers and help your system be compatible with all the hardware installed on your system. While drivers rarely cause issues with Windows features, you can never be too sure. Hence we recommend you install the latest available drivers on your system. You can use the link below to go to our detailed guide for updating drivers on Windows 11. If you are using a pre-built system or a laptop, then we recommend checking your OEM support page for dedicated driver updates as well.
Fix #12: Create a Registry value for the Start menu Xaml process
There is a registry value that if modified, can disable your Start menu altogether. If you have been using registry modifiers, cleaners, and more, then it is likely that this registry value was modified which ended up disabling the Start menu on your system. Additionally, the Start menu’s functionality was moved to a Xaml process once Windows 10 was released. This process is known to glitch out
Use the guide below to check if the start menu is disabled on your system and re-enable it if needed.
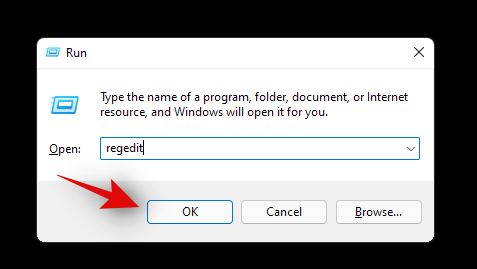
Press Windows + R on your keyboard and type in the following command given below.
regedit
Now press Enter on your keyboard or click on ‘Ok’.
Copy and paste the following address in the address bar at the top of your registry editor.
HKEY_CURRENT_USER\Software\Microsoft\Windows\CurrentVersion\Explorer\Advanced
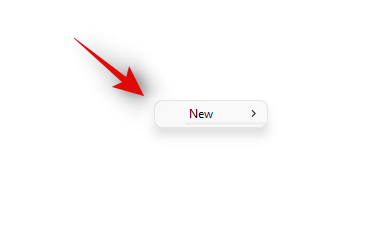
Now right-click on your right tab and select ‘New’.
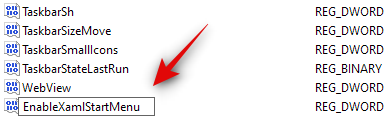
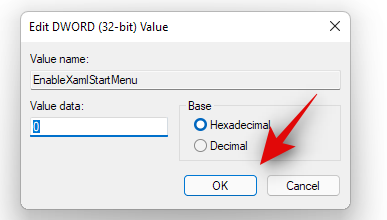
Select ‘DWORD (32-bit value)’.

Enter the name as ‘EnableXamlStartMenu’.
Enter the value as ‘0’.
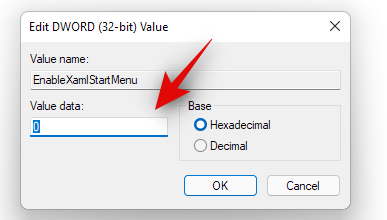
Restart your PC now.
Once restarted try activating the Start menu now. If the Xaml process was facing conflicts, then they should be fixed now and the Start menu should be back up and running on your system again.
Fix #13: Restart Windows background services
If the Start menu still fails to launch then it’s time to restart all background Windows services. Usually restarting the ‘ShellExperienceHost.exe’ is enough but if that does not work for you, you can try restarting all the services listed below. This usually gets the Start menu back up and running on most systems.
Press Ctrl + Shift + Esc on your keyboard to open the ‘Task Manager’. Now click on ‘Details’ at the top to switch to the Details tab.

Find ‘StartMenuExperienceHost.exe’ in the list and click and select it.

Press Delete on your keyboard or click on ‘End Task’ in the bottom right corner. Click on ‘End Process’ again to confirm your choice.

ShellExperienceHost.exe will now be killed. The process should automatically restart within a few seconds. Once restarted, try activating the Start menu on your system. If the menu starts working then you are good to go. However, if it is still not working then use the guide above to restart the following services on your system as well.
- SearchIndexer.exe
- SearchHost.exe
- RuntimeBroker.exe
And that’s it! If a background process was stopping you from accessing the Start menu then the issue should be fixed for you by now.
Fix #14: Run a Windows Troubleshooter
During a Windows 1909 feature update back in 2019, the Start menu was essentially broken due to a background conflict. To fix this issue for the masses, a troubleshooter was released by Microsoft to help fix this issue. If the Start menu is still not working for you then you can try running this troubleshooter on your system. Use the guide below to download and run the troubleshooter on your system.
- Microsoft Start menu Troubleshooter | Download Link
Download the archive linked above to a convenient location on your local storage and extract its contents.

Now copy and paste the ‘startmenu.diagcab’ file on your desktop.

Double click and run the file from your desktop. Click on ‘Advanced’.

Check the box for ‘Apply repairs automatically’. Click on ‘Next’ once you are done.

The troubleshooter will now do its thing and try to fix the Start menu on your system. Any errors or issues found will be automatically fixed and the Start menu’s functionality should now be restored on your system.

However, if the troubleshooter fails to fix the Start menu then this might indicate a more serious issue on your system. In such cases, let’s verify if Windows is actually able to access and initiate the process for the Start menu on your system. Use the checks below to help you along with the process.
Fix #15: Check if the Start menu works in a new local admin account
We now need to check if the Start menu is actually available within your install of Windows 11. Let’s create a new local account that will help you verify its functionality. If the Start menu is working in the new account then it is likely an issue with your current user account.
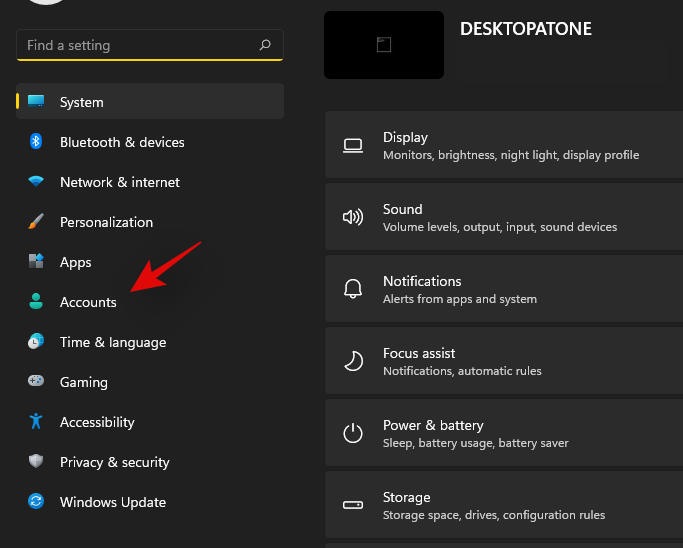
Press Windows + i on your keyboard and click on ‘Accounts’ on your left.
Click on ‘Family & other users’.

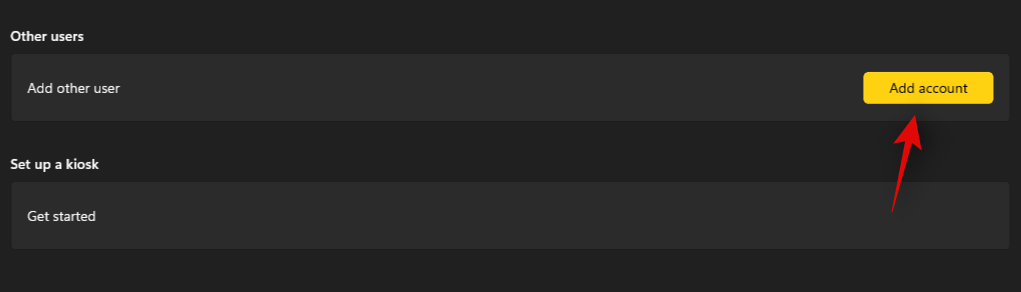
Now click on ‘Add account’ under other users.
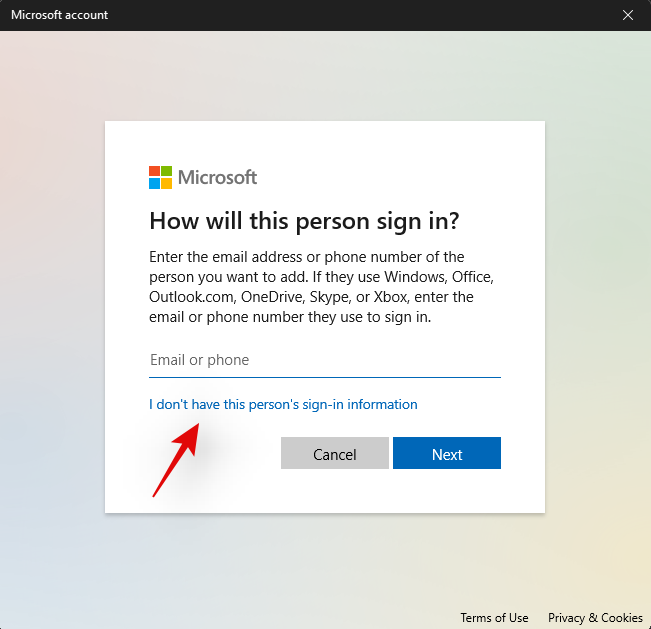
Click on ‘I don’t have this person’s sign-in information’.
Click on ‘Add a user without a Microsoft Account’.
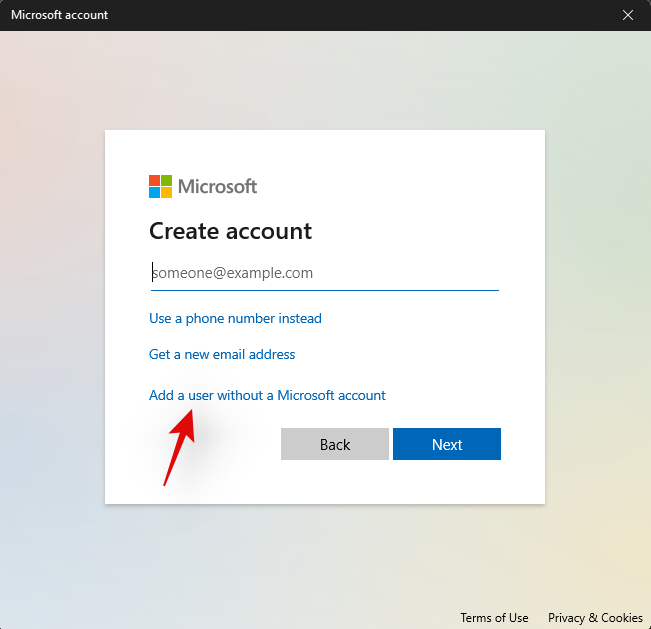
Now enter a username for the new account, and a password if needed.

Click on ‘Next’ once you are done.
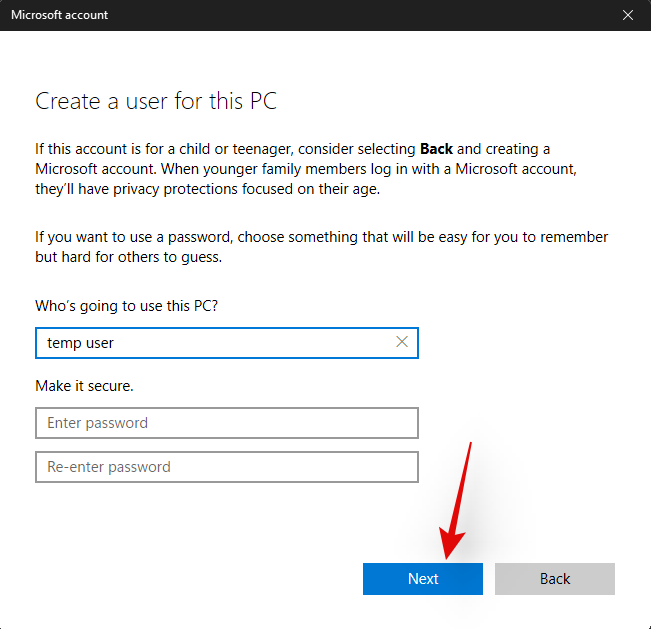
The new user account will now be created. Sign out of your current account and sign in to the new account.
Try to activate the Start menu now in the new temporary local account. If it is working then this is an issue specific to your user account. However, in case the Start menu fails to open, then this might indicate a more serious issue with your Windows 11 installation.
Fix #16: Check if the start menu is working in safe mode
It’s now time to check if the Start menu is working in Safe mode. In case it is, then a third-party app is likely interfering with the Start menu’s functionality. You can remove any third-party apps used to modify the Start menu to try and fix this issue. Follow the guide below to activate Safe mode on Windows 11.
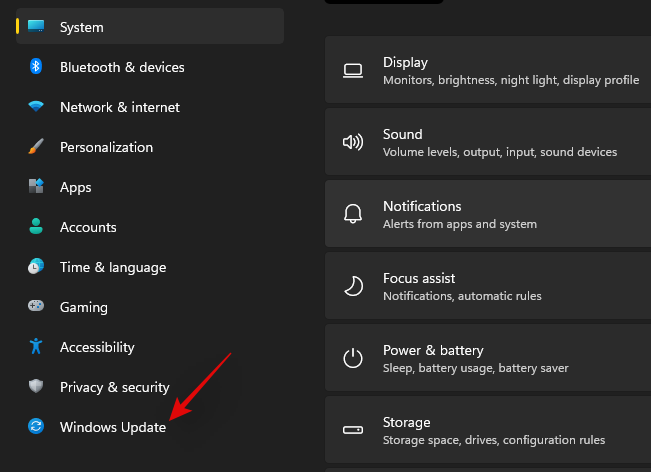
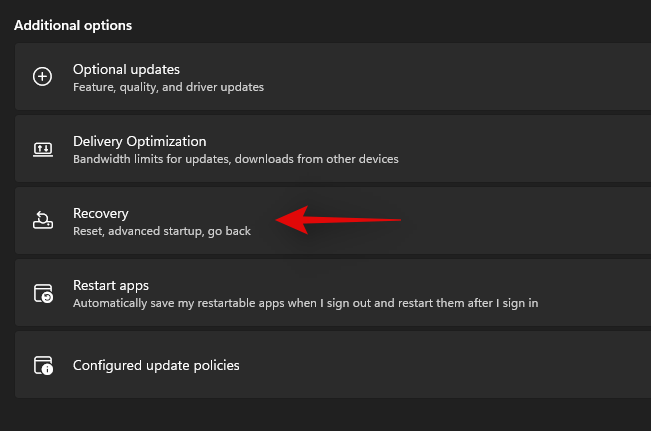
Press Windows + i on your keyboard and select ‘Windows Update’.
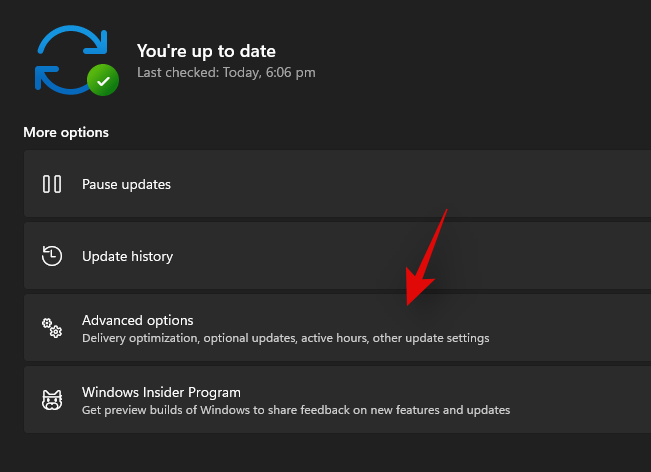
Now click on ‘Advanced options’.
Click and select ‘Recovery’.
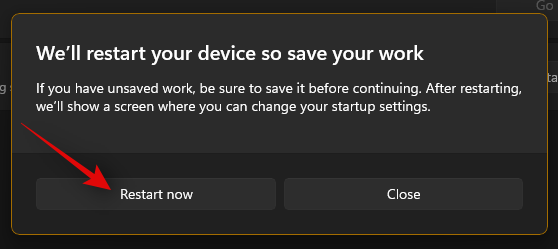
Now click on ‘Restart now’ beside ‘Advanced startup’.

Click on ‘Restart now’ again.
Your PC will now restart to the recovery screen. Click and select ‘Troubleshoot’.
Now click on ‘Advanced options’.
Click on ‘Startup Settings’.
Press ‘F4’ to start your PC in safe mode now.
Once your PC restarts, the safe mode should be active on your system. Now try to activate the start menu. If the menu activates, then it is likely that a third-party app is causing issues on your Windows 11 system. You can try removing apps used to customize the Start menu one by one to find the culprit on your system.
Fix #17: Run a malware and antivirus scan
We recommend you try and run a malware scan before opting for the last resort. If any malware or malicious service is causing issues with the Start menu, then a scan will help solve these issues. Use the guide below to run a malware scan through Windows Defender.
Press Windows + S on your keyboard and search for ‘Windows Security’. Click and launch the app once it shows up in your search results.

Click on ‘Virus & threat protection’.

Click on ‘Scan options’.

Select ‘Full Scan’.

Finally, click on ‘Scan now’.

Windows Defender will now scan your entire PC for malware and malicious software. In case any are found, they will be automatically quarantined, and you will be prompted to take the necessary action as soon as possible.
3 General Fixes: Last Resort options
Fix #18: Create a new user via command prompt
If you’re facing an issue where you’re unable to add a local account via Settings to your PC then you can use the command prompt (CMD) for the same. Once added you can try and check if the Start menu is working for you. If it is, you can try the fixes below to restore it in your original account. However, if none of the fixes work for you then you can use the newly created account instead. The new account will be created with administrator privileges so you shouldn’t have problems moving your files and Settings. More on this below.
Press Windows + R to bring up the Run dialog box and type in the following. Press Ctrl + Shift + Enter on your keyboard once you are done.
cmd

Type in the following command and press Enter on your keyboard. Replace ‘USER’ with your desired username for the new account. Similarly, replace ‘PASSWORD’ with your desired password.
net user /add USER PASSWORD

Now execute the following command as well and use the same username as above.
net localgroup administrators USER /add

The user will now be added to your PC. Simply restart and log into the new account when the PC restarts.
The start menu should work alright now in the new user account. You can copy your files from the old user account to the new account.
To find your data in the old user account, open Windows Explorer and go to the User folder under the C Drive (or whichever drive you have installed Windows in).

Click on the old user account. Now, copy all the files from here to your new user account that you can also find in the Users folder.
An easy method to transfer files from one user account (old one) to another user account (new one) is to copy the profile. Read more about it here.
Fix #19: Perform a Windows Reset
If you had zero luck with all of the previous methods, we think you should try a Windows Reset. It has been known to solve a host of problems in Windows 11 while keeping your personal files intact. Moreover, resetting Windows to its factory settings can give your PC a fresh start.
Here are the steps.
For this method, you’ll need an elevated PowerShell instance.
Press Win key + r to open the Run box, then type in ‘PowerShell and press Ctrl + Shift + Enter to open PowerShell as administrator.

When opened correctly, you should already be inside the C:\Windows\system32 folder.

Now type in ‘system reset and press enter. You should be presented with two options, to either keep all your files or to remove everything. Click on ‘Keep my files’.

Within a few minutes, Windows should give you a list of apps that’ll be removed from your PC after the reset. Here’s how our list looks.
Once you’ve scrolled through the list of apps, simply click on the ‘Next’ button.

Windows should now start the reset process. Simply follow the instructions and your PC should be reset within a couple of minutes. The Start menu should be working now.
Fix #20: Re-install Windows from scratch
Well, if you’re really considering this method, it’s safe to assume that none of the other methods worked for you. At this point, we think it’s now time to go for a clean installation of Windows 11, which will probably wipe your current Windows partition (if you choose to).
Note: Before proceeding with this method, we recommend making a complete backup of all your files stored inside folders on the Windows drive, such as in Downloads, Documents, and the likes.
Once you have backed up all your files from the Windows drive, let’s take a look at the things you’ll need.
- A USB stick of 8GB or more (no external hard drives, unless you want to lose all your precious data)
- Rufus
Next, follow our guide on downloading and installing the Windows 11 ISO.
Read: How to Download and Install Official Windows 11 ISO
We hope that after following this guide, you were able to fix the annoying and unresponsive Start menu in Windows 11 and bring it back to life.
If you find yourself stuck at any point in this guide, let us know in the comments below.
Related:
- What Windows 11 Services to Disable Safely and How?
- How to Unzip Files on Windows 11 Natively or Using a Software
- How to Ungroup Icons on Windows 11 Taskbar With a Registry Hack
- How To Remove Language Switcher From the Taskbar on Windows 11
- How to Fix Windows 11 Green Screen Error [8 Ways]
- How to Install PIP on Windows 11
- How to Change a Wallpaper on Windows 11


10 responses to “How to Fix ‘Windows 11 Start Menu Not Working’ Issue?”
№ 8 PowerShell nothing happens after entering the command
My search AND start isn’t working, how can you even expect someone to use Windows + S?
Restoring windows 10,
Start Menu not working
Start key on keyboard not working
Start menu not working in safe mode
Windows 11 not allowing me to add new local account ( nothing happens on add user )
Script to fix menu fails – says StartMenuExperience doesnt exist
Registry entry for xAml unfortunately doesnt work
Windows + S, not working
Removed everything from startup, to no avail
Very unfortunate release for day 1..2 , thanks for the guide though…but no cigar for me 🙁
Actually, the same things happened with me. I’ve tried all the steps. I have a fix. You told that the “creating new account” option doesn’t work because when you click the button nothing happens, I have the solution:
Open cmd as administrator and type
Net user /add [username] [password]
Net localgroup administrators [username] /add
Now, if you login into that account, everything will work fine. The problem is that yoh have to copy settings and stuff from your main account. Believe me, this is the ONLY fix that worked for me
Yes, this worked good to know it can work, however I’ve got so many settings/profile configs its just not feasable to permanently keep win11 atm, so rolling back again unfortunately.
Really appreciate the fix/approach though.
I had the same issue with my laptop Asus Zenbook Flip 13 OLED (UX363, 11th Gen Intel), i spend 2 hours with Microsoft customer support and they didn’t figure it out,
finally read something about display driver, so this is what I did.
I download the latest Graphics driver from Asus website, restarted the computer.
then i removed the display driver from Device manager, the start menu works, after that i updated the display driver and start menu is working perfectly.
I hope this helps
I have confirmed 1 cause (of many, I am sure).
Switching from HIGH CONTRAST mode back to NORMAL mode and then switching back to HIGH CONTRAST will cause the Start Menu to stop responding to clicks or the Windows key.
The incredibly simple fix for this is to press CTRL+ALT+DELERE, press Enter (Lock Computer)
Then log back in. When complete, the Start Menu behaves normally.
This might only work on Professional and Enterprise versions of Windows 11.
I hope this is useful and, IMO, this should be at the top of the solutions as it may work for other causes and literally requires no modifications to the system.
Nothing worked for me. I fixed it by running msconfig from a run command and disabled all non-microsoft services and startup items. Start menu and search now works!
I then added back in all startup items (that I wanted) rebooted, still works.
Ran msconfig again and added services back in until the problem came back.
Turned out it was the HP Sure Click services that was causing the problem.
Fix #6: Run DISM and SFC Worked great! My start button wasn’t working, it looked like it was going to open but then nothing. I tried restarting, updates, indexing but none of those worked. For my hp stream 14 running windows 11 home in s mode,I had to get out of s mode for it to work. Overall, it’s still running great!! ? thanks !
I’ve tried following various steps to resolve the problem of my “Start” button missing following the windows 11 update. Most solutions are written as if I was a computer wizard and are not at all easy to follow. Also i am not given enough time to carry out the instructions before i get a message saying the “Chat” has ended. I want step by step directions more suited to me, a computer bafoon. Microsoft have created this problem so can they not issue an update to resolve it rather than relying on the operator to try and do it. Failing that can I return to Windows 10 which was working fine. Changa for Change sake again!