
What to know
- You can download and install Windows 11 on your PC using the official ISO file available on Microsoft’s website.
- The downloaded ISO can be used to install Windows using the setup.exe file, via a USB device, as well as on a virtual machine like VirtualBox or VMWare.
- Refer to the guide below to get step-by-step instructions for installing Windows 11 for all the different methods.
Those with supported hardware can install Windows 11 using an ISO file available freely on Microsoft’s website. The new OS brings along numerous changes, such as a new File Explorer, new Start menu, enhanced security features, Snap layouts, AI features like Copilot, and a lot more.
If you’re looking to upgrade your PC manually, then here’s how you can do so with the latest ISO.
How to download Windows 11 ISO and install Windows 11 using the ISO
Microsoft has made the Windows 11 ISO files available for download for anyone who wants to install Windows 11 that way. Well, not just anyone. There are certain requirements that you (and your PC) must meet first.
Related: How To Share Files and Folders on Windows 11
Windows 11 Requirements
- Ensure that you are on Windows 10 v2004 or higher.
- Ensure that you meet the basic requirements for installing Windows 11 on your system.
- Ensure that you have at least 9GB of free disk space on your system so that you can download Windows 11 on your local storage using the Assistant.
- Ensure that you run the Installation Assistant as an administrator.
- Processor: 1GHz or faster with 2 or more cores.
- RAM: 4GB or higher
- Graphics: DX12 compatible with WDDM 2.0 driver
- Disk Space: 64GB free space on the drive you want to install Windows 11 on.
- System: UEFI, with Secure Boot
- TPM: 2.0 or higher
- Display: 720p @ 8bits or higher
Related: How to Check Battery Health Windows 11
Step 1: Download the official Windows 11 ISO
To download the official Windows 11 ISO file, click on the link given below.
- Download: Windows 11 Official Release ISO
- On the page, scroll down to the bottom and click on ‘Select Download’ to reveal the available download options.

- Select ‘Windows 11’.

- Click on Download now.
- Then select the product language from the drop-down menu, and click Confirm.
- On the next page, you will have the final link. Click on it to start the download.
Related: How To Dual Boot Windows 11 with Windows 10: Step-by-step guide
Step 2: Install the official Windows 11 ISO (4 methods)
Now that we have all the bases covered, it’s time to get started with the installation. There are a couple of ways of going about it.
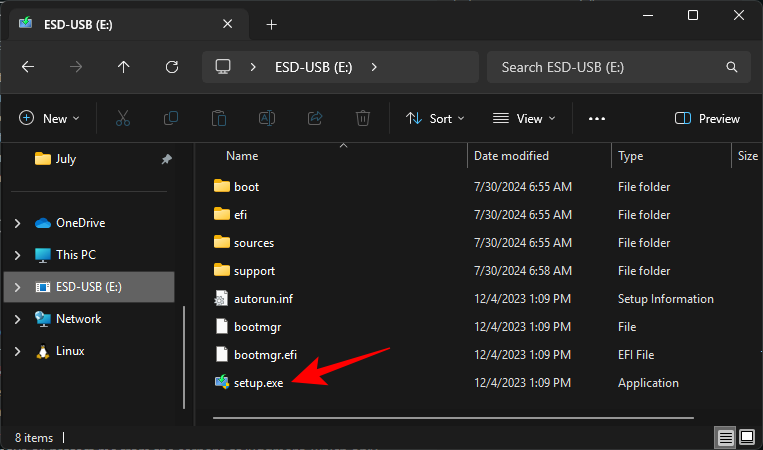
Method 1: Install on the same PC with setup.exe
This method describes the process of installing Windows 11 from the ISO straight away to the machine that it is downloaded on.
- To start it off, double-click the ISO file to mount it.
- Once it’s mounted, double-click the setup.exe file within it.

- This will begin installation immediately.

- Follow the on-screen prompts to continue to install Windows 11.
- During the installation, you will come upon the ‘Ready to install’ window. Click on Change what to keep to decide what you want to keep.

- If you want to do a clean installation, select ‘Nothing’. If not, choose from the other two, whichever is more appropriate to your needs, and continue on.

- The Setup may look for new updates before actually beginning to install Windows 11.

- Keep following the on-screen prompts to continue to complete the setup.

Your PC will restart a few times when installing Windows 11.
Method 2: Install via a USB device (Create Installation Media)
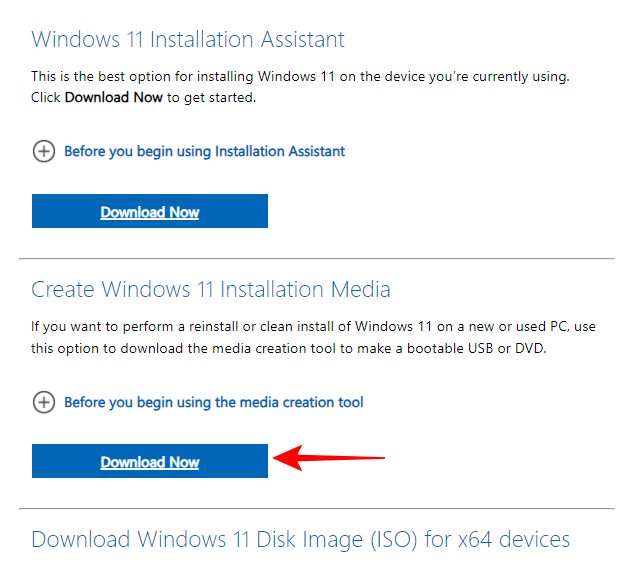
The ‘Create Windows 11 Installation Media’ on Microsoft’s page provides yet another way for you to install Windows 11. With this method, you can use the installation media to download and create a bootable USB drive that you can use to install Windows 11 on any supported PC. Here’s how to go about:
- On the Download Windows 11 page, click on Download Now under “Create Windows 11 Installation Media”.
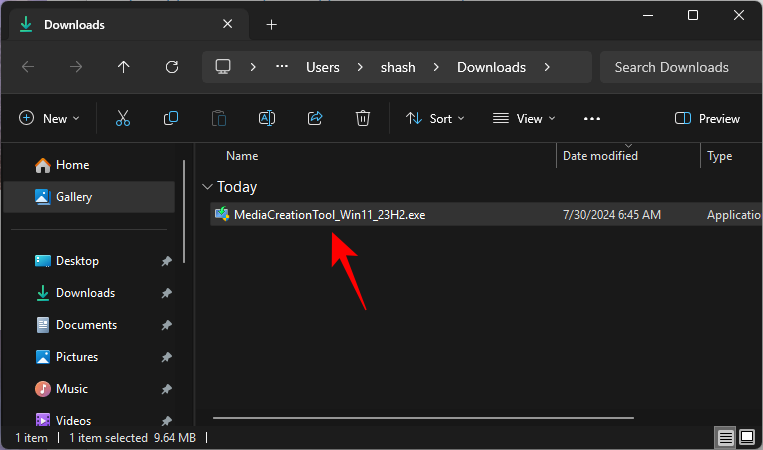
- Once downloaded, plug in your USB device, and run the MediaCreationTool executable file.
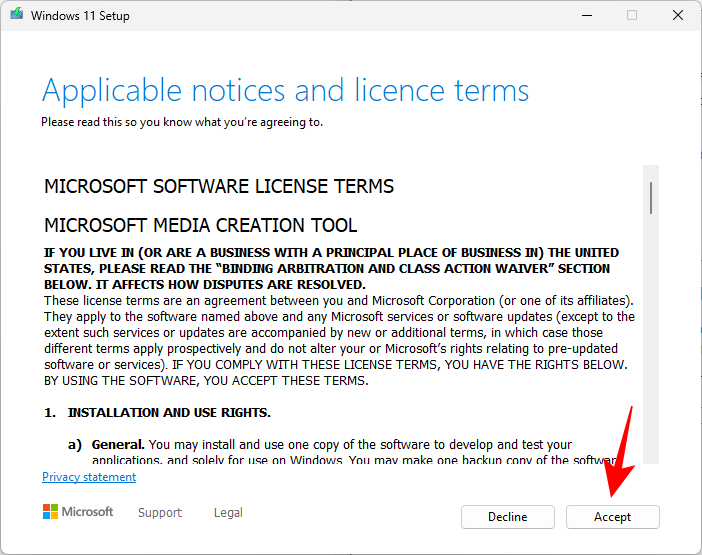
- Accept the terms and agreements.
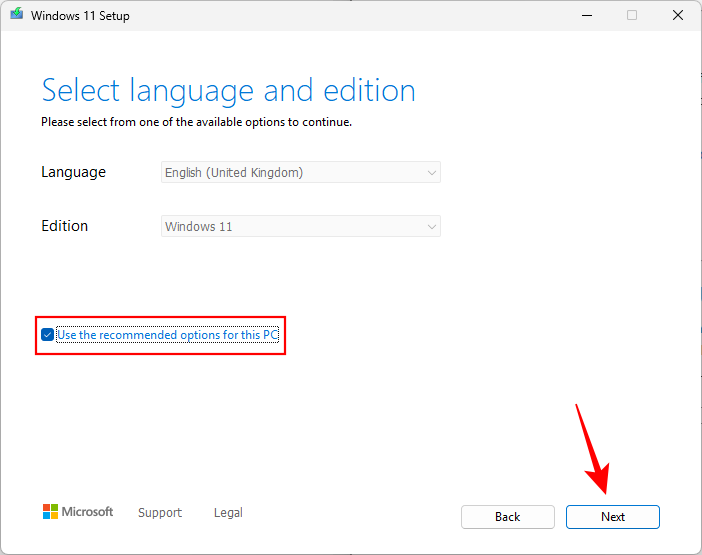
- Select Use the recommended options for this PC and click Next.
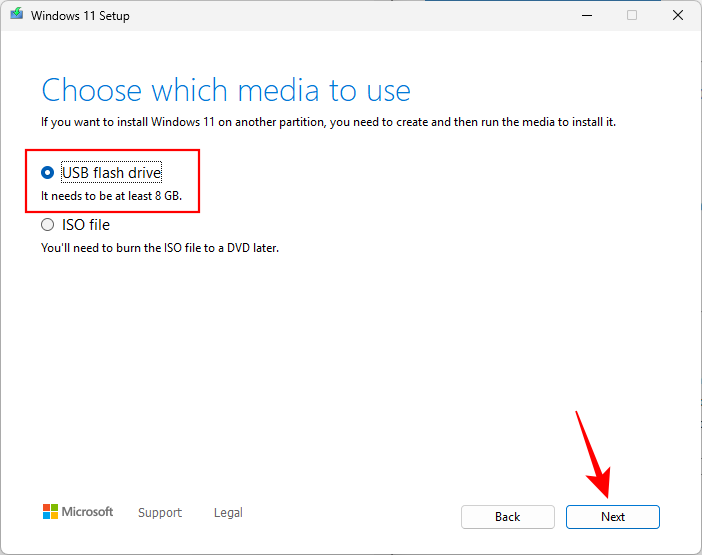
- Select USB flash drive and click Next.
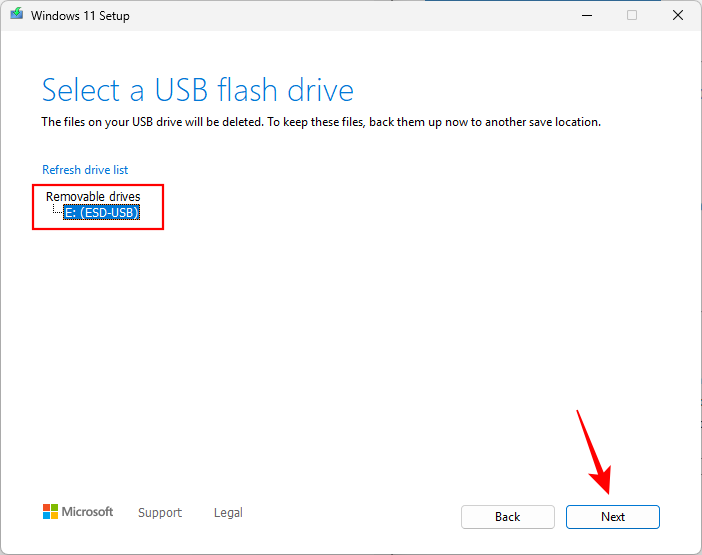
- Select your USB drive and click Next.
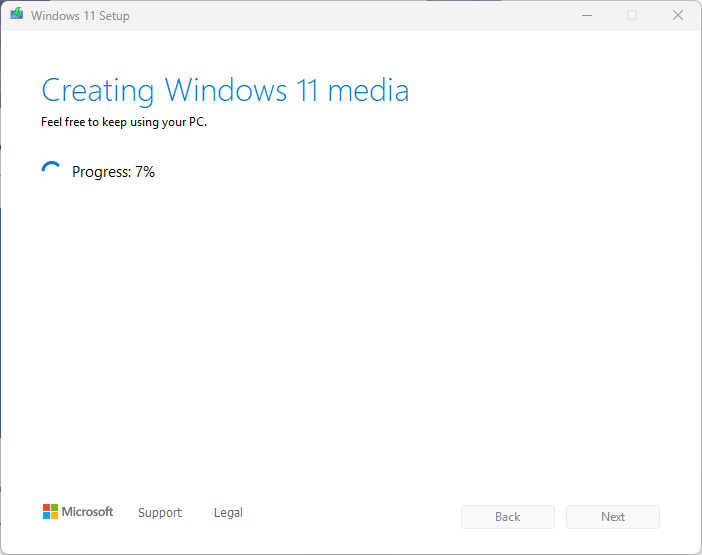
- Wait for the ISO to download and for the setup to create a bootable Windows 11 USB drive.
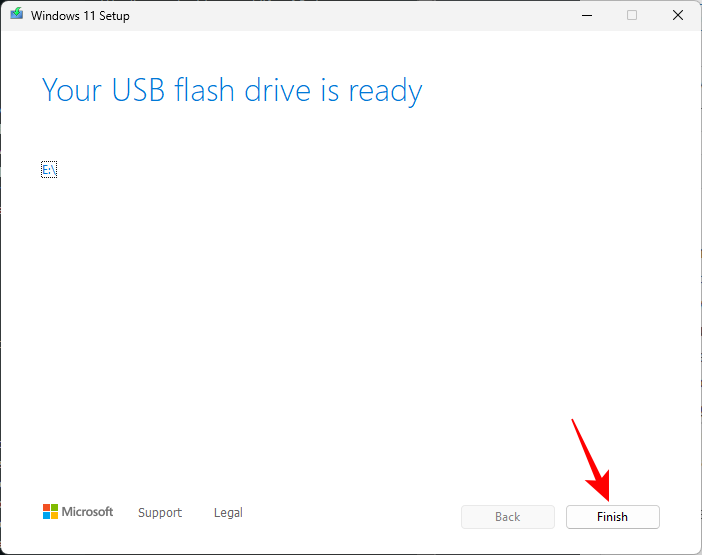
- Once done, click on Finish.
- Now you can use the USB drive to install Windows 11 on any supported system. Simply plug in and run setup.exe as before.
If you already have the ISO downloaded, you can use the following method to burn the ISO file on your USB device as well.
Method 3: Install via a USB device (Using Rufus)
Here’s how to use the ISO to create installation media for Windows 11 and use it to install on any compatible PC.
3.1: Create a bootable Windows 11 USB drive
- First up, plug in a USB device, then open File Explorer (
Windows + E). Right-click on your USB and select Format.

- With the default settings applied, click on Start.

- Now that your USB device is formatted, you will have to create an installation media on it with the ISO. For this, we’re going to use the Rufus tool. Download: Rufus
- Download Rufus and open it up. It should automatically detect your USB device and show it under the Device menu.

- Now, click on Select to choose your ISO file.

- Now, select the downloaded ISO file and click on Open.

- The ISO file will be selected in Rufus now.

- Once the ISO file is selected, Rufus will update all the formatting options and configure the options for you. All you need to do is to hit Start.

- When prompted, just click OK.

- Rufus will now format the USB and copy the official Windows 11 to create a portable bootable USB device. Once the process is complete, you will see ‘Ready’ as shown below.

- Now, it’s time to get the installation process underway.
3.2: Install Windows 11 using the bootable USB drive
Plug this USB into the computer on which you want to install Windows 11, and restart the PC into boot mode.
- For this process, first up, shut down your PC. Then, turn it back on and press F8 to restart the PC into boot mode.
- Once you’re in Boot mode, click on Use a device.
- Then select your USB Drive.
- The Windows 11 setup should start. Click Next to proceed.

- Click on Install now. Enter your product key. If you don’t have one, click on I don’t have a product key at the bottom.
- Select the version of Windows that you want to install and click Next. Accept the terms and agreements and click Next.
- Here’s that choice again – to upgrade or to start afresh. The choice is yours, but we’re going to go for a clean installation and are thus selecting the Custom: Install Windows only.
- Select your partition and click Next.
- Now, this is where you’ll get the new out-of-box setup experience. Select your country and click Yes.
- Choose the input method and click Yes.
- For a first, Windows now lets you name your PC from the setup itself. Enter a name and click on Next.
- Link your Microsoft account and click Next.
- As such, go through all the on-screen instructions until you come to the final installation process. You’ll see the steps remaining and the percentage markers at the bottom.
Once the process is complete, your computer will restart and you’ll have Windows 11 running on your PC.
Method 4: Install on a Virtual Machine
You can also simply install Windows 11 on a virtual machine. Now, there are various virtual machine programs out there. But for this guide, we’re using Oracle VM VirtualBox.
- Download: Oracle VM VirtualBox
- Download and install the VirtualBox and open it. Click on New.

- Type in a name for the operating system. Then click on the Version drop-down menu.

- Select Windows 10 (64-bit) or Windows 11 (if available). Either of them will do.

- Click Next.

- Adjust the slider to allocate the amount of RAM for this virtual machine. Then click Next.

- Click Create.

- Click Next.

- Choose Fixed size and click Next.

- Enter the size of your virtual hard disk and click Create.

- VirtualBox will take a while to create the virtual hard disk. Once the disk is created, click on Settings.

- Click on Storage in the left panel. Then, next to Controller: SATA, click on the first CD-ROM icon.

- Select the downloaded Win 11 ISO and click Choose.

- Click on the Empty slot below.

- Then click on the CD/ROM icon next to ‘Optical Drive’, and choose your recently created virtual drive.

- Click OK.

- Now click on Start.

- Your Windows 11 setup will now begin on your virtual machine.

- Go through the steps as shown in the previous method and start using your Windows 11.
FAQ
Here we address a few common queries that people have had ever since the release of the official Windows 11 ISO.
Is the official Windows 11 ISO the latest Windows 11 build?
Yes, this is the latest available version of Windows 11 for end users. The link above will be updated with newer versions as they are released.
Do you still need TPM 2.0 and Secure Boot?
Yes, the infamous system requirements have persisted and you will have to have TPM 2.0 and Secure boot enabled.
We hope you were able to download the official Windows 11 ISO and install it easily. Until next time!.
RELATED
- What Windows 11 Services to Disable Safely and How?
- How to Stop Pop Ups on Windows 11
- How to Check Windows 11 Version
- How to Change Brightness on Windows 11
- How to Add, Remove or Change Order of Shortcuts in Windows 11 Action Center
- How to Show Hidden Files on Windows 11
- 6 Ways to Update Drivers on Windows 11
- How to Permanently Remove Microsoft Edge From Windows 11


One response to “How to Download and Install Official Windows 11 ISO”
The modded ISO worked for me, but I had to disable my internet for it to work. Thank you. This PC ran windows 10 pro, then got the free Windows 11 Pro update… that was about 5 years ago now. Then this PC had a bad crash from some bad software, and then, after running Windows 11 all of those years it now refused because of TPM 2.0 and CPU!!!! So how in the world did it run all of those years before??? Anyway, on Windows 11 Pro again thanks to you…. What a mystery….