Tech enthusiasts and developers had started using Windows 11 even before it was made available on the Insider Preview channels. At the time there were only unofficial leaked links of the Windows 11 ISO files, and the process of installing them on a PC was made possible through third-party tools that help one to create bootable USB drives.
Ever since then, Microsoft has been rolling out Windows 11 on its Dev and Beta channels for those enrolled in the Windows Insiders Program and even made the ISO file available officially. But the tools and the process to create a bootable USB for Windows 11 have stayed the same. Here we take a look at everything you need to know to make a Windows 11 bootable USB and the steps to go about doing so.
Related: Does Windows 11 Have Ads?
How to Create a Windows 11 Bootable USB Drive
Before we begin, there are a few requirements that you should be cognizant of so that you have everything you need before you begin the process.
Step 1: Check system requirements and compatibility
First things first, you have to make sure that the system that you’re going to install Windows 11 using a bootable USB is compatible and meets the minimum system requirements for Windows 11. The basic requirements for the same are given on Microsoft’s Windows 11 specifications page.
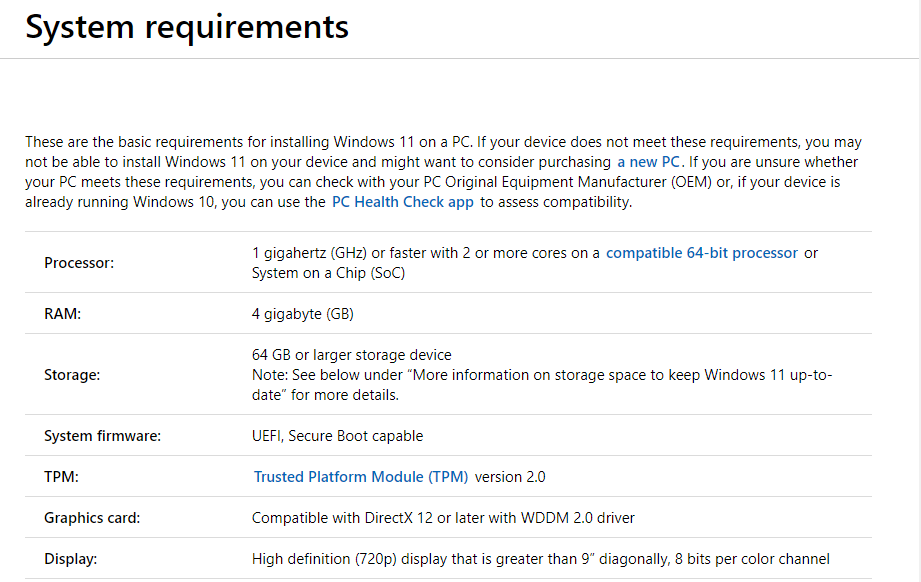
Though this is not strictly necessary to create a bootable USB with Windows 11, you should still ensure that the system requirements are met to avoid being disappointed while trying to install Windows 11 on your PC.
Related: Should You Install Windows 11 Dev Build?
Step 2: Download Windows 11 ISO
The next bit involves downloading the Windows 11 ISO file with which you will be creating the bootable USB. But before we begin, know that you will have to be part of the Windows Insider Program in order to access the download link. Follow the link given below to download the Windows 11 ISO:
Download: Windows 11 ISO
On the ‘Windows Insider Preview Downloads’ page, scroll down to the bottom and click on the drop-down menu below ‘Select edition’.

Select the edition that you want to download.
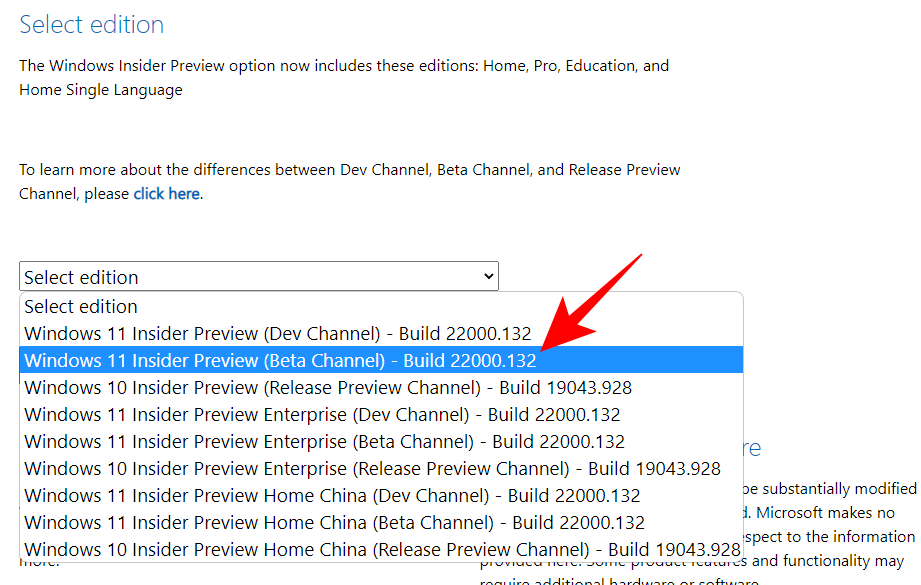
Then click Confirm.

Select the product language and click on Confirm.

On the next page, click the Download button.

Related: How to Tell If Your Computer is 32 or 64 Bit on Windows 11
Step 3: Format your USB
Next up, you will need a USB device with at least 8GB of storage space. Connect it to your PC and backup the files if there are any as you’ll be formatting this USB completely. Here’s how to format and prepare your USB for Windows 11 booting purposes:
Open File Explorer (Win + E) and right-click on your USB. Select Format.
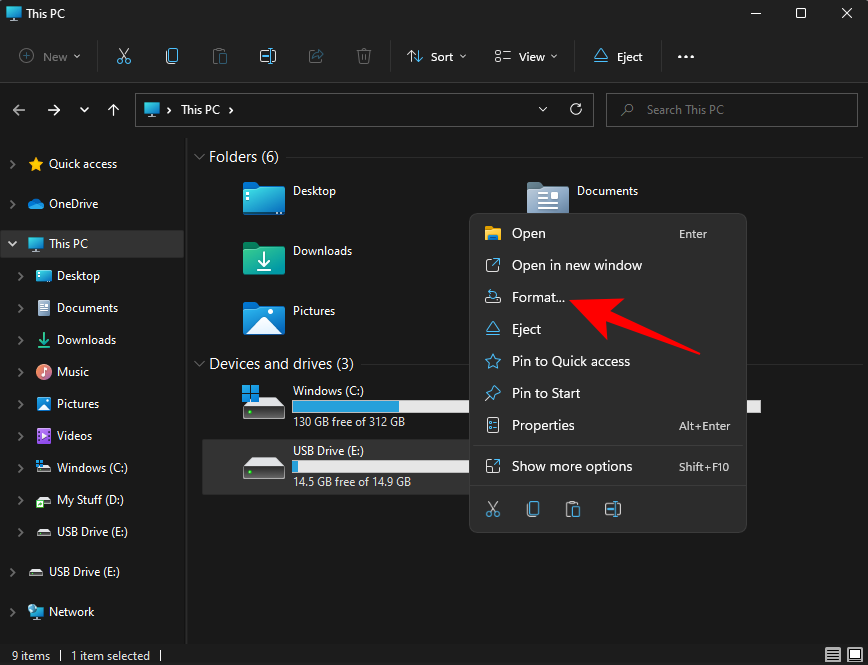
With Quick Format checked, click on Start.

Click OK.
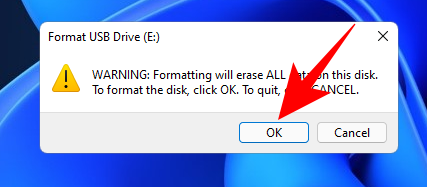
Your USB is now ready.
Related: How To Dual Boot Windows 11 with Windows 10
Step 4: Create a bootable Windows 11 USB
Now that all the requirements are covered, let’s go through the process of creating a bootable Windows 11 USB device. There are a few tools that you can use to do so. Let’s take a look at them one by one so you have enough options to choose from.
Method #01: Using Rufus
One of the most popular tools to create a Windows 11 bootable USB device is Rufus. It is a highly efficient software that quickly converts your USB into a bootable device.
Download: Rufus
Download the latest version of Rufus from the above link and run it.

Rufus will detect your USB device automatically. If you have more than one external storage device connected, you can select your USB device from the first drop-down menu.

Then click on Select.
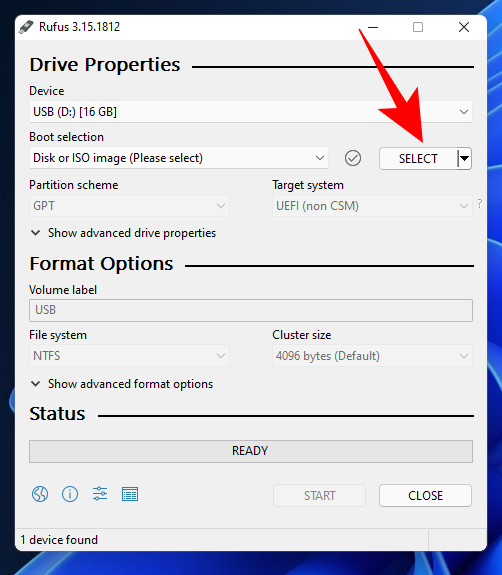
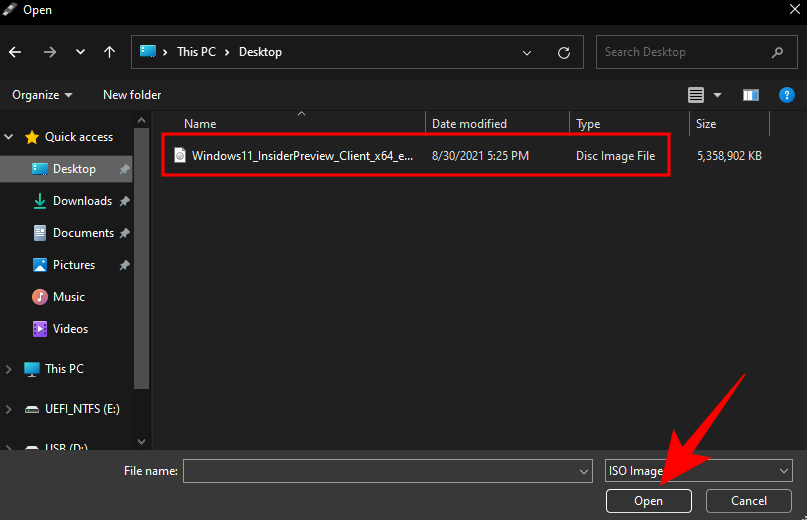
Browse for the downloaded Windows 11 ISO and click Open.
Once the ISO file is loaded, Rufus will configure the rest of the options automatically. However, you will have to make sure the right partition scheme is selected. Change it to GPT for UEFI boot mode. Select the ‘MBR’ partition scheme only if your BIOS mode is legacy.
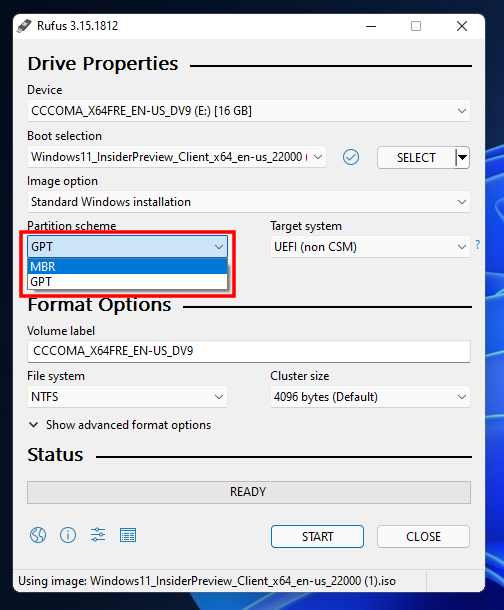
Click on Start.

When prompted, click Yes.
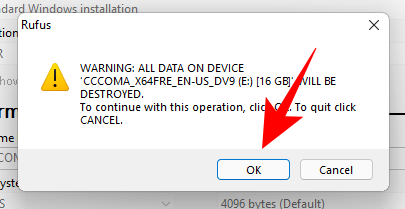
The process will take some time. Once it’s done, you will see the “Ready” status message turn green.
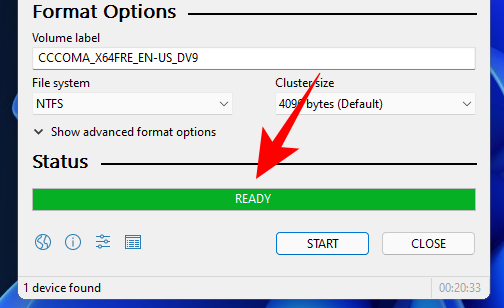
You have now created a Windows 11 bootable USB device.
Method #02: Using UNetbootin
This is another easy-to-use tool that lets you quickly and easily create a Windows 11 bootable USB.
Download: UNetbootin
Click on the link above and download UNetbootin for Windows. Run the application. Then click on the three-dot button towards the bottom right.
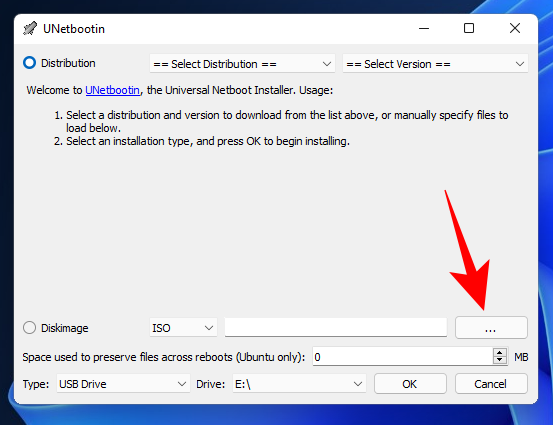
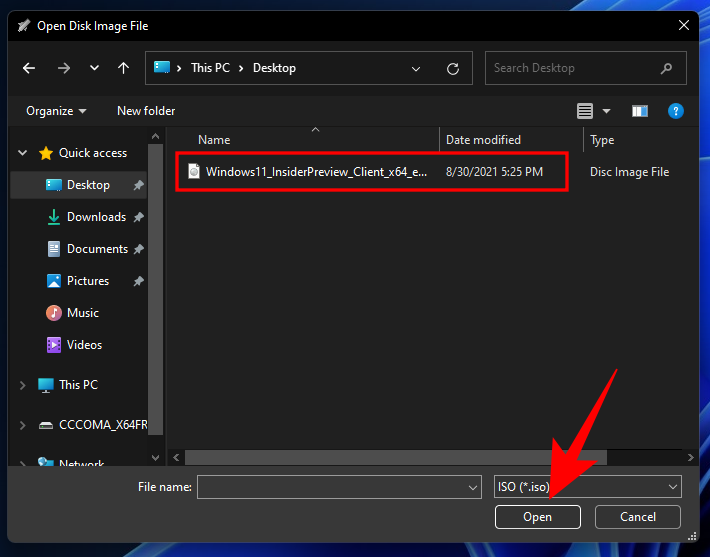
Select the Windows 11 ISO and click Open.
Then click OK.

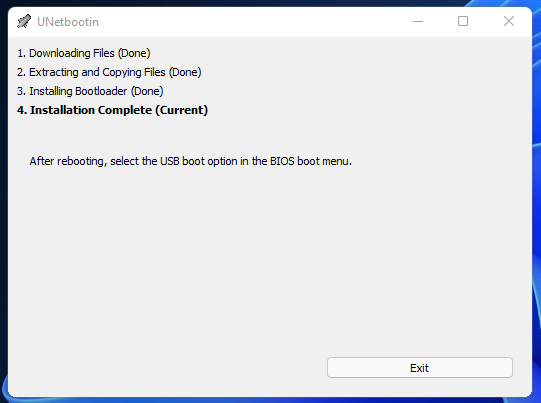
UNetbootin will take time to create the Windows 11 bootable device. Once it’s done, you will see the “Installation Complete” message as shown below.
Method #03: Using UUByte ISO Editor
The other tool that we’re looking at is UUByte. This is graphically more convenient to use and has a simplified interface. But that comes at the cost of registering and getting a license to use it which may not be what you’re looking for. However, if the tools mentioned above don’t work out for you, or you don’t mind getting the license, you can definitely give this tool a shot.
Download: UUByte ISO Editor for Windows
After downloading the tool, run the setup and then launch UUByte ISO Editor. Then click on Burn.

Click on Browse.

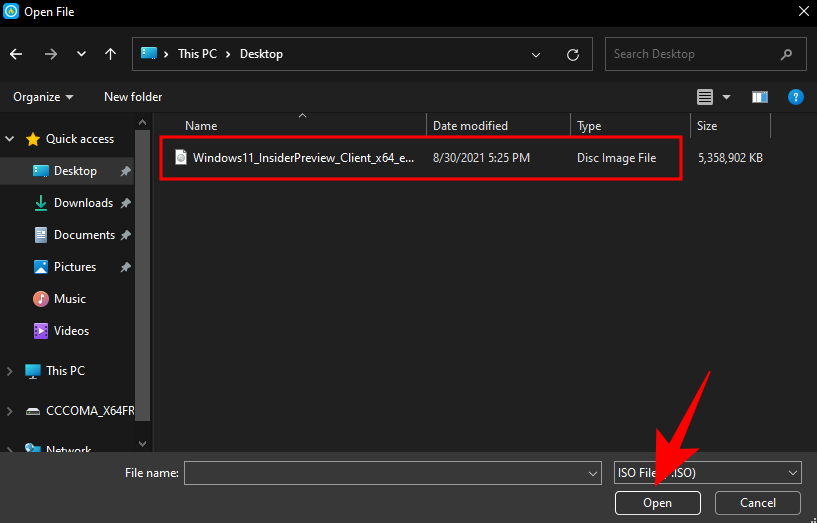
Select the Windows 11 ISO file and click Open.
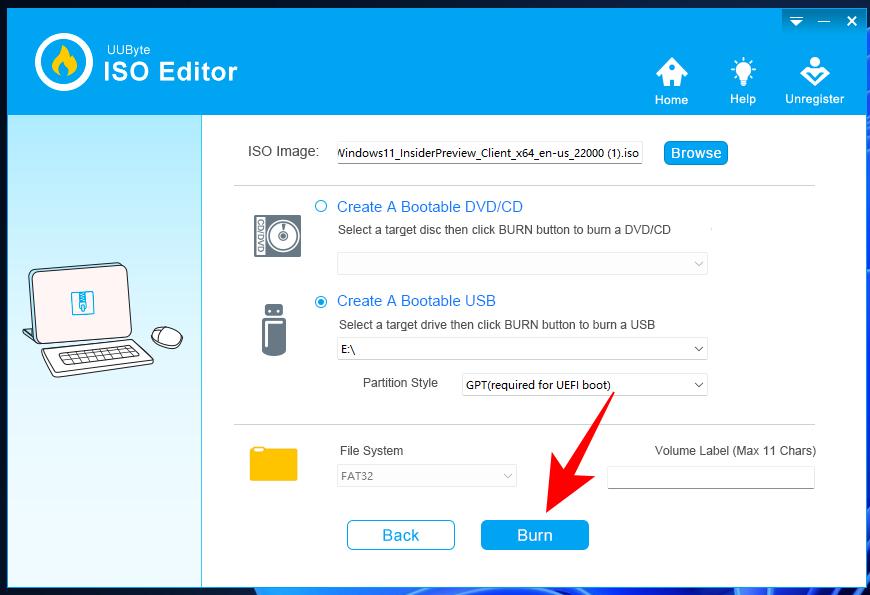
Then select Create A Bootable USB. The rest of the settings will be applied automatically. However, do check once that the “Partition Style” is the right one (use GPT for UEFI boot). Click on Burn to start the process.
Fix: Rufus not detecting USB device
Even though Rufus is one of the more common tools to create a Windows 11 bootable USB device, it can run into a few problems. For instance, you may find that Rufus is not detecting your USB device even though it is properly connected to your PC.
If that is the case, one thing that you can do to fix this is to click on “Show advanced drive properties“…
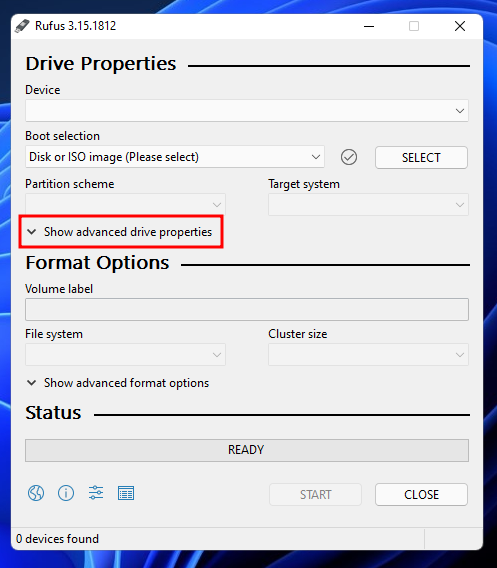
… and select List USB Hard Drives.

Your USB device should now be recognized. If that doesn’t work, you can try disconnecting the USB device and plugging it back into a different port.
If Rufus isn’t able to format your drive, you can do so yourself. Take a look at the “Format your USB drive” section above for the same.
Frequently Asked Questions (FAQs):
With the actual release of Windows 11 some months away, news about Windows 11 has been coming out in trickles. In the meantime, most of us want to know how to get our hands on a copy, be it via Windows updates or through a bootable device. Here, we take a look at a few queries concerning the availability of Windows 11 and the formatting style that one should use when creating a bootable device.
Is Windows 11 download available?
Windows 11 ISO file is available officially only for those enrolled in the Windows Insider Program. So, in order to avail of the ISO file, you will have to register into the Program and select a channel to be a part of. Currently, the ISO is available only for those in the Dev and the Beta channel.
GPT vs MBR: Which Formatting style should you select?
GPT runs on UEFI Boot mode, whereas MBR, its predecessor, uses the legacy BIOS. Microsoft recommends the GPT formatting style when using media creation tools. This is to ensure that the USB device remains compatible and in line with the system requirements for the new Windows 11, which includes the UEFI secure boot.
These were all the ways and tools that you can use to create a bootable Windows 11 USB device. In the absence of a native “Create Installation Media for another PC” option in the setup, the tools mentioned in the guide are the only reliable ways of creating a bootable Windows 11 device. We hope you were able to create one of your own to install Windows 11 on another PC.
RELATED
- How to Search in Windows 11
- 15 Ways to Repair Windows 11
- How to Reset Windows 11
- 6 Ways to Update Drivers on Windows 11
- How to Uninstall Updates on Windows 11
- How To Share Files and Folders on Windows 11


