
Apple has always been determined to provide a secure and private environment for its users. So, it is no surprise that iOS 15, the latest entrant to the iOS lineup, has a bunch of privacy-centric features. Today, we will take a look at the top privacy features of iOS 15 and tell you which settings you must tweak to get the most out of your iPhone.
Is privacy on iOS 15 good enough by default?
Before we go deep into the subject of improving privacy, it is important to know whether iOS 15 itself is private. Apple talked up all the privacy features they are building into iOS 15 at their WWDC 2021 Keynote. And now that we are seeing the OS in the flesh, we would like to assure you that it does live up to the promise. The app tracking transparency feature, which was introduced in iOS 14.5, has been carried over, and there are a couple of new, cool additions as well.
From hiding your email to making iCloud data inaccessible to hackers, iOS 15 goes a long way in order to help you find some sense of security. In the section below, we will tell you all about the new features and much more.
Related: How to Get Rid of ‘Oil painting effect’ on iPhone 13 and 12 Camera
Top 7 tips to improve privacy on iOS 15
iOS 15 has introduced a few privacy features, but that is not all you can do to make your iPhone feel more secure and private than ever. Here are some of the top tips to make your iPhone more private than ever.
Related: How to Turn Off Focus on iPhone on iOS 15 [11 Ways Explained]
1. Reconfigure Location preferences
Localized ads are probably the most dominant type of digital advertising in 2021. Every advertisement company wants to know where you are so that it can effortlessly show you targeted advertisements inside third-party applications. Thankfully, you can make sure that most applications do not have access to your location, even if you grant them the first time.
To change location preferences for applications, first, go to Settings and tap on ‘Privacy.’

Next, go to ‘Location Services.’

The toggle at the top of your screen is likely to remain on. You can disable it to stop Location Services for all apps. However, this will make some apps that require your location to function properly unusable. So, it is best to keep the toggle on and disable some applications.
Tap on the application you want to reconfigure.

Now, you can select from four options: ‘Never,’ ‘Ask Next Time Or When I Share,’ ‘While Using the App,’ and ‘Always.’ We do not recommend picking ‘Always.’ You can either pick ‘While Using the App’ or ‘Never’ to have complete control over the app’s deeds.

You can even close the app from recent menu to make sure it is not tracking you in the background.
Additionally, look to turn off the ‘Precise Location’ toggle whenever possible.

That way, the apps that do not require your exact location will only see a general outline of your current location, not your exact address.
Related: How to Watch Movies on FaceTime
2. Disable tracking for all apps
Apple introduced App Tracking Transparency in iOS 14.5. This basically gave the control back to the users, forcing apps to ask for consent before they try to track them. Companies like Facebook publicly went against Apple for this, but the Cupertino giants have not taken a step back. App tracking transparency is well and truly alive on iOS 15 and it even allows you to stop apps from bothering you with tracking requests.
To disable all future app tracking requests on your iOS 15-running iPhone, first, go to ‘Settings’ and tap on ‘Privacy.’
Now, go to ‘Tracking.’

Disable the toggle ‘Allow Apps to Request to Track’ and exit the area.

You can also toggle individual app tracking on or off from that area.
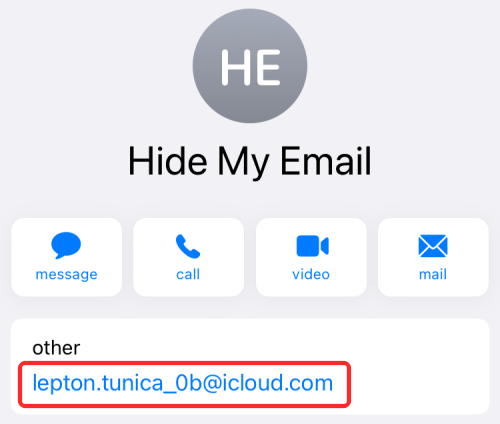
3. Turn on Hide My Email
Hide My Email is one of the newly-introduced iOS 15 features for iCloud+ users that allows you to protect your real email ID from spammers. Generally, we are forced to share our original email ID when we are trying to sign up for a new service. This basically gives the service you are signing up for the opportunity to exploit your email ID and share it with advertisement companies. With Hide My Email, you are basically adding a filter on top of your private email ID, making sure no one gets their hands on it unless you want them to.
Hide My Email on iOS 15 generates random email addresses and lets you use them to sign up for different services.
You can also add labels, generate multiple email addresses, and remove an address whenever you feel like it. When you choose to kill off an address, it basically kills off all spam emails forwarded to it. To learn more about what Hide My Email is and how it works, click on this link.
To know how to set it up, click on this link.
4. Disable detailed notifications
When you unlock your iPhone, all notifications on your lock screen become visible. The same happens when you are browsing and a new notification comes in. Getting detailed notifications is not an issue when you are browsing privately, of course, but it can be careless or embarrassing when your messages are exposed to someone looking at your phone.
To avoid embarrassment and potential security breaches, you could simply stop iOS 15 from exposing your notifications, even when the phone is unlocked, both on the lock screen and in general.
First, go to Settings and tap on ‘Notifications.’

Now, simply tap on ‘Show Previews.’ Set it to ‘Never’ to keep the notifications hidden at all times.

5. Configure iCloud+ Private Relay
Similar to Hide My Email, Private Relay is also another iCloud+ exclusive feature that helps improve the privacy aspect of your iPhone. If you have an iCloud+ subscription — starts from $0.99 — you can toggle Private Relay on. Apple claims that Private Relay will make data almost impossible to intercept, even to Apple itself. When browsed through Safari, iCloud+ Private Relay will hide your IP address and browsing activity. This makes sure no one sees who you are and what you are looking into.
To configure Private Relay, first, go to Settings and tap on your name banner at the top of your screen.

Then, go to ‘iCloud.’

Next, tap on ‘Private Relay.’

Finally, toggle ‘Private Relay (Beta)’ on.

Since the Private Relay feature is still in Beta, there could be some bugs here and there.
6. Turn on App Activity Recording
iOS 15 is not only focused on making your activities harder to track, but it also goes a long way to make sure apps are not exploiting your resources. To make this process transparent and hassle-free, iOS 15 has introduced something called App activity recording. This basically keeps a log of all the permissions an app is taking and resources it is using over the course of a week, giving you all the tools you need to make an informed decision about the legitimacy of the application.
To turn on App Activity Recording, first, go to Settings and tap on ‘Privacy.’
Scroll down to the bottom of the screen and tap on ‘Record App Activity.’

Finally, toggle on ‘Record App Activity.’

This will save a seven-day summary of the apps that access your location, camera, microphone, and the likes. You will also see when apps and activities inside other apps contact domains. Tap on the ‘Save App Activity’ button to save the activity log to your device’s internal storage.

7. Turn on Data Protection
This one is for those who are desperate to keep their data private and will not mind taking a little risk. The Data Protection feature of your iPhone comes into play when you fail to verify using Face ID and cannot enter your passcode in ten attempts. In case you misplace your phone, the Data Protection functionality will make sure the perpetrator does not get to access private information on your phone.
To turn on Data Protection, first, go to Settings and tap on ‘Face ID & Passcode.’

You will need to enter your password to enter. Next, scroll down to the bottom of the screen, and toggle on ‘Erase Data.’

Finally, tap on ‘Enable’ to turn on Data Protection.

As an added security measure, be sure to leave a little clue for yourself somewhere in your house. This will help you remember your password and save your data from being erased.
RELATED
- Does iPhone 13 Have LiDar?
- How to Fix ‘Last Line No Longer Available iPhone 13’ Error
- What Does ‘Notify Anyway’ Mean in iOS 15?
- How to Remove “Shared With You” in Safari
- How to Turn Off Shared Photos on iPhone and Stop Sharing
- iOS 15 Notifications Silenced? How to Fix
- How to Start Shareplay on FaceTime


