
Windows 11 has come a long way since it was announced and the beta versions seem to be getting more and more testers each day. Windows moved to UWP apps for its system and
Windows Store back when Windows 10 was released. This has been a much welcome transition for the most part, but UWP apps bring along their own errors with them. One prominent problem that seems to pop up occasionally with a Windows update is the ‘ms-resource:AppName’ error. Are you facing the same issue? Here’s all you need to know about it.
What is the ‘ms-resource:AppName’ error?
The ‘ms-resource:AppName’ error refers to an issue with Explorer.exe and ShellExperienceHost.exe on your system in most cases. Sometimes this error is also caused by a misbehaving UWP app. This error occurs when the app fails to launch when intended or Windows is forced to use a corrupted cache when listing your apps.
If the app is misbehaving then you will find the app having ‘ms-resource:AppName’ as its name in most places including the Start menu, taskbar, app list, and more. However, if your explorer.exe and shellexperiencehost.exe processes are misbehaving then you will face this error only in the Start menu in most cases.
Here’s how you can identify your problem and fix it accordingly.
Related: Windows 11 Shortcuts: Our Complete List
Identify your issue
Start by identifying the concerned app and pinning it to your Start menu. If the app is already pinned you can skip this step. Ensure that the app is showing ‘ms-resource:AppName’ as its name in the Start menu.
Now press Windows + R on your keyboard to launch the Run dialog box. Type in the following command and press Enter on your keyboard.
shell:appsfolder

Check the concerned UWP app’s name in this folder. If you get ‘ms-resource:AppName’ as the app name, then you are facing this error everywhere and you can follow the subsequent fixes in this guide for your issue.

However, if the app shows its correct name in this folder, then this indicates an issue with Explorer.exe and ShellExperienceHost.exe on your system. You can use the first guide in such cases. Let’s get started.
How to fix the ‘ms-resource:AppName’ error
You can fix this error by refreshing your cache, restarting the affected process, or by repairing the concerned app as well as the Microsoft Store. Follow one of the guides below depending on your analysis of the affected app.
Note: While this issue can be replicated, we can not test every situation. Hence it is recommended that if all your apps show this error in Windows Explorer, then you can try the first fix in the ‘If you face the error only in the Start menu’ section.
Case 1: If you face the error only in the Start menu
If you are only facing this error in the Start menu, then follow the guide below.
Press Windows + S on your keyboard and search for PowerShell. Hit Ctrl + Shift + Enter on your keyboard once it shows up in your search results.

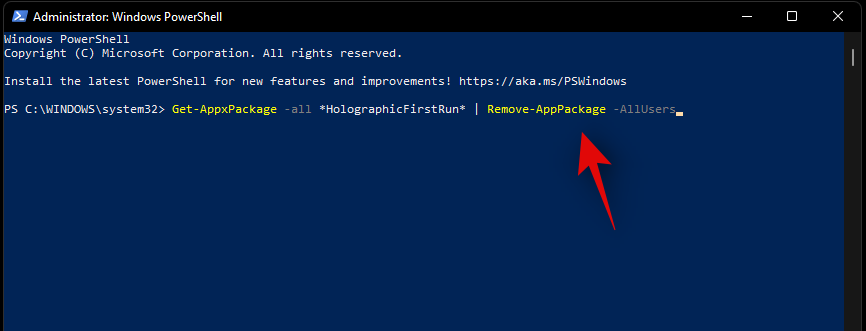
PowerShell will now launch as administrator on your system. Type in the following command and press Enter on your keyboard.
Get-AppxPackage -all *HolographicFirstRun* | Remove-AppPackage -AllUsers
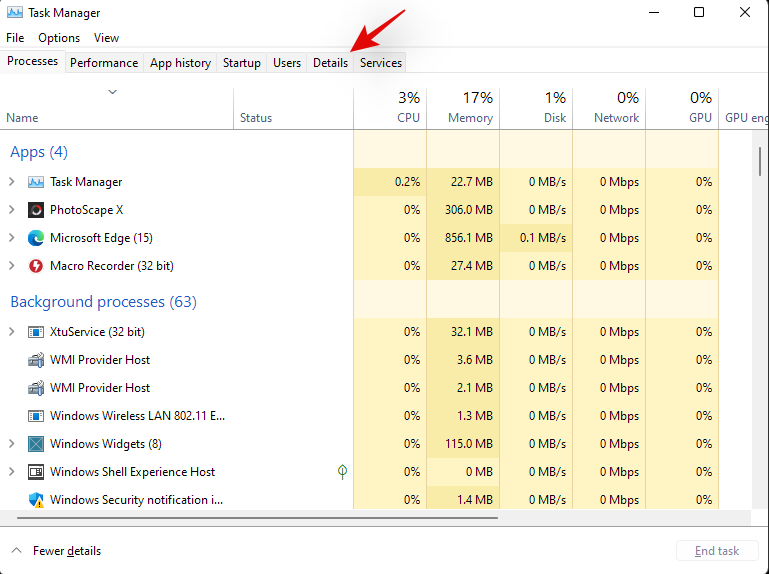
Once executed, we recommend you save all your work and restart your system. Once restarted, press Ctrl + Shift + Esc on your keyboard to launch the Task Manager. Click and switch to the ‘Details’ tab at the top.
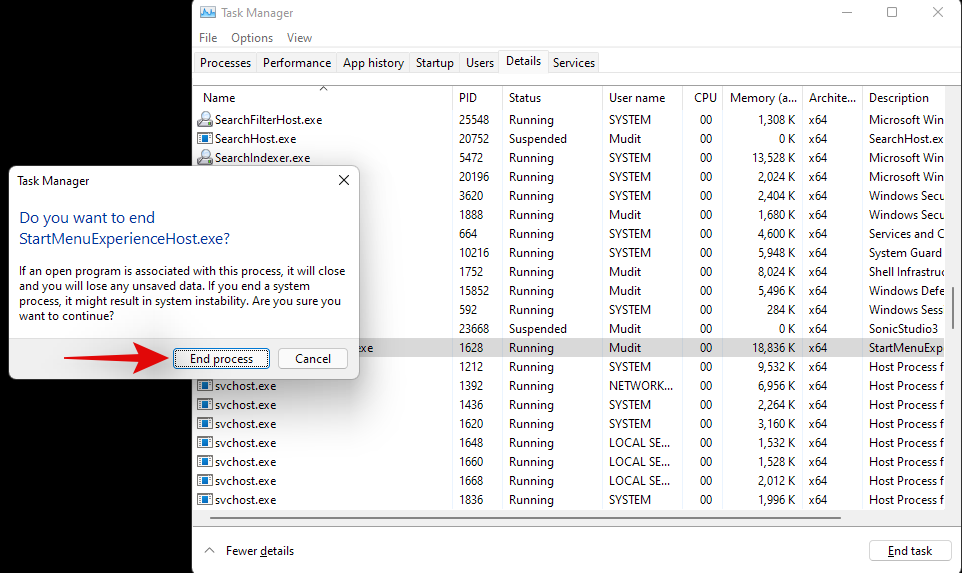
Find ‘ShellExperienceHost.exe’, click on it, and hit Del on your keyboard. If you do not have the process currently running, you can select ‘StartMenuExperienceHost.exe’ instead.

Click on ‘End process’ to confirm your choice.
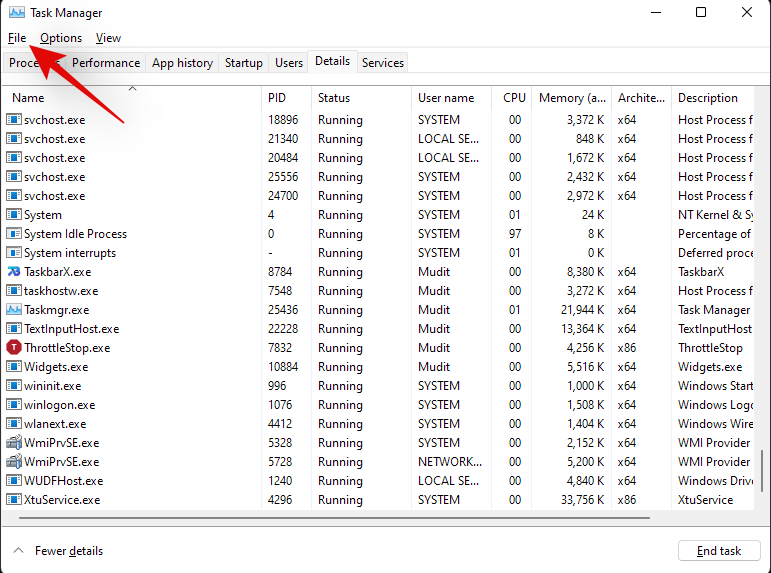
Now repeat the step above to end the following processes as well.
- StartMenuExperienceHost.exe
- Explorer.exe
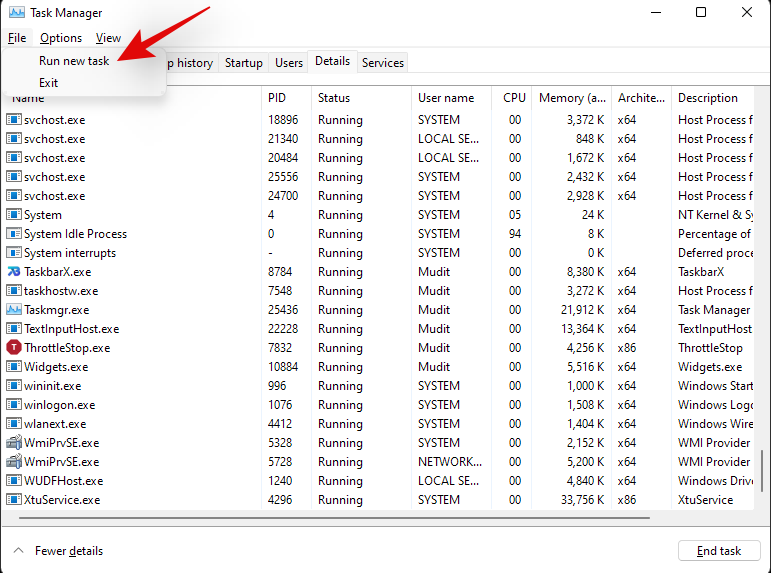
Once done, click on ‘File’ in the top left corner.
Select ‘Run new task’.
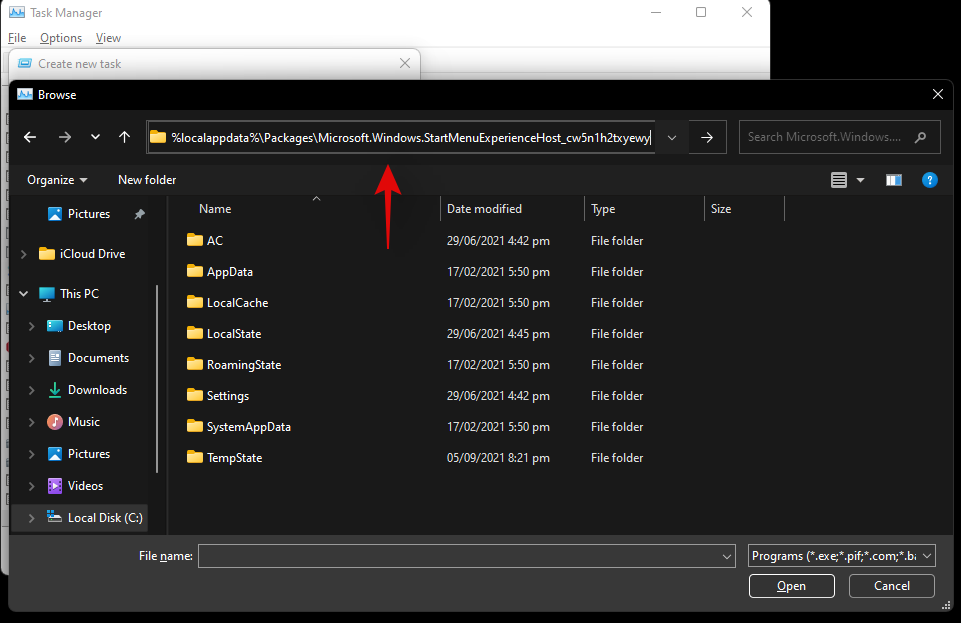
Click on ‘Browse’.

Navigate to the following directory. You can also copy-paste the same in the address bar at the top of the ‘Browse’ window.
%localappdata%\Packages\Microsoft.Windows.StartMenuExperienceHost_cw5n1h2txyewy
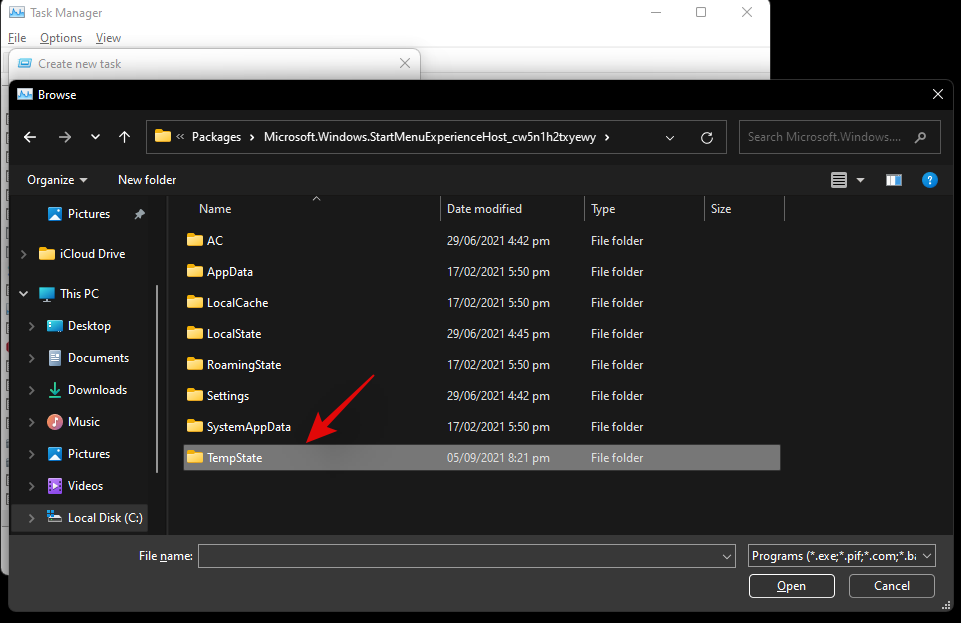
Select the folder named ‘TempState’ and delete it permanently from your system.
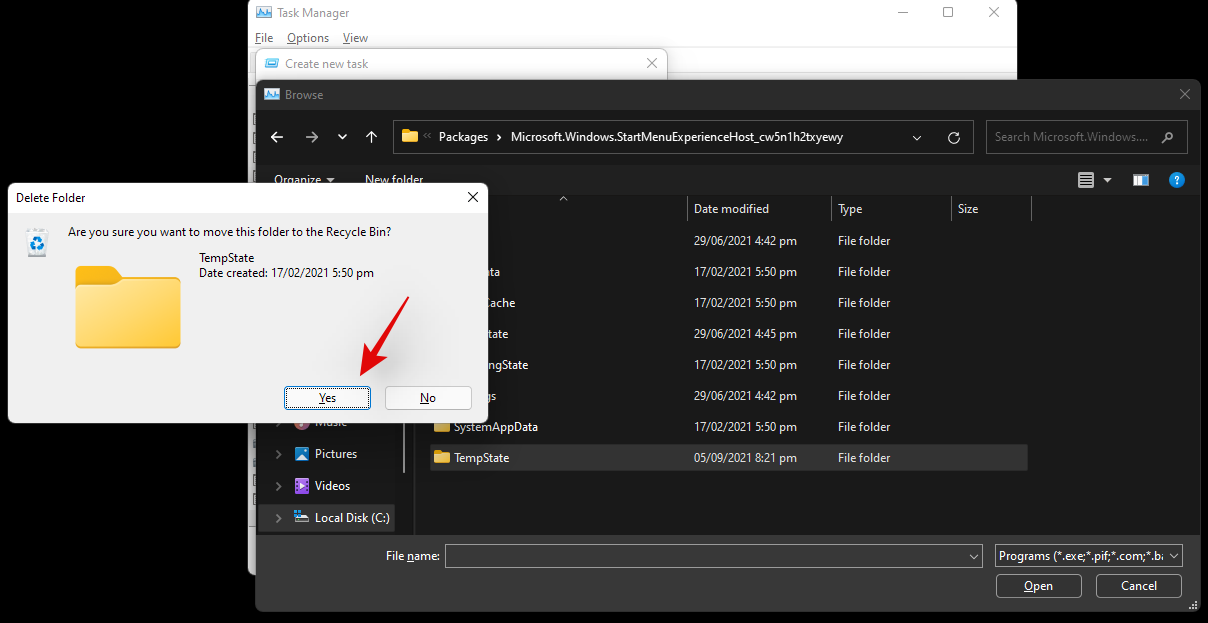
Confirm your choice by clicking on ‘Yes’.
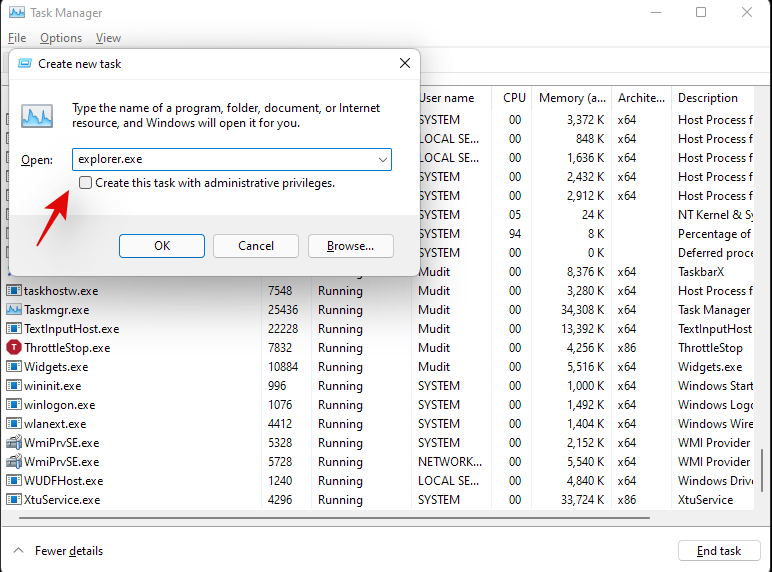
Click on ‘File’ again and select ‘Run new task’. Type in the following term and press Enter on your keyboard.
explorer.exe
Explorer should now restart on your system along with the StartMenuExperienceHost.exe process. We now recommend you restart your system. Upon a restart, the ‘ms-resource:AppName’ should now be fixed on your system.
Case 2: If you get the error everywhere
If you are facing the ms-resource:AppName everywhere, then you can try the fixes mentioned below. Ideally, a repair or reinstall of the concerned app should fix this issue for you, but if not, you can opt for the more serious fixes mentioned below. Let’s get started.
Method #01: Repair the app
Press Windows + i on your keyboard and click on ‘Apps’ on your left.

Now click on ‘Apps & features’.

Scroll the list and find the currently affected app. Click on the ‘3-dot’ menu beside it.

Note: If you are looking for a system app affected by this error, then, unfortunately, it won’t show up in your app list. In such cases, you can simply reinstall the system app using the guide below.
Select ‘Advanced options’.

Click on ‘Terminate’.

Now click on ‘Repair’.

Windows will now do its best to repair the concerned app in the background.

Go to the previous page and repeat the steps above to repair the Microsoft Store app as well as shown below.

Once both apps are repaired, try accessing the affected app again. The issue should now be fixed for you.
Method #02: Reset the app
If repairing the app did nothing for you, then you can reset the app using the guide below.
Press Windows + i on your keyboard and select ‘Apps’ from the left sidebar.
Click on ‘Apps & features’.
Click on the ‘3-dot’ menu beside the affected app.
Select ‘Advanced opitons’.
Click on ‘Terminate’ and then click on ‘Reset’.

Click on ‘Reset’ again to confirm your choice.

Reset the Microsoft Store app as well by using the steps above.
You can now try and access the affected app, which should now be fixed in most cases.
Method #03: Uninstall and reinstall the concerned app
If a Reset and Repair did not work for you, then you can try reinstalling the app on your system. This method works for both system and third-party apps. Follow the steps below to get you started.
Press Windows + S on your keyboard and search for PowerShell. Hit Ctrl + Shift + Enter on your keyboard once it shows up in your search results.
PowerShell will now launch as an administrator on your system. Type in the following command and press Enter on your keyboard.
Get-AppxPackage | Select Name, PackageFullName

You will now get a list of all the apps on your system. Find the concerned app in the list and copy its entire name.

Open notepad and paste the package name in your clipboard and save the text file to a convenient location on your local storage for later reference. Type in the following command and press Enter on your keyboard. Replace NAME with the package name you copied to your clipboard earlier.
Get-AppxPackage NAME | Remove-AppxPackage

The selected app will now be uninstalled from your system. We recommend you restart your system at this point before reinstalling the app using the steps below. Once your system restarts, open the Notepad file we saved earlier and copy the Package Name to your clipboard.
Now launch PowerShell as an administrator using the steps above. Once launched, type in the command below and press Enter on your keyboard to execute it. Replace NAME with the package name we copied to your clipboard.
Add-AppxPackage -register "C:\Program Files\WindowsApps\NAME\appxmanifest.xml" -DisableDevelopmentMode

The selected app will now be reinstalled on your system. We will now need to refresh Windows UI to detect the new app properly. The best way to do this is by restarting your system.
Restart your system and the ms-resource:AppName error should now be fixed on your system.
Method #04: Reinstall all missing system apps
If the error persists on your system then let’s try uninstalling and reinstalling all missing system apps on your system. If you recently used a cleaner or uninstaller on your system then it is likely that a critical system app was also removed during this process which is causing this issue. We can fix such errors by checking and reinstalling any missing system apps on your system. Follow the guide below to get you started.
Press Windows + S on your keyboard and search for PowerShell on your system. Hit Ctrl + Shift + Enter on your keyboard once it shows up in your results.
PowerShell will now run as administrator on your system. Type in the following command on your system and hit Enter to execute it.
Get-AppXPackage -allusers | Foreach {Add-AppxPackage -DisableDevelopmentMode -Register "$($_.InstallLocation)\AppXManifest.xml"}

Windows will now check all your system apps and reinstall any missing apps. Apps that already exist will show up as a red text error in PowerShell which can be ignored.
Restart your system and the ms-resource:AppName should now be fixed on your system.
Method #05: Run SFC & DISM commands
SFC and DISM commands can help fix issues with your disks and Windows image. If a corrupted file or a disk error is causing this issue on your system then these commands can help fix such errors. Follow the guides below to get you started.
Check and fix Disk errors
An SFC scan can help you scan and fix errors with your disk. Follow the guide below to get you started.
Press Windows + R on your keyboard and type in CMD. Press Ctrl + Shift + Enter on your keyboard to run CMD as an administrator on your system.

Now type in the following command and press Enter on your keyboard.
sfc /scannow

Windows will now do its thing, scan your disk and fix any errors it finds.
Check for corrupted system files and replace them
DISM can help you scan for corrupted system files on your system and replace them if needed. This DISM command will also help you repair your system image if it has been corrupted. Follow the guide below to get you started.
Press Windows + S on your keyboard, search for CMD and click on ‘Run as administrator’.

CMD will now launch as administrator on your system. Type in the following command and press Enter on your keyboard.
DISM /Online /Cleanup-Image /RestoreHealth

Once the process finishes, restart your system and the error should be fixed on your system.
Still facing ‘ms-resource:AppName’ error? Last Resort you can try
If you are still facing the ms-resource:AppName error on your system then this indicates a more serious issue with your Windows image. You will now have to repair your Windows installation to fix this issue. We recommend you first try to Reset your PC while retaining your data.
Related: How to Repair Windows 11 [15 Ways]
The above will help fix your issue in most cases. However, if the error persists then we recommend proceeding with a fresh installation of Windows 11 on your system. Your error will be definitely solved after a fresh installation of Windows 11. You can use this comprehensive guide from us to reset your Windows 11 PC in multiple ways.
Related: How to Reset Windows 11
We hope you were able to fix ms-resource:AppName error on your system using the guide above. If you have any more questions, feel free to reach out to us using the comments section below.
Related:
- Laptop Hotkeys Not Working on Windows 11? How to Fix and Why Is This Happening
- How to Login as Administrator on Windows 11 or Windows 10
- How to Clear Space on Windows 11
- How to Fix ‘Windows 11 Start Menu Not Working’ Issue
- How to Use Focus Assist on Windows 11
- How to Map a Drive in Windows 11
- How to Uninstall McAfee on Windows 11 [5 Ways]
- How to delete temporary files in Windows 11


One response to “How to Fix ms-resource:Appname Error on Windows 11”
Solution is well explained, simple to execute and absolutely on-point!