One of the requirements for Windows 11 is UEFI Secure Boot support. It is a new hardware requirement without which installation Windows 11 can be a little tricky. Now that Windows 11 is gradually rolling out to users through Windows Updates and others are getting their hands on it via the Windows 11 Installation Assistant and the official media creation tool, many users are prevented from upgrading to the new OS because of a “Secure boot state unsupported” error message or another similar error: Secure Boot Can Be Enabled When System in User Mode. So, what are the issues and how can you fix them? Here’s everything you need to know.
What is Secure Boot?
Secure Boot is a relatively new feature, but one that can easily be found on modern motherboards. As the name suggests, it provides an additional layer of security to the system while it is booting up to prevent any malware infestation and damage.
Secure boot is the gatekeeper to a safe and reliable Windows experience. With secure boot, your PC will only use the OEM-trusted software to boot up. It ensures this by checking firmware code signatures on your system’s hardware. As long as there is a match between the firmware module signatures and the secure boot’s database of signatures, the firmware codes will be executed and the PC will boot. If there is a mismatch or there are no valid credentials, the secure boot will raise the flag and refuse the firmware codes from being executed.
Issues: Secure Boot Can Be Enabled When System in User Mode / Secure Boot State Unsupported
As mentioned before, most modern-day PCs have motherboards that support Secure Boot. But if your system is utilizing the legacy boot framework and secure boot is not enabled, you will see that the Secure Boot State is “Unsupported”. That can happen even if your motherboard has the Secure Boot option. Let’s take a look at a few fixes that can potentially resolve the problem.
Fix #01: Check if your PC supports Secure Boot
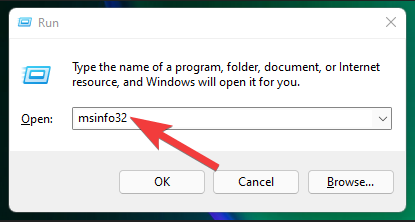
First of all, let’s see if the PC supports Secure Boot. To do so, press Win + R to open the RUN box, type msinfo32 and hit Enter.
This will open the “System Information” window. Here, look for “Secure Boot State”. Its value should be On.
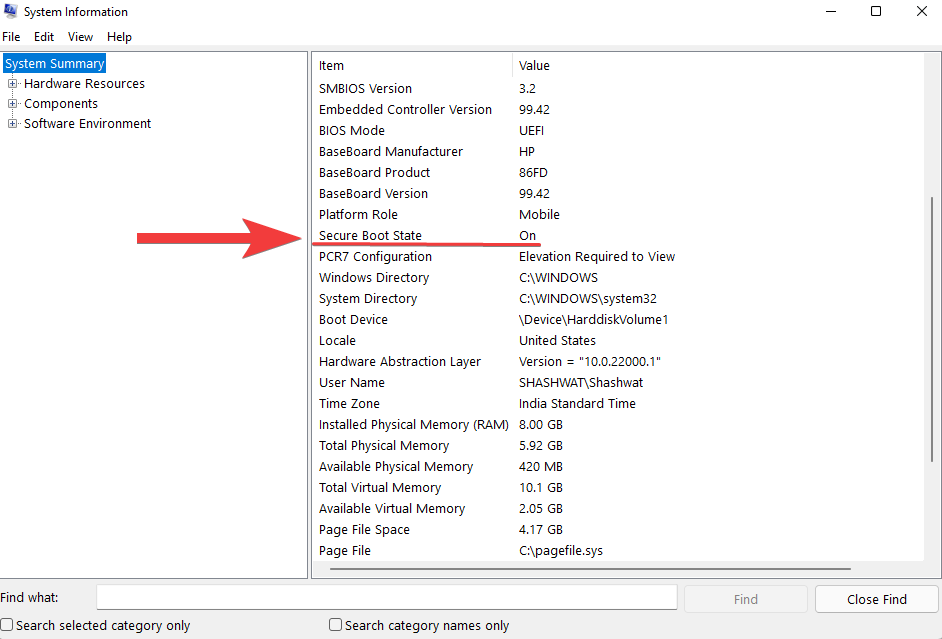
If it isn’t, or you see “Unsupported” in its stead, go through the fixes given below to enable it.
Fix #02: Re-enable Secure Boot in BIOS
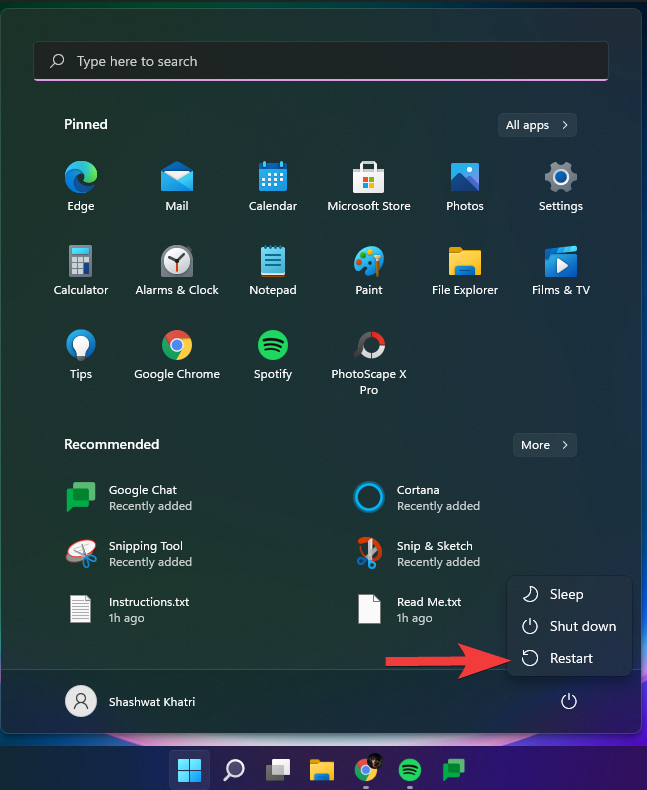
For this fix, you will have to access your PC’s BIOS menu. To do so, press Start and click on the Power button.
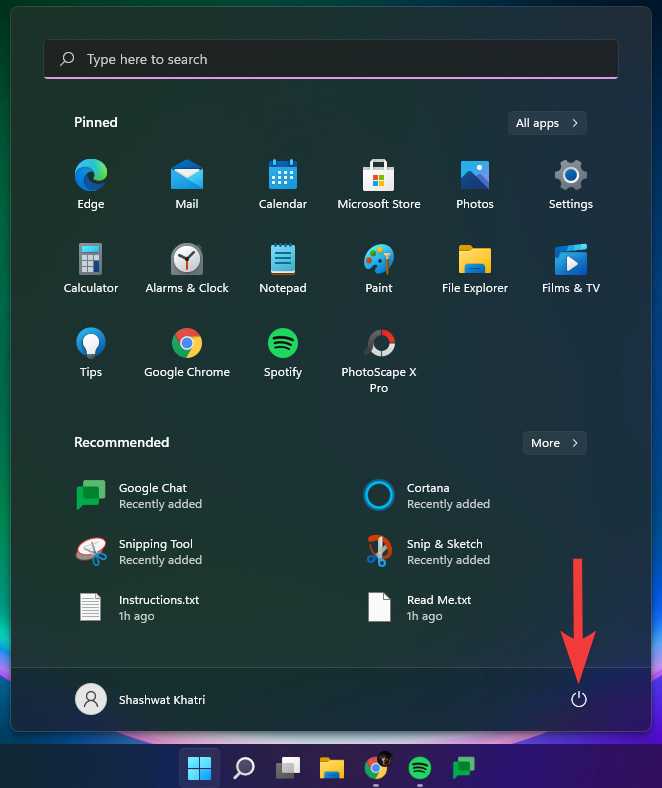
Then, while holding down the Shift key, click on Restart.
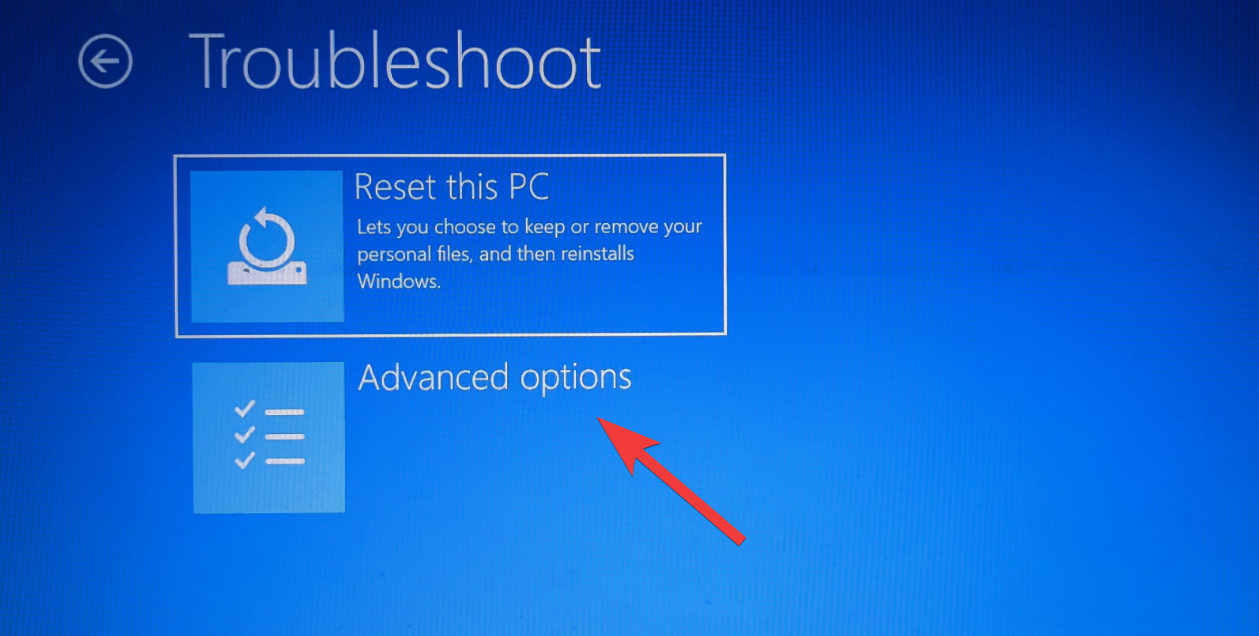
Your computer will boot straight to the Advanced Startup screen. Here, click on Troubleshoot.

Then select Advanced Options.
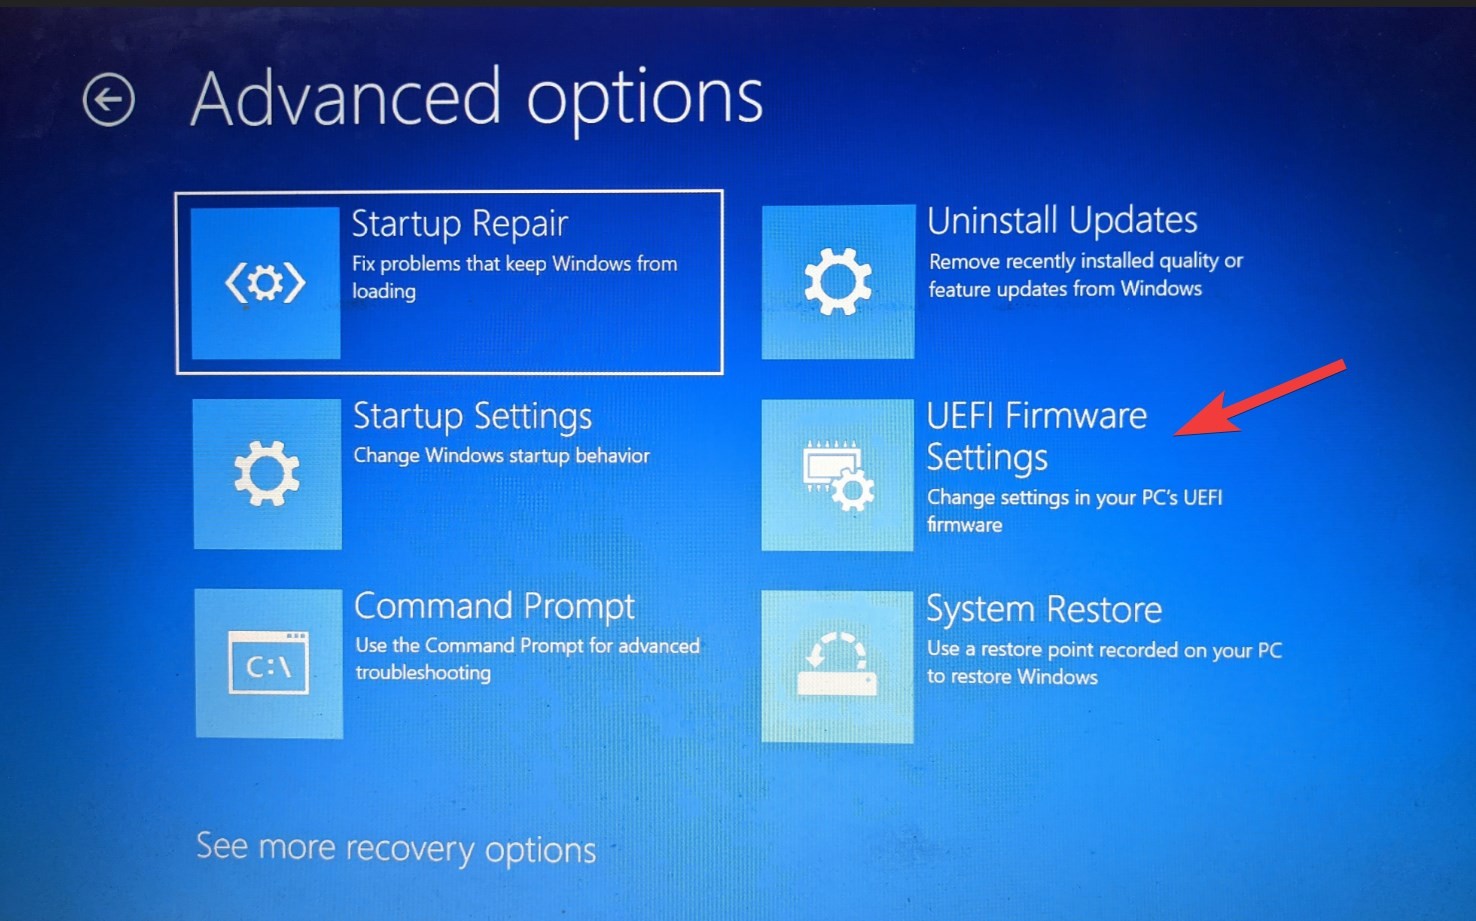
Then click on UEFI Firmware Settings.
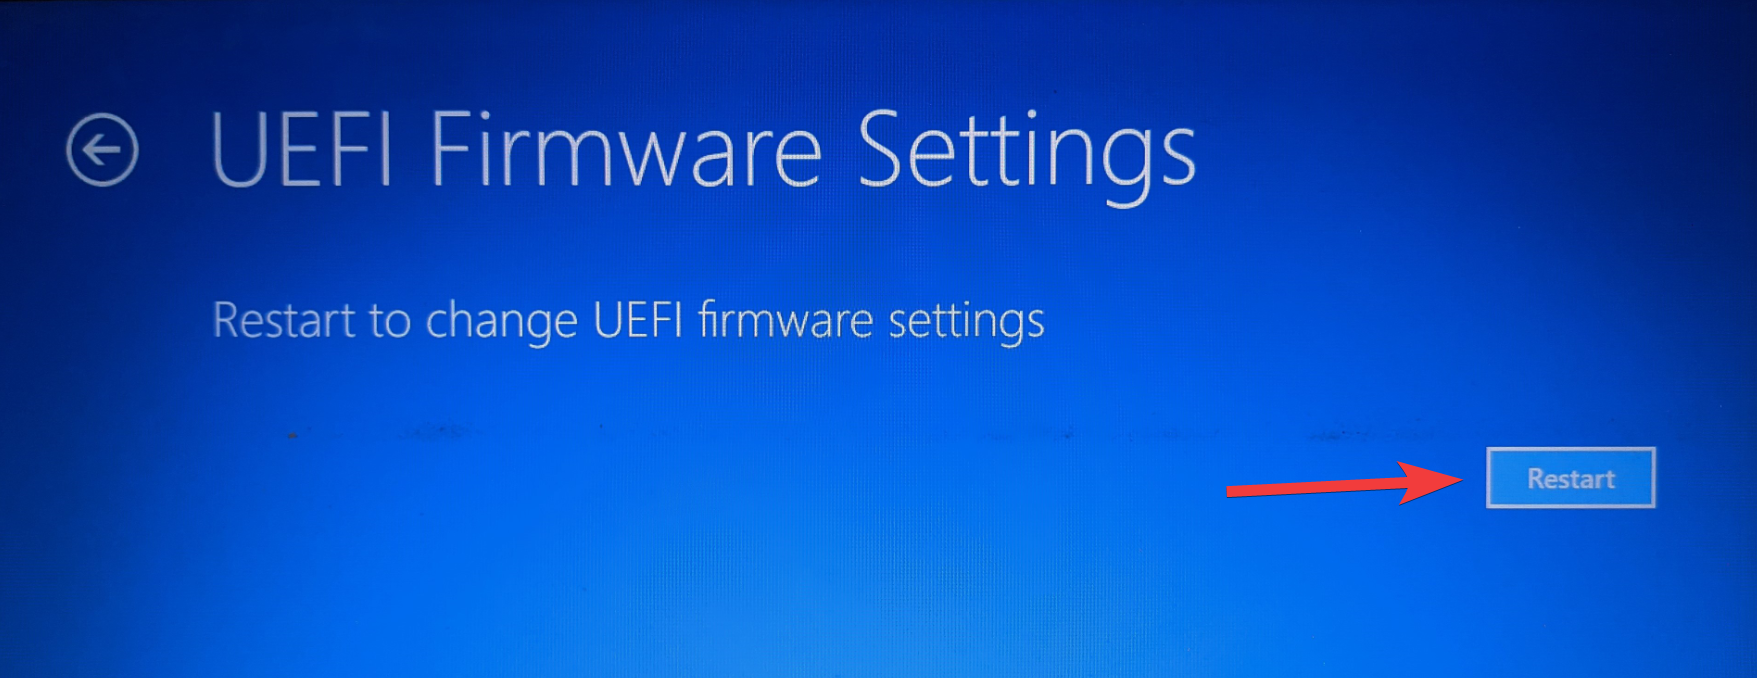
Then click on Restart.
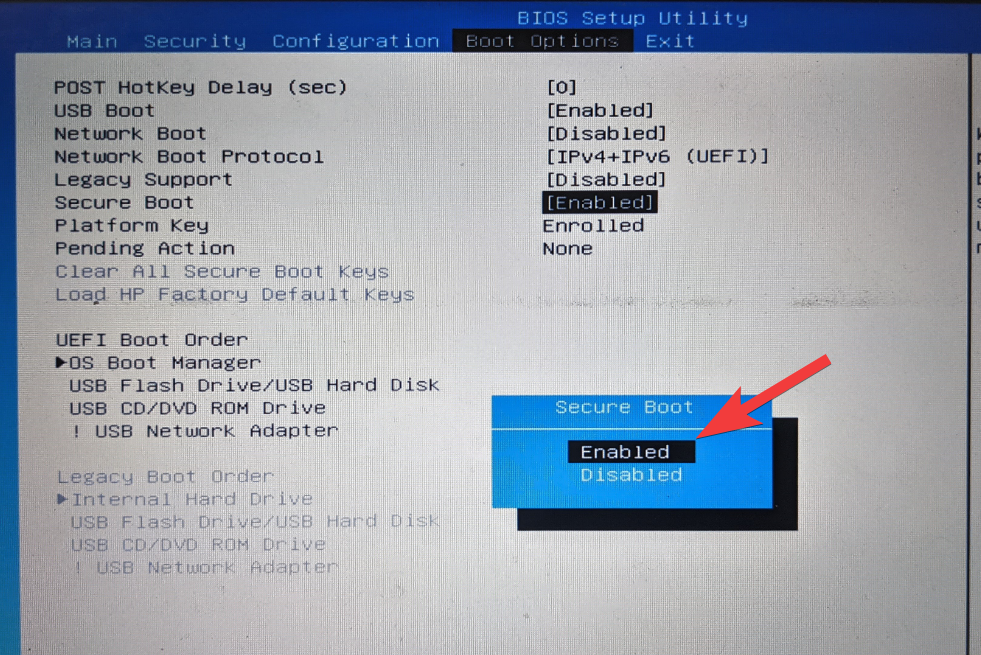
You will now see the Startup Menu appear. This will differ depending on your PC’s manufacturer. Press the key corresponding to “Boot Setup”.
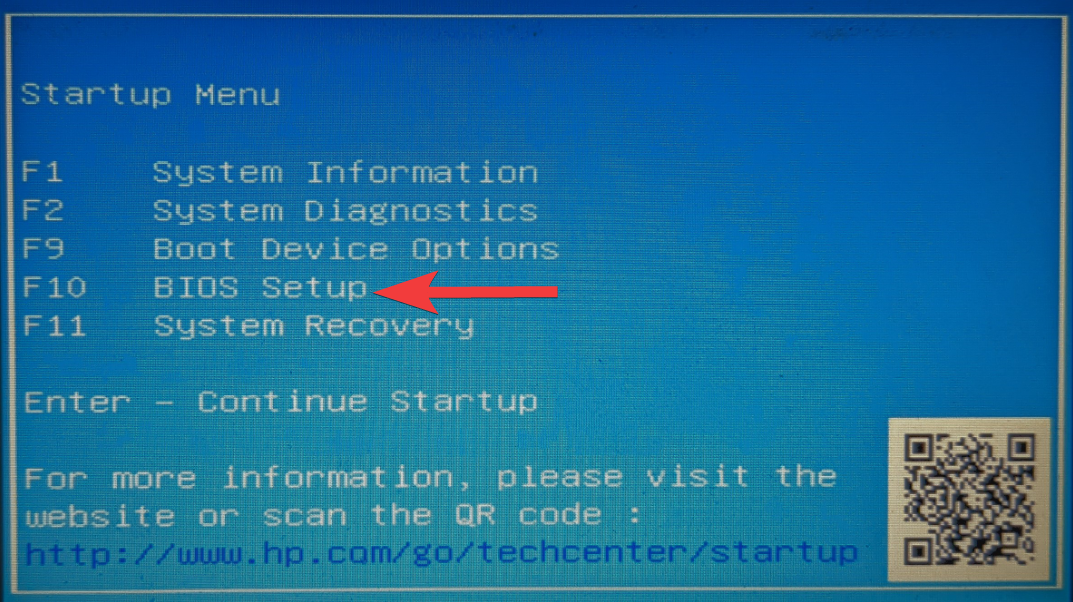
Once the Boot Setup opens up, search for the “Secure Boot” option. In most cases, it will be under the Boot Options tab or the “Security” tab and will vary depending on your PC. Use the arrow keys to get to that tab.
Then find Secure Boot and make sure it is set to “Enabled”.

If it isn’t, press Enter on it. Then select Enabled and hit Enter.
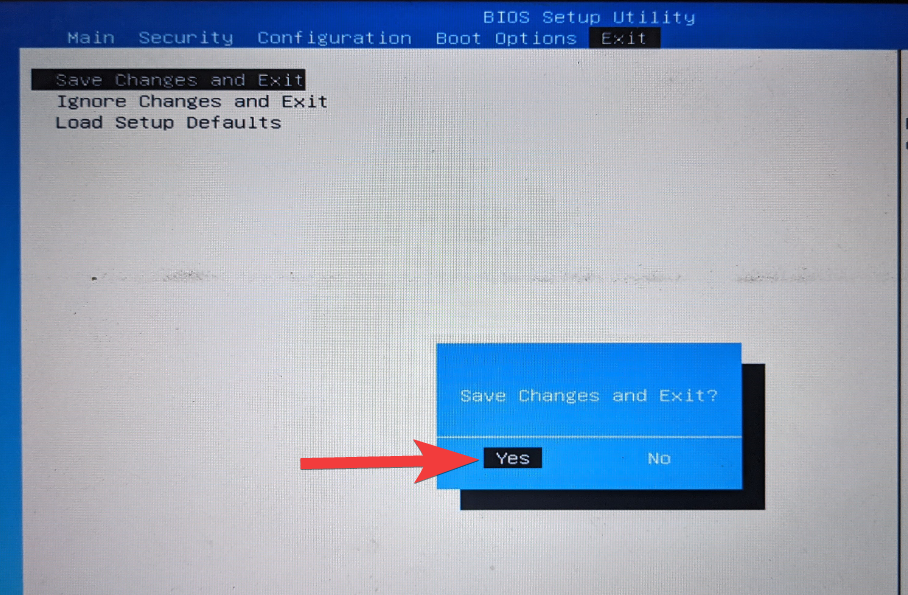
After making this change, navigate to the “Exit” tab.
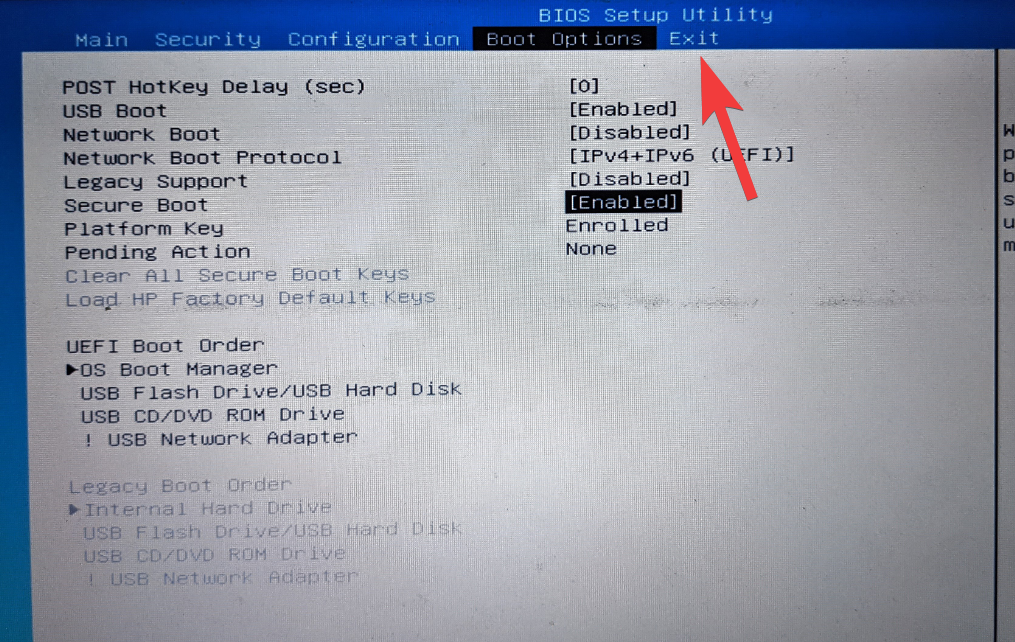
Press Enter on Save Changes and Exit.
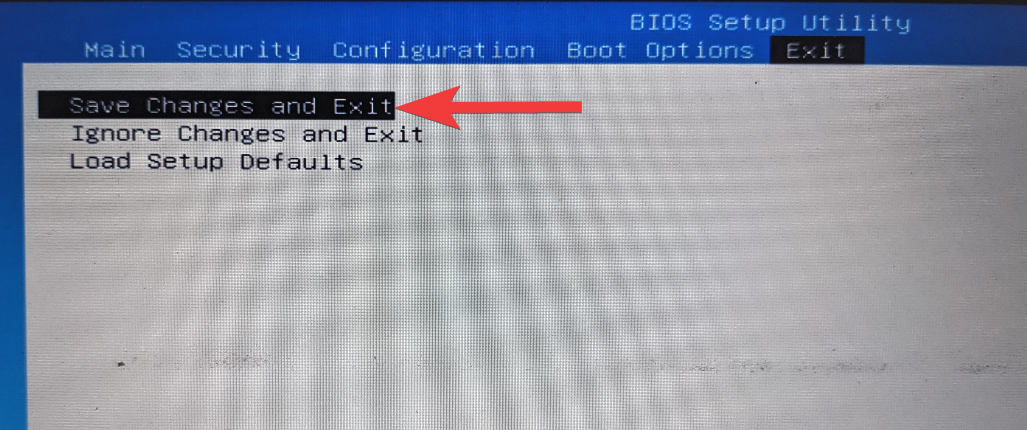
Select Yes and press Enter.
This will re-enable Secure Boot on your PC and should show the “Supported” value in System Information.
Fix #03: Change Legacy to UEFI (MBR to GPT, if supported)
Legacy BIOS systems can boot only from Master Boot Record (MBR) formatted tables. To run Windows 11, however, it has to be converted to the GPT partition format, if it isn’t already so.
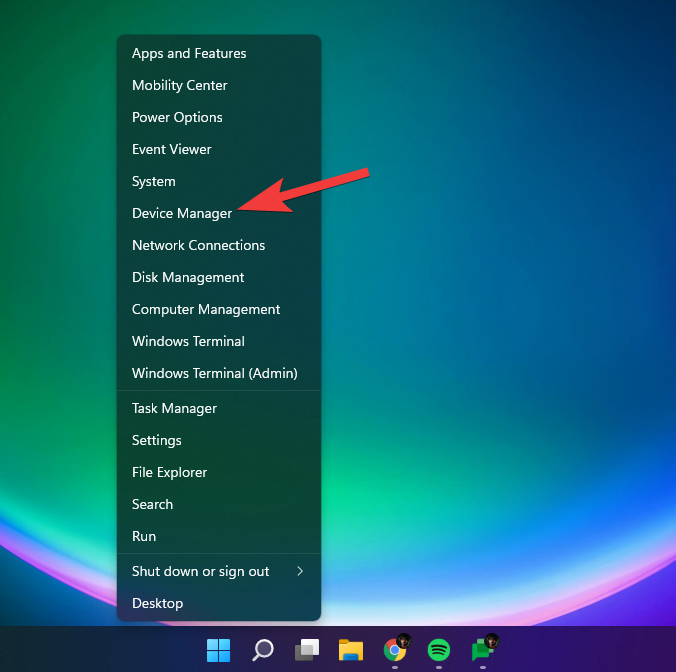
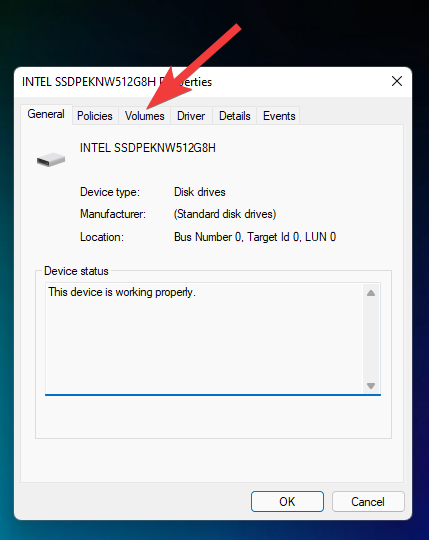
To check the format of your system disk partition, right-click on the Start menu and select Disk Management.
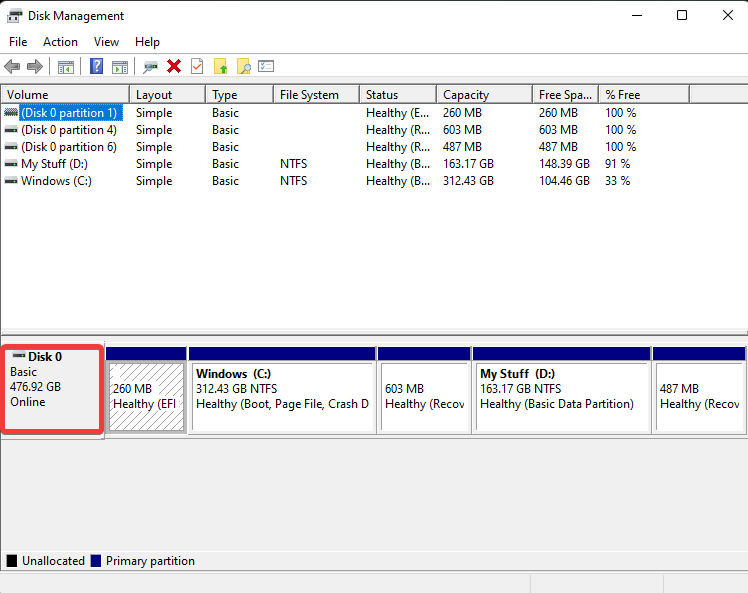
Then right-click on your disk on the left.
Select Properties.
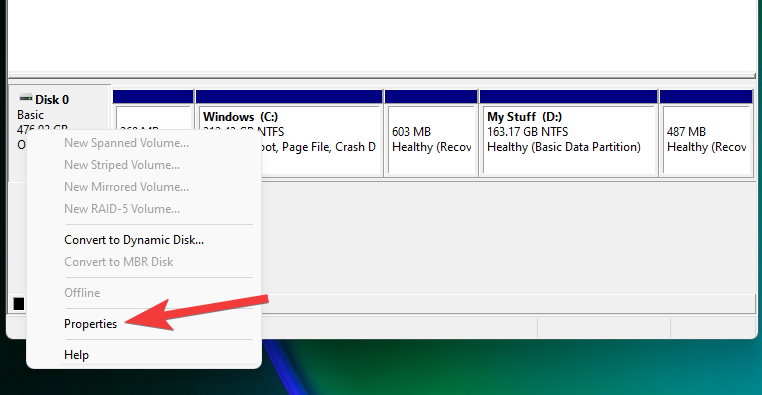
Switch to the Volumes tab.
Check “Partition style”.
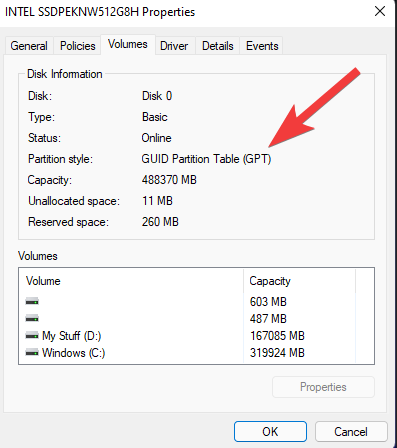
If it says MBR instead of GPT, here’s how to go about converting it:
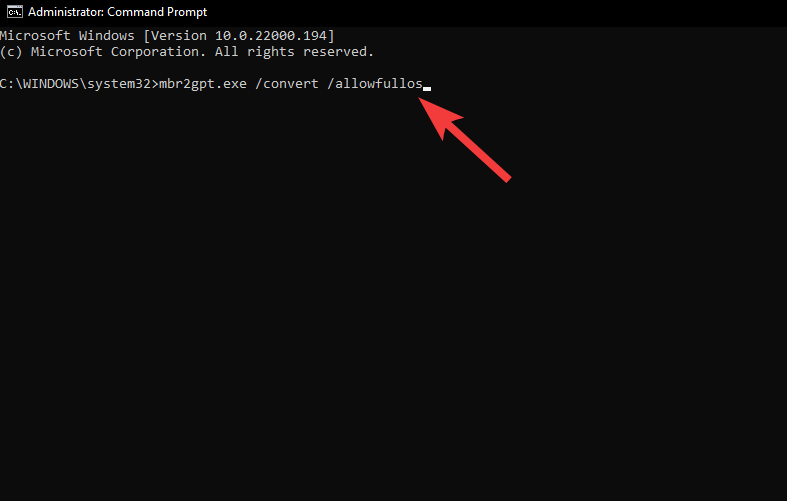
Press Start, type cmd, and click on “Run as administrator”.

Now type the following command:
mbr2gpt.exe /convert /allowfullos
Then press Enter. Once the validation completes, the conversion process will complete in no time. You can check the partition style of the disk via Disk Management again. It should now read GUID Partition Table (GPT).
Fix #04: Disable CSM and re-install Windows
Compatibility Support Module (CSM) is a module of the modern-day UEFI system. But because it only simulates a legacy BIOS environment for your current OS to boot from, it remains unsupported by UEFI.
To enable UEFI on your system, you would have to go the extra mile of disabling CSM and then reinstalling Windows. To get a step-by-step guide for this, check out How to Disable CSM to install Windows 11.
FAQs:
Here we answer some commonly asked questions about Secure Boot.
Why is Secure Boot not supported?
If you see Secure Boot State as “Not supported”, one of the three things could be the case – system disk’s partition style is set to MBR, or Secure Boot is disabled in BIOS, or CSM is enabled. It’s also possible that your PC’s hardware just doesn’t support it. Check out the fixes given above to resolve these issues.
Should I enable Secure Boot?
Secure Boot is an additional layer of security for Windows PCs. As it is a system requirement to install Windows 11, you should definitely consider enabling it if it isn’t already.
How do I enable Secure Boot state?
To enable the secure boot state, make sure that your disk is in the GPT format (fix #03) and that CMS is disabled (fix #04). Then go to the BIOS menu and enable Secure Boot (fix #2).
We hope you were able to change the Secure Boot state from Unsupported to On. Even though there are workarounds to the secure boot requirements for Windows 11, it is recommended that you enable Secure Boot and get the safety of the Windows experience as Microsoft wants you to have it.
RELATED


