Windows 11 is here and one of the first things that an avid Windows user would appreciate is the look and overall design of the Windows shell experience. Everything is centralized and beckons the user even with its minimalist design.
Designers and app creators are using the base design of Windows 11 to explore further customization possibilities, and one of the recent apps to come out is ‘Live Tiles Anywhere’ app. Let’s see what it has to offer and how you can create live tiles (like those on Windows 10) and widgets using ‘Live Tiles Anywhere’ on Windows 11.
What is ‘Live Tiles Anywhere’ app?
Most of us remember ‘Live Tiles’ as that Windows 10 Start Menu feature that never really took off. It’s understandable then that Microsoft didn’t implement it in Windows 11. But the idea behind Live Tiles was not all out of whack.
Live Tiles were square-shaped tiles that contained a picture or a number and showed notifications previews from apps. They also rotated sometimes and had links to starts programs. But their application (no pun intended) was never quite done right and they tended to stay within the Start Menu only.
However, one developer has created a modified version of it – Live Tiles Anywhere – which, as the name suggests, can be used anywhere you like, be it in the Start Menu or as desktop widgets. Let’s see ‘Live Tiles Anywhere’ in action and see how you can create them on Windows 11.
How to install Live Tiles Anywhere on Windows 11
Live Tiles Anywhere is available as an app from the Microsoft Store.
Download: Live Tiles Anywhere on Microsoft Store
Click on the link above to get Live Tiles Anywhere from your browser. Alternatively, press Start, type ‘store’, and open the Microsoft Store.
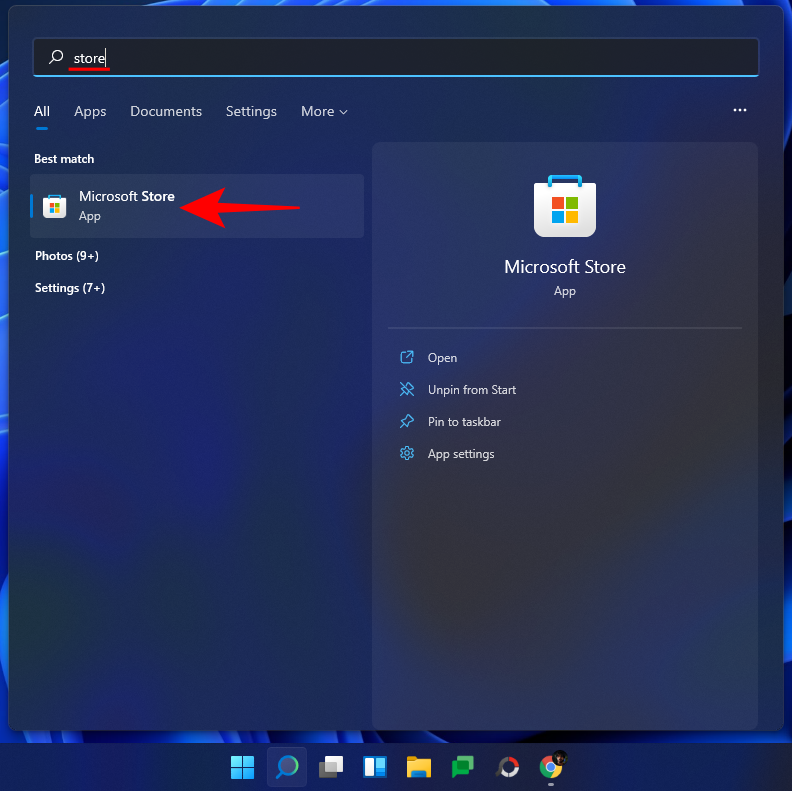
Here, search for Live Tiles Anywhere and select it from the list of available options.
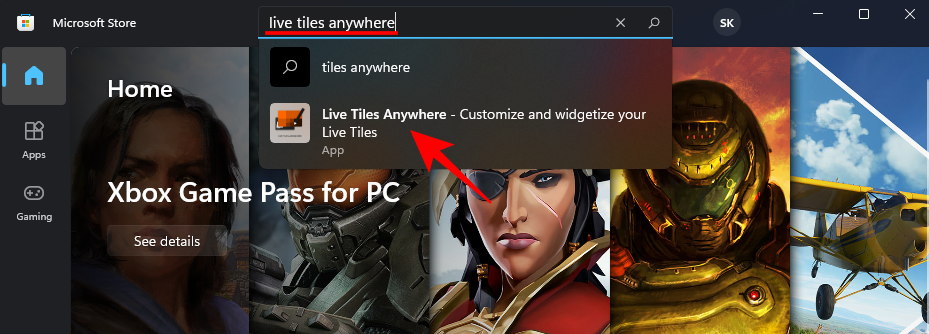
Then click on Get.

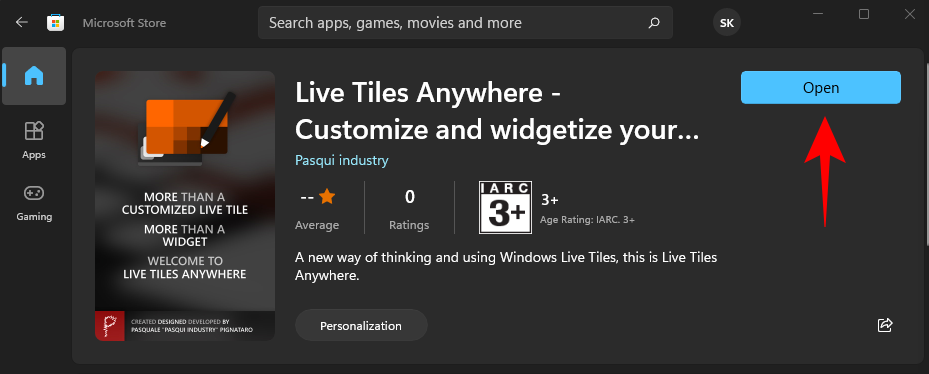
Once it’s downloaded and installed, click on Open.
How to create Live Tiles Anywhere on Windows 11
Once Live Tiles Anywhere opens up, you will be under the ‘Custom Tiles’ tab by default. Here, click on Create a new custom tile.

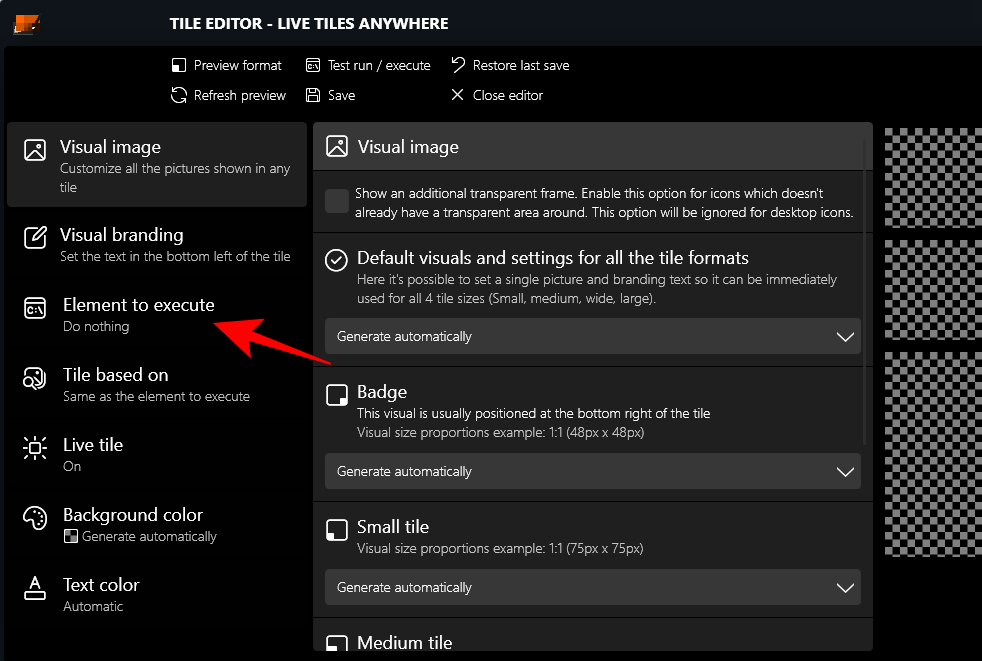
This will bring you to the Tile Editor window. Firstly, click on Element to execute in the left panel.
Here, click on the drop-down menu.
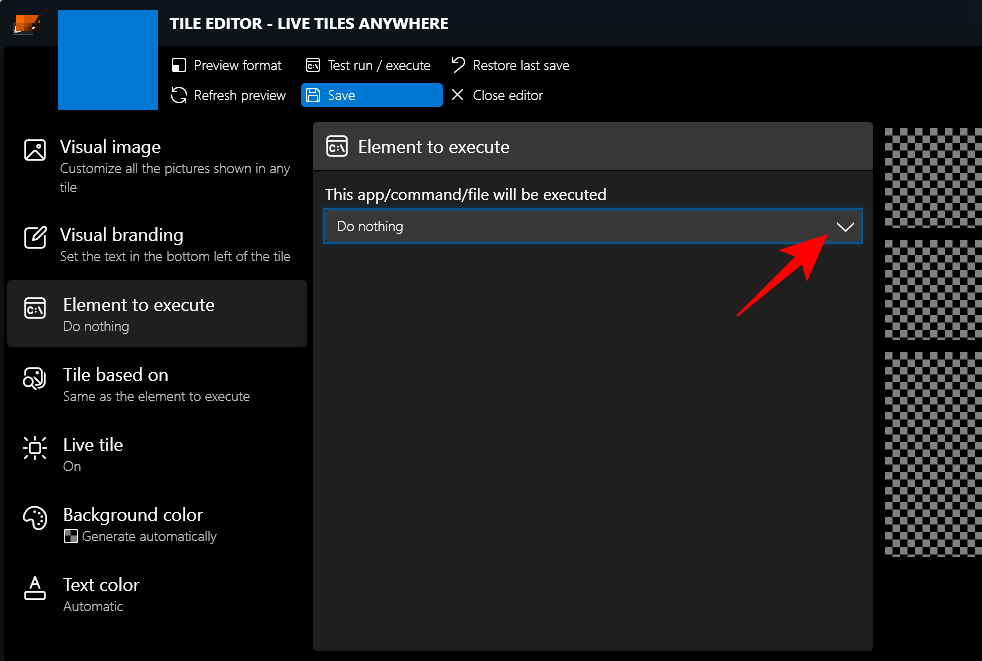
Then select Installed apps.

Then click on Pick an app.
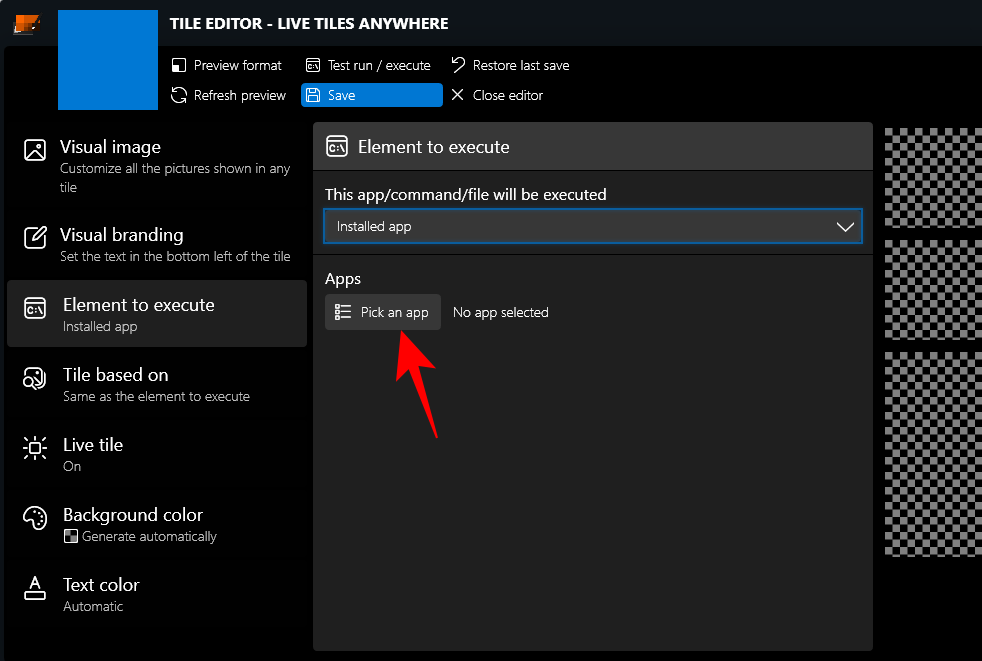
Select an app for your first Live Tile and click on Save.

There are a few other customization options such as Background color, text color, visual image, and visual branding, etc. that you can look through.
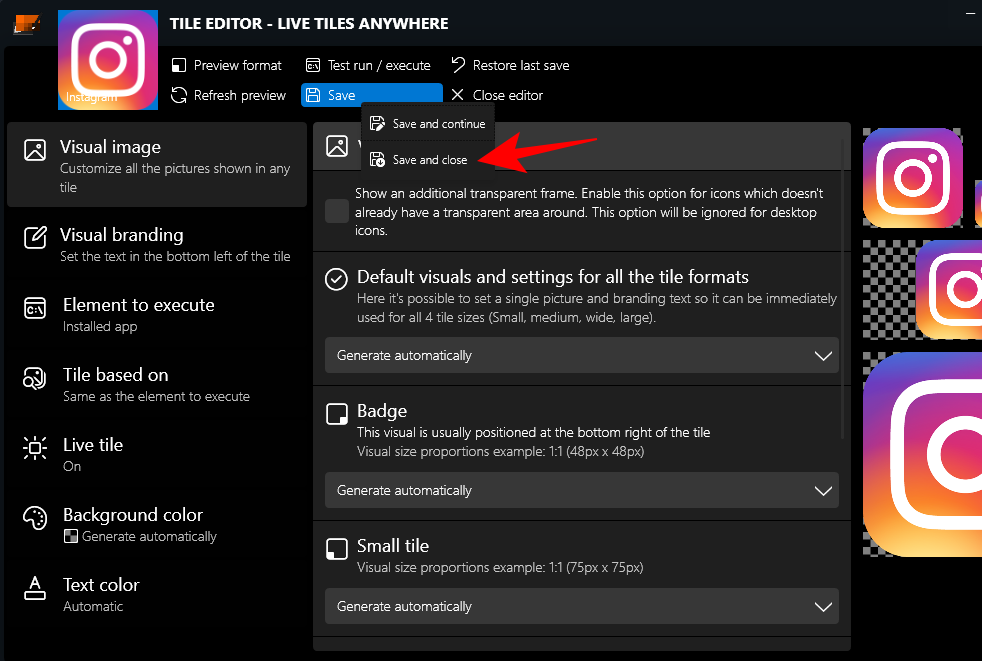
Click on Save to finish.

Then click Save and close.
Under the ‘Custom Tiles’ tab, right-click on the tile and click on Pin to the Start Menu.

When prompted, click Yes.

Currently, the app isn’t optimized to show live tiles in the Windows 11 Start Menu nor is it meant to replace its UI components, which use small ‘badges’ as app icons. If you’re using Windows 10, however, you will see it as an actual live tile.
You can also put this tile on the desktop. To do so, right-click the tile and select Create a desktop icon.

Use Live Tiles as Widgets on Windows 11
Once a custom live tile is created, it can be used as a widget to be placed anywhere on the desktop. To do so, right-click on the live tile and select Create a widget.
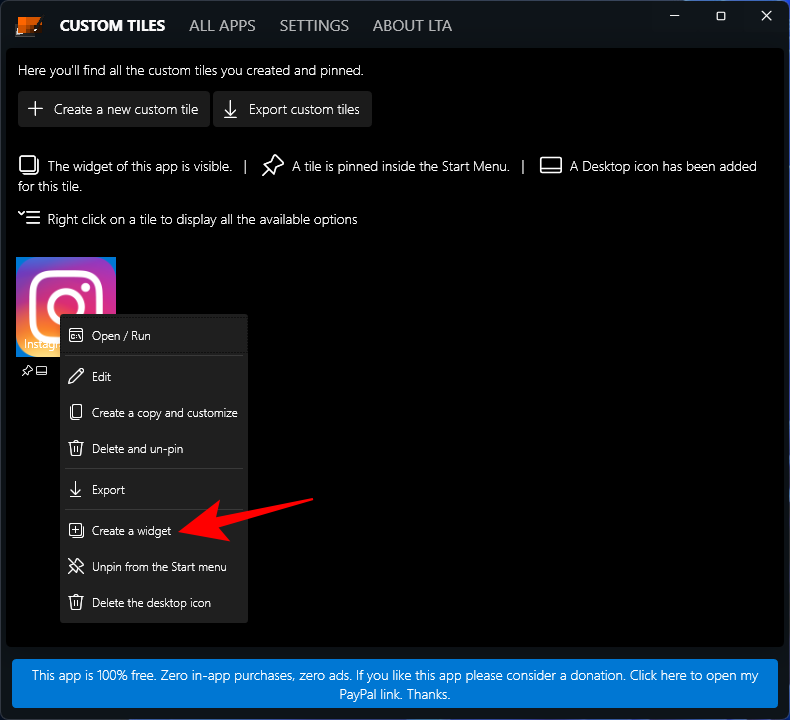
Another, quicker way to create a widget on the desktop is to do so without creating a custom live tile. For this, open the ‘Live Tiles Anywhere’ app and go to the ‘All Apps’ tab. Here, search for an app, right-click on it and select Create a widget.

This will directly put the widget on the desktop.
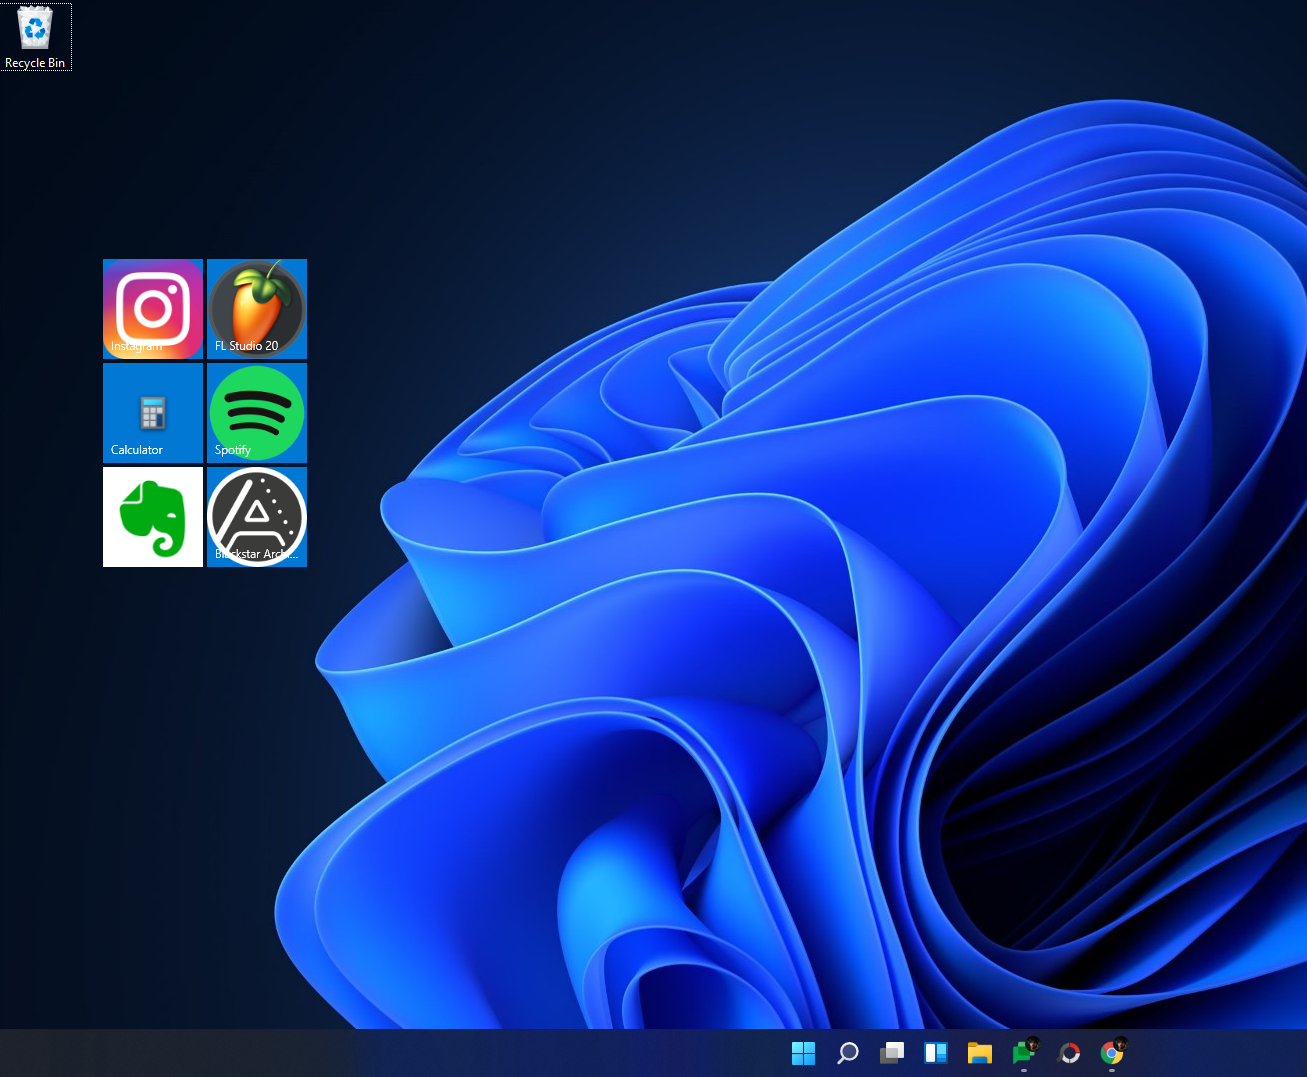
Although not yet perfected, the idea behind the ‘Live Tiles Anywhere’ app has a lot of potential. As the developer makes changes to it, we might see a better version come out soon.
RELATED
- How to Stop the Photos App From Grouping Pictures on Windows 11
- Windows 11 Snap Layouts not working? Here’s how to fix
- How to Set Google Chrome as Default Browser on Windows 11
- How to Change Drive Letter on Windows 11
- How to Make Windows 11 Bootable USB in 4 Easy Steps
- How to Extend Volume Windows 11 or Windows 10

