What to know
- You can disable updates for Windows 11, Microsoft products, as well as apps downloaded from the Microsoft store.
- Disable updates by pausing updates for a week in Windows Update settings. Or Stop “Windows Update” service and change its ‘Startup type’ to Disabled in the Services system app. Alternatively, disable updates by using a metered connection in Wi-Fi properties, and ensure ‘Download updates over metered connections’ in Windows Update is disabled.
- You can also disable updates from Registry Editor and Group Policy Editor (refer to guide for details). Third-party apps like Win Update Stop offer one-click solutions to disable updates.
- Disable updates for MS products from Settings > Windows Update > Advanced options > disable Receive updates for other Microsoft products. Disable updates for Microsoft Store from profile picture > Settings > disable App updates.
Windows Updates can get annoying with its constant pop-ups and restarts. Additionally, you may not always want to be at the forefront of receiving Windows updates. You might want to disable Windows Updates on your system for all these reasons and more. Here are how you can get started and all the options at your disposal to disable Windows Updates.
What happens when you disable updates?
When you disable updates on Windows 11, depending on your setup you will stop receiving updates for the following Windows and Hardware components.
- Windows security updates
- Windows feature updates
- Windows cumulative updates
- System drive updates
- Hardware specific updates
- Updated generic drivers for USB and other peripheral devices
- OEM issued updates (optional)
While it is recommended to keep your updates enabled, it is not terribly necessary. Here’s how you can disable them on Windows 11.
Related: How to See WiFi Password (Windows 11)
How to disable updates on Windows 11
Follow the guide below to disable updates in Windows 11. We will first start by disabling Windows updates, and then subsequently disabling updates for Microsoft products and Microsoft Store apps. Let’s get started.
1. Disable Windows Updates in 7 Ways
Here’s how you can disable Windows updates on your system depending on your preferences. You can opt for a temporary solution like pausing updates or opt for a more robust solution like disabling Windows Updates using GPO. Use either of the sections below to help you along with the process.
Method 1: Pause Updates
You can pause Windows updates from the Settings app for a set amount of time. You get the option to pause updates for a week maximum. Here’s how you can get started on your system.
- Press
Win+Ion your keyboard and click Windows Update on the left. - Click Pause for 1 week.
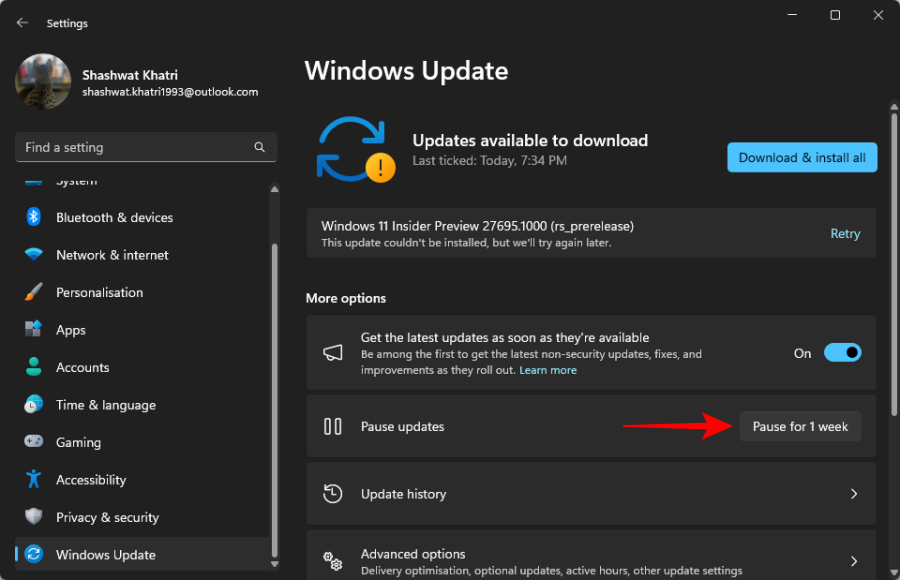
Updates will now be paused for a week on your system.
Related: Microphone Not Working Issue Fix (Windows 11)
Method 2: Disable the Windows update service
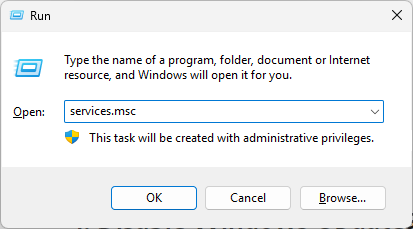
You can also disable the Windows update service on your system. This helps you circumvent the time limitations when using the Settings app to disable updates on your system. Use the guide below to help you along with the process.
- Press
Win+R, type services.msc, and pressEnter.
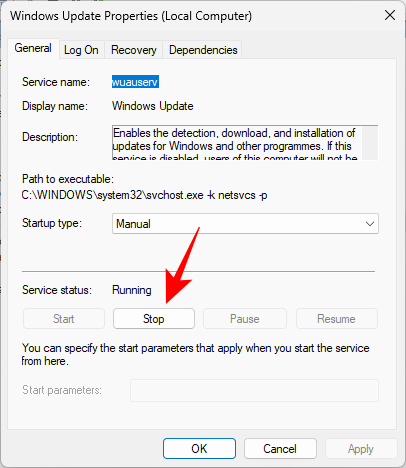
- Now, scroll down and double-click on Windows Update.
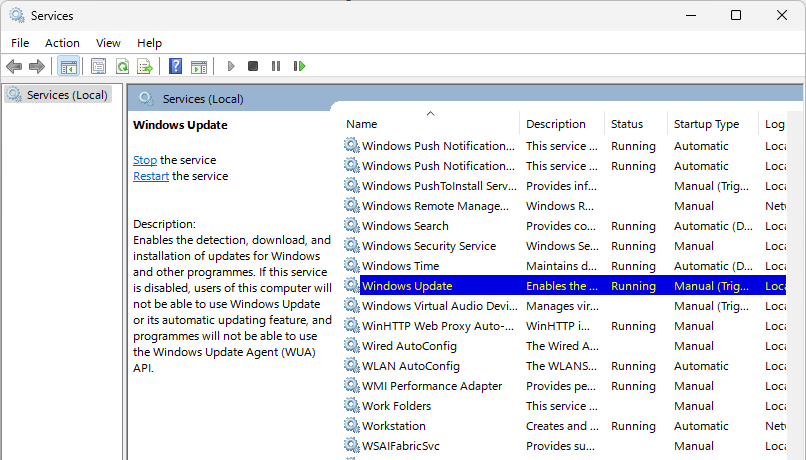
- If it’s running, click on Stop.
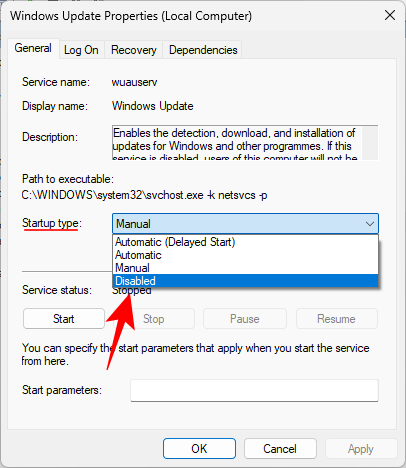
- Then click on the drop-down menu next to Startup type. Select Disabled.
- Click OK.
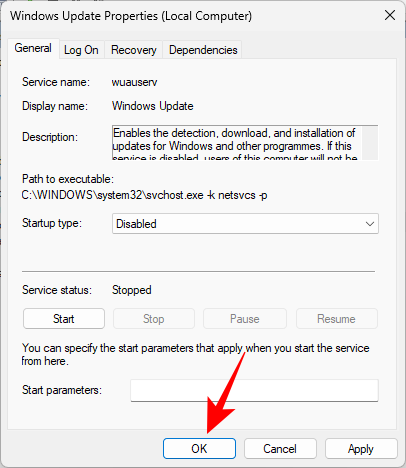
And that’s it! Windows update service will now be disabled on your system. We recommend you restart your system and the changes should take effect once your system boots up.
Related: How to Unzip Files on Windows 11
Method 3: Using Group Policy Editor (GPO)
If you’re using Windows 11 Pro or higher, then you can use the Group Policy Editor or GPO to disable Windows Updates on your system. This is an enterprise-level solution that is quite robust and allows you to even selectively receive updates on your system. Use the guide below to help you disable Windows updates on your system using GPO.
- Press
Windows + R, type gpedit.msc, and pressEnteron your keyboard. - Navigate to the following path using the left sidebar: Computer Configuration > Administrative Templates > Windows Components > Windows Update > Manage end user experience.
- Now, on the right, double-click on Configure Automatic Updates.
- To disable Windows updates completely, select Disabled.
- Then click OK.
- If you don’t want to disable Windows 11 updates entirely, then click Enabled for Configure Automatic Updates instead.
- In the Options: section, click on the drop-down menu and select one of the following options based on your requirements.
- Once you’ve selected your Windows update configuration, click OK.
- Restart your PC and the changes should now be in place as intended
Related: How to Reset Sound Settings (Windows 11)
Method 4: Using the Registry Editor
You can also use the Registry Editor to configure or disable Windows Updates depending on your requirements. This is the ideal solution for Windows 11 Home users who do not have access to the Group Policy Editor. Follow the guide below to help you configure Windows Updates using the Registry Editor.
- Press
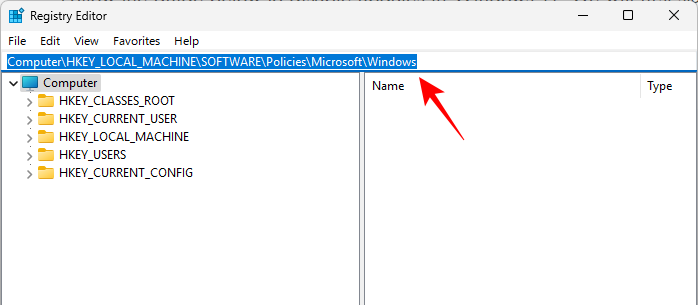
Win+R, type regedit, and pressEnter. - Navigate to the following key:
Computer\HKEY_LOCAL_MACHINE\SOFTWARE\Policies\Microsoft\Windows
Alternatively, you can copy the above and paste it into the Registry Editor’s address bar and pressEnter.
- Right-click on Windows and select New > Key.
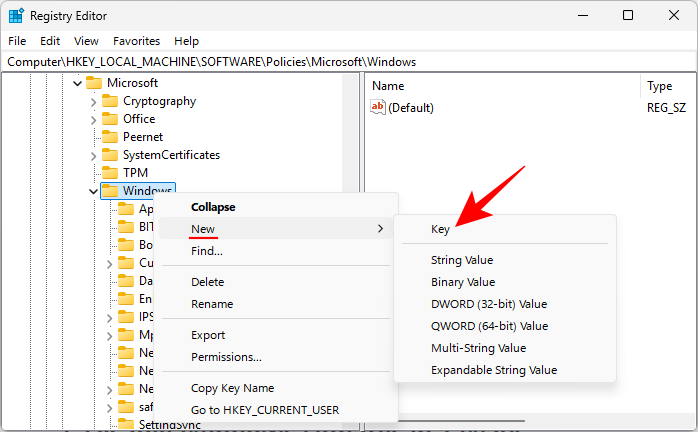
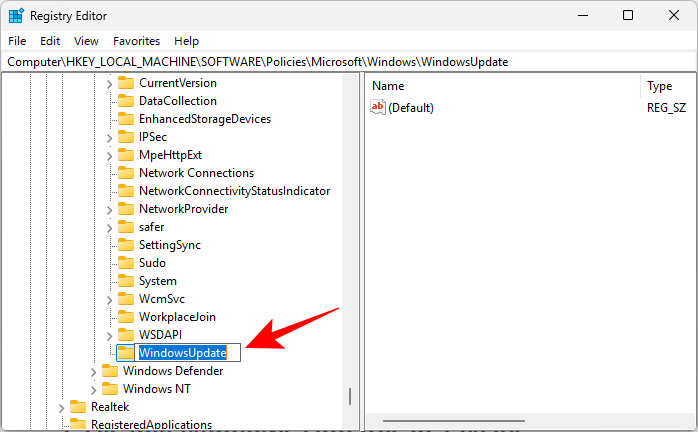
- Name this key WindowsUpdate and hit
Enter.
- Now, right-click this key and create a sub-key via New > Key.
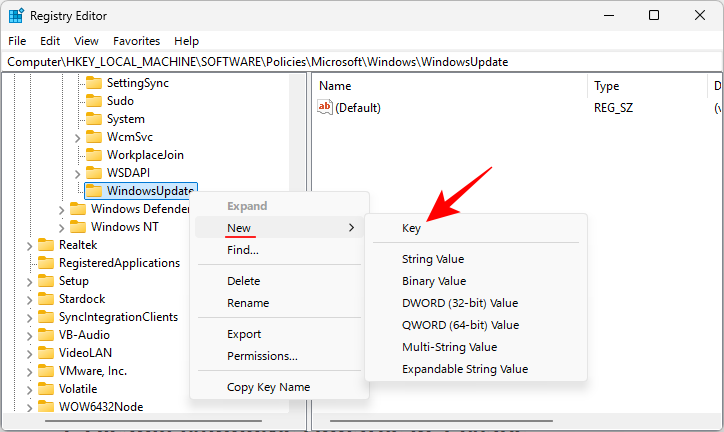
- Name this key AU.
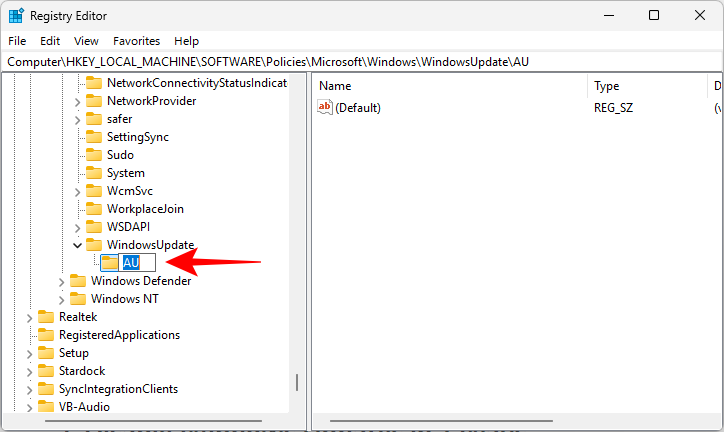
- With the newly created AU key selected, right-click in the space on the right and select New > DWORD (32-bit) Value.
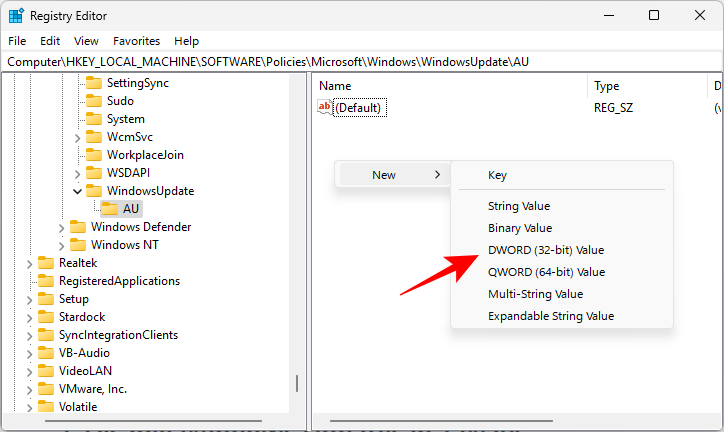
- Name this key AUOptions.
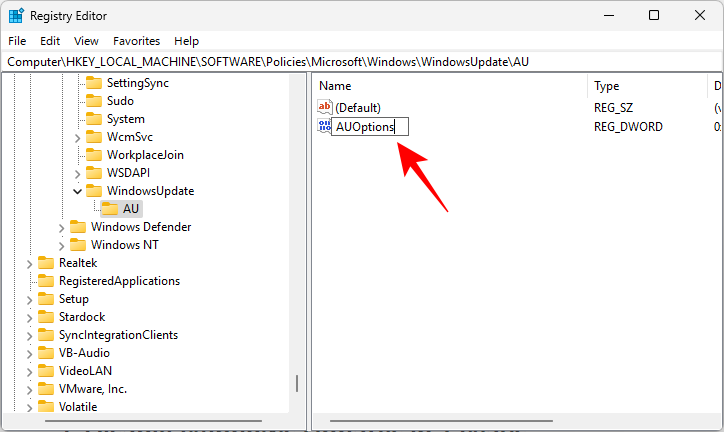
- Double-click AUOptions and change its value to one of the following numbers depending on the configuration you prefer.
- 2: Notify for download and auto-install
- 3: Auto download and notify for install
- 4: Auto download and schedule the install
- 5: Allow local admin to choose settings
- 7: Allow download, Notify to install, Notify to restart
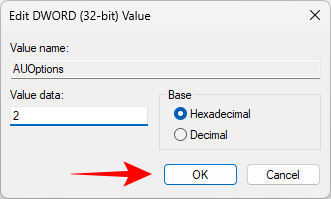
Once done click OK. And that’s it! You will now have disabled Windows Updates using the Registry Editor.
Related: How to Fix Microsoft Edge Battery Drain on Windows 11
Method 5: Using metered connection
A metered connection will help limit Windows’ activities in the background. It will also allow you to take advantage of the Windows Updates option and block updates indefinitely. Use the guide below to help you set it up on your PC.
Note: Windows Security updates will still be allowed on a metered connection considering their priority.
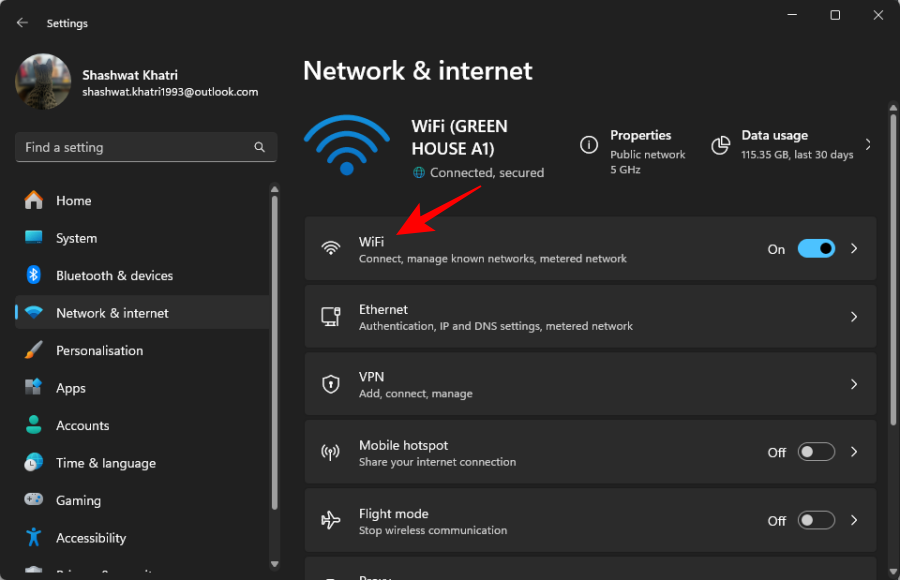
- Press
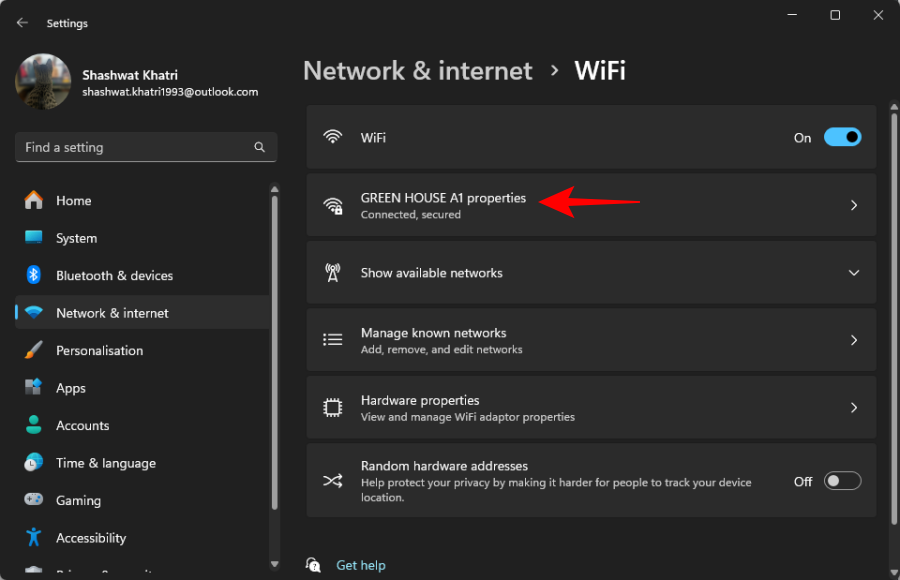
Win+Iand click on Network & internet. - Click Wi-Fi.
- Select your Wi-Fi connection.
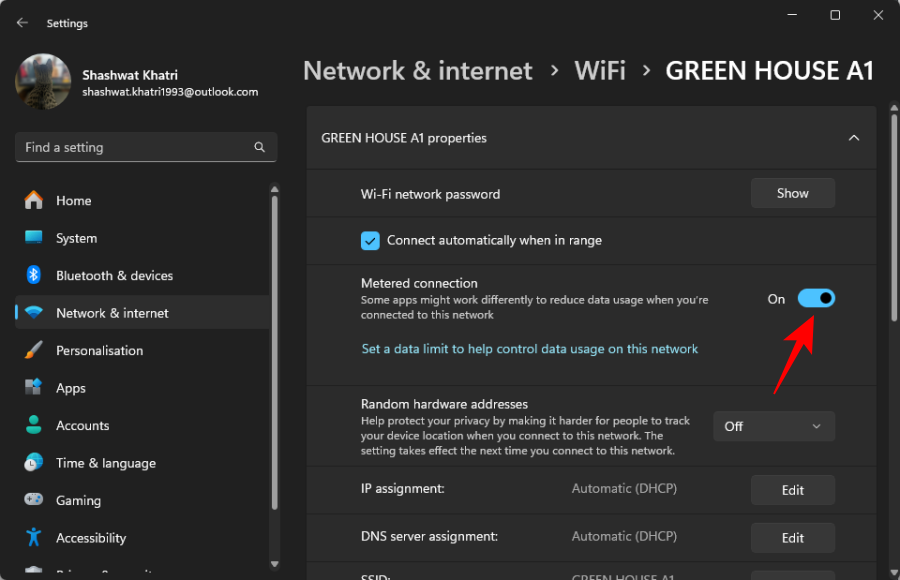
- Turn on the toggle for Metered connection.
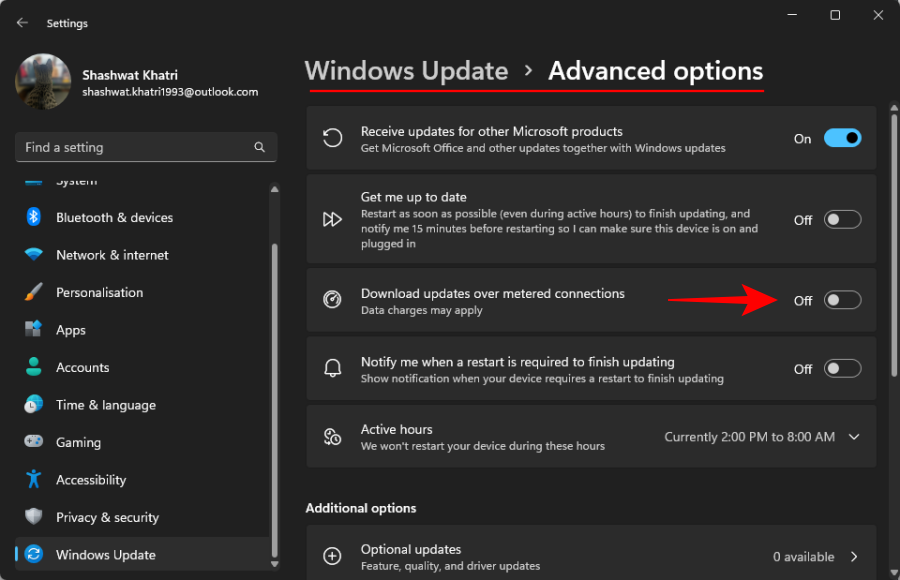
- Now click Windows Update. Click Advanced options.
- Ensure the toggle for Download updates over a metered connection is turned off.
And that’s it! Windows will now respect your network settings and disable automatic updates on a metered connection. Keep in mind that you will continue to receive updates over networks that haven’t been set as a metered connection on your PC yet.
Method 6: Hide updates
Microsoft has a Windows update troubleshooter tool that lets you hide (or show) specific updates that you don’t want to be installed while keeping everything else up to date.
This is the ideal solution if you’re trying to avoid forced bios or driver updates issued by your OEM. You can also use this utility to regularly block future updates on your system to prevent it from updating. Follow the steps below to help you along with the process.
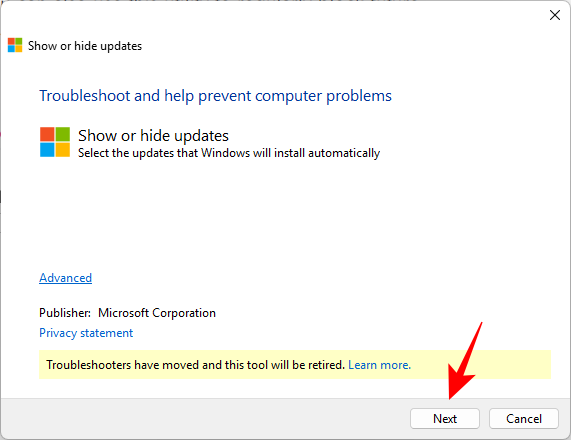
- Download and run the tool linked above. Once open, click Next.
- The tool will now look for available and hidden updates for your system. Click on Hide updates.

- Now select the available update that you want to hide. These will be hidden and won’t show up in your system unless you unhide them. Click Next.
- Once the selected updates are hidden, click on Close.
The selected updates will now be hidden from your system.
Method 7: Using a third-party app
There are tons of apps that help you disable Windows Updates on Windows 11. We recommend you use Win Update Stop. Download the tool linked below and follow the subsequent steps to help you along with the process.
- Win Update Stop | Download Link
- Once downloaded, install and run the application. Click Disable.
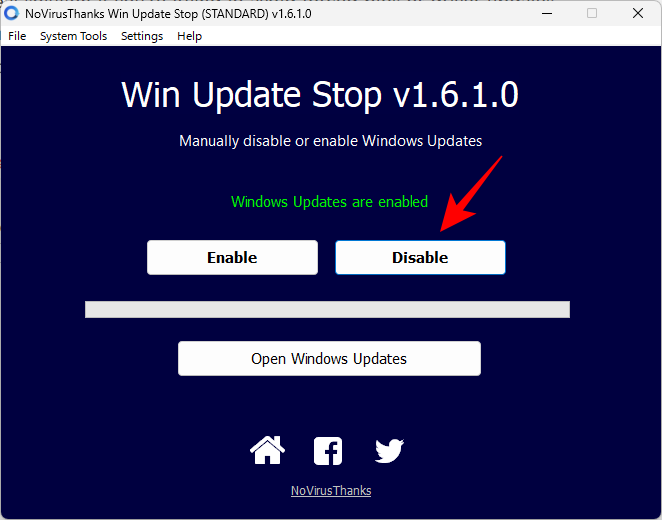
- And that’s it! You will now have disabled updates using Win Update Stop.

2. Disable Updates for Microsoft Products on Windows 11
Microsoft Products like Office, OneDrive, and more receive updates via Windows Update. You can stop this behavior by using the guide below.
- Press
Win+Iand click Windows Update. Click Advanced options.
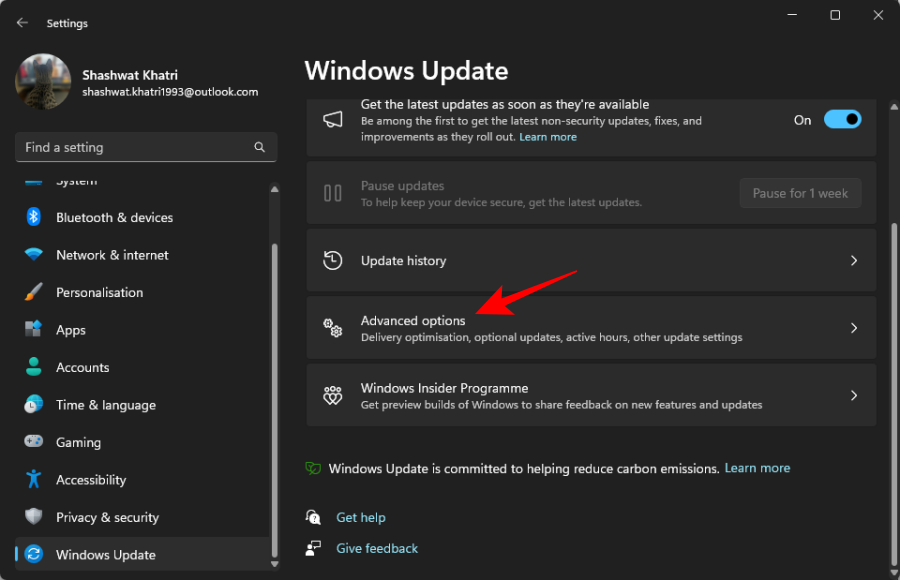
- Turn off the toggle for Receive updates for other Microsoft products.
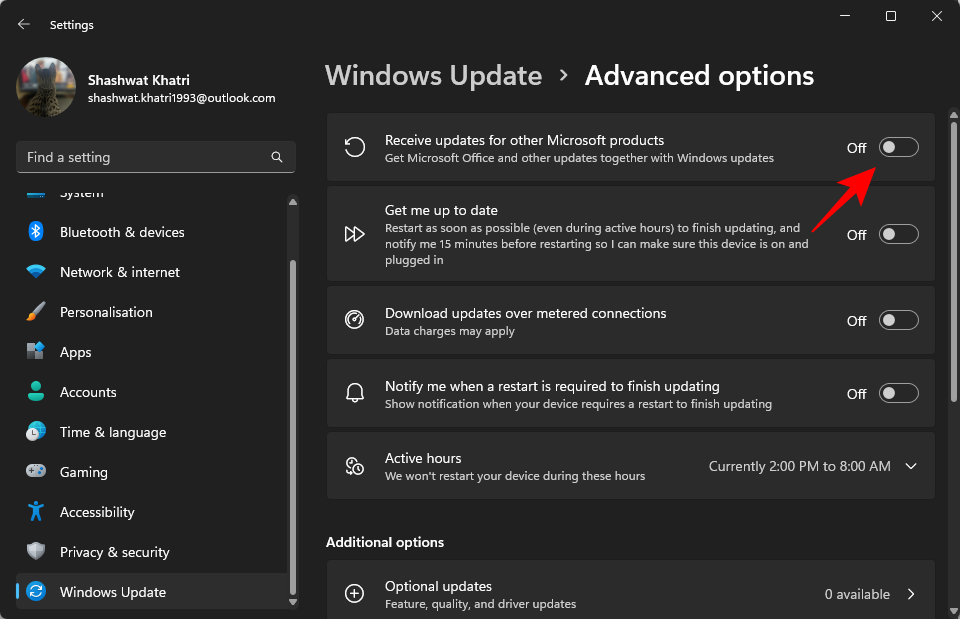
You will now have disabled updates for Microsoft Products on your system.
3. Disable Updates for the Microsoft Store on Windows 11
Microsoft Store is another application that can auto-update all store apps in the background automatically. This can cost you resources, power, and data depending on your setup. You can disable the same by using the guide below.
- Launch the Microsoft Store on your system and click your profile picture in the top right corner.
- Select Settings.
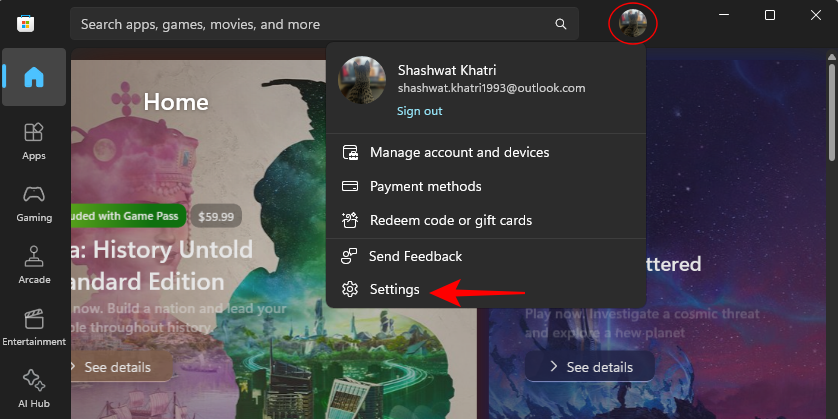
- Turn off the toggle for App updates.
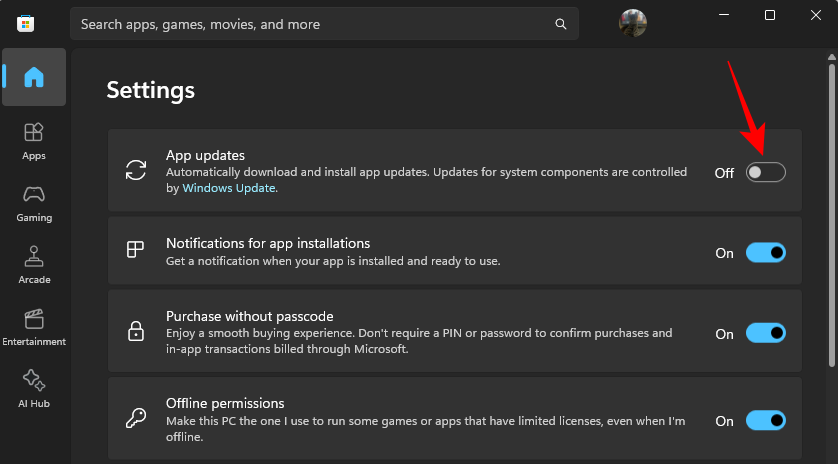
And that’s it! Store apps will no longer be updated in the background on your system.
Why disable updates on Windows 11
Though turning off Windows updates is not generally recommended, there are cases when it becomes necessary to do so.
It isn’t a rare thing to receive updates that bring their own set of security vulnerabilities and bugs, and many have had to suffer because of it in the past.
Similarly, if you don’t want Windows automatically updating your hardware drivers because, say, the latest version is causing you trouble and you’ve opted for an older one, you may benefit from keeping Windows updates disabled.
Some users also like having more granular control over their updates and configure Windows updates to notify them before downloading and installing any so they can review them and decide which ones to let through.
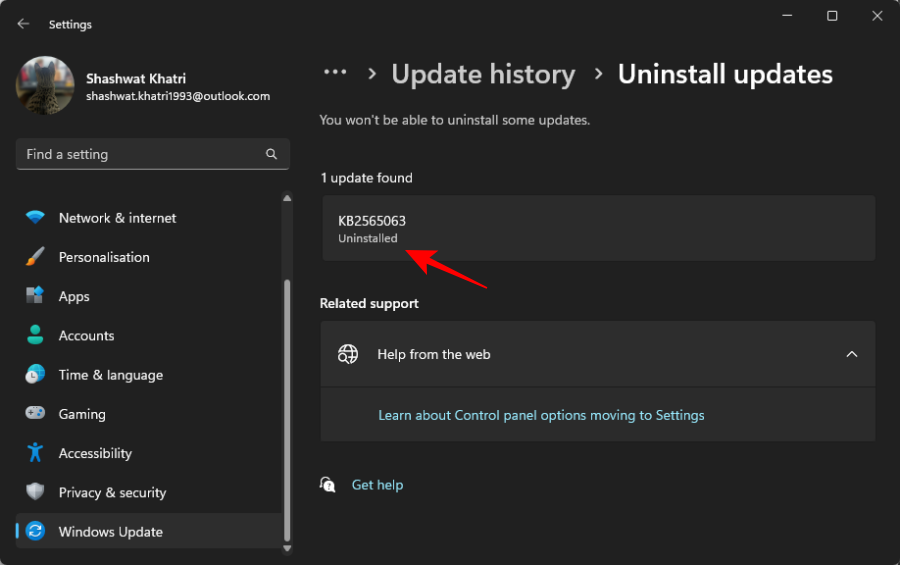
How to uninstall installed updates on Windows 11
Here’s how you can uninstall Windows updates on Windows 11. Follow the steps below to help you along with the process.
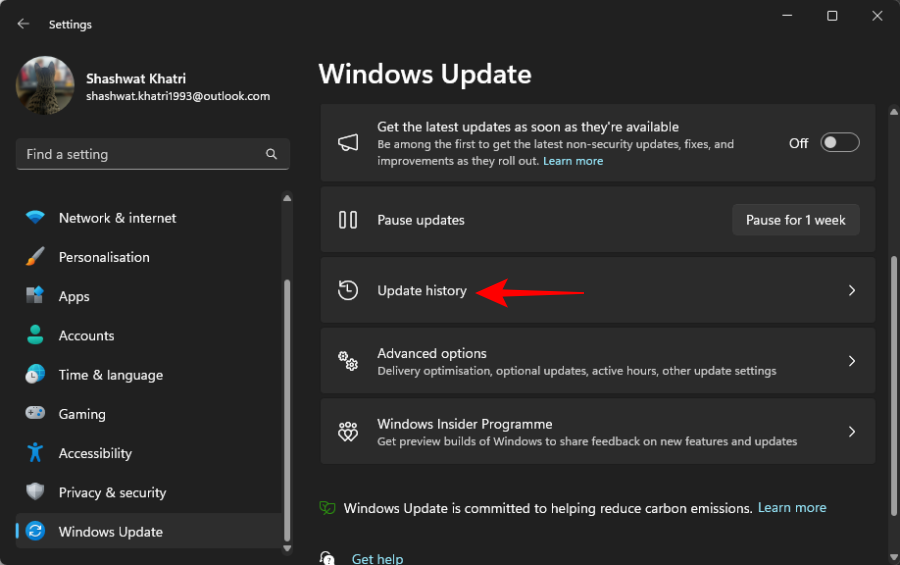
- Press
Win+Iand click Windows Update. Click Update history.
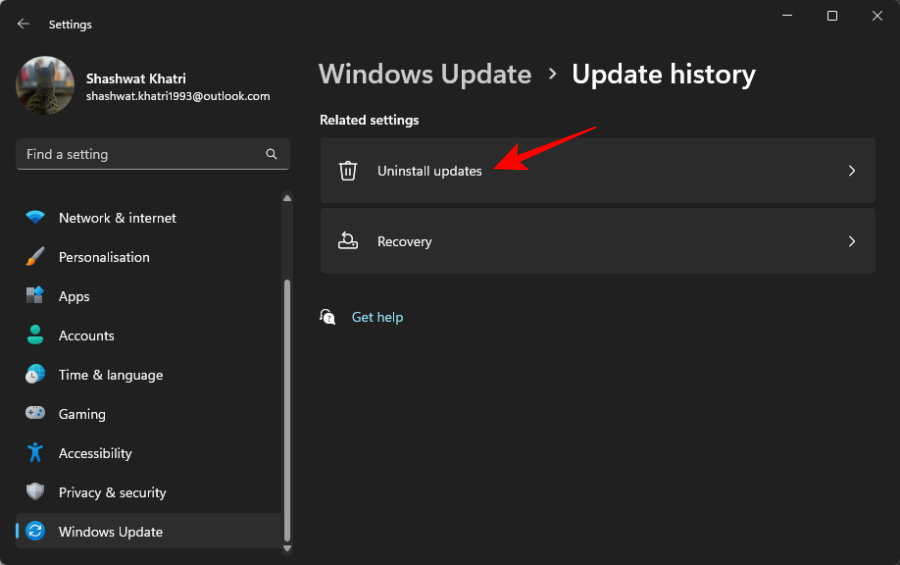
- Select Uninstall updates.
- Select the update you wish to remove by clicking on Uninstall next to it. Click Uninstall again.
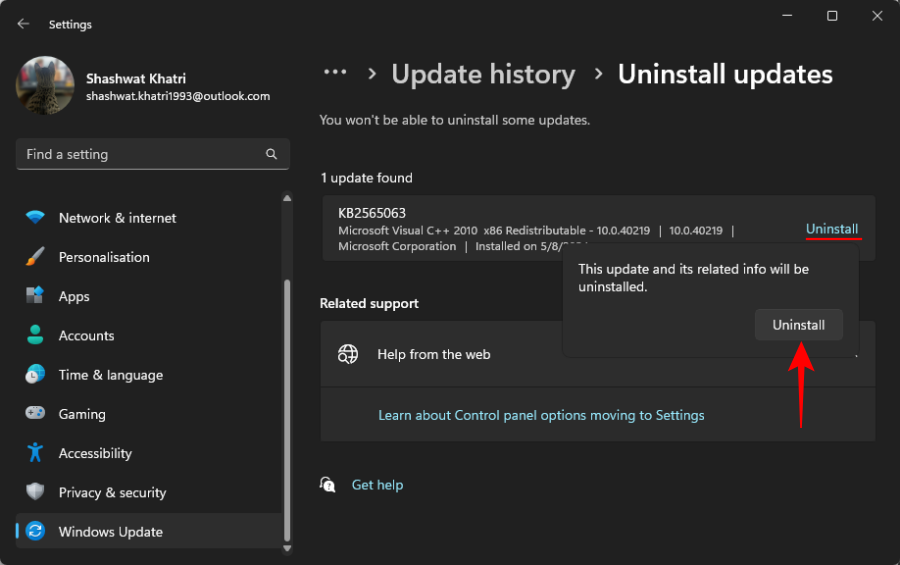
- And just like that, the update will be uninstalled.
Note: Some minor updates might not be available in this list.
FAQs
Here are a few commonly asked questions about disabling Windows updates on Windows 11.
Should I disable updates on Windows 11?
Windows Updates should be disabled only if there’s a great need for it. If you’re not suffering from any buggy patches and if all your drivers are functioning without a hitch, keep Windows updates on.
Though the updates that you get aren’t always perfect, they are the only source of future security patches and cumulative updates that you’re invariably going to need sooner or later.
Can I permanently disable updates on Windows 11?
Yes, you can permanently disable updates. Even though Microsoft is quite aggressive in forcing users to keep Windows updated, and for good reasons too, the methods mentioned in this guide will help you prevent that.
Will I need to disable updates again?
In case you reset Windows, reinstall updates or install a feature update, you might have to update your configurations again to disable Windows updates. However, Windows should respect your settings when updating Microsoft Store and other products manually.
Can I re-enable updates?
Yes, simply revert the changes we made above and restart your system. You can then use the Settings app to check and install updates available for your system.
We hope this post helped you easily disable Windows updates on your system. If you face any issues or have any more questions, feel free to drop them in the comments below.
RELATED:
- How to Type Accents on Windows 11 [6 Ways]
- How to Fix ‘100% Disk Usage’ issue on Windows 11
- List of Windows 11 Shortcuts
- How to Create a Restore Point in Windows 11
- How to Move the Taskbar to Top in Windows 11
- How to Disable Widgets on Windows 11
- How to Disable Web Results in Windows 11 Start or Search Menu