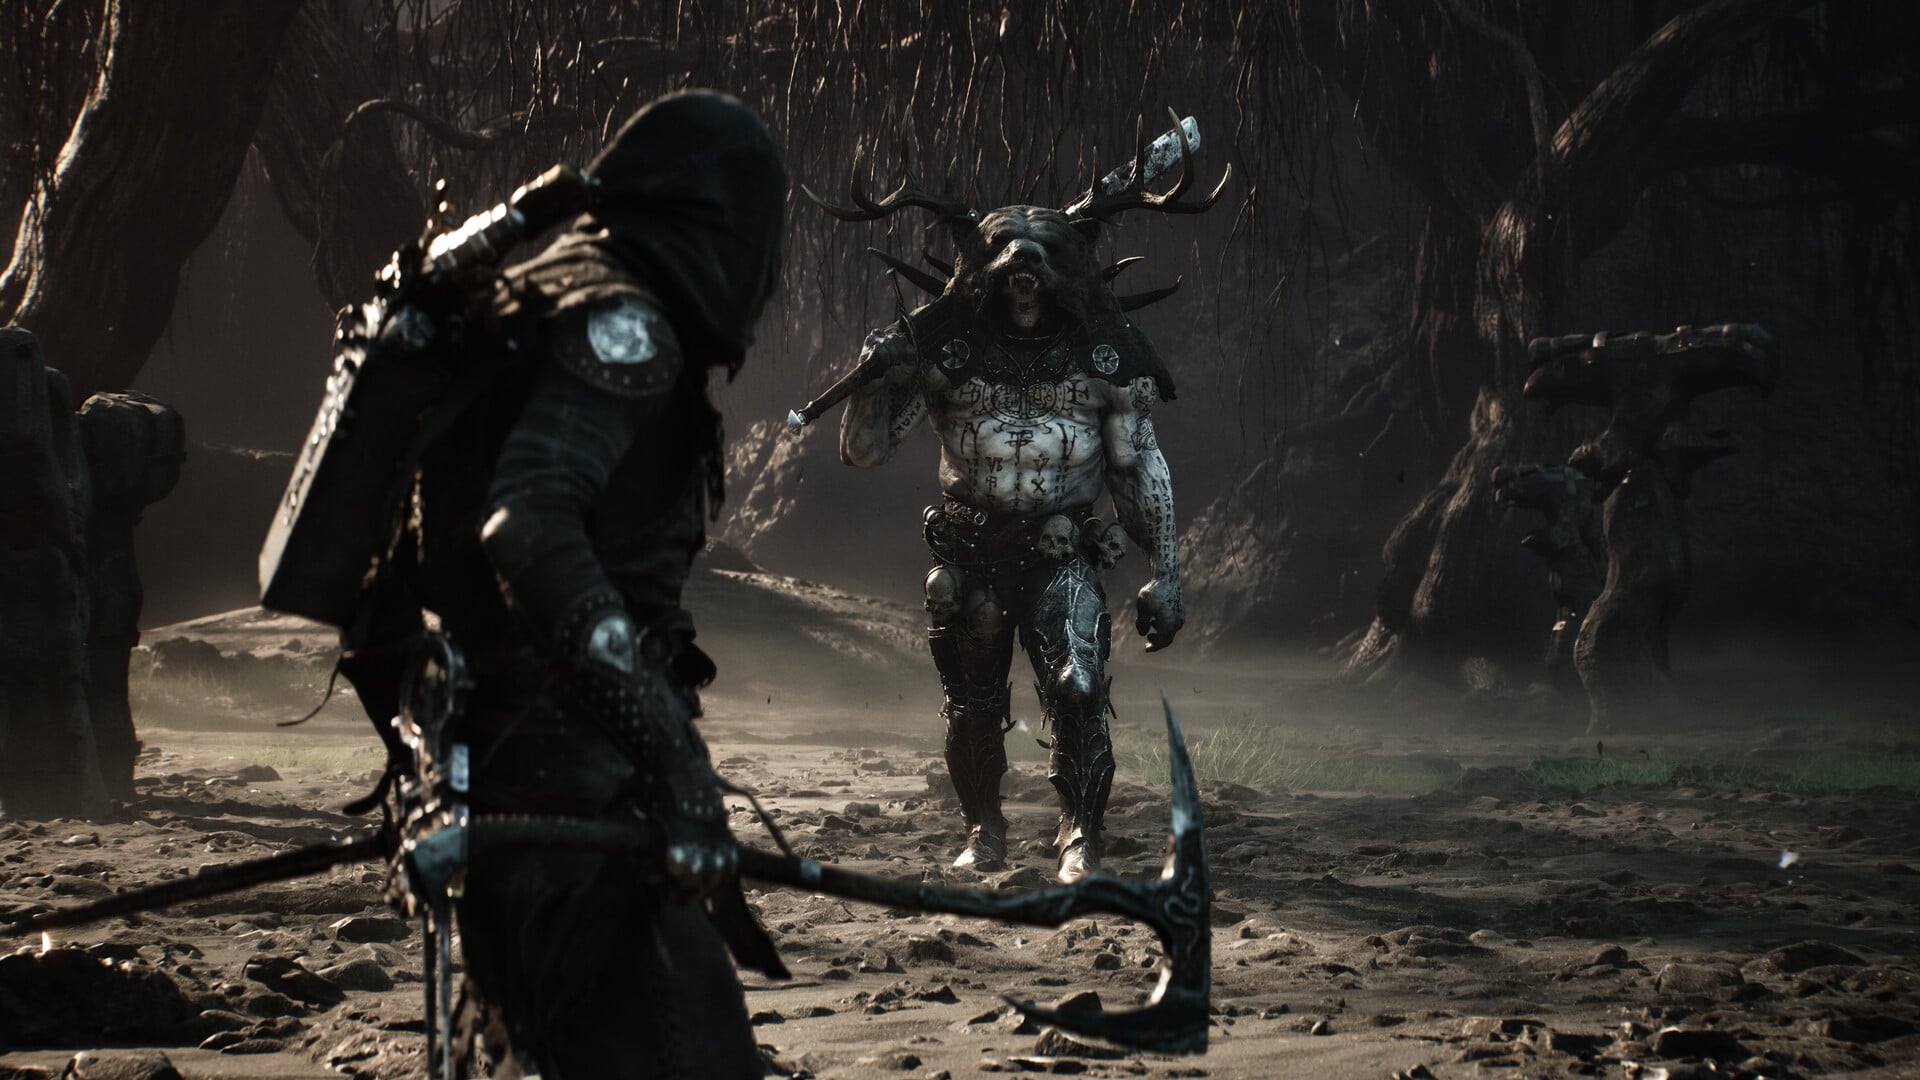
Official Mortal Shell II gameplay screenshot from the game’s Steam store listing.
⚡QUICK ANSWER Mortal Shell 2 has 34 named enemies in this reference, and the safest way to use the list is to pair each enemy with its practical counter while keeping exact drops separate unless a reward is known.
This bestiary runs from Babka through Wraith, covering the full named roster supplied for this guide. Check the comparison first for an immediate combat plan, then open an individual entry for the enemy’s role and a more specific counter.
Numerical elemental resistances are now available for 55 named enemies, and are listed in full below. For enemies without a full set of values below, the Counter field is the practical guide. The Counter field therefore treats guard breaking, spacing, Hardening, Break pressure, camera control, status avoidance, and recovery punishes as practical weaknesses.
Regular-enemy reward rows appear only when a specific payout is available. If an entry has no Reward row, read that as an unlisted drop rather than proof that the enemy drops nothing.
Image credit: Playstack
Enemy resistances, health and poise: the full numbers
Resistances work the same way across all four damage types: the lower the number, the more damage that type does. An enemy sitting at 3 curse resistance takes far more from curse than one at 40.
Break resistance is separate. It governs how much punishment an enemy absorbs before its guard gives way, so a high figure there means elemental pressure will usually serve you better than trying to break it.
Enemy
Health
Poise
Bleed
Frost
Shock
Curse
Break
Lowest resistance
BladeSlave
325
75
9
9
8
8
50
Shock
Bloodcursed Lithopod
2600
150
22
8
10
6
100
Curse
Bor, the Deluded Monarch
1800
120
3
3
5
3
150
Bleed
Caged Grisha
3200
300
13
19
15
8
150
Curse
Droeg, the Conquerer
6900
270
19
22
16
20
220
Shock
Gloombound Ritualist
470
85
9
10
15
9
75
Bleed
Gloombound Wraith
2630
90
6
10
9
9
200
Bleed
Great Arbiter of Flesh
1750
200
12
6
15
8
150
Frost
Grisha
2000
270
13
14
15
8
150
Curse
Grisha Hunter – Axe
500
55
7
12
5
6
50
Shock
Grisha Hunter – Bow
500
55
7
12
10
9
50
Bleed
Grisha Hunter – Spear
500
55
7
12
10
9
50
Bleed
Harbinger
75
—
3
3
3
3
—
Bleed
Hexapod
8000
1200
15
10
20
18
140
Frost
Huksar, The Grisha Hunter
350
75
6
6
10
6
50
Bleed
Infested Miner
1600
200
3
5
9
3
200
Bleed
Lucian, the Thirsting Knight
1400
150
4
3
10
8
150
Frost
Lucian, the Thirsting Knight
1400
150
4
3
10
8
75
Frost
Magdalena, the Lady of the Woods
3850
500
15
15
17
14
220
Curse
Malborn Offspring
8500
250
16
10
15
12
220
Frost
Orrem, the Discarded Golem
2100
126
20
17
12
15
175
Shock
Orrem, the Discarded Golem
7000
1
20
17
15
15
220
Shock
Orrem, the Reclaimed
7000
350
20
15
15
20
220
Frost
Pale Grisha
2800
300
19
14
15
8
150
Curse
PapaRoach
440
100
7
9
5
10
75
Shock
PapaRoach
560
125
10
13
7
12
100
Shock
Prophet of Profane Infinities
2740
200
10
8
14
7
200
Curse
Sariel, the Endless
800
120
20
10
9
8
200
Curse
Sester Secundus
1500
90
5
2
15
7
200
Frost
Shellsnatcher
800
150
7
11
9
10
150
Bleed
Sir Isaac, the Scholar-Prince
7200
300
15
18
12
16
220
Shock
Snowworm
130
75
9
9
8
8
25
Shock
Solnir, the Gloom Seeker
3200
180
22
12
8
12
150
Shock
Spiced Muraden Red
500
100
100
100
100
100
100
Bleed
Starlight Anomaly
1100
90
5
11
11
11
100
Bleed
Starved Harridan
4200
240
20
15
17
20
125
Frost
Strange Grisha
3000
250
12
13
15
8
150
Curse
Stray Sester
1200
200
7
4
7
8
150
Frost
Subjugated Guardian
2700
150
8
6
10
6
250
Frost
Tainted Vestige
1000
200
20
20
17
20
150
Shock
Tarblighted Stoner
1650
300
10
10
9
11
100
Shock
The Lost Child
3690
800
15
26
25
18
220
Bleed
The Monolith
18000
300
20
15
22
35
220
Frost
The Nameless Captive
6800
235
17
17
18
12
220
Curse
The Wandering Shepherd
1050
5
12
9
12
10
125
Frost
The Warden
1750
200
10
10
10
7
75
Curse
Tishina’s Confessor
1400
220
40
40
7
50
100
Shock
Twin Sisters
650
200
7
4
7
8
150
Frost
Urrig, the Executioner
4200
190
12
15
8
9
100
Shock
Vellen, High Lord of Mammon
1500
160
40
40
7
50
200
Shock
Viletongue Batushka
1100
80
4
5
7
7
200
Bleed
Vrago, Solikar Champion
1900
250
12
9
11
10
150
Frost
Vrannic, the Grand Illusionist
2000
100
12
11
13
13
75
Frost
Zmee, the Royal Guard
800
300
12
6
8
8
100
Frost
Zmey, the Unbidden
35000
350
25
20
35
40
250
Frost
What the numbers say
Zmey, the Unbidden is the tankiest enemy here at 35000 health.
Bor, the Deluded Monarch has the lowest curse resistance at 3, the softest curse target on the list.
Bor, the Deluded Monarch has the lowest bleed resistance at 3.
Subjugated Guardian is the hardest to break at 250, so lean on elemental damage rather than guard pressure.
A blank cell means that value is not listed for that enemy. It does not mean zero. Enemies without a full stat block are covered by the tactical entries further down.
Every named enemy at a glance
Enemy
Counter
Babka
Read the opening string and punish its recovery.
Batushka
Isolate it and keep Hardening ready.
Depraved
Dodge first, then answer with a short combo.
Cannibal Knight
Break its guard before committing to melee.
Centipede Ghost
Track its movement and retain a disengage.
Draugr
Bait the attack string and counter once.
Frog Mama
Move laterally and attack after a commitment.
Grisha
Wait out the string and avoid long combos.
Grisha Hunter
Keep it visible and deny flank pressure.
Head Tree
Stay mobile and approach from a clear side.
Heavy Cultist
Build Break and avoid frontal trades.
Multi Headed Harpy
Control the camera and preserve escape stamina.
Papa Roach
Separate it from the pack before attacking.
Parasite
Remove it early in mixed encounters.
Parasite Knight
Pressure its defense before entering melee.
Porphyrion
Learn its pattern and punish recovery.
Shell Snatcher
Preserve Hardening and evade the shell pull.
Shepherd
Circle off-line and punish recovery.
Sicario
Use short combos and expect retaliation.
Slug
Wait for its movement to settle.
Snowworm
Keep your distance and track its movement.
Spider
Clear it before the encounter becomes crowded.
Spider Bro
Fight it in open space.
Stone Crab
Probe its flanks and apply Break pressure.
Tarred Corpse
Dodge the visible tell and counter promptly.
Tarred Stoner
Close after the throw and build Break.
Tarred Vestige
Respect its heft and punish recovery.
The Coffin
Hold Hardening through its main commitment.
The Head
Strafe first and strike during recovery.
Toxic Stalker
Avoid trades and reset status pressure.
Turrets
Use cover and close between shots.
Vampire
Deny extended contact and use short punishes.
Warden
Break its defense while preserving stamina.
Wraith
Track it before swinging.
In a mixed encounter, prioritize whichever enemy controls space, threatens your Shell, or blocks a safe retreat. Once that pressure is removed, separate the remaining targets and return to controlled dodge-and-punish exchanges.
Image credit: Playstack
How to use this list for routing, farming, and survival
Build farming routes around fights you can repeat cleanly. Pull pack enemies apart with careful positioning, eliminate ranged or mobile threats first, and avoid turning a routine Gloom run into a multi-target damage race.
Shielded enemies need a different opener from ordinary melee targets. Use sustained crossbow fire to damage their guard, then enter melee after the defense breaks. Against large elites, watch the entire attack sequence and punish its recovery instead of trading into the active swing.
Turrets and other projectile threats are much safer when approached through solid cover. A Shell Snatcher deserves immediate attention because its shell-pulling action can change the entire fight; preserve Hardening and disengage rather than extending a combo.
Situation
Best approach
Shielded enemy
Damage the guard with sustained crossbow fire, then close after the defense breaks.
Large enemy or elite
Read the full attack string, retain escape stamina, and punish the recovery with a controlled combo.
Shell-snatching threat
Make it the priority target, preserve Hardening, and evade the action that pulls the Harbinger from the Shell.
Toxic enemy
Maintain space, avoid prolonged trades, and disengage before status pressure dictates the fight.
Turret or projectile threat
Break line of sight, approach between shots, or remove it before engaging the melee pack.
Boss-style encounter
Learn the timing, limit each opening to a safe punish, and avoid overlong combos.
QUICK WIN
Spend your Gloom at a Beacon before testing a new elite or entering a major boss fight. Gloom is used to level the Harbinger, falls at your death location, and can be recovered if you return safely.
General roster enemy whose opening sequence should be read before committing.
Counter
Enter at mid-range, retain escape stamina, and punish the end of its sequence rather than opening with a long combo.
Batushka
Field
Detail
Role
Gate defender encountered on the route into Glutted Mire.
Counter
Deal with it before pushing into the village, keeping Hardening available while learning its committed attacks.
Depraved
Field
Detail
Role
General pressure enemy that rewards controlled melee exchanges.
Counter
Let it initiate, evade the attack, and answer with a short punish that leaves stamina for the reset.
Cannibal Knight
Field
Detail
Role
Knight-type melee threat that can stall an aggressive approach.
Counter
Pressure a raised guard before attacking the body; sustained crossbow fire gives you a safer shield-breaking opener.
Centipede Ghost
Field
Detail
Role
Creature threat where tracking and spacing matter more than guessing an element.
Counter
Keep it centered on-screen, observe how it closes distance, and attack only while a safe disengage remains available.
Draugr
Field
Detail
Role
Melee roster enemy suited to basic timing practice.
Counter
Bait its sequence from the edge of range, dodge the commitment, and take one clean punish before resetting.
Frog Mama
Field
Detail
Role
Creature encounter that should be fought with room to move.
Counter
Use lateral movement, avoid standing directly in its approach line, and strike after a clearly committed action.
Grisha
Field
Detail
Role
Recurring large monster found in the wild, with one Grisha serving as a prominent Flooded Village encounter.
Counter
Wait for the attack string to finish and punish the recovery. Overlong combos surrender the opening and invite a trade.
Grisha Hunter
Field
Detail
Role
A distinct Grisha variant in the named enemy roster.
Counter
Keep it visible, avoid fighting with your back to other threats, and reserve stamina for repositioning after each punish.
Head Tree
Field
Detail
Role
An environmental-looking enemy that can disrupt movement through an encounter space.
Counter
Approach from a clear side, remain mobile until its main action is visible, and avoid committing while another enemy controls the camera.
Heavy Cultist
Field
Detail
Role
Heavy humanoid threat built to punish direct trading.
Counter
Apply Break pressure during safe windows and move away from the front before its next sequence begins.
Multi Headed Harpy
Field
Detail
Role
Multi-headed creature threat whose attack direction can be difficult to read.
Counter
Control the camera, fight away from walls, and preserve enough stamina to escape before starting a punish.
Papa Roach
Field
Detail
Role
Creature-type enemy that becomes more disruptive inside a mixed group.
Counter
Draw it away from nearby threats and finish the isolated exchange before returning to the pack.
Parasite
Field
Detail
Role
Opportunistic enemy that should not remain active during a larger fight.
Counter
Remove it early with quick, low-commitment attacks, then turn to the more durable target.
Parasite Knight
Field
Detail
Role
Knight-class parasite threat combining pressure with defensive presence.
Counter
Force a defensive response, damage any raised guard, and enter melee only when a clean body opening appears.
Porphyrion
Field
Detail
Role
Named enemy suited to patient, pattern-driven combat.
Counter
Spend the opening exchange learning its cadence, then limit yourself to one reliable punish per recovery window.
Shell Snatcher
Field
Detail
Role
Cocoon-like threat capable of pulling the Harbinger out of a Shell.
Counter
Preserve Hardening, avoid reckless aggression, and disengage as soon as the shell-pulling action begins.
Shepherd
Field
Detail
Role
General roster enemy that becomes easier to manage when isolated.
Counter
Circle away from its direct line, encourage a committed attack, and answer from the side during recovery.
Sicario
Field
Detail
Role
Assassin-style pressure enemy that calls for disciplined exchanges.
Counter
Use compact combos, keep defensive resources available, and prepare for an immediate retaliation.
Slug
Field
Detail
Role
Low-profile creature threat whose movement can distort melee spacing.
Counter
Do not chase into an awkward angle; wait for its movement to settle and strike from a position you can leave safely.
Snowworm
Field
Detail
Role
Worm-like creature where movement tracking is the first priority.
Counter
Maintain distance until you understand its approach, then punish from the edge of its active range.
Spider
Field
Detail
Role
Creature threat that becomes harder to follow when several attack angles overlap.
Counter
Clear it before slower enemies close in, using quick attacks that do not lock you into place.
Spider Bro
Field
Detail
Role
A separate spider variant in the enemy roster.
Counter
Move the fight into open ground, keep the target centered, and avoid being pinned between it and terrain.
Stone Crab
Field
Detail
Role
Armored creature threat that can punish attacks aimed carelessly into its defense.
Counter
Probe the flanks when frontal hits fail, apply Break pressure, and stop attacking before exhausting your stamina.
Tarred Corpse
Field
Detail
Role
Tarred roster enemy suited to basic dodge-and-counter play.
Counter
Wait for the visible tell, evade the committed action, and retaliate before the enemy resets.
Tarred Stoner
Field
Detail
Role
Large brute-style threat associated with rock-throwing pressure.
Counter
Stay clear of the projectile line, close after a throw, and use the melee window to build Break damage.
Tarred Vestige
Field
Detail
Role
The regular-enemy form related to the heftier Tainted Vestige encounter.
Counter
Respect the heavier attack pattern, avoid trading into its active swing, and punish only after the commitment ends.
The Coffin
Field
Detail
Role
Unusual named enemy that should be approached as a tell-driven encounter.
Counter
Hold Hardening until its main commitment becomes readable, then retaliate without exhausting your escape stamina.
The Head
Field
Detail
Role
Distinct named threat that rewards movement before offense.
Counter
Strafe until its line of attack is clear, then move in during recovery for a brief punish.
Toxic Stalker
Field
Detail
Role
Status-pressure enemy that makes prolonged exchanges increasingly dangerous.
Counter
Control the spacing, refuse extended trades, and disengage when toxic pressure begins dictating your movement.
Turrets
Field
Detail
Role
Stationary projectile threats that control open lines across an encounter.
Counter
Use solid cover, move between shots, and destroy them before dueling melee enemies in the same space.
Vampire
Field
Detail
Role
Close-pressure enemy that should not be allowed an extended exchange.
Counter
Deny sustained contact, make one short punish after a commitment, and create distance before the next sequence.
Warden
Field
Detail
Role
Defensive humanoid threat capable of slowing an aggressive push.
Counter
Pressure its defense without emptying your stamina, then convert the opening into a controlled melee punish.
Wraith
Field
Detail
Role
Evasive supernatural threat that punishes attacks made before its position is clear.
Counter
Track it before swinging, hold stamina for a sudden reposition, and attack only after it commits.
Major boss rewards and unique items
Boss
Reward
Magdalena, the Lady of the Woods
Magdalena’s Memento ×1; Gloom ×11,344
Lost Child
Lost Clotstone ×1; Gloom ×13,019
Nameless Captive
Captive’s Scabstone ×1; Gloom ×12,673
Sir Isaac, the Scholar-Prince
Scholar’s Wormstone ×1; Gloom ×54,254
Droeg, the Conqueror
Conqueror’s Reward (Black Needle) ×1; Gloom ×38,753. Spend 100 Resolve to drive the weapon forward in a series of swift piercing thrusts.
Hexapod
Hexapod Core (Axatana) ×1; Gloom ×38,753. Spend 60 Resolve to carve through enemies with a rapid succession of strikes.
Monolith
Monolith Fragment ×1; Gloom ×65,511
Malborn Offspring
Offspring Trophy ×1; Gloom ×63,333
Orrem, the Reclaimed
Orrem’s Head ×1; Gloom ×64,442
Zmey, the Unbidden
“None” is currently listed; this may mean no unique reward or incomplete reward data.
Gloombound Legion
Black Needle; Sester’s Crest; Gloom
Prophet of Profane Infinities
Obsidian Hammer
These are encounter payouts, not regular-enemy drop entries, so they should not be used to infer what similarly named or recurring enemies can drop. The Gloombound Legion shares one health bar across several enemies, and a hanging explosive barrel can damage multiple members at once.
Against Malborn Offspring, Proxima’s Ampereon perks grant lightning immunity after the required bond improvements, while Genessa’s Faithful Double summons can distract the boss. Against Hexapod, favor swift dodges over stationary defense.
Frequently Asked Questions
Does every Mortal Shell 2 regular enemy have an exact drop table?
No. Comprehensive per-kill item tables and numerical drop rates are unavailable across the full roster. For farming, track named rewards separately from incidental currency or consumable pickups instead of treating one kill as a fixed loot result.
Do bosses count as enemies when comparing weaknesses and rewards?
Bosses are enemies for combat planning, but they are outside this 34-entry regular bestiary. Their larger health pools, unique patterns, Gloom payouts, and named items belong to their individual encounters.
Can beta placements and rewards be used for the launch version?
Beta enemy placements, boss order, statue interactions, and rewards may differ from the launch version. Recheck the current map and encounter state before building a farming route around beta information.
What should I use when an enemy has no exact elemental weakness?
Start with a neutral physical setup you handle comfortably. Observe one full attack string, test Hardening or a parry against its commitment, apply Break pressure when the target guards, and spend only the recovery window on offense.









Leave a Reply