Windows 11 users are no strangers to the austere system requirements imposed by Microsoft on your PC before you could even think about installing Windows 11. Well, that strict approach to transition users to the new age of Windows is back.
Now, Microsoft has started sticking a new watermark on the system running Windows 11 even they shouldn’t (you can bypass Windows 11 requirements, you know!) that reads “System requirements not met. Go to Settings to leam more” at the lower-right corner of your desktop and refuses to go anywhere unless tackled head-on. So, let’s see how you can get rid of the “System requirements not met” watermark and restore your desktop to its original condition.
Why does Windows 11 show the “System requirements not met” watermark on your PC?
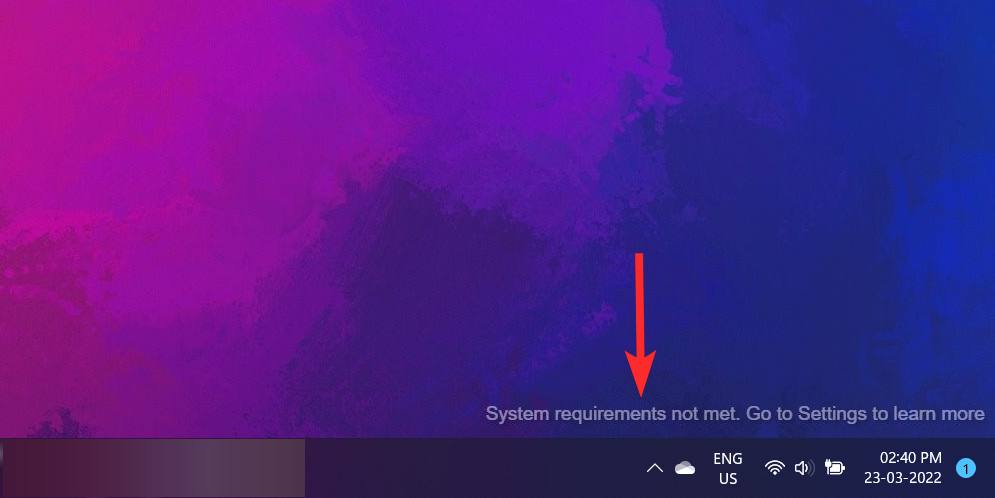
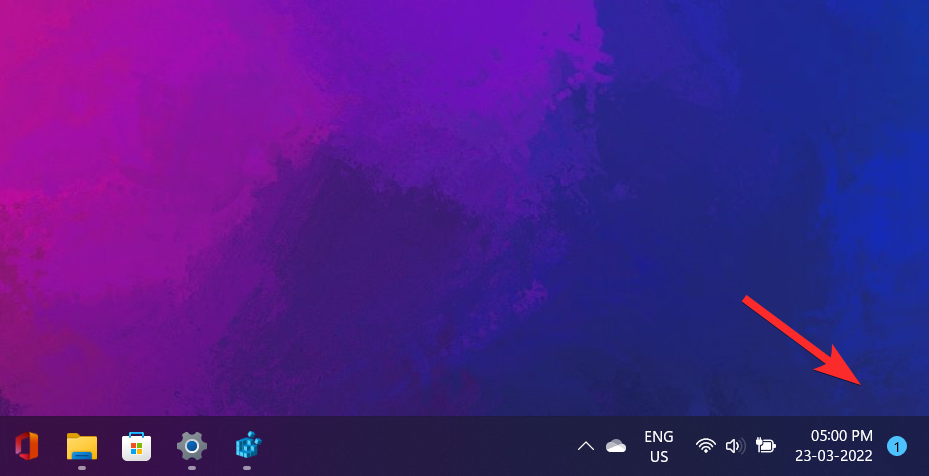
If your PC doesn’t support Windows 11 officially but you still managed to install the new OS by bypassing the requirements, you might be greeted with a new watermark in the bottom right on your desktop: System requirements not met. Go to Settings to leam more.
Related: How to Install Windows 11 on Unsupported Hardware
Microsoft started showing the watermark only recently, and we doubt they will stop showing it on their own.
In fact, you can see a similar message in Windows Insider Program settings.
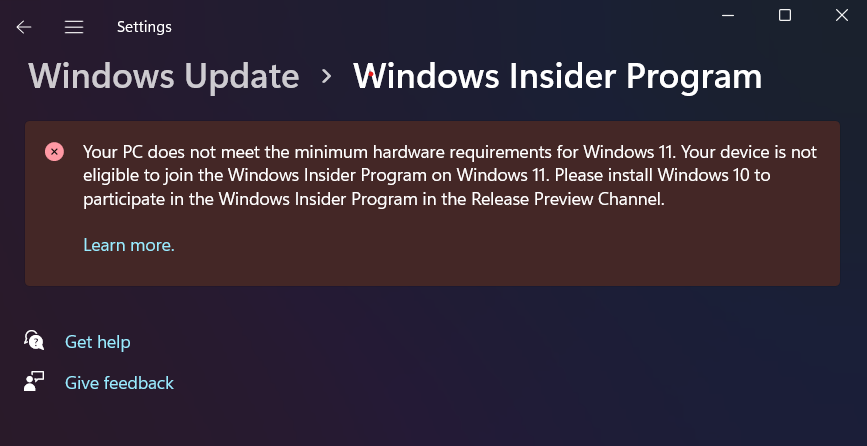
The good news is that removing this seemingly permanent and equally awkward watermark from your desktop is fairly easy. Let’s see how you can go about doing it in just a few steps.
How to remove the “System requirements not met” watermark on Windows 11
Removing the “Systems requirements not met” from your desktop is fairly easy and can be done by making minor changes to a registry file. However, there are two ways of making changes to a registry file.
You can either head over to the Registry Editor and edit the concerned key DWORD value manually or you can simply run a Registry file (.reg) that will make these changes automatically.
Let’s see how you can implement both methods on your Windows 11 PC to remove the watermark.
Method 1: Using Registry (manually)
Open the Run dialog from your PC by pressing Windows + R from your keyboard.
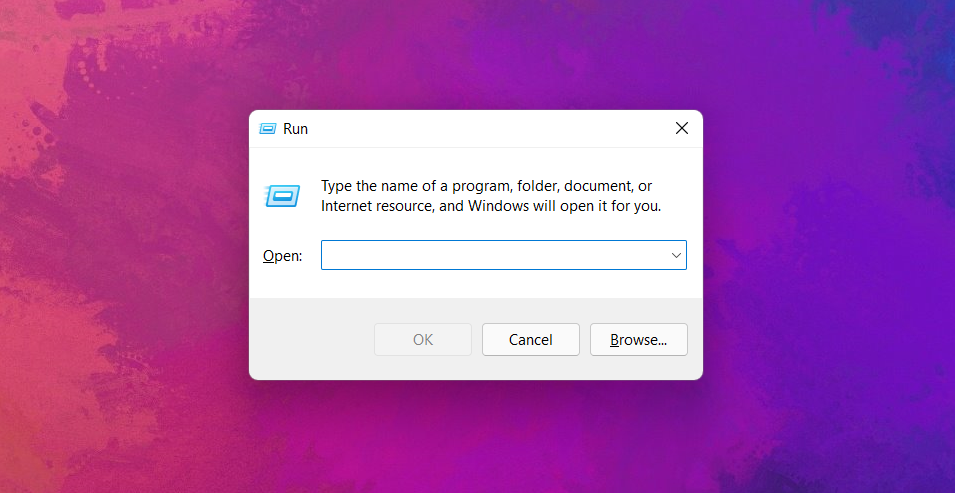
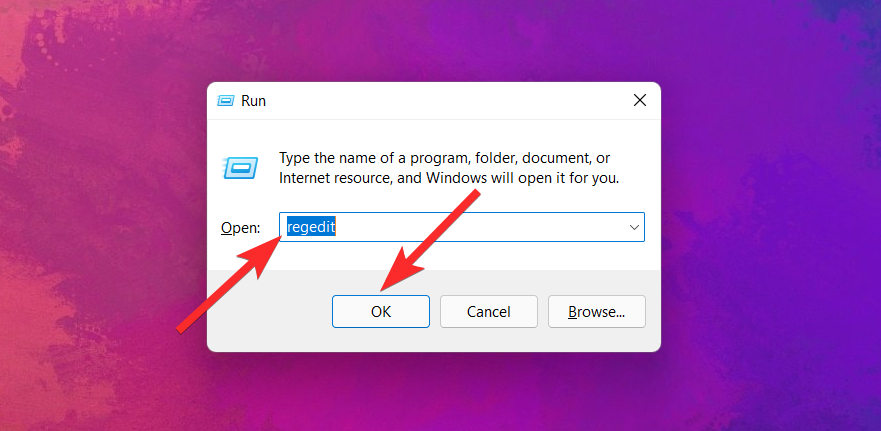
In the Run dialog, type “regedit” and click on ‘OK’.
In the Registry Editor, enter the following path in the address bar and hit ENTER from your keyboard.
Computer\HKEY_CURRENT_USER\Control Panel\UnsupportedHardwareNotificationCache
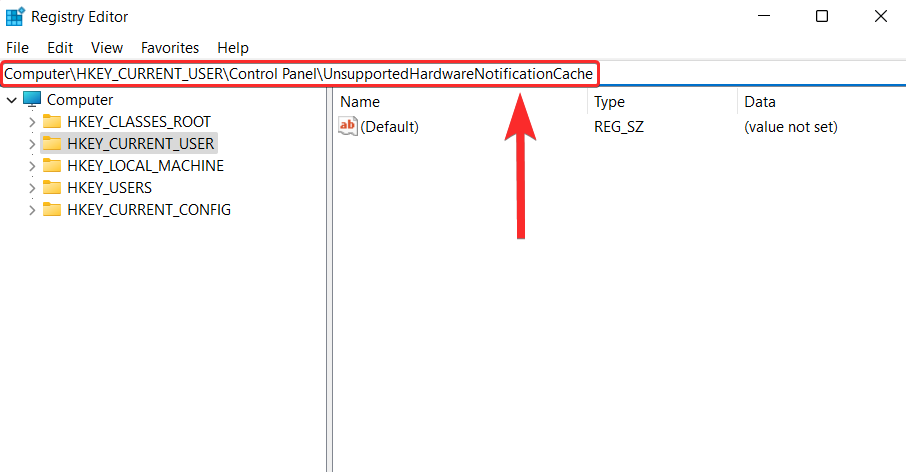
Note: If the Registry Editor can’t find the UnsupportedHardwareNotificationCache key on your PC, you will be required to manually create this key and edit it accordingly. In this case, skip the next 4 steps.
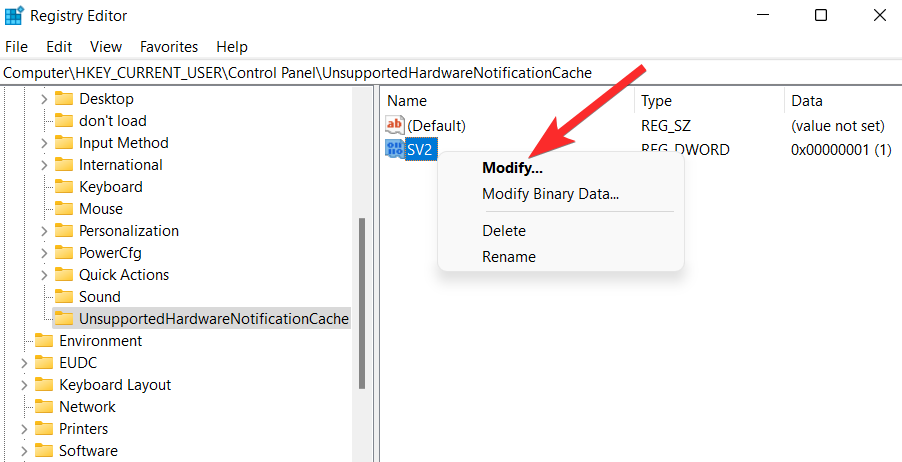
In the ‘UnsupportedHardwareNotificationCache’ key, right-click on the SV2 DWORD value and click on the ‘Modify’ option.
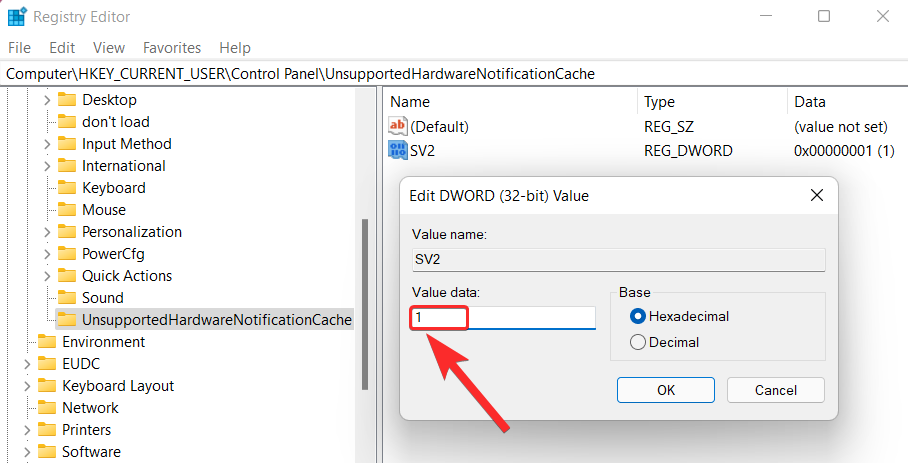
Change the ‘Value data’ field from ‘1’ to ‘0’.
Click on ‘OK’ to finalize the changes made.
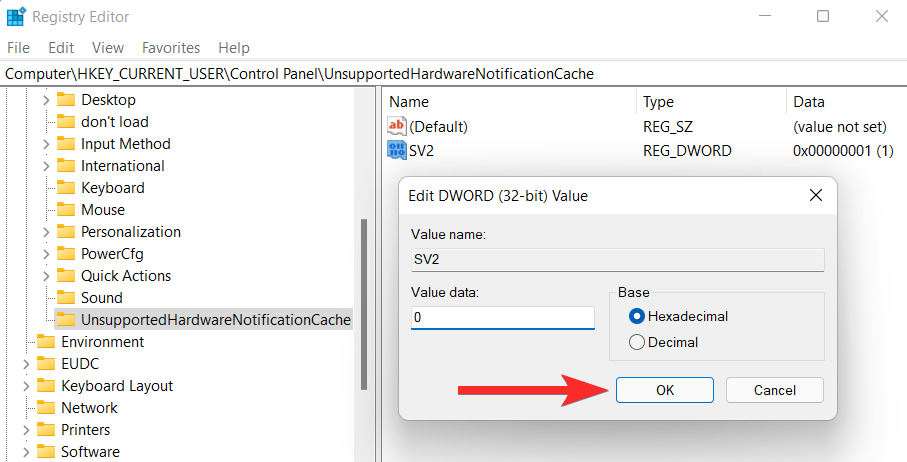
Now, close the Registry Editor and restart your PC to apply the change made in the SV DWORD.
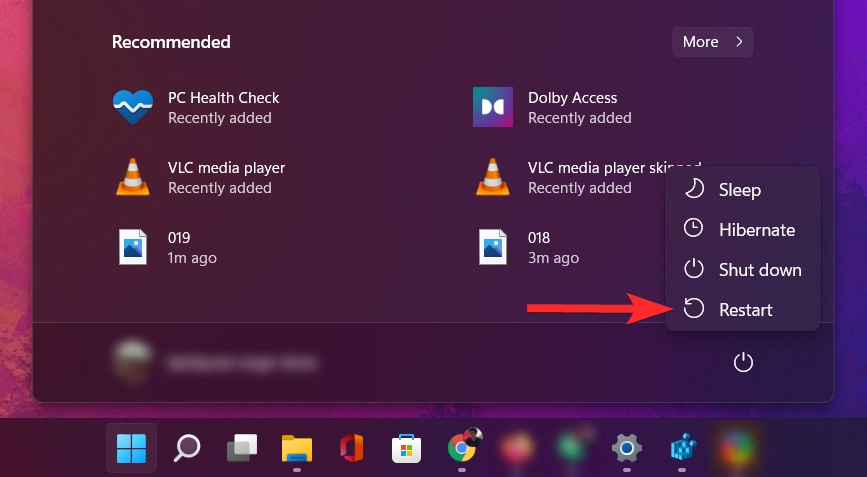
The watermark should now disappear from your desktop.

Can’t find ‘UnsupportedHardwareNotificationCache’ key?
Alternative: If you don’t have the UnsupportedHardwareNotificationCache key on your PC
Open the Registry Editor, enter the following path in the address bar, and hit ENTER from your keyboard.
Computer\HKEY_CURRENT_USER\Control Panel
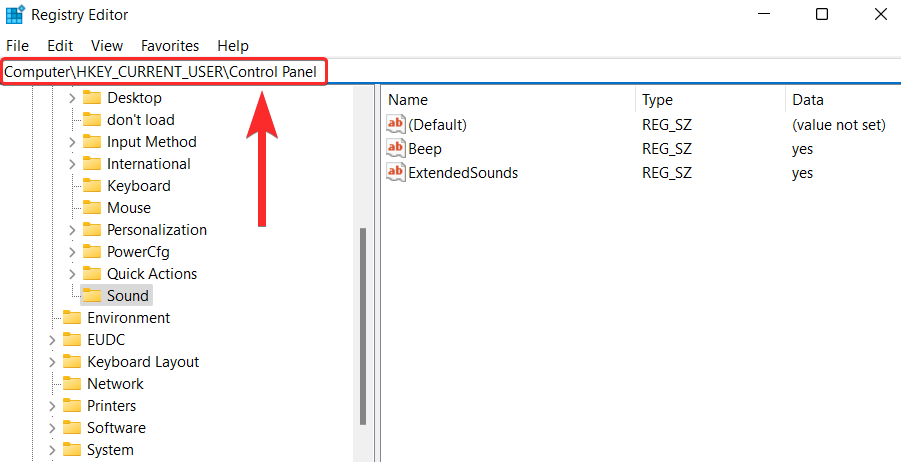
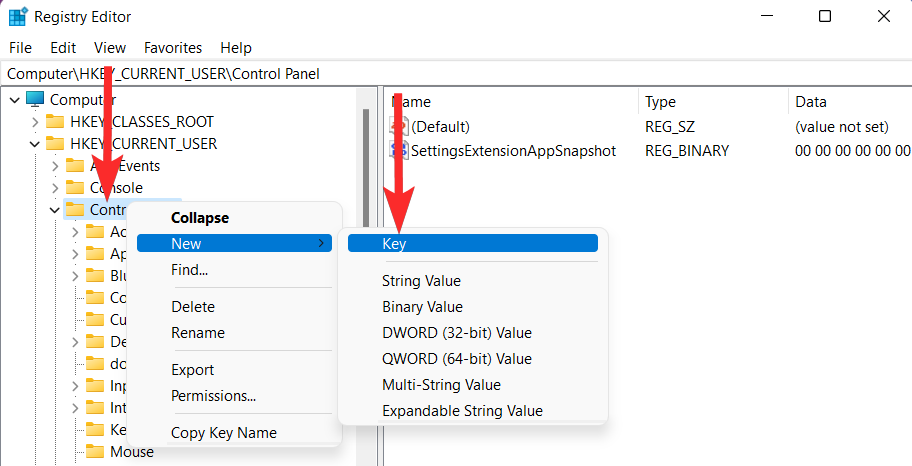
In the left panel, right-click on ‘Control Panel’ and select New > Key.
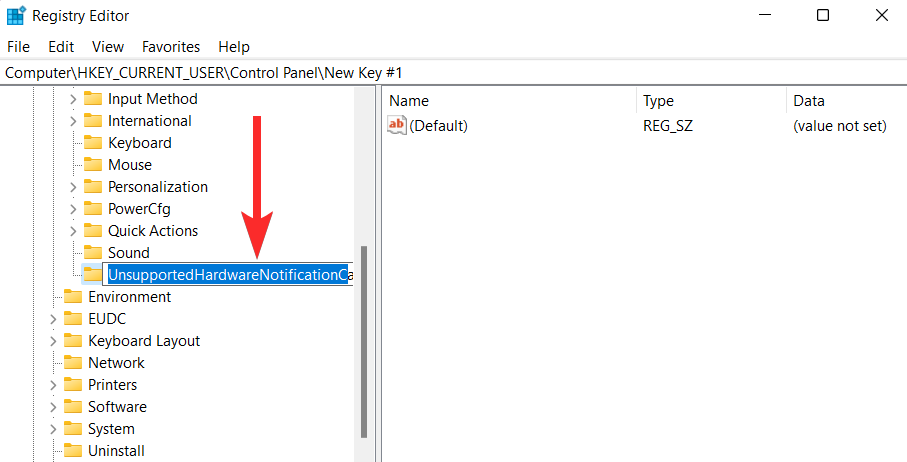
Rename this newly created key as “UnsupportedHardwareNotificationCache”.
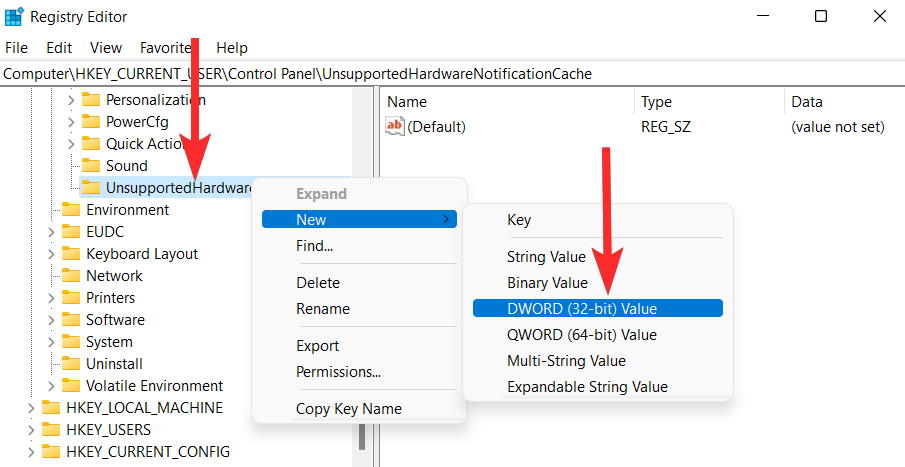
Now, right-click on the ‘UnsupportedHardwareNotificationCache’ key and select New > DWORD (32-bit) Value.
Rename the DWORD Value as “SV2”.
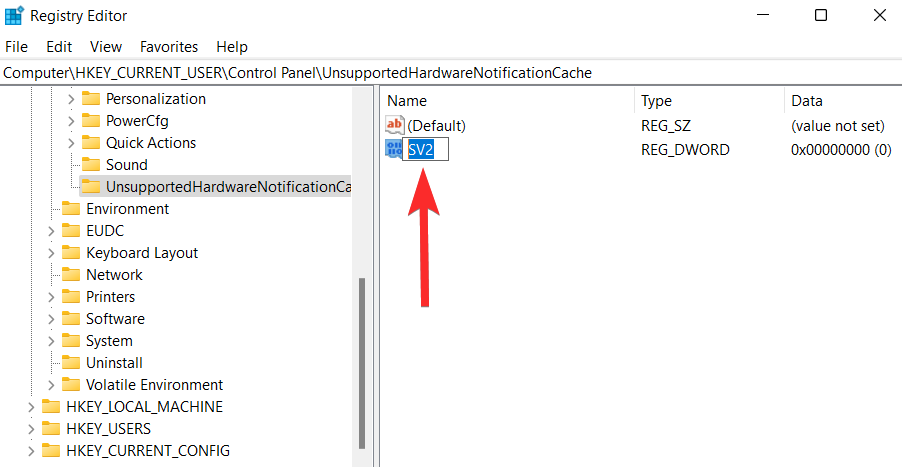
Change the ‘Value data’ field from ‘1’ to ‘0’.

Click on ‘OK’ to finalize the changes made.

Now, close the Registry Editor and restart your PC to apply the change made in the SV DWORD.

The watermark should now disappear from your desktop.
Method 2: Using a Registry script (automatically)
To automate the process of adding the ‘UnsupportedHardwareNotificationCache’ key in the Registry, you need to run a registry script. You can find this script in a .zip file attached below. We have also included a script to add the watermark in this .zip file itself.
Here’s how you can use a registry script to add the ‘UnsupportedHardwareNotificationCache’ key and thus, remove the “System requirements not met” watermark from your Windows 11 desktop.
- Download the zip file at this link.
- Filename: Automated scripts for UnsupportedHardwareNotificationCache entry in registry.zip
Note: This will download a .zip file on your PC. You will need Winrar or any other similar compression tool to extract this file. You can download Winrar from here.
Open the newly downloaded .zip file and extract the files using Winrar or any other compression tool.
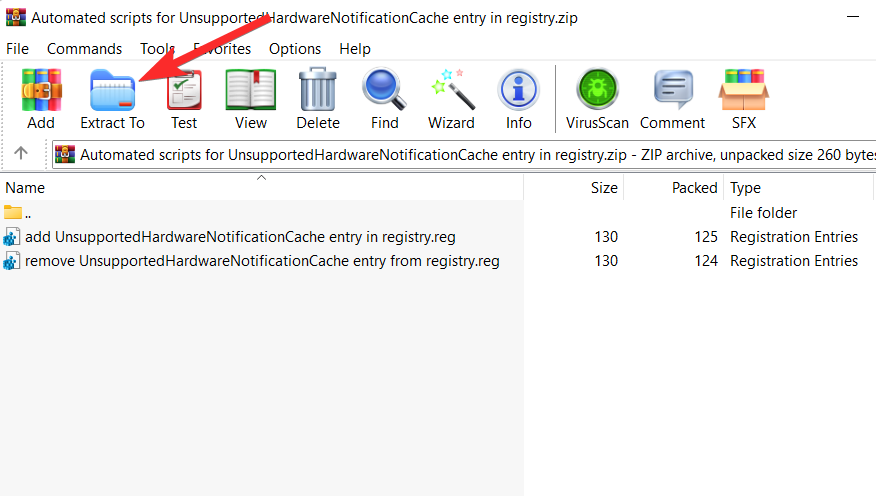
Navigate to the location where you extracted the files in the previous step.

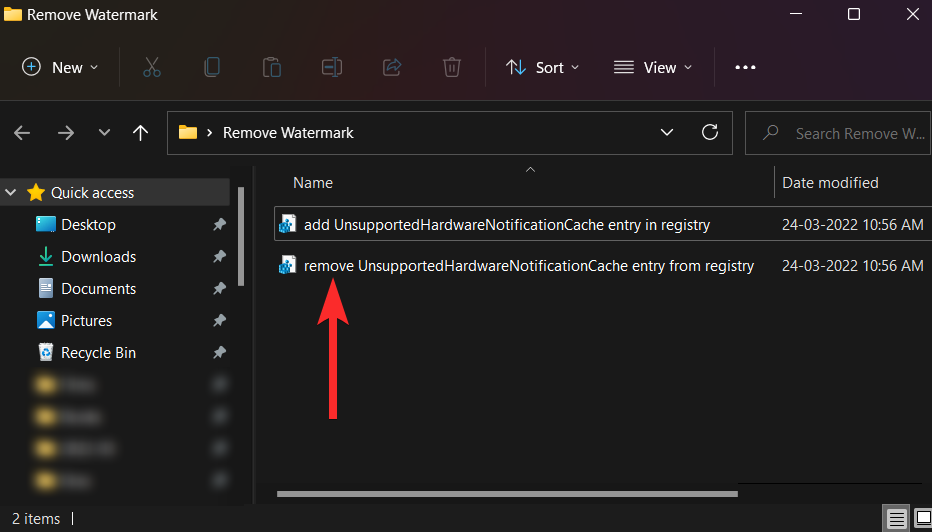
From here, double-click on the ‘remove UnsupportedHardwareNotificationCache entry from registry’ file. Then confirm the UAC prompt to launch the Registry Editor as an administrator.
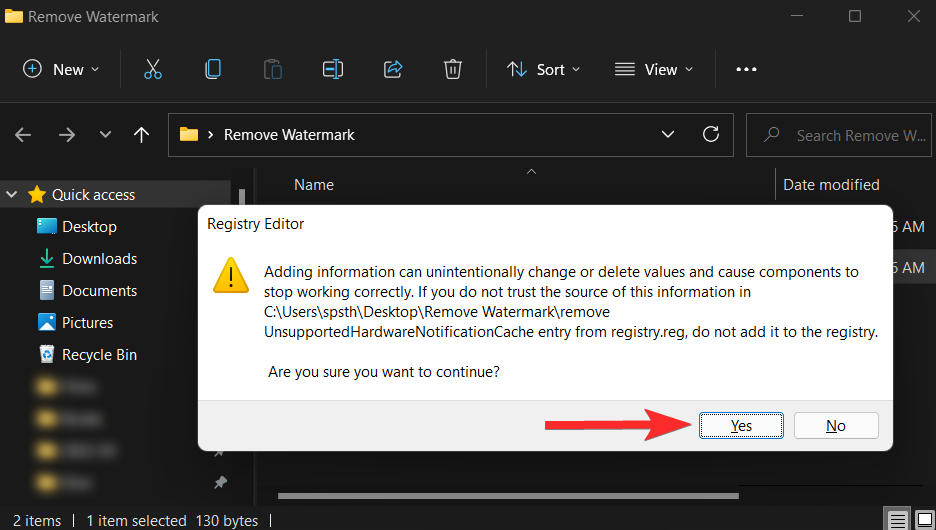
You will see the following prompt, asking your permission to make changes to the Registry Editor. Click on ‘Yes’ to confirm.
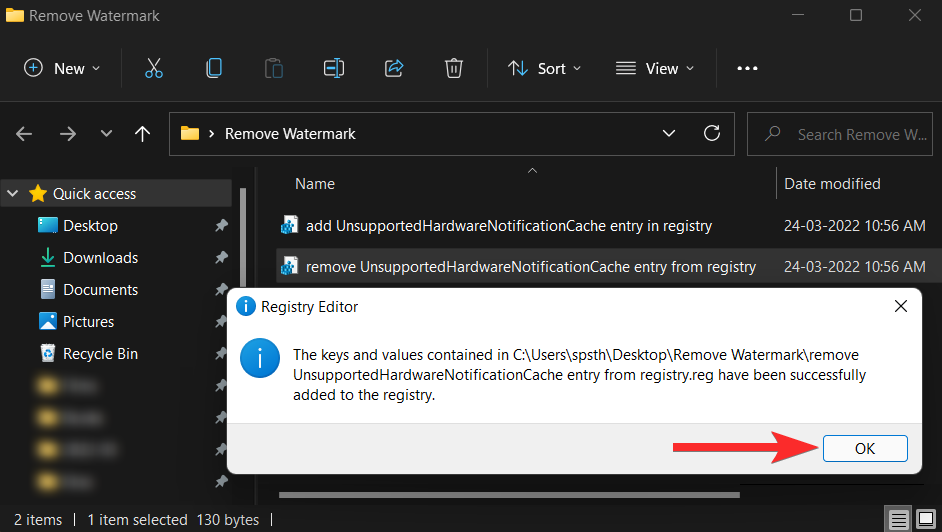
Click on ‘Yes’ to acknowledge the changes made.
Now, restart your PC to apply the changes made.

The watermark should now disappear from your desktop.

How to find if your PC supports Windows 11
To check whether your PC is supported by Windows 11, perform the following check using the PC health check tool.
Open a web browser on your PC and download the PC health check tool from the following link:
https://www.microsoft.com/en-us/windows/windows-11#pchealthcheck
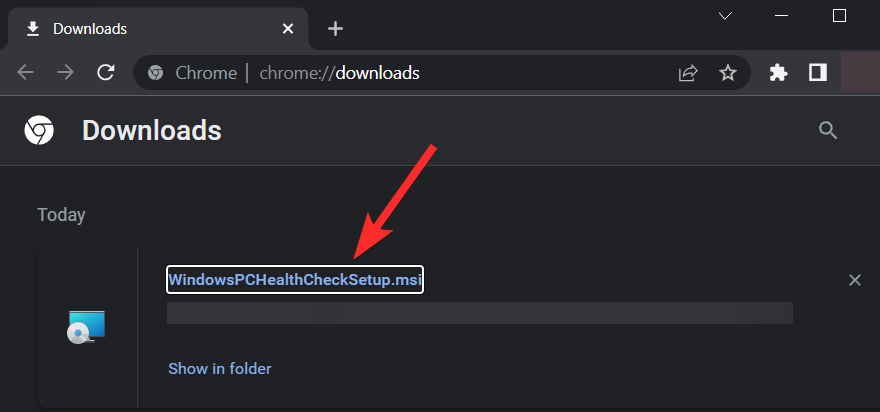
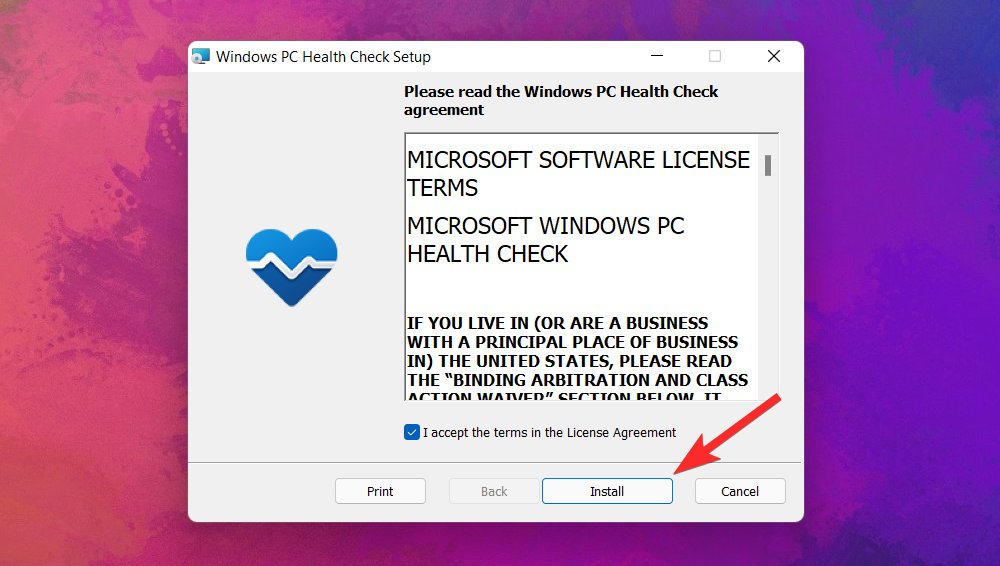
Open the downloaded setup file from your PC and follow the on-screen instructions to install the software.
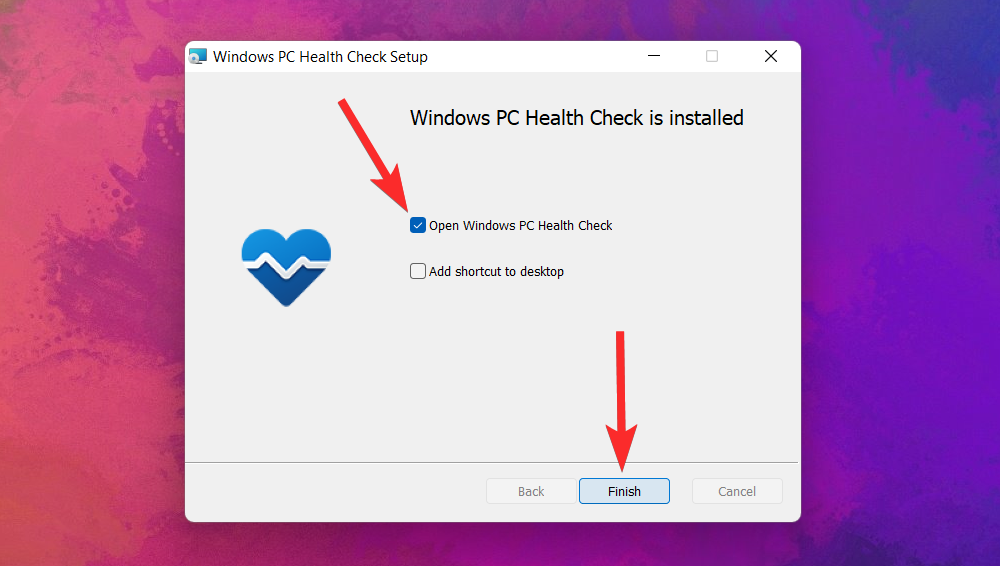
Once the setup is complete, make sure the “Open Windows PC Health Check” checkbox is ticked and click on ‘Finish’.
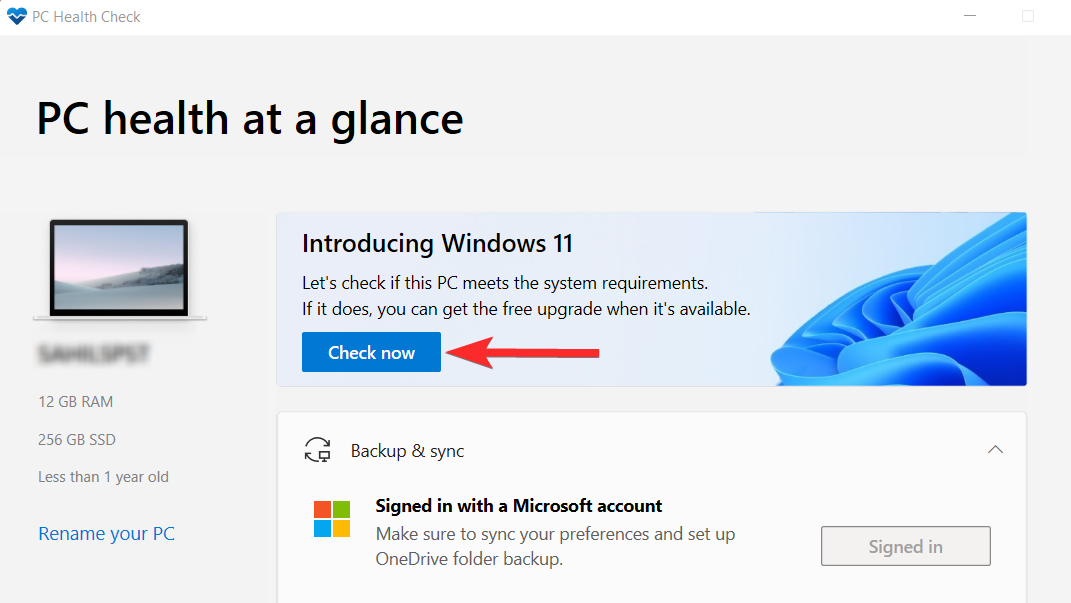
In the PC health check tool, click on the ‘Check now’ option.
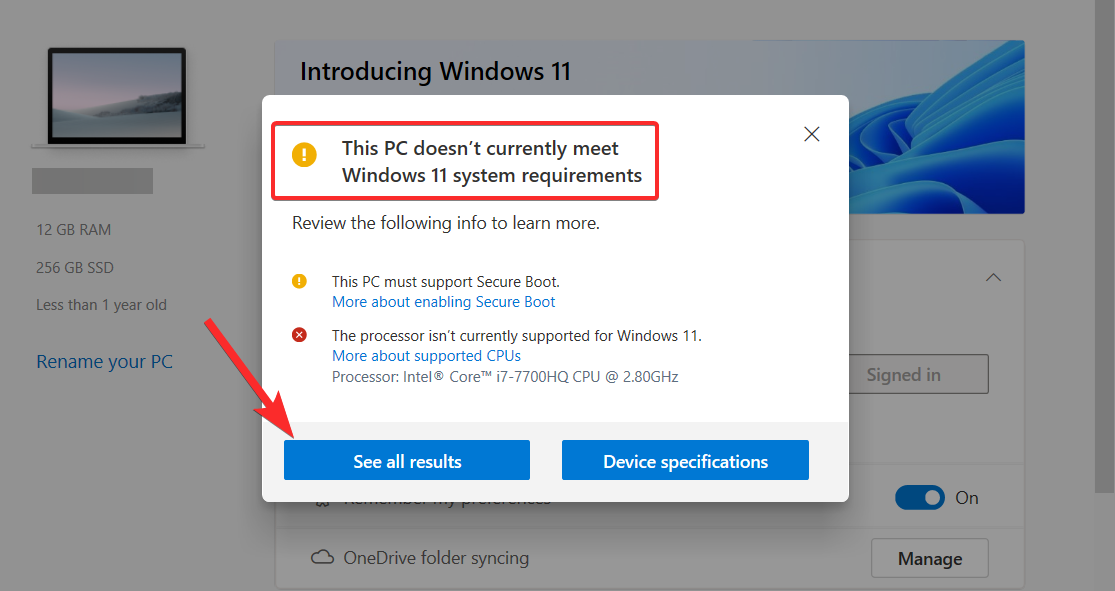
You can now see whether your PC meets Windows 11 system requirements. To see additional results, click on the ‘See all results’ option.
You can then scroll down and check whether a specific system requirement is met by your PC or not.
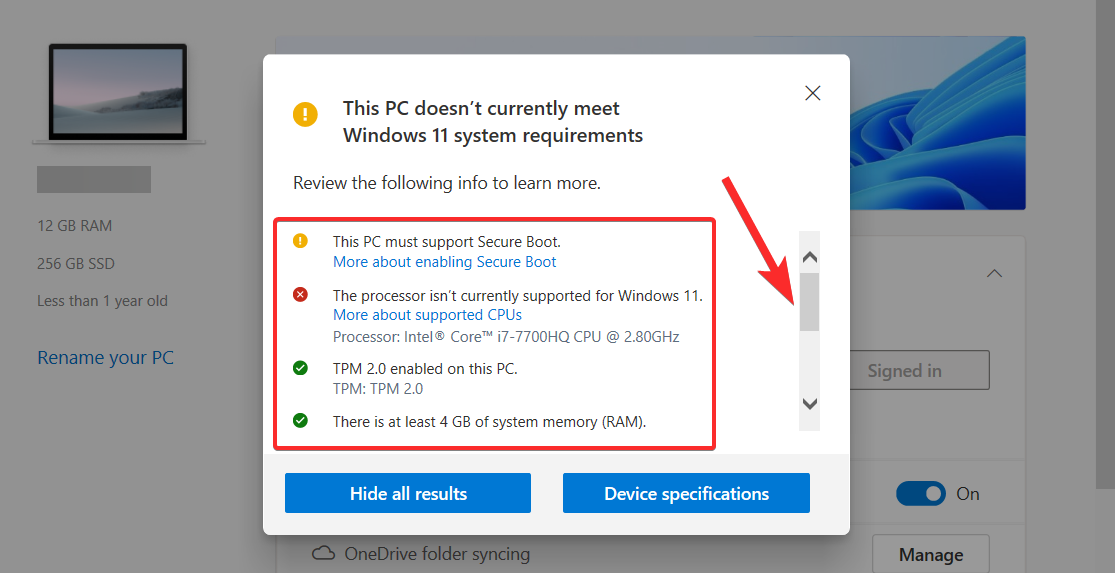
You can also find out whether your system meets the minimum requirements of Windows 11 by cross-checking your system specifications with those listed on the Windows 11 website.
Can I join Windows Insider Program after removing the Watermark?
The Windows Insider Program is a community of registered members who get exclusive access to the latest Windows updates before they’re made available to the public. Microsoft refers to these members as “insiders” because they get to test and return feedback on the latest pre-release builds.

Here’s how it works:
- The first step is to register for the program by signing in to the Azure Active Directory (ADD) using your Microsoft account.
- The next step is called “Flight”. Flighting basically refers to running preview builds on your devices once you’re registered for the Windows Insider Program.
- The final step is to share your insights into the preview builds tested by you by providing feedback.
Now, let’s return to the question in focus. Can you join Windows Insider Program by removing the Watermark?
No. Removing the “System requirements not met” watermark using the guides mentioned in this article will not allow you to use the Windows Insider Program. In fact, if you visit the Windows Insider Program from the Settings app, you will encounter a familiar error message.
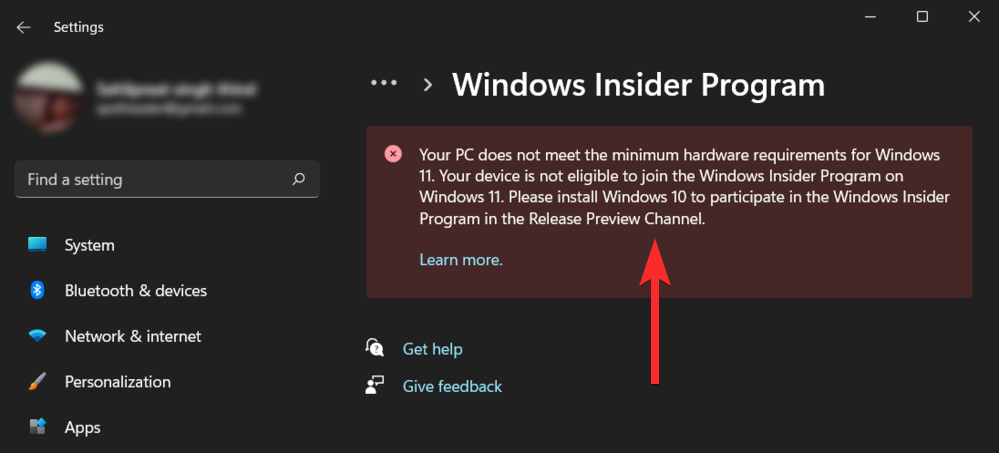
However, you can still use your Microsoft account to register for the Windows Insider Program from Microsoft’s website itself.
If you’re curious about Windows insider Program and you want to get a detailed analysis and discussion on the same, feel free to refer to the following resources:
- How To Download Windows 11 Insider Build
- Why are Windows Insider Program options greyed out on Windows 11?
- How to Cancel a Pending Windows Insider Update
- Should You Install Windows 11 Dev Channel Build Under Insider Preview?
- What Happens When Stable Windows 11 Arrives if You Install Dev Channel Insider Build Now
FAQs
While we hope all your queries were answered in the crux of this article itself, it’s always fun to include additional tidbits of information that help you relate on a user-to-user level, especially commonly asked questions. Here are a few of them.
Why am I seeing this watermark even if I have Windows 11 installed and running?
If your PC did not satisfy the minimum hardware requirements for installing Windows 11, including TPM 2.0, it’s possible that you had to bypass the restrictions using methods that are not officially supported by Microsoft.
In order to remind users that they’re running Windows 11 on unsupported hardware, Microsoft has decided to stamp the permanent watermark that you might’ve seen near the bottom-right corner of your desktop.
I don’t see the watermark on my desktop. Should I still try to remove it?
If you don’t see the watermark on your desktop, it’s likely that your system hardware meets the minimum hardware requirements for Windows 11. In that case, you’re free from the shackles of this watermark.
However, it’s also possible that the Watermark is yet to appear on your build version. In that case, you can take precautions and still apply the methods mentioned in this guide to have a heads up before the watermark eventually arrives on your particular PC.
What does the watermark indicate?
The watermark indicates that your PC is not supported by Windows 11. It looks very similar to the watermark on unactivated copies of Windows and is located near the lower-right corner of your desktop, right above the taskbar.
Does the watermark imply that your copy of Windows 11 is not genuine?
No. If you had a genuine copy of Windows 10, then installing Windows 11 on your unsupported hardware will still net you a genuine copy of Windows 11. In that case, the presence of the watermark does not indicate that your copy of Windows 11 is not genuine.
Windows 11 is free of charge if you meet the system requirements and you have a genuine copy of Windows 10.
Does the watermark have any effect on system performance?
No. Fortunately, the new watermark does not affect the performance of your PC, nor does it restrict you from performing any action, other than being a part of the Windows Insider Program.
Will Microsoft abandon the watermark in the near future?
Through the watermark, Microsoft wants to apply pressure on users who’re still running Windows 11 on unsupported hardware. Chances are Microsoft will try to keep the pressure through this watermark until it can convince users to upgrade their hardware.
RELATED
- Windows 11 Update Not Showing? Reasons and Fixes Explained
- First 10 Things to Do on Windows 11
- How to Download and Install Official Windows 11 ISO
- How to Upgrade to Windows 11 in 3 Easy Ways
- If I Decline Windows 11 Upgrade, Can I Get It Later? [Explained]
- Using Windows 11 Without Microsoft Account: Everything You Need to Know


ive done about 10 systems for fam and friends, none have wattermark still , i wonder if this only
happens if you did upgrade from 10, my case , they were all clean installs, and tpm and secureboot bypass keys were added at the windows 11 setup screen , Sft f10, etc method,