Dedicated accounts help you keep track of your files while ensuring that you can sync your preferences and settings over the cloud. Microsoft launched its offering back in 2007 with Windows Live which has since then evolved into Microsoft Account.
Having a Microsoft Account gives you numerous perks including the ability to tie your purchases to your account, purchase subscriptions, sync settings, use Office for the web, and a lot more. But not everybody is a fan of Microsoft Accounts and Windows 11 makes it quite difficult to remove one from your setup.
Additionally, if you’ve recently upgraded then you might find it even harder to not use a Microsoft Account during the OOBE, and here’s all you need to know about it.
- Can you use Windows 11 without a Microsoft account?
- What happens if you install Windows 11 without a Microsoft account?
- Which Windows 11 version can be installed without a Microsoft account?
- How to remove Microsoft account from Windows 11
- How to switch to a local account and keep all your files
- How to set up Windows 11 without a Microsoft account
- How to link your local user account with your Microsoft Account
- Using Windows 11 Without Microsoft Account: What do you gain
- Using Windows 11 Without Microsoft Account: What do you lose
- FAQs
Can you use Windows 11 without a Microsoft account?
Yes, contrary to popular belief, you can use Windows 11 without a Microsoft Account whether you own the Windows 11 Home or Pro edition. The workarounds to avoid using a Microsoft Account are different for each version of the OS, and you can use either one to set up and use Windows 11 to use it without a Microsoft Account.
Related: How to Log in as Administrator on Windows 11
What happens if you install Windows 11 without a Microsoft account?
When setting up Windows 11 without a Microsoft Account, you will lose out on Microsoft’s integrated experience and services. This includes the inability to use apps like Mail, Xbox, Microsoft Store, and more, as well as sync features like syncing your devices, settings, preferences, and more.
In addition to this, you might get limited experience in certain apps like the Microsoft Store which requires you to verify your age to download certain free apps, including the likes of Netflix, Amazon Prime Video, and more.
Upgrading to Windows 11 without a Microsoft account will also give you more control over your user profile, allowing you to use other names as well as set custom names for your ‘Users’ folder. This is because Windows 11 will automatically use the first 4 letters of your Microsoft Account email ID as your User folder in Windows when setting up via a Microsoft Account.
Which Windows 11 version can be installed without a Microsoft account?
You can install all Windows 11 versions be it Home, Pro, or Enterprise on your PC without the need for a Microsoft Account. While the Home edition does require you to use a Microsoft Account at first glance, you can use various workarounds and tricks to bypass these requirements.
Unlike bypassing TPM and SecureBoot requirements, bypassing the Microsoft Account requirement does not hinder your privacy or security. You will continue receiving Windows updates as usual without any drawback apart from losing out on Microsoft Services and features.
Use either of the guides below depending on your current setup to use Windows 11 without a Microsoft Account.
Related: How to Check and Display CPU Temp on Windows 11
How to remove Microsoft account from Windows 11
Removing a Microsoft Account from your Windows 11 PC will depend on your current setup as well as the additional user accounts currently available on your PC. If you’re the only user on the PC and are using your Microsoft Account, then we will first need to create a local account and then remove your Microsoft Account.
If you have multiple accounts on your PC then we will first need to assign a PC administrator and then remove your Microsoft account accordingly. Follow the sections below depending on your current setup to help you along with the process.
Things to know before removing your Microsoft account
Here are a couple of things that you should keep in mind when removing your Microsoft account from Windows 11.
- Do not remove your Microsoft Account using the guide below if you wish to retain its associated data. You can instead use the subsequent guide to switch your Microsoft Account type to a local one instead.
- Removing your Microsoft account will remove all data stored within the account, including associated apps, credentials, files, and more.
- Your Microsoft Account will not be deleted when following this process. The account will only be removed from your PC. You will still be able to access your Microsoft Account data via the web and use your credentials to sign in to various Microsoft apps.
- You can sign into Microsoft apps with your Microsoft account individually. This will help you keep using apps like Mail, Microsoft Store, and more on your device.
You can now follow the guide below to first create a local administrator account on your PC and then subsequently use the next section to remove your Microsoft Account from your PC instead.
Related: How to Get Classic Shell on Windows 11 Via Open Shell
Step #01: Create a Local Administrator account
We will first create a local administrator account to ensure that Windows has an administrator account to fall back on when removing your Microsoft Account from the PC. You can create a new account via the Settings app, Control Panel, or via the User Account Settings. Use either of the guides below depending on your preferences to help you along with the process.
Option 1 under Step #1: Using Settings
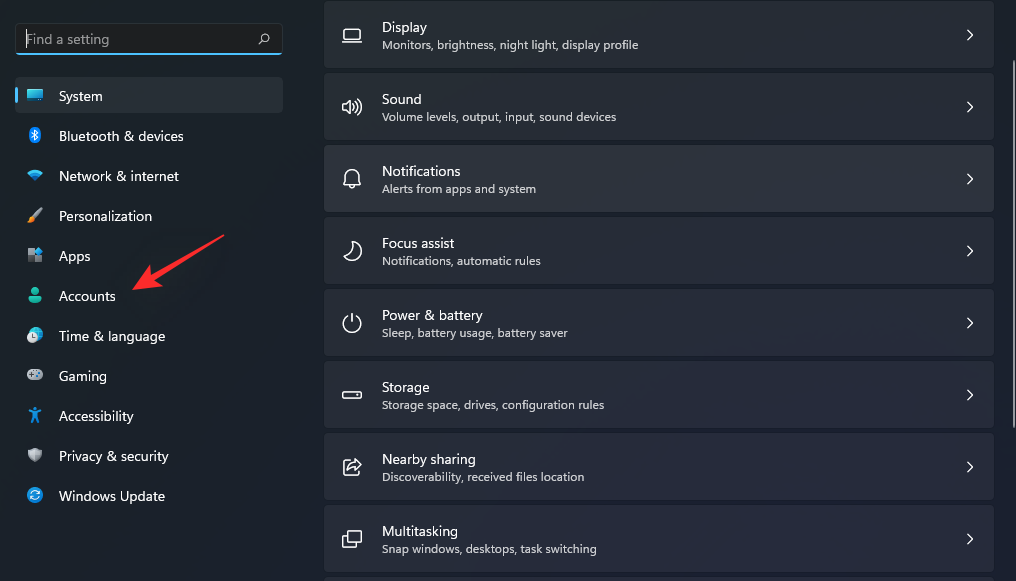
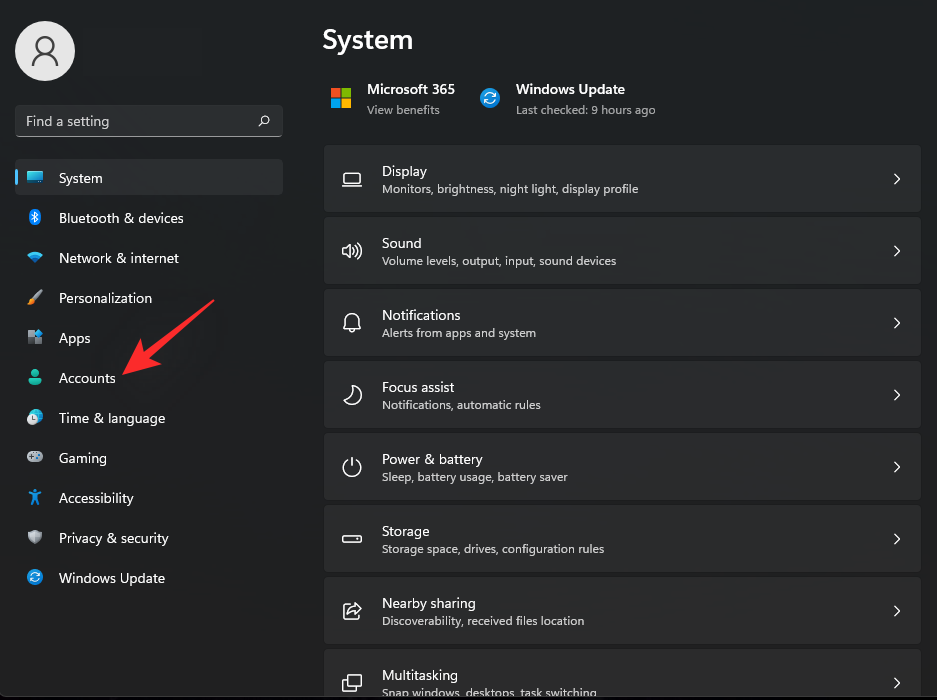
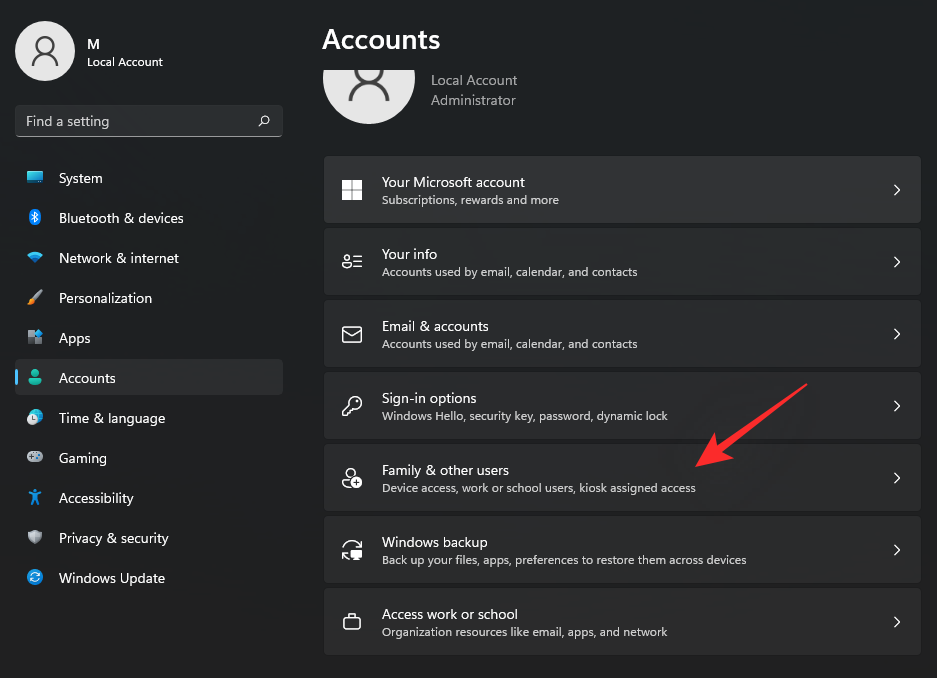
Press Windows + i on your keyboard to open the Settings app and click on ‘Accounts’ on your left.
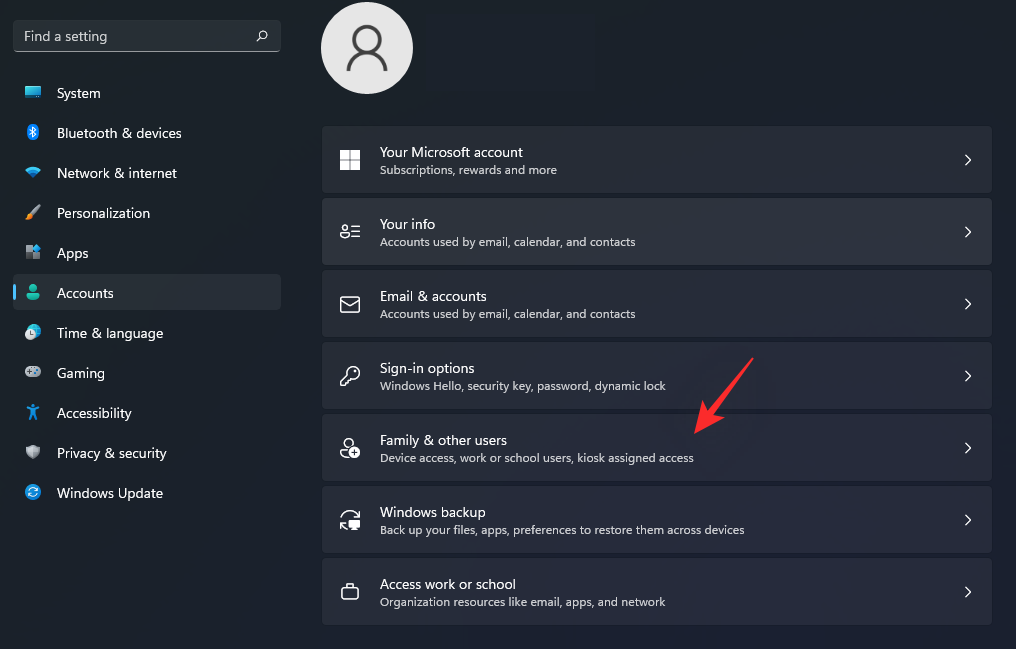
Now click on ‘Family & other users’.
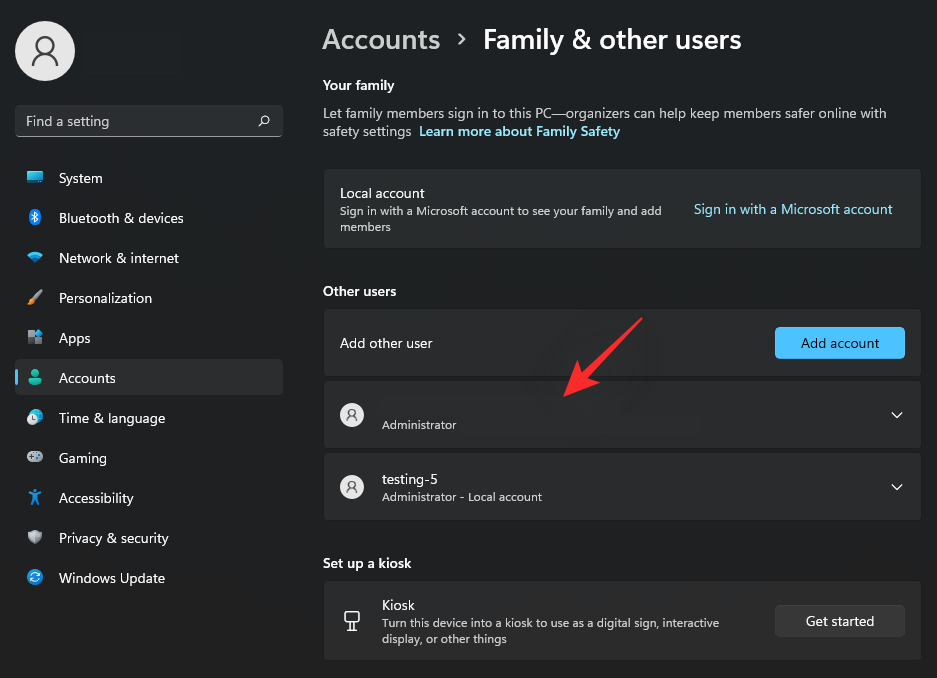
Click on ‘Add account’ beside ‘Add other user’.

You will now be asked to sign in with a Microsoft account. Click on ‘I don’t have this person’s sign-in information’ instead.

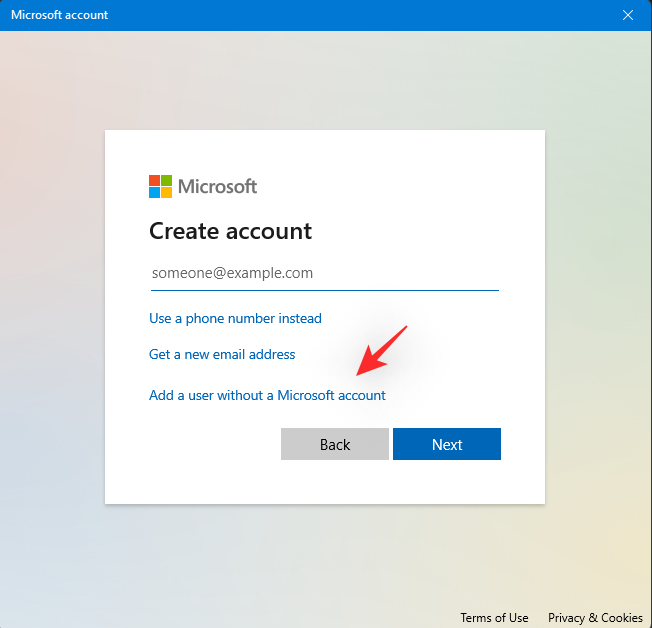
Click on ‘Add a user without a Microsoft account’ on the next screen.
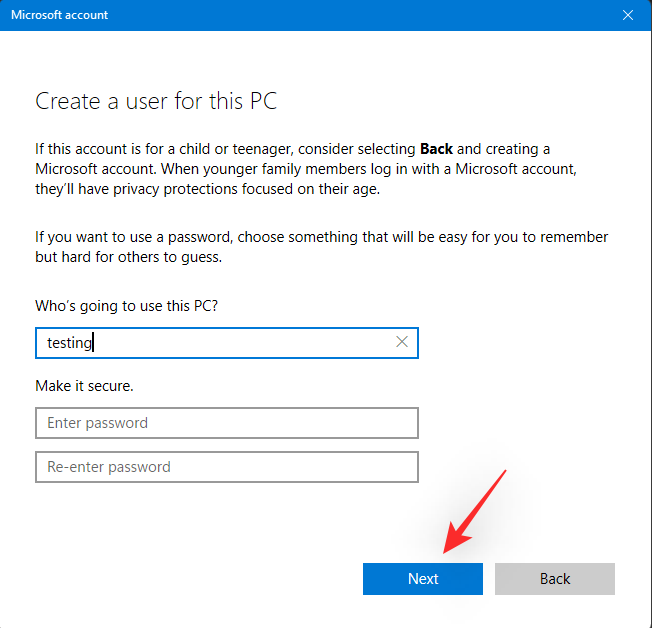
Now enter the desired name for your new local administrator account. Subsequently, enter the desired password for the account in the respective field.
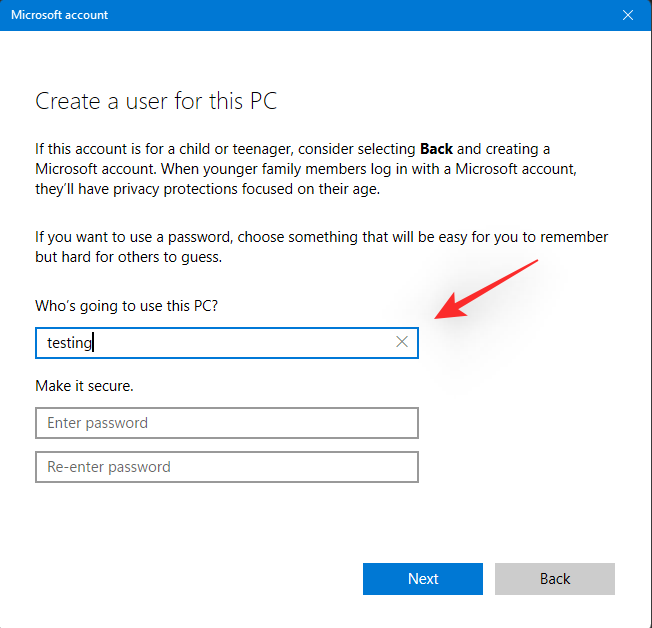
Note: If you do not wish to use a password for your local user account then you can leave these fields empty instead.
Click on ‘Next’.
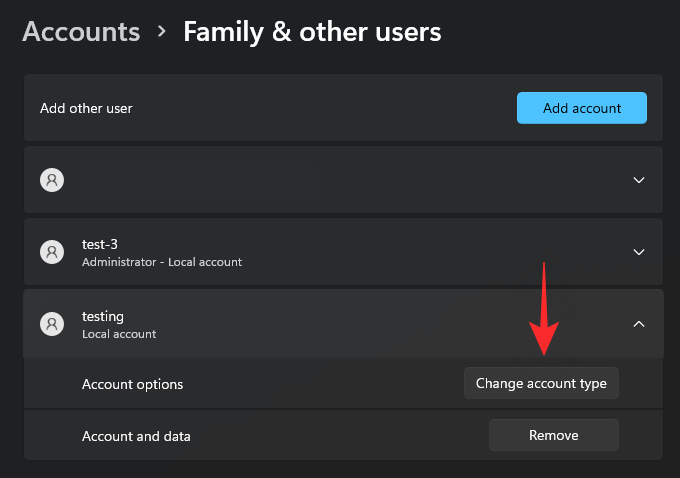
The new local account will now be created and added to your PC. You can set up the account when you log in to it the next time. We now need to change the permissions for your new account. Click on the newly created local account on your screen. Select ‘Change account type’.
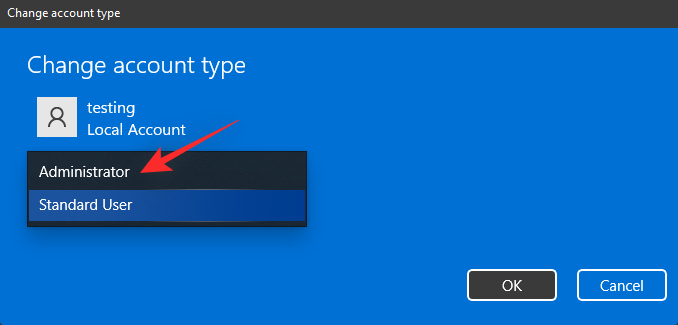
Now click on the drop-down menu and select ‘Administrator’.
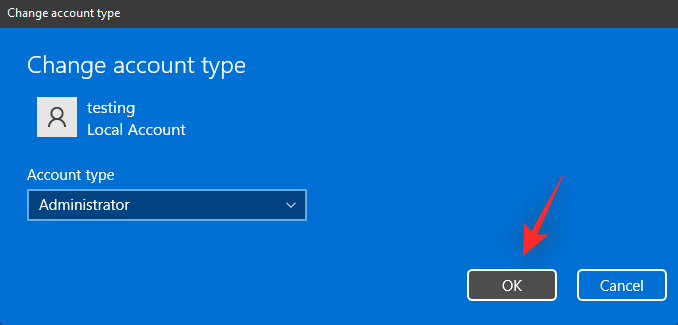
Click on ‘Ok’ once done.
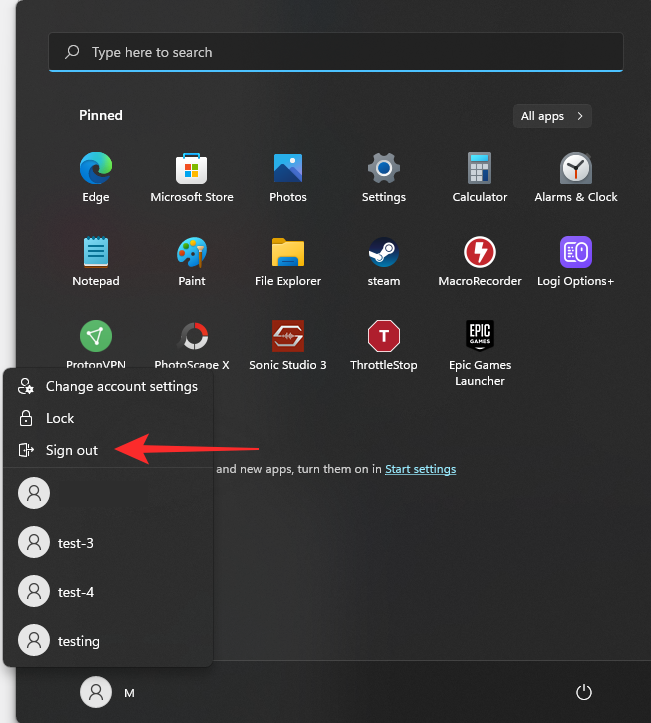
Launch the Start menu and click on your name in the bottom right corner. Select ‘Sign out’ to log out of your current account.
Now select the new account we created by clicking on the same in the bottom left corner of your screen. Sign in to your account once selected.
You will now be greeted by the OOBE experience. Toggle your privacy settings on or off on your screen now depending on your preferences. Follow the rest of the instructions to finish setting up your account.
Your new local admin account will now be created and active on your PC. You can now use the next section to completely remove your Microsoft account from your PC.
Option 2 under Step #1: Using Control Panel
You can also create a new account via the Control Panel, the old-fashioned way. Follow the guide below to help you along with the process.
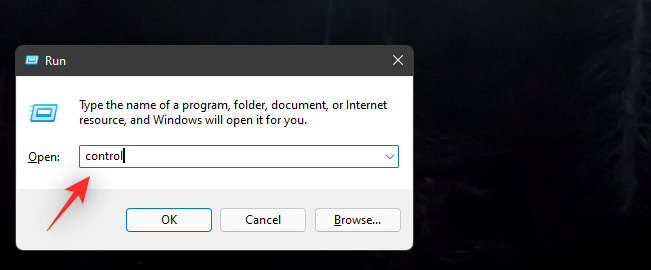
Press Windows + R on your keyboard, type in the following, and press Ctrl + Shift + Enter on your keyboard.
control
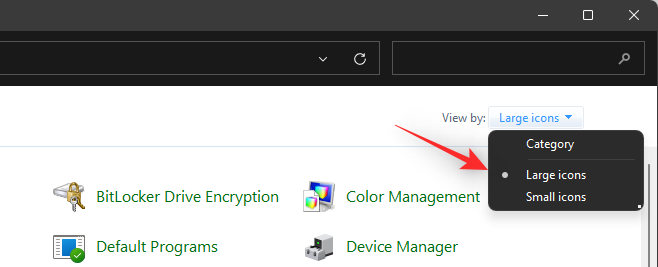
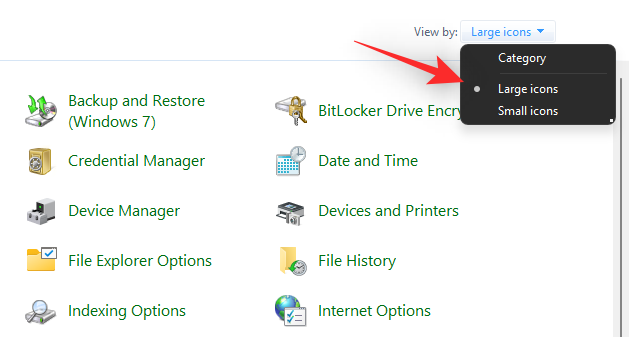
Click on the drop-down menu in the top right corner and select ‘Large icons’.
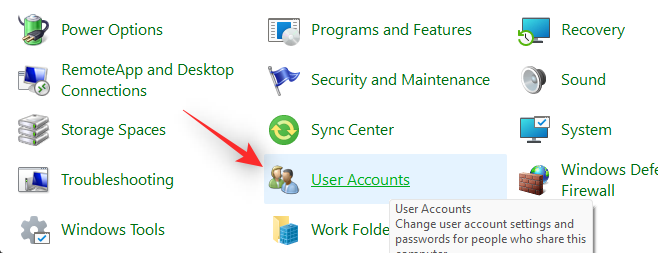
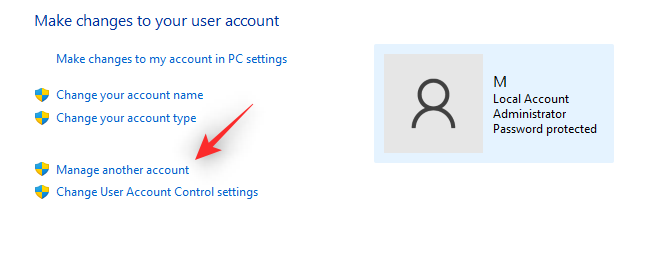
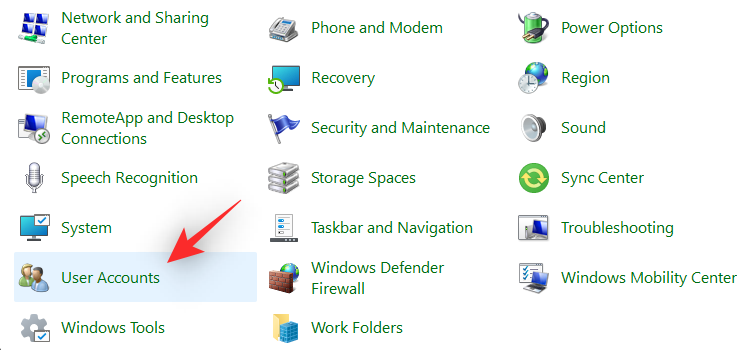
Scroll to the bottom and click on ‘User Accounts’.
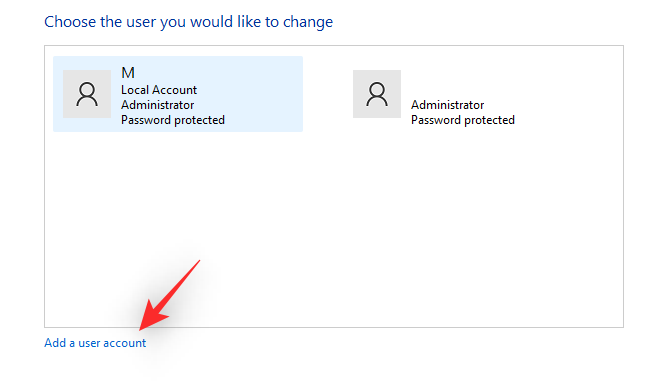
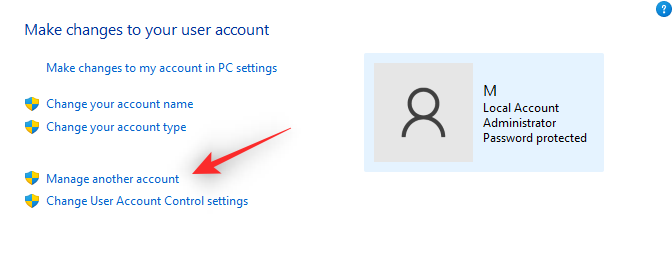
Click on ‘Manage another account’.
Now click on ‘Add a user account’.
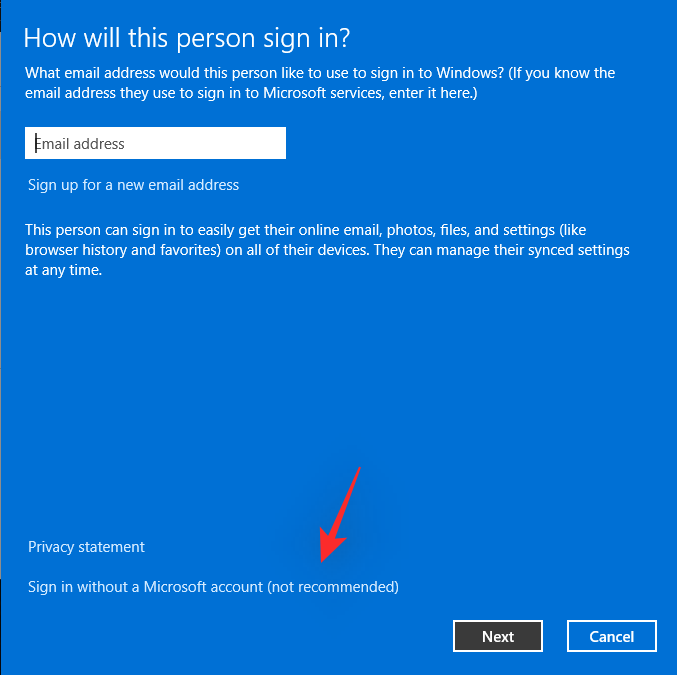
Click on ‘Sign in without a Microsoft account (not recommended)’ at the bottom.
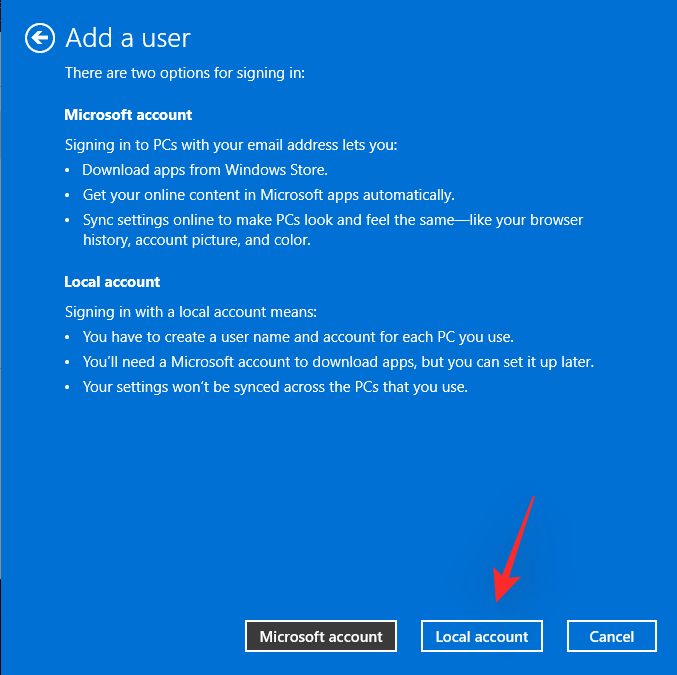
Select ‘Local Account’.
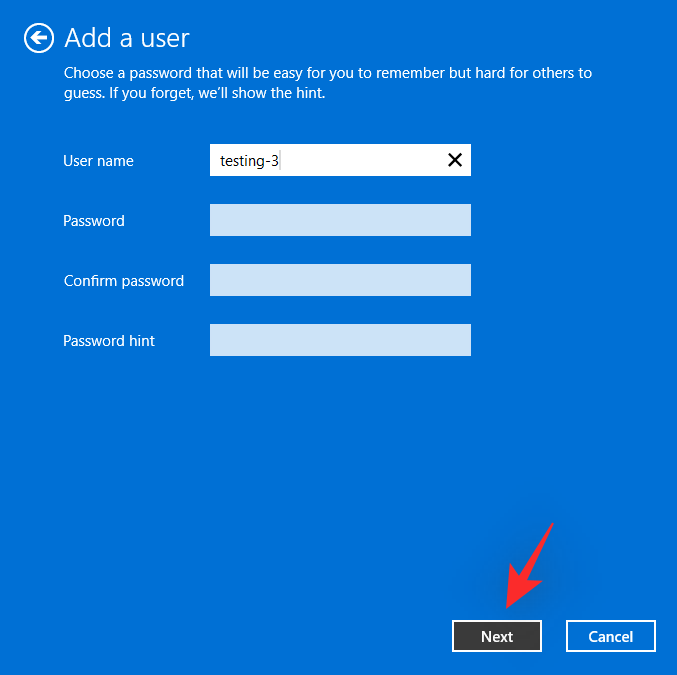
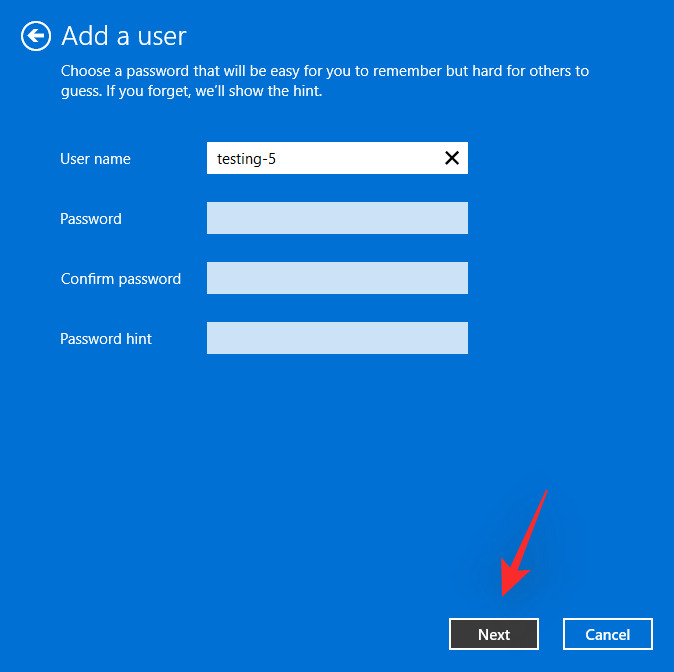
Enter a username for your new local account at the top. Subsequently, choose and enter a password for your new account.
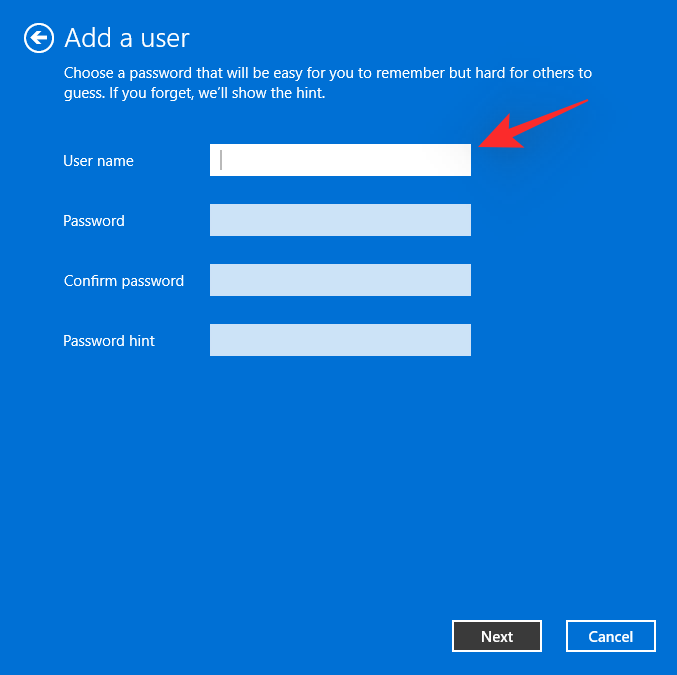
Note: If you wish to use your account without password protection, then you can leave these fields blank instead.
Click on ‘Next’ once you are done.
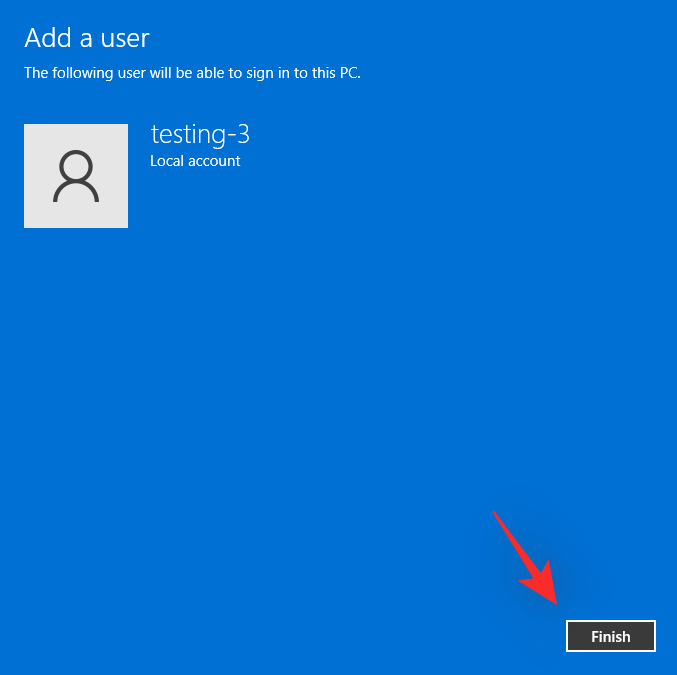
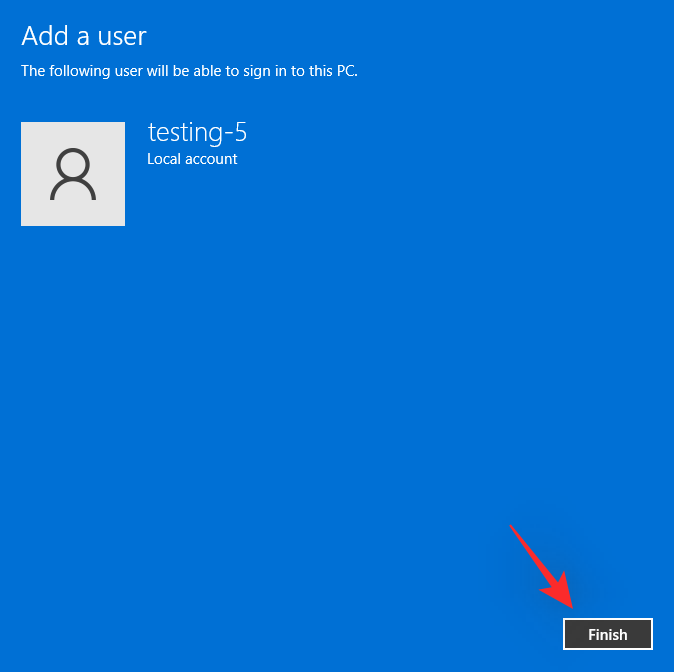
Click on ‘Finish’.
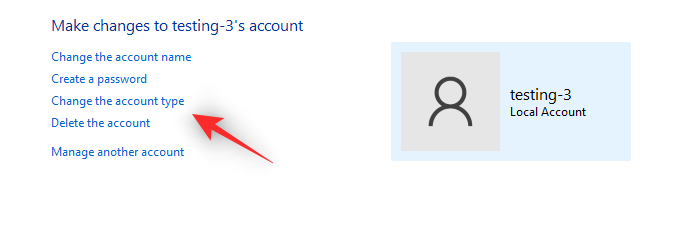
The new account will now be included in the list on your screen. Click on the same to elevate its permissions.
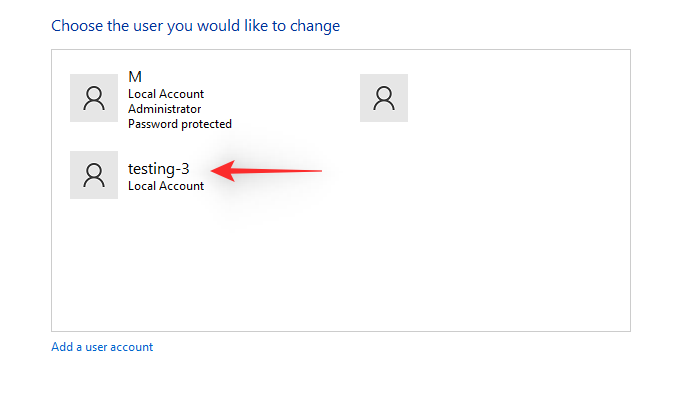
Select ‘Change the account type’.
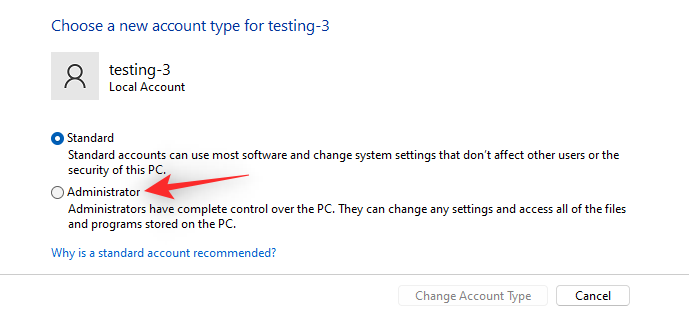
Now click and select ‘Administrator’.
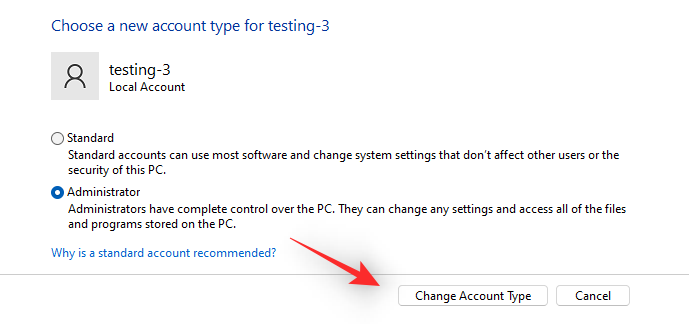
Click on ‘Change Account Type’ to confirm your choice.
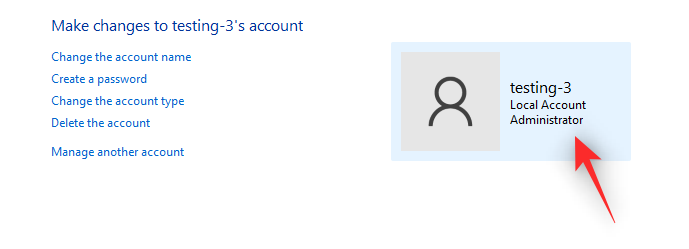
The new local account will now have elevated permissions as an administrator.
You can log in to the new account and follow the on-screen instructions to set it up and complete the OOBE process. Once done, you can use the next section to remove and delete your Microsoft Account from your Windows 11 PC.
Option 3 under Step #1: Using User Account settings
User Account Settings is an advanced settings panel in Windows that allows you to manage all profiles and user accounts on your PC. You will need to be an administrator to access and use this panel on your PC. Follow the guide below to help you along with this process.
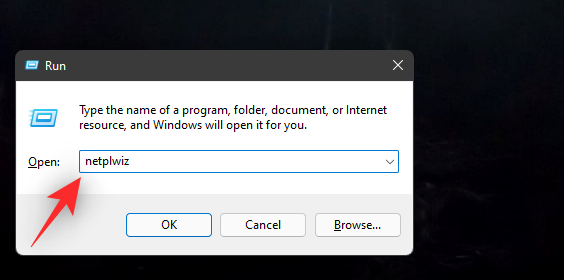
Press Windows + R on your keyboard, type in the following, and press Enter on your screen once done.
netplwiz
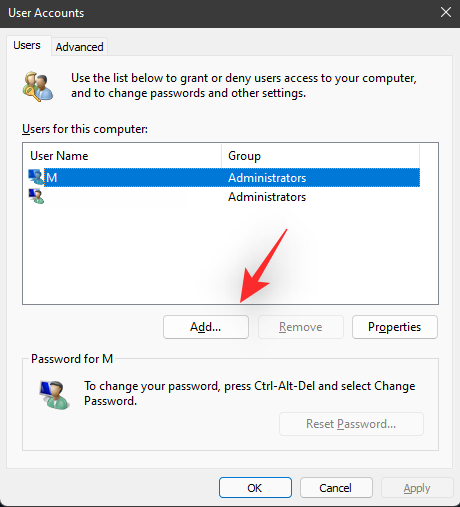
You will now get a list of all the profiles and user accounts currently set up on your PC. Click on ‘Add’ to create a new local administrator account.
Click on ‘Sign in without a Microsoft Account (not recommended)’.
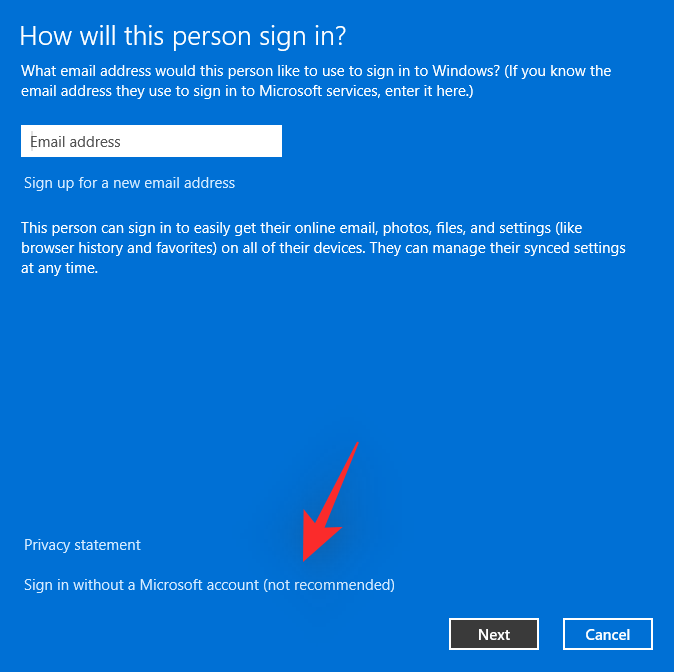
Click on ‘Local account’.

Choose a user name and subsequently a password for your new account. If you don’t wish to have a password then you can leave the respective fields empty.
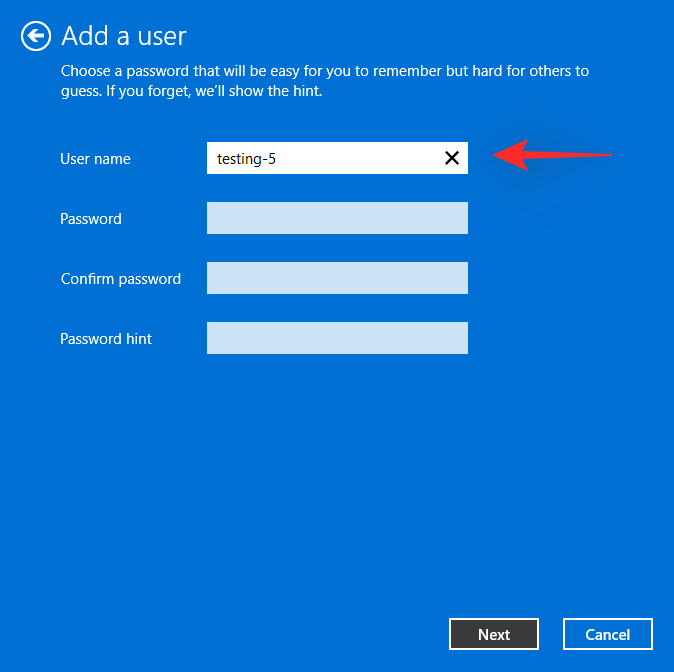
Click on ‘Next’ once you are done.
Click on ‘Finish’ once you are done.
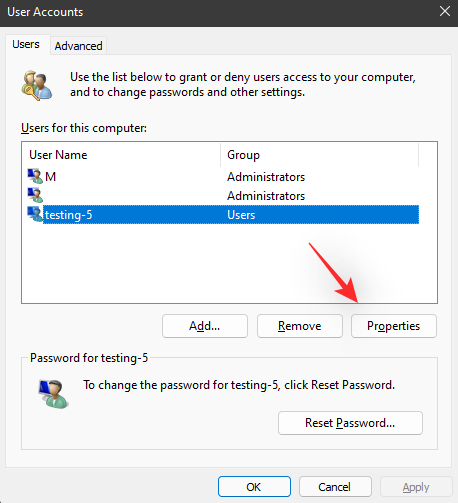
Now click and select the new user account we just created from the list on your screen. Click on ‘Properties’ once done.
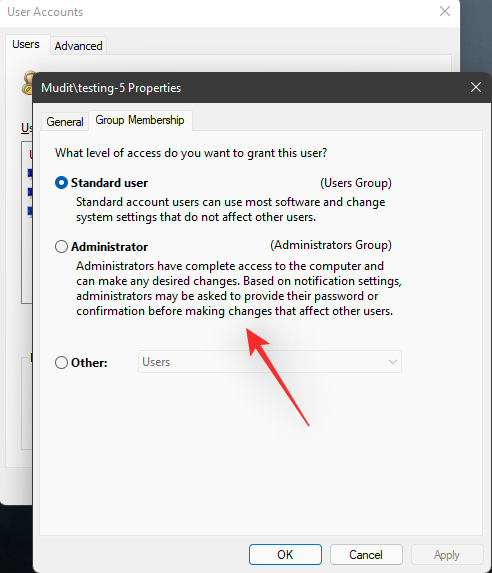
Click on ‘Group Membership’ at the top.
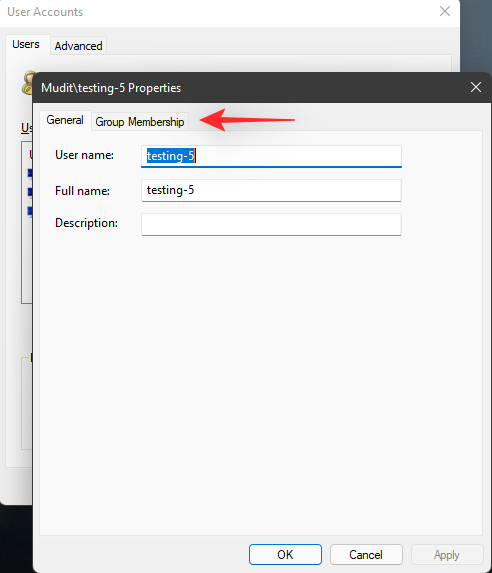
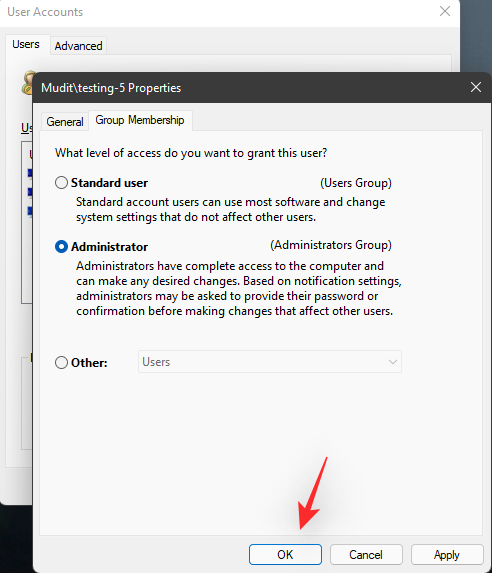
Now click and select ‘Administrator’.
Finally, click on ‘OK’.
Click on ‘OK’ again to close the User Account Settings panel.
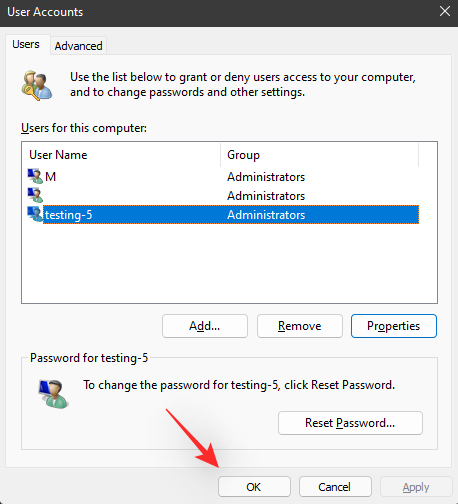
The new account will now have been created on your PC. You can now log out and complete setting up the account by logging into it and following the on-screen OOBE instructions.
Once your account is past the first time setup, you can use the guide below to completely remove your Microsoft account and profile from your PC.
Step #02: Remove your Microsoft Account
We can now remove your Microsoft Account from your PC. Keep in mind that removing the account will delete all your data and files and we recommend you back up all the necessary files before using the guide below.
Option 1 under Step #2: Using Settings
Press Windows + i on your keyboard and click on ‘Accounts’ on your left.
Click on ‘Family & other users’.
Now click on your Microsoft Account from the list on your screen.
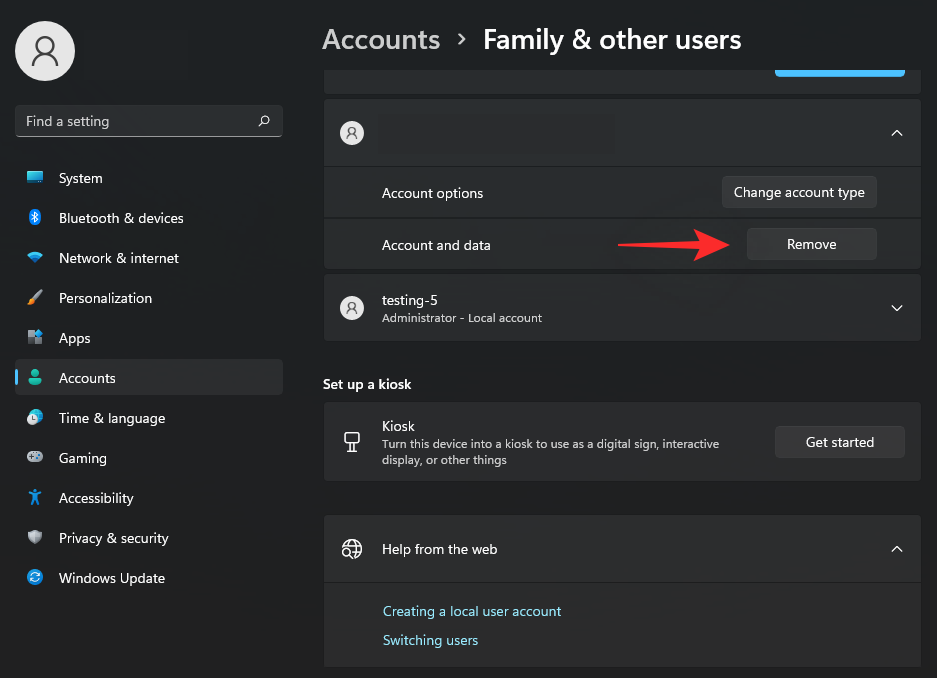
Click on ‘Remove’ beside ‘Account and data’.
Click on ‘Delete account and data’.
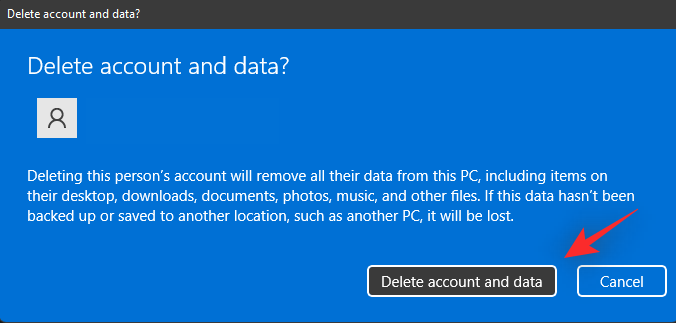
And that’s it! The selected Microsoft Account will now be removed from your PC.
Option 2 under Step #2: Using Control Panel
Press Windows + R on your keyboard, type in the following, and press Enter.
control
Now click on the drop-down menu in the top right corner and select ‘Large icons’.
Click on ‘User Accounts’.
Now click on ‘Manage another account’.
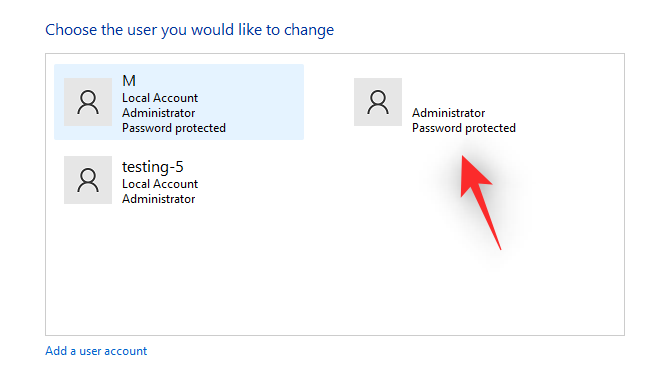
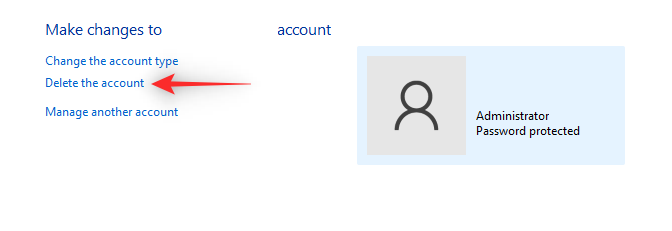
Click and select your Microsoft Account from the list on your screen.
Click on ‘Delete the account’ on your left.
Click on ‘Delete files’ to clear all account data. Click on ‘Keep files’ to keep some of your data. This mainly includes files associated with your user profile and not installed applications and other data.

And that’s it! Your Microsoft Account will now be removed from your PC.
Option 3 under Step #2: Using User Accounts settings
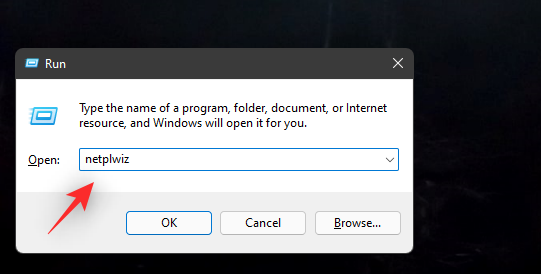
Press Windows + R on your keyboard, type in the following, and press Ctrl + Shift + Enter on your keyboard.
netplwiz
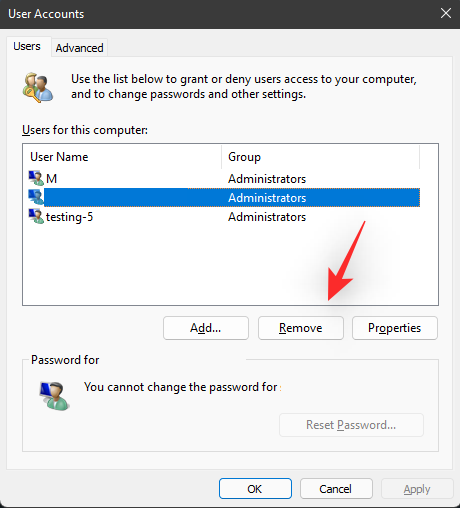
Select your Microsoft Account from the list on your screen by clicking on it. Now click on ‘Remove’.
Click on ‘Yes’ to confirm your choice.
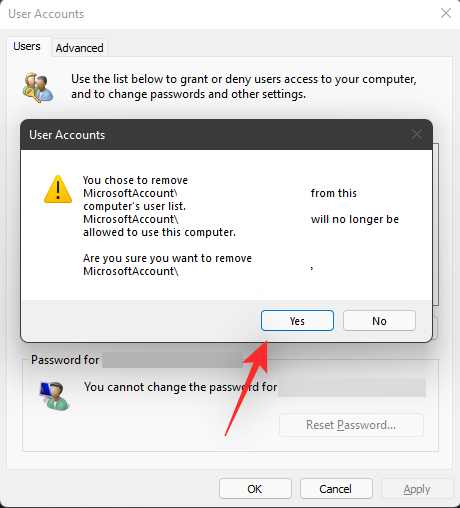
The selected Microsoft Account will now be removed from your PC.
How to switch to a local account and keep all your files
If you wish to retain all your files and services then we recommend you switch your current account to a local one instead. Your new local account will have the same privileges and permissions as your Microsoft Account. Follow the guide below to help you get started.
Note: You need to be signed in with your Microsoft Account to convert the same to a local account on your Windows 11 PC.
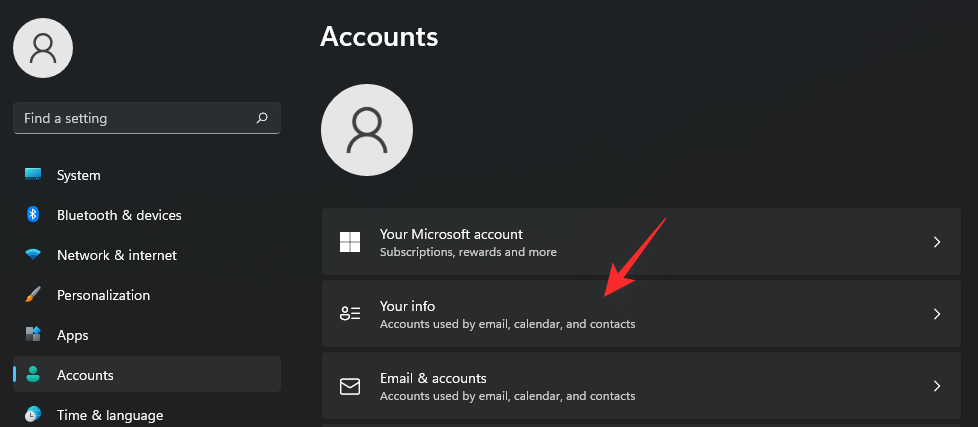
Press Windows + i on your keyboard and click on ‘Accounts’ on your left.

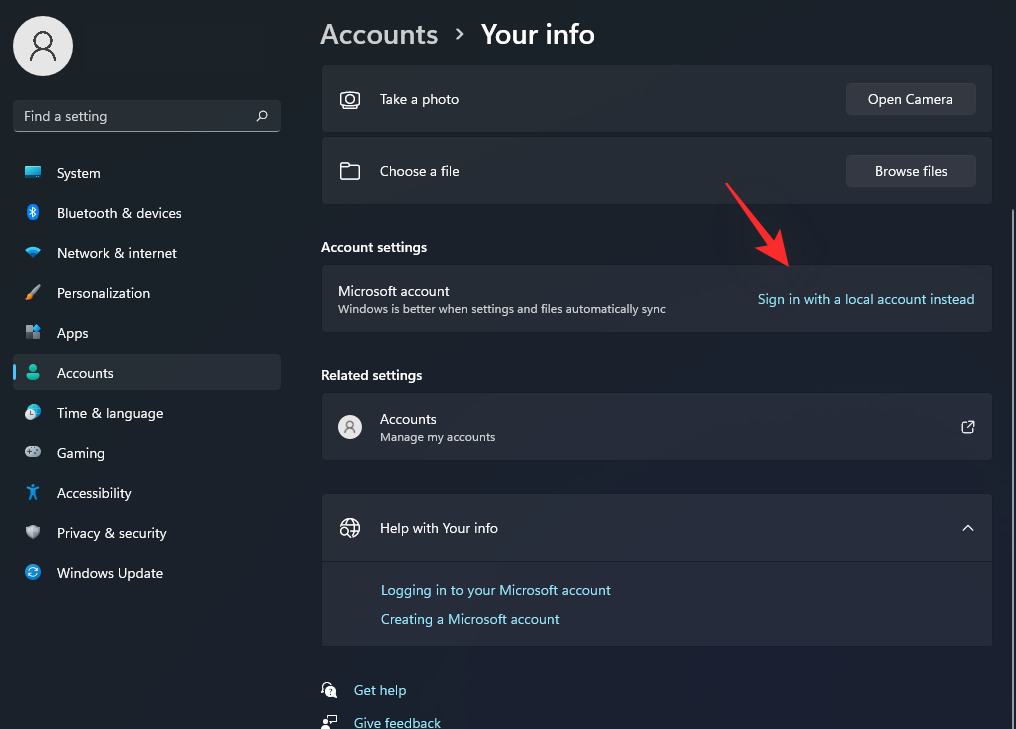
Click on ‘Your info’ now.
Select ‘Sign in with a local account instead’.
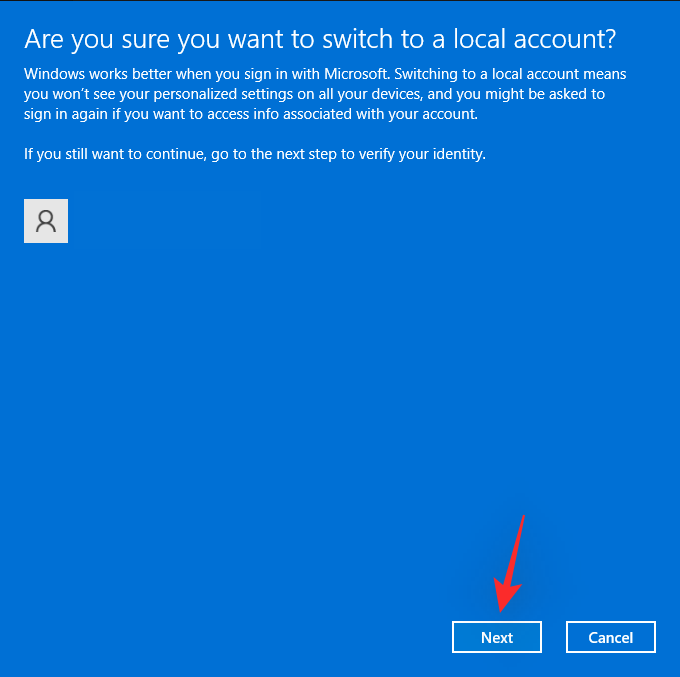
Confirm your choice by clicking on ‘Next’.
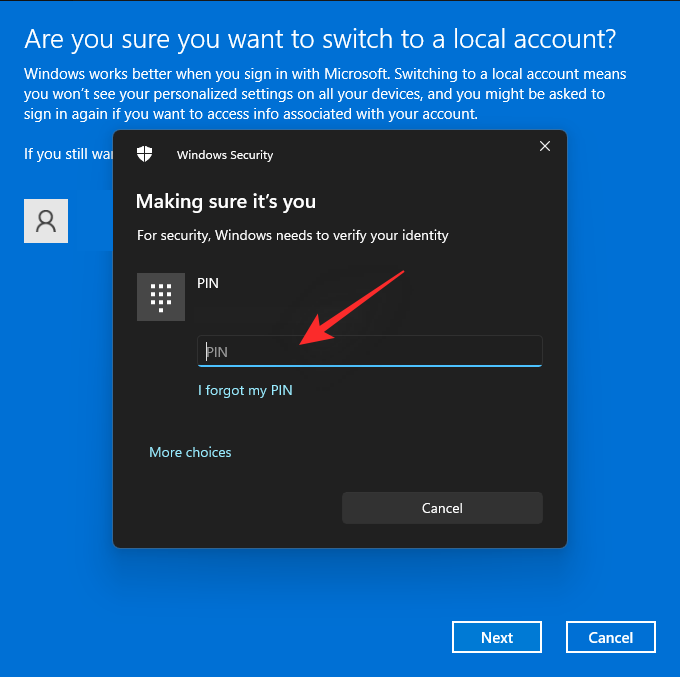
Enter your password to confirm your identity. Click on ‘Ok’ once done.
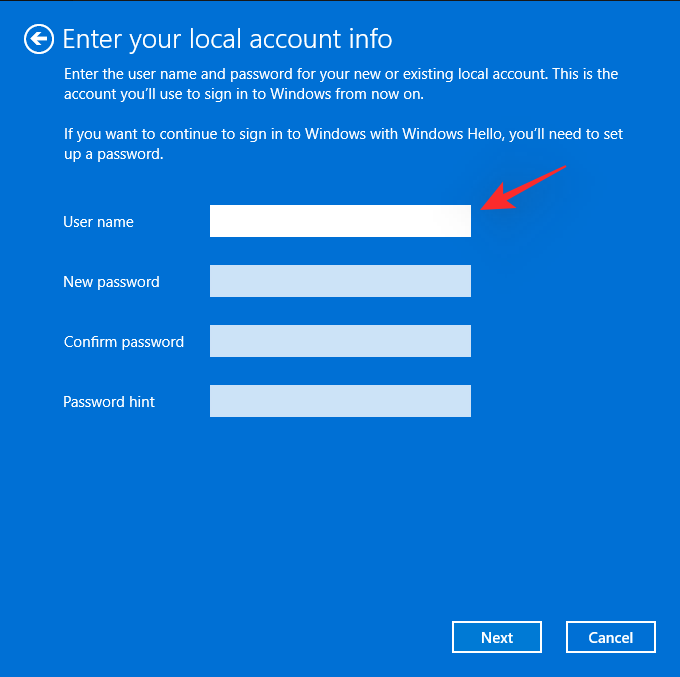
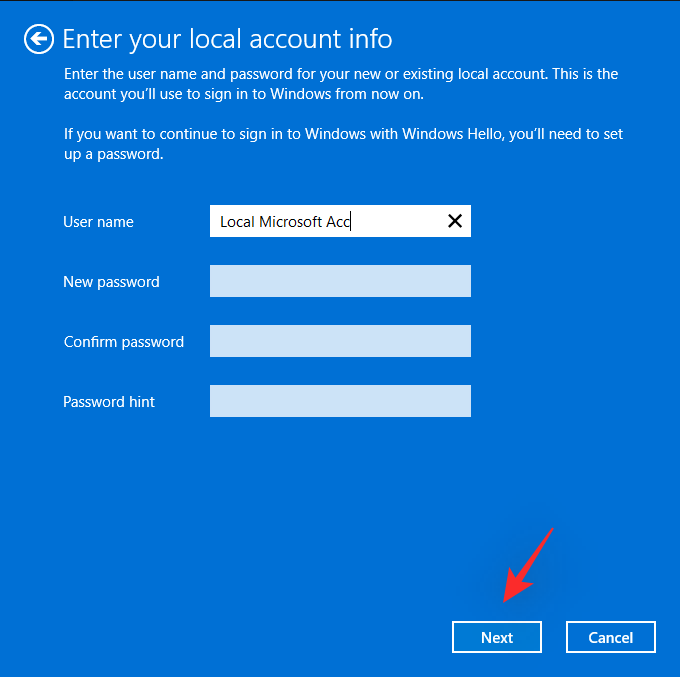
Enter a username for your new local account. Additionally, enter a password in the dedicated spaces if needed. If you don’t wish to use a password then you can leave these fields blank instead.
Click on ‘Next’.
Click on ‘Sign out and finish’.
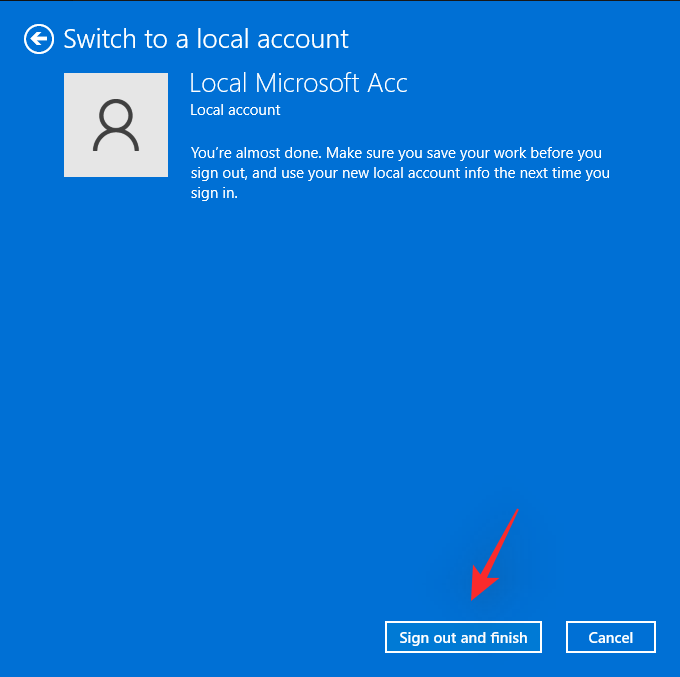
And that’s it! The selected Microsoft Account will now be converted to a local account. You can now remove the account completely from your PC if needed.
Related: Windows 11 Update Not Showing? Reasons and Fixes Explained
How to set up Windows 11 without a Microsoft account
If you’re looking to set up Windows 11 without a Microsoft account then you can use the following workarounds mentioned below. Windows 11 Home users can use either of the methods below to circumvent Microsoft’s requirement for a Microsoft account. If you are using any other version of Windows 11, then you can use the subsequent guide instead. The process should be much simpler as Microsoft allows Windows 11 pro or higher to be easily set up without a Microsoft account.
For Windows 11 Home Edition
Windows 11 Home users can use the following tricks to bypass the Microsoft Account requirement during the OOBE. Assuming that you have already installed Windows 11 and have been greeted by the OOBE, follow either of the sections below depending on your preferences. If you are yet to upgrade, then we recommend you download and install Windows 11 before proceeding with the methods below.
Method #01: Use the no Internet Trick
Once you are greeted by the OOBE, follow the on-screen instructions till you are asked to sign up with a Microsoft Account. By this point, you will have set a name for your PC as well as connected to the internet. Disable your network by turning off your Wi-Fi router for a while or by disconnecting your Ethernet cable. The same should be reflected by the missing network adapter icon in the bottom right corner of your screen.
The setup will now detect the lack of a network connection and will now allow you to set up a local account instead. Click on the ‘Back’ arrow in the top left corner of your screen to go back to the previous screen.
And that’s it! You will now be asked to enter the name of your new local account. Enter the name and then set a password if needed. Subsequently set up your security questions and you should be good to go. You can now follow the on-screen instructions to complete the OOBE set up and use Windows 11 Home with your new local account instead.
Method #02: Using CMD
You can also bypass the Microsoft Account requirement via the CMD when setting up Windows 11 after the installation process has been completed. Follow the steps below to help you along with the process.
Follow your on-screen OOBE instructions till you are asked to sign in with your Microsoft Account. Now press Shift + F10 on your keyboard to launch CMD on your PC.
Now enter the following command and press Enter on your keyboard.
taskkill /F /IM oobenetworkconnectionflow.exe
The network connection will now be terminated for your PC. Close CMD, and click on the ‘Back’ arrow in the top left corner of your screen.
The setup will now detect the lack of a network connection and allow you to create a local account instead. Enter the desired information and continue with the OOBE as usual. Once completed, your Windows 11 Home edition should be set up using a local account instead.
Method #03: Use fake credentials
Fake credentials can also help you bypass the Microsoft Account requirement natively. Follow the steps below to help you along with the process.
Install and continue with the Windows 11 Home OOBE as you normally would until you are asked to sign in with your Microsoft Account. Now enter the following email address in the respective field.
Click on ‘Next’.
Enter the following as your fake password.
WXYZ
Click on ‘Sign-in’ once done.
OOBE will now encounter an error and you will be notified of the same. Click on ‘Next’ to continue with the process.
Click on ‘Don’t sign in with a Microsoft account’ to select the same.
Click on ‘Next’ once you are done.
You will now be asked to set up your new local account instead. Follow the on-screen instructions to complete the OOBE process and you should be able to use Windows 11 Home without a Microsoft Account on your PC.
For other Windows 11 Editions
If you are installing Windows 11 Pro or Enterprise edition then you can use the steps below instead to set up a local account on your PC. Install Windows 11 as usual and continue with the OOBE until you are asked to sign in with your Microsoft account. You can then follow the guide below to help you along with the process.
Once you are asked to enter your Microsoft account email ID, click on ‘Sign-in options’ instead.
Click and select ‘Offline account’.
Click on ‘Skip for now’ to confirm your choice of not using a Microsoft account.
Select ‘Don’t sign in with Microsoft account’ by clicking on the same.
Click on ‘Next’ once you are done.
Now enter a name for your new local account and click on ‘Next’ once you are done.
Enter a password and confirm the same in the respective fields. If you do not wish to use a password then you can leave these fields blank.
And that’s it! Your Windows installation will now use the defined local account. You can now continue with the OOBE and on-screen instructions to complete the setup based on your preferences and requirements.
How to link your local user account with your Microsoft Account
Did you know that you can still add your Microsoft account to Windows 11 so that you can use it with various Microsoft Services and apps? Doing so will help you keep using all Microsoft apps and services while ensuring that you can sign up for new apps using the same account as well. Follow the guide below to help you along with the process.
Press Windows + i on your keyboard and click on ‘Accounts’ on your left.
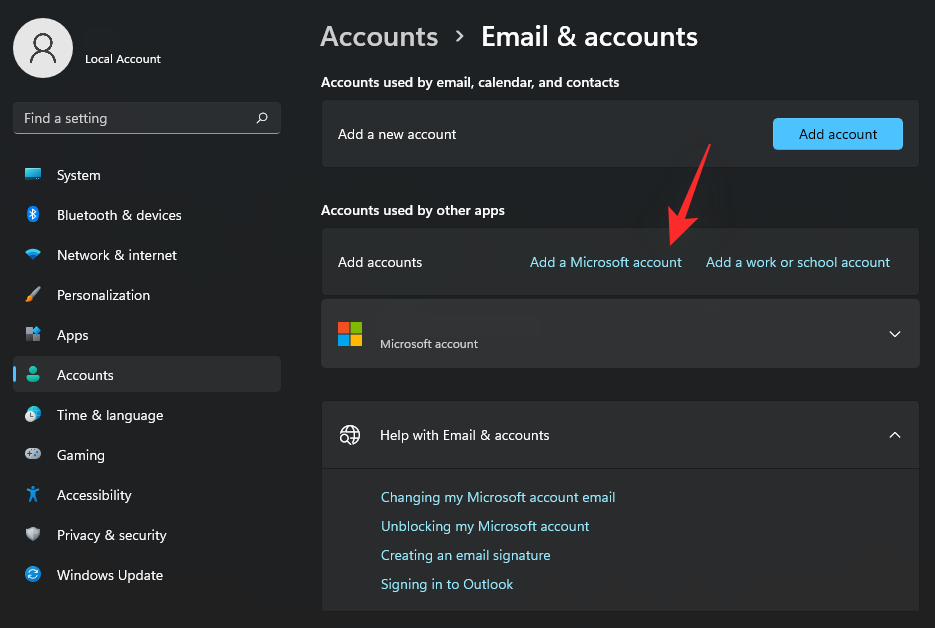
Now click on ‘Email & accounts’.

Click and select ‘Add a Microsoft account’.
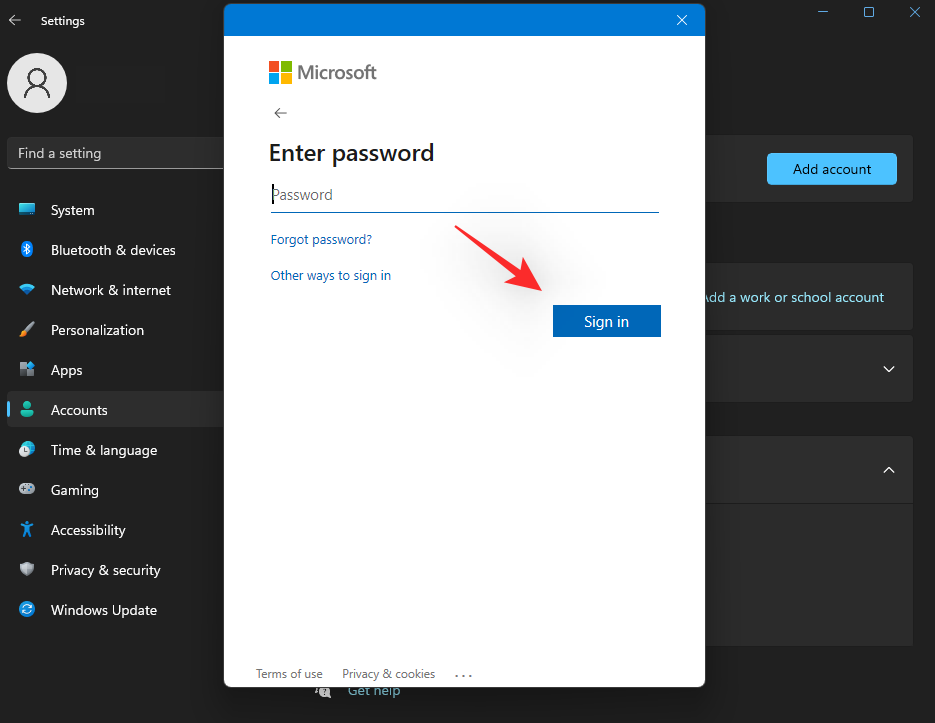
Enter your email ID and click on ‘Next’.

Now enter your password and click on ‘Sign in’.
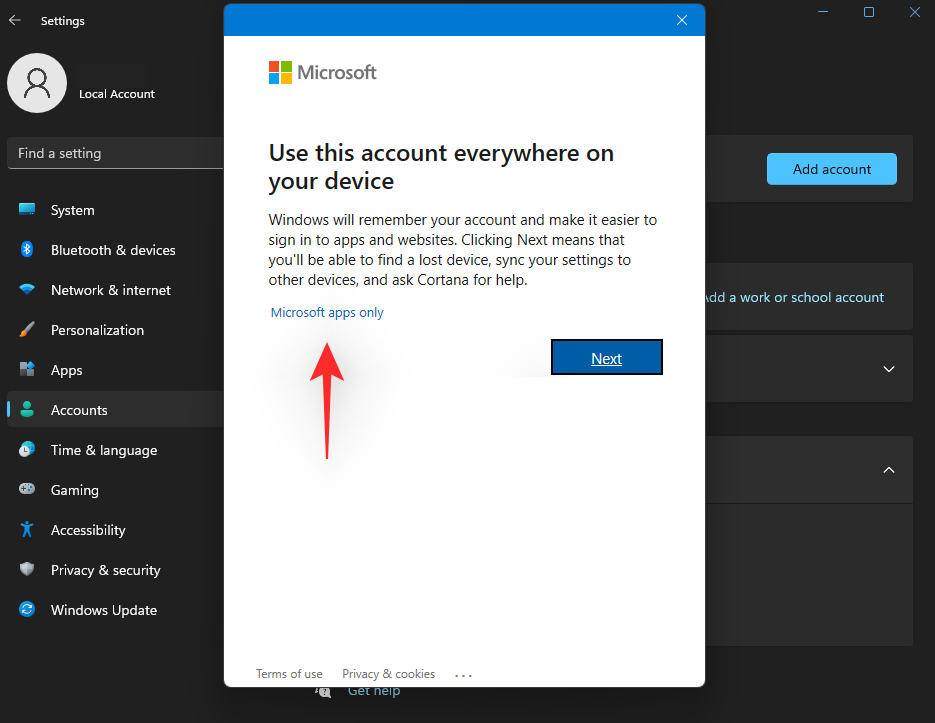
You can now choose how the Microsoft account is used with your current user profile. As we only wish to use it with Microsoft apps and services, click on ‘Microsoft apps only’.
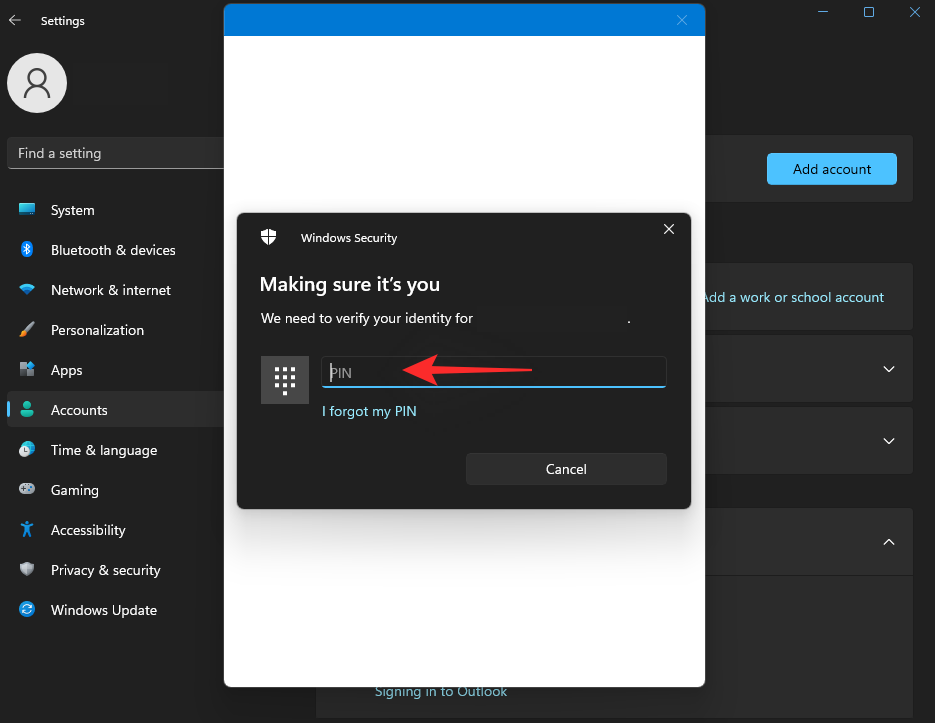
You will now be asked to link the account with your Windows Hello password for easy authentication. Click on ‘OK’.

Now enter your Windows Hello Pin to link it with the Microsoft account.
However, if you don’t wish to use your Windows Hello Pin then click on ‘Cancel’ instead.
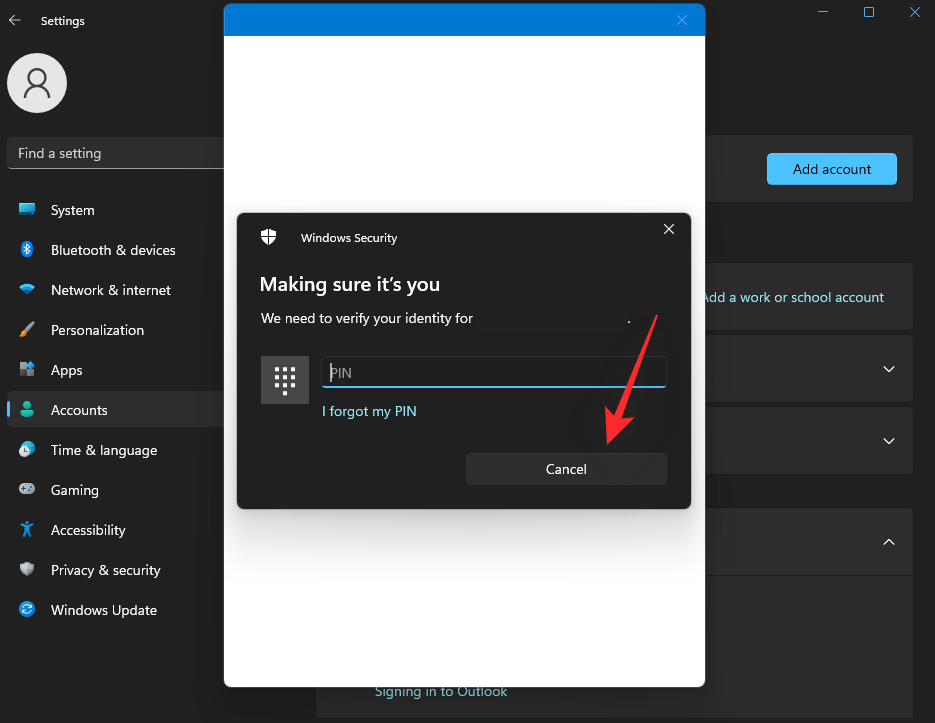
Click on ‘I’ll set up my account later’.
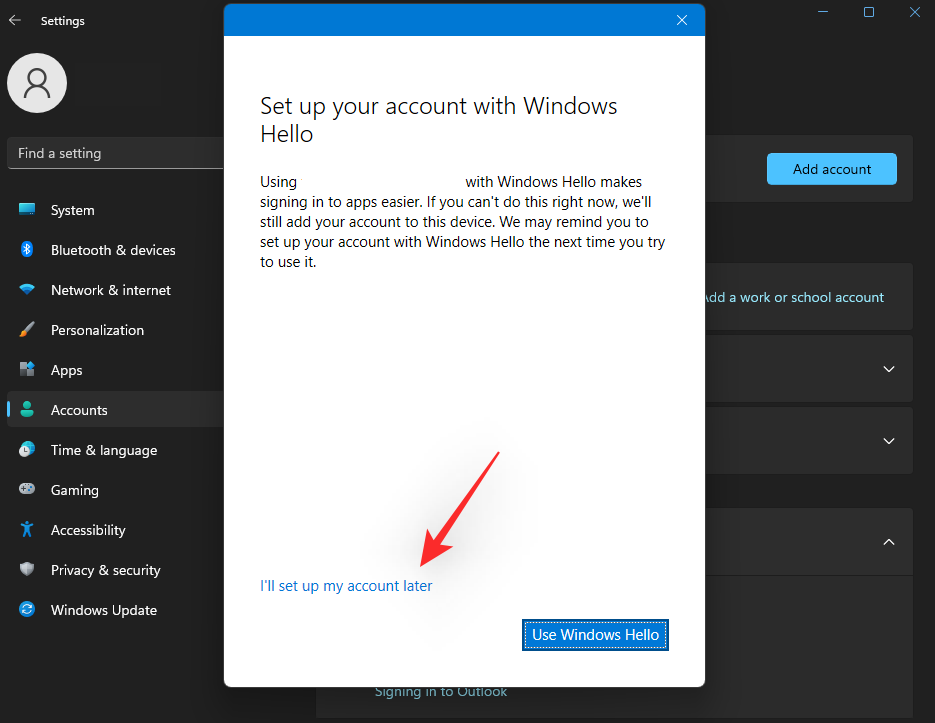
And that’s it! The selected account will now be added to your user profile. You can now easily use the same with most Microsoft apps and services on your PC.
Using Windows 11 Without Microsoft Account: What do you gain
Having a local account on Windows 11 has its perks and advantages. Here are some important ones to help you weigh your options.
- Security: Online databases get leaked and hacked regularly. And while Microsoft does its best to manage user security, a leak of your Microsoft Account password could compromise all devices using the concerning ID. Having a local account helps mitigate this issue by allowing encryption, local keys, and complex passwords at the lock screen.
- Privacy: A big factor when it comes to tech giants like Google, Microsoft, Apple, and more is privacy. Inarguably some or most of your statistical data is being shared remotely with servers to improve services and user experience. Having a Local account ensures at least some of your data is not transmitted to remote servers thus improving your privacy.
- Custom User folder name: When using your Microsoft Account, the first 4 letters of your email ID will be used as your User folder name in ‘C:\Users’. This can be a double-edged sword and many people seem to dislike this feature. A local account helps you use your Username as your User folder name without the restriction for 4 letters.
- Individual setups: If you have multiple devices for different tasks and scenarios, then having the same preferences or settings for all of them might not be the best option. Local accounts can help you customize your setup and create personalized spaces on a per device basis.
Using Windows 11 Without Microsoft Account: What do you lose
There are some cons as well to not using a Microsoft Account within Windows 11. Here are the most prominent ones that should help you make an educated decision based on your current needs and requirements.
- Microsoft Store Acces: Without a Microsoft Account you will be unable to use the Microsoft Store. This can be a serious drawback if you wish to run Android apps on your system.
- No free OneDrive access: Microsoft Accounts now get free 5GB of cloud storage when signing into Windows. If you do not use your Microsoft Account you will lose out on this 5GB of cloud storage.
- Sync features: Microsoft Accounts can help sync a lot of information across devices, including browser data and system preferences. If you have multiple systems in different locations for the same task, then this is an invaluable feature to synchronize your experience. Sadly, not using your Microsoft Account will also cause you to lose out on sync features offered by Microsoft.
- Cortana: Cortana will also operate with limited functionality when you skip out on a Microsoft Account. The voice assistant has improved when it comes to local account support but it is still a long way to go when compared to the full integrated experience when using a Microsoft Account.
- Parental Controls: Family and parental controls will also be absent from your device. You will need to use a Microsoft Account both as an administrator and for your family member to make use of parental and family controls on the device.
FAQs
Microsoft’s services, apps are more integrated into Windows 11 than ever before. As such you can experience unexpected behavior when removing your Microsoft account from the OS. Here are a few commonly asked questions that should help you get up to speed with the latest available information.
Is your data lost when you remove a Microsoft account?
Yes, all your profile data and contained files, will be removed when removing your Microsoft account from the PC. Windows 11 will notify you about the same and show you a list of all the data that will be deleted when removing your account.
If you wish to retain your data, then we recommend that you create a local manual backup or switch to a local account instead. This will help convert your current Microsoft account to a local account, which will help you retain all your data and files. Follow this section above to help you along with the process.
Can you still sign in to Microsoft apps using your account?
Yes, even if you are using a local account, you can use your Microsoft account to sign in to Microsoft apps and services individually. This will ensure that you can keep using the necessary apps and services without losing out on their functionality.
Keep in mind that some apps and services might offer limited functionality, especially when it comes to cloud services and features like syncing Settings, files, preferences, and more across all your devices.
Can I use a local account natively on Windows 11 Pro?
Yes, you can use a local account directly when setting up Windows 11 Pro edition on your PC. Use this section to help you along with the process.
Can I still sync my preferences and settings when using a local account?
Unfortunately no, your preferences, device settings, and more will not be synced when using a local account on your Windows 11 PC. Settings and preferences contain private and sensitive data which needs to be kept secure. Your Microsoft account helps verify your identity and allows secure servers to sync and store your data in the cloud.
However, a local account has no way of ensuring maximum security unless it can communicate with Microsoft servers and use them to sync and store your settings and preferences. Thus, you can not sync your preferences and settings across your devices when using a local account on a Windows 11 PC.
Do I need to be using my Microsoft Account to use Xbox services?
Yes, you will need a Microsoft account to avail of Xbox services on a Windows 11 PC. However, this does not mean that you need to be using a Microsoft Account profile, you can sign into each Xbox service or app individually to continue enjoying your games.
Your Gamertag as well as your save files will all be retained and synced when using your Microsoft account. Being signed in with your Microsoft account allows you to easily register and sign in to Xbox services and apps but it is not a requirement.
We hope this post helped shed light on removing your Microsoft Account from a Windows 11 PC. If you face any issues or have any more questions for us, feel free to reach out using the comments below.
RELATED
- How to Ungroup Icons on Windows 11 Taskbar With a Registry Hack
- How to Fix “This PC Doesn’t Currently Meet All the System Requirements for Windows 11” Error
- If I Decline Windows 11 Upgrade, Can I Get It Later? [Explained]
- How to Disable CSM to install Windows 11
- Where is ‘My Computer’ on Windows 11? How to Find ‘This PC’ Easily!
- How To Remove or Replace appraiserres.dll in Windows 11 Setup
- How to Install and Use Git on Windows 11


