Every file on your system has a file extension associated with it that lets Windows know the file’s type and the application that will be suitable to open it. However, they’re not enabled by default on Windows 11, which means your file names won’t show their extensions straight away. In this guide, we explore a few ways to show file extensions on Windows 11 and why it is a good idea to do so.
What are file extensions on Windows?
As stated earlier, file extensions highlight the type and the format of the file in which it was rendered. File extensions tend to be three or four letters long, such as PNG or DOCX, and make up the second part of a file name – the one that comes after the period.
For example, in the file “painting.jpg”, painting is the name of the file while jpg is its extension. This enables Windows to understand which application or set of applications will be ideal for opening the files.
Related: How to Change a File Type on Windows 11
6 ways to show file extensions on Windows 11
Let us explore all the different ways in which you can make file extensions visible on Windows 11.
The File Explorer on Windows has always afforded the convenience of hiding or showing file extensions with a few clicks. Here’s how to go about showing file extensions on Windows 11:
Press Win + E to open the File Explorer. Alternatively, click on it in the taskbar.

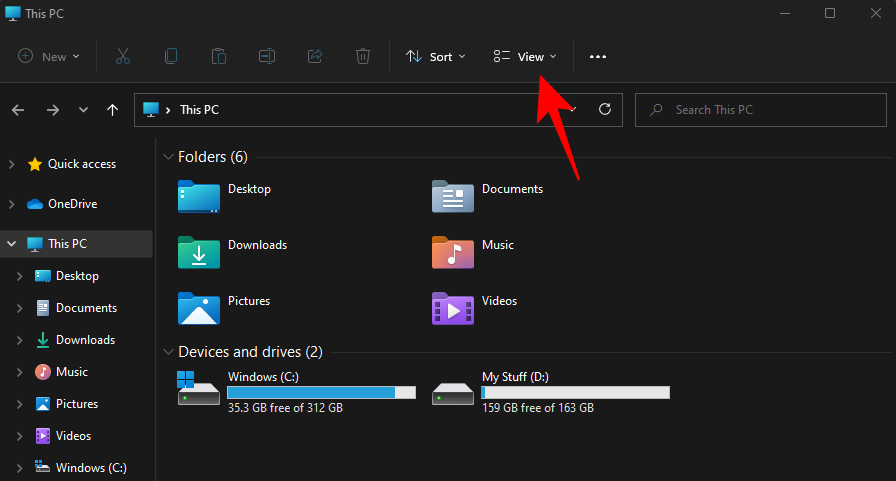
Now click on View in the toolbar above.
Then go to Show and then click on File name extensions so that there’s a tick next to it.
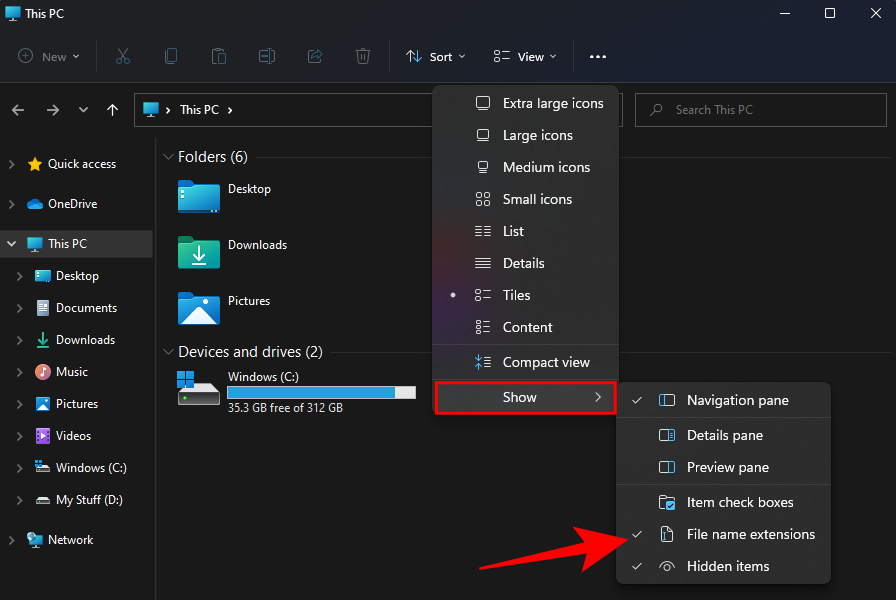
Once you do so, you will have enabled visibility for file extensions.
Method #02: Using File Explorer – Folder Options
The File Explorer lets you show file extensions from the ‘Folder Options’ option as well. Here’s how to go about it:
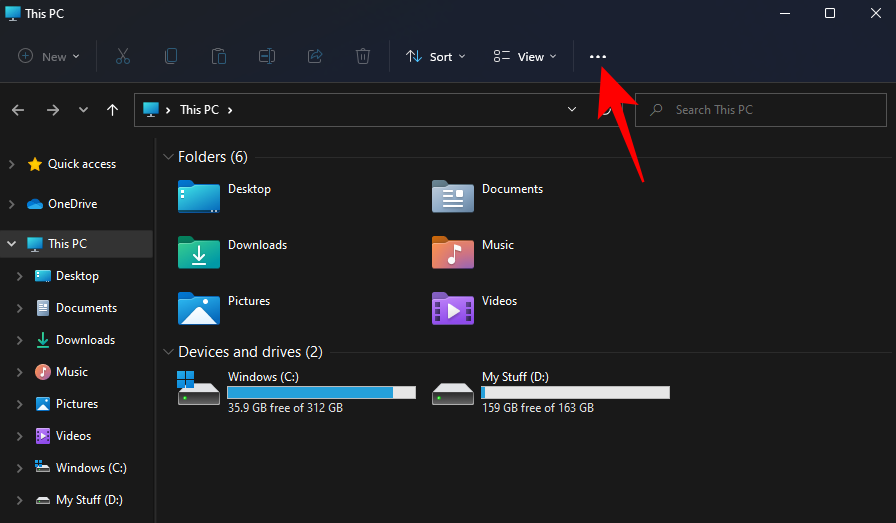
Open File Explorer by pressing Win + E. Then click on the three-dot icon at the top.
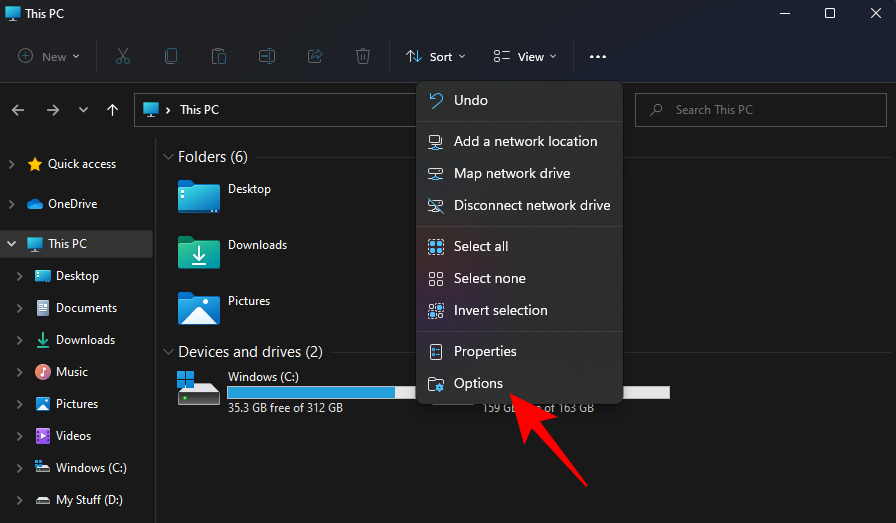
Choose Options.
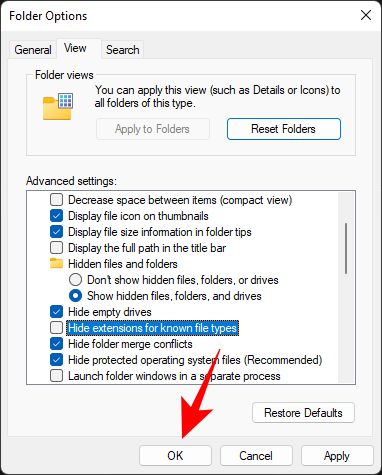
Click on the View tab to switch to it.
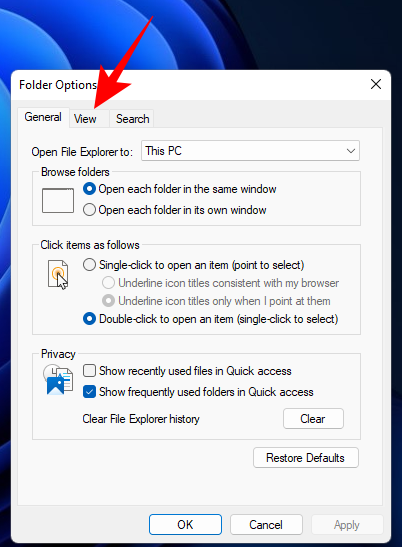
Now make sure the Hide extensions for known file types is unchecked. Then click on OK.
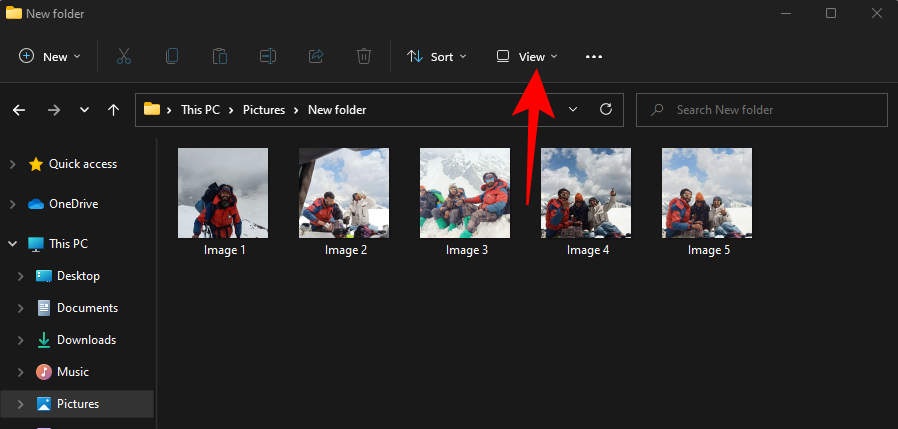
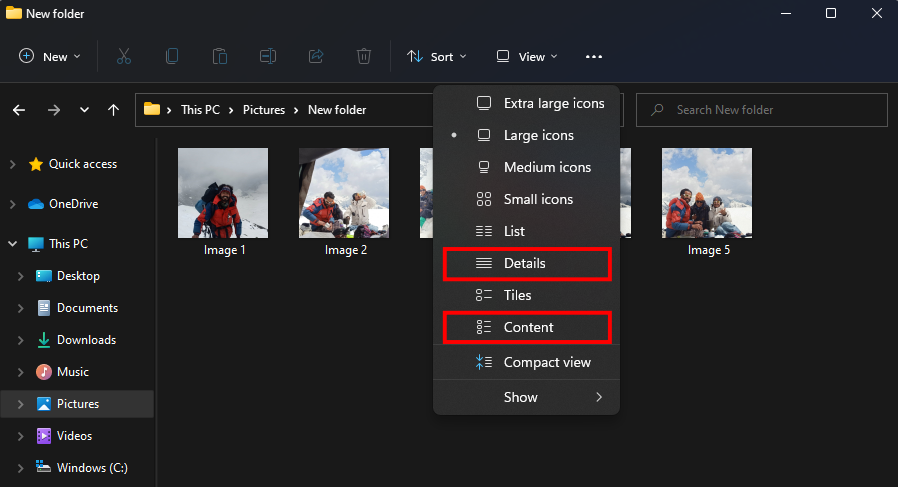
Another way to view the file extensions is to add the file ‘Type’ column in the File Explorer. This works only if you’ve set ‘View’ to either ‘Details’ or ‘Content’. Here’s how to go about the whole process:
Open File Explorer and navigate to a folder that contains a few files. Then click on View at the top.
Select either Details or Content. In our example, we’re choosing the former.
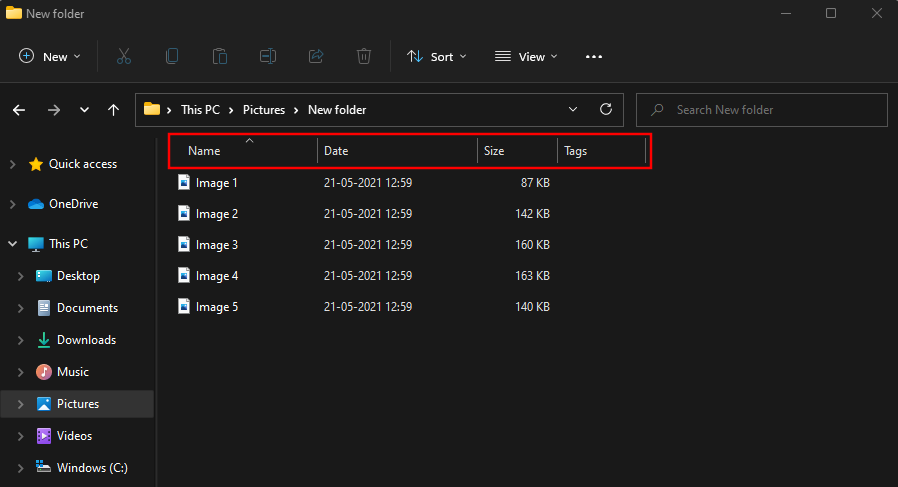
Doing so will display the details of the files. To add the ‘Type’ column, right-click on any of the columns towards the top of the files.
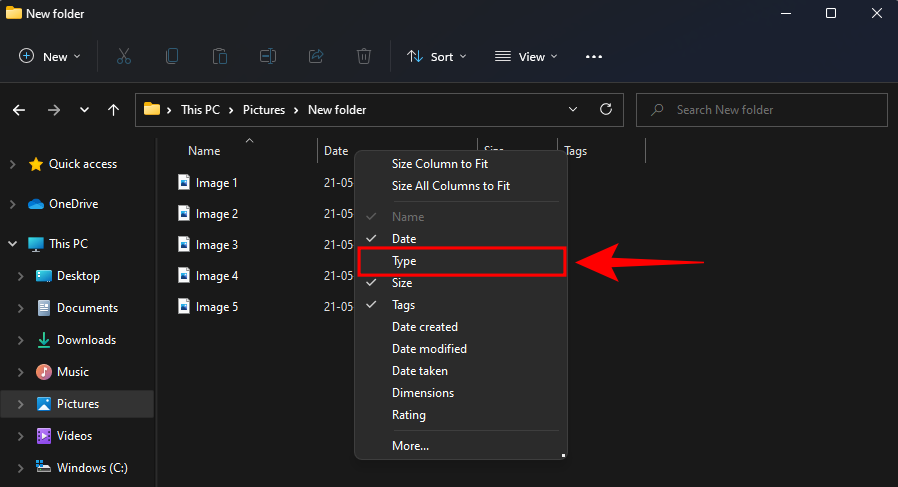
Then select Type.
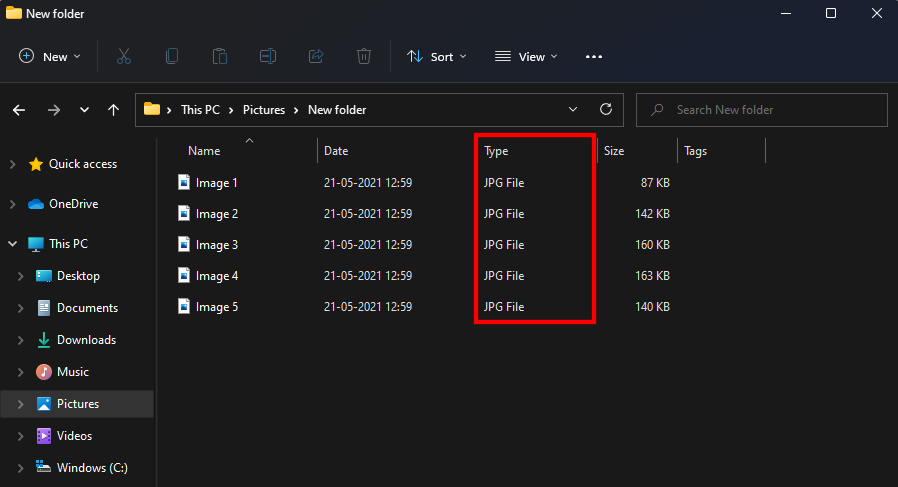
You will now see the ‘Type’ column appear, displaying the extensions of the files.
Method #04: Using Registry Editor
If the aforementioned methods don’t work on your system, you can also make use of the Registry Editor to show file extensions. Here’s how:
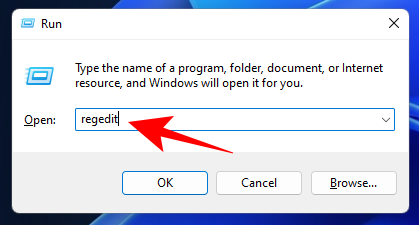
Press Win + R to open the RUN dialog box. Then type regedit and hit Enter.
Now navigate to the following address in the Registry Editor:
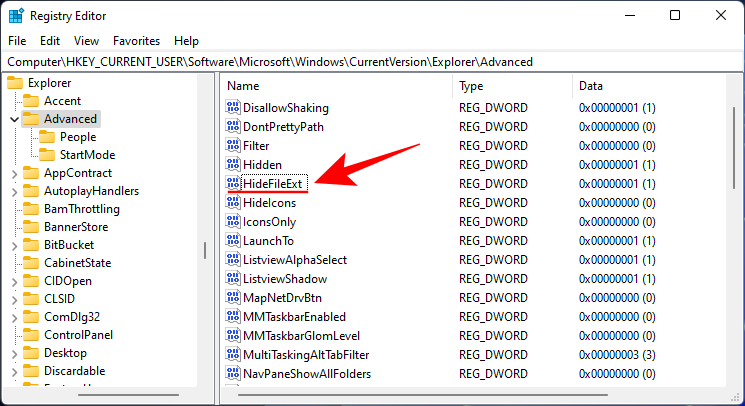
Computer\HKEY_CURRENT_USER\Software\Microsoft\Windows\CurrentVersion\Explorer\Advanced
Alternatively, simply copy the above and paste it into the Registry Editor’s address bar.

Then hit Enter. On the right, double-click on HideFileExt.
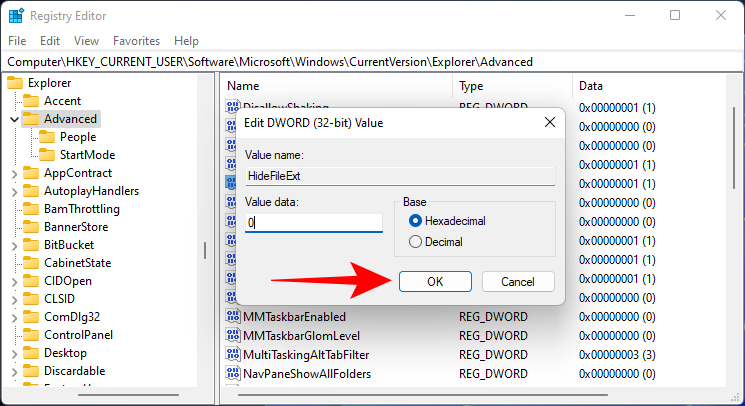
Change its value data from 1 to 0. Then click OK.
Restart Windows Explorer or your PC for the changes to take effect.
Method #5: Using Command Prompt
For those who like working on a Windows terminal like the Command Prompt, here’s how you can show file extensions with a simple command:
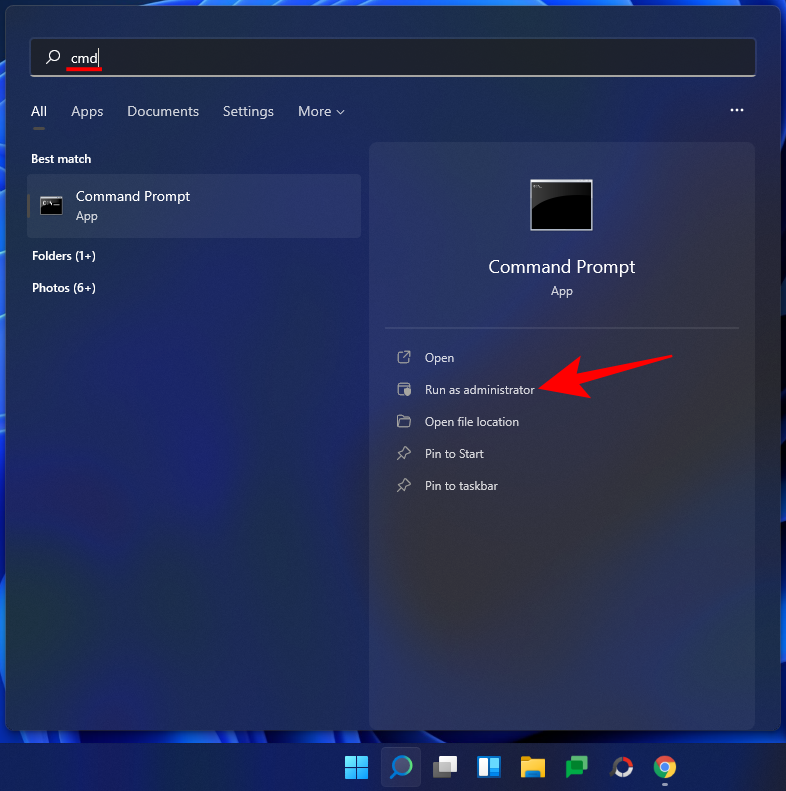
Firstly, press Start, type cmd, and click on Run as administrator.
reg add HKCU\Software\Microsoft\Windows\CurrentVersion\Explorer\Advanced /v HideFilesExt /t REG_DWORD /d 0 /f

Then press Enter. You should see the “operated completed successfully” message.

This means that the command is registered and your file extensions should now be visible.
Method #6: Using Batch Script
A batch file is another, rather simpler, way to show file extensions on Windows. Once created, this batch file can be used on any computer for the same purpose. Here’s how to create one and use it to make file extensions visible:
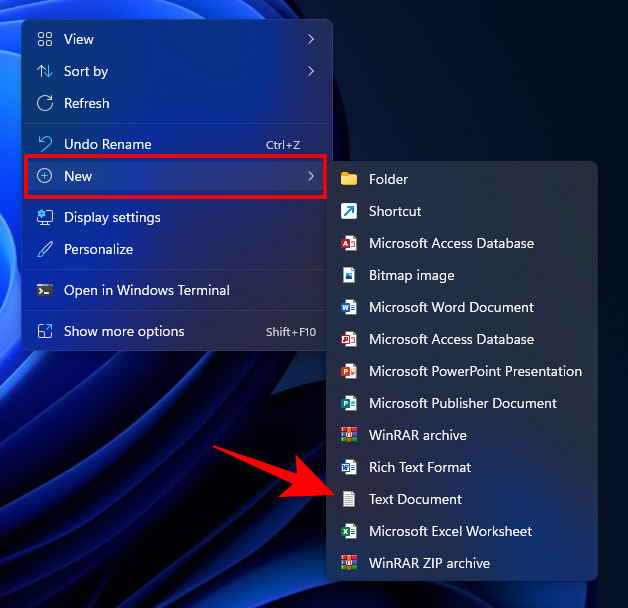
Right-click on the desktop and select New > Text document.
Open this Notepad file and type the following into it:
reg add HKCU\Software\Microsoft\Windows\CurrentVersion\Explorer\Advanced /v HideFileExt /t REG_DWORD /d 0 /f
Or simply copy the above and paste it into the Notepad file.
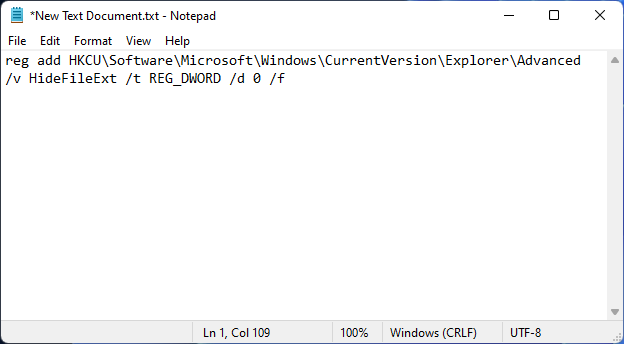
Then click on File.
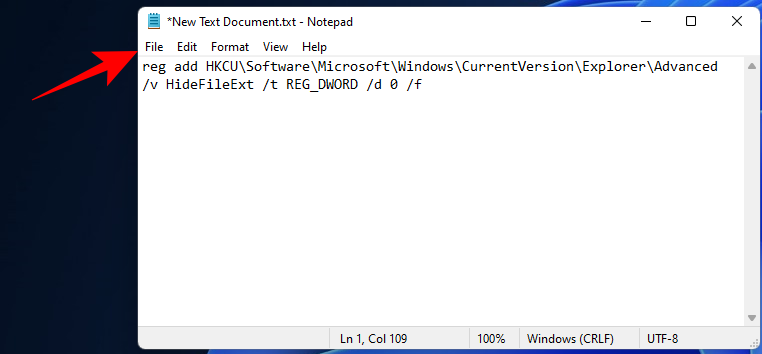
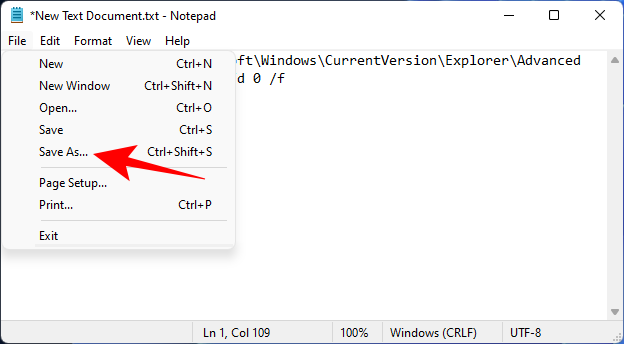
Click on Save as.
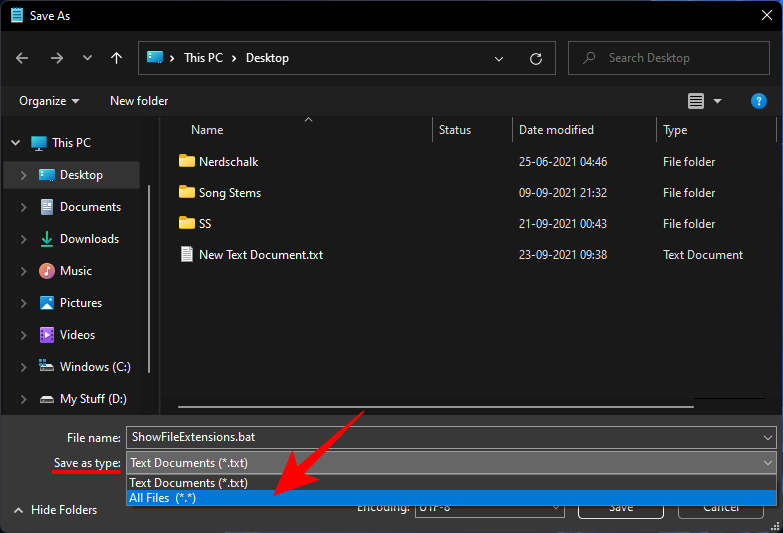
Give this file a name and make sure to add .bat at its end.
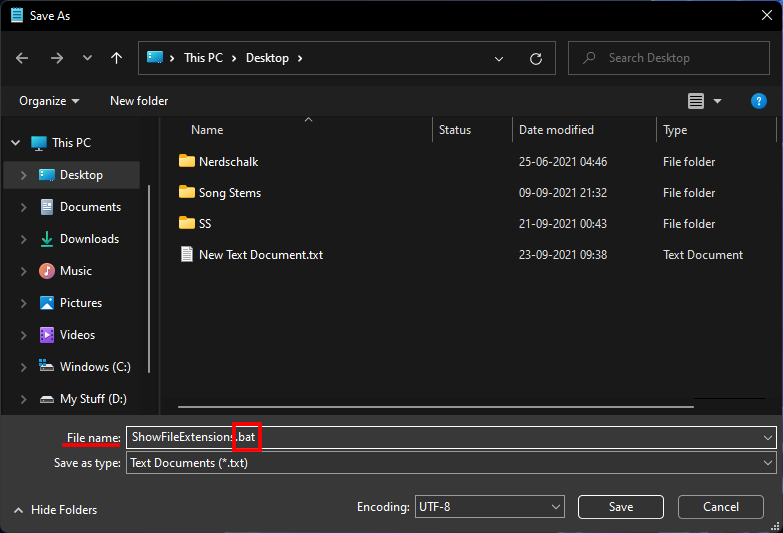
Then click on the drop-down menu next to “Save as type” and select All files.
Then click on Save.
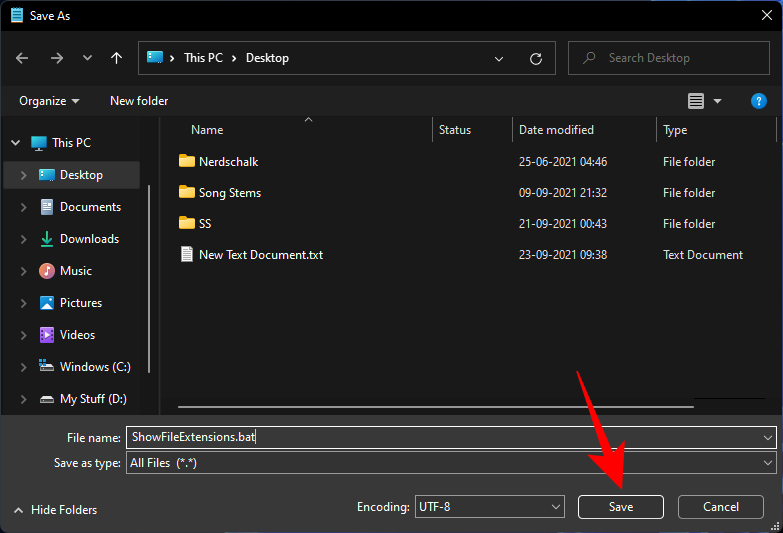
The batch file will now be saved. Double-click it to make file extensions visible.

Why should you keep file extensions visible?
Turning on file extensions visibility not only lets you know the type of a file, but also provides information that is important from a security point of view. When you download a file, having file extensions visible will ensure that you know the exact type and extension of the file being downloaded.
File names can also have multiple periods in them, and if you haven’t turned on file extension visibility, you may end up downloading a malware infected file. For instance, a file name called wallpaper.png may actually be wallpaper.png.exe. So, instead of a PNG file, you actually have an executable that can introduce malware to your system if you’re not careful.
Other than that, if you have file extensions visible, you can change a file’s type easily by changing the extension.
Frequently Asked Questions (FAQs)
Here we answer a few commonly asked questions concerning file extensions.
How do I change file extensions in Windows 11?
There are various ways to change file extensions in Windows 11. Refer to our guide How to Change a File Type on Windows 11: Basic and Advanced Ways to Do So! for the same.
How to hide file extensions in Windows 11?
Hiding file extensions is as easy as showing them. In our guide above, in Methods #1-3, simply select the box that says “Hide extensions for known files”. In Methods #4-6, change the value from 0 to 1. Everything else remains the same.
How to show hidden files in Windows 11?
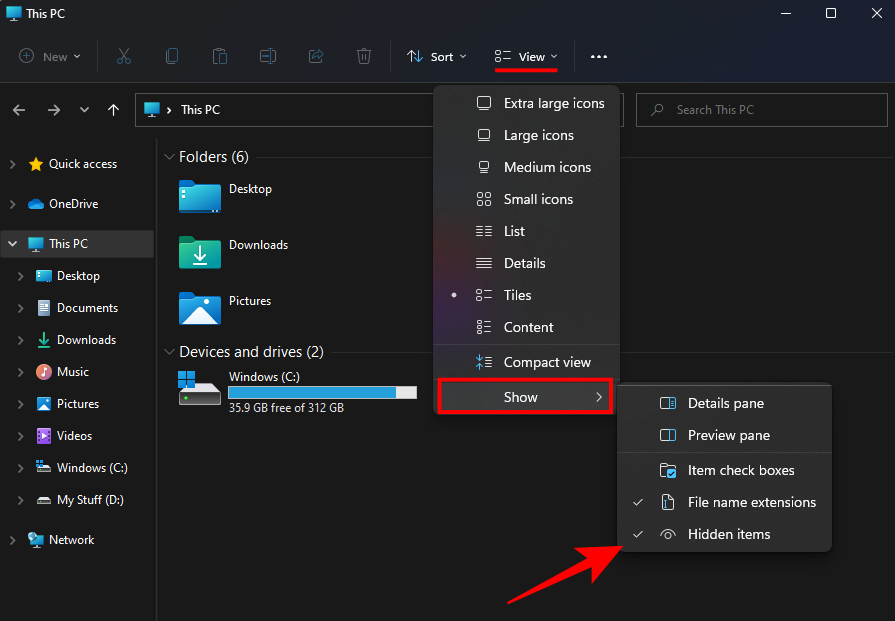
The simplest way to show hidden files is to do so from the File Explorer option. Press Win + E to open File Explorer. Click on View at the top, select Show, then click on Hidden items to make sure there’s a tick next to it.
Related: How to show large files on Windows 11
What are some common filename extensions in Windows?
There are tons of filename extensions that are recognized by Windows. Microsoft’s support page has a dedicated page that lists all the common filename extensions and their formats.
We hope you were able to show file extensions on your PC with the methods given above. Doing so comes in handy when you have to change file types and to know exactly the extension of the file that you’re accessing.
RELATED
- How To Set 7zip as Default on Windows 10 or 11
- How to Find Which File or Folder is Currently in Use on Windows 11
- Where Are Changes Stored on a Document Saved on Your Computer
- How to Find Duplicate Files in Windows 11
- How to Uninstall Apps on Windows 11: Everything You Need to Know
- How to Fix: “Is Not Recognized as an Internal or External Command, Operable Program or Batch File” error
- Windows 11 Shortcuts List
- How to Change the Default Browser on Windows 11 | Set Google Chrome as Default


