
What to know
- On PC, check Word’s autosave location:
C:\Users\(username)\AppData\Roaming\Microsoft\Word\ - Also, look for the unsaved Word files in
C:\Users\(username)\AppData\Local\Microsoft\Office\UnsavedFilesorC:\Users\(username)\AppData\Local\Temp - Look for files that end with .asd, .tmp, and .wbk.
- On a Mac, the files are saved at
~/Library/Containers/com.microsoft.Word/Data/Library/Preferences/AutoRecovery. - Refer to the guide below to learn how to recover them, change the frequency of auto-saves, and more!
The autosave function of Microsoft Word is a real lifesaver when it comes to recovering lost work. Word processors also create temporary files while the document is still open. But where are the files stored and how can you access them again? Here is everything you need to know about where your document changes are stored on your computer.
How to find Word’s AutoRecovery files saved on Windows
With the AutoSave option turned on Word automatically saves a version of your document that will stay available as long as you are working on it without saving.
These buffer document files can be found in different locations, depending on which version of Word you’re on. This is how to check where these files are.
Check Word’s Autosave Location
You can check for the autosave folder from inside Word itself.
- Open a Word document and click on File.

- Then Options at the bottom.

- In the side pane, choose Save. Then check the location given next to AutoRecover file location.
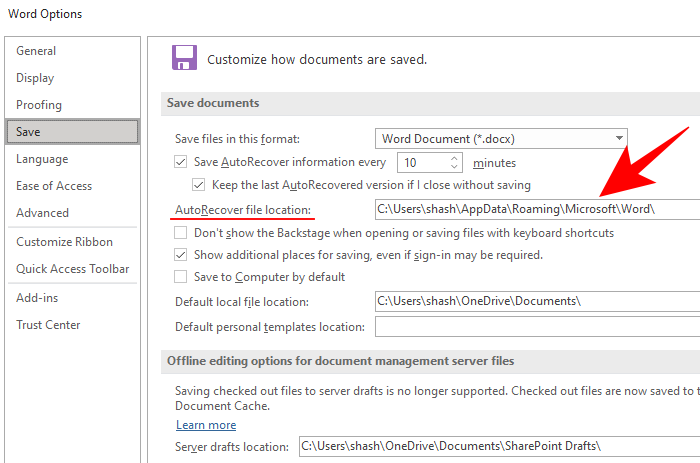
- By default, it is set to this:
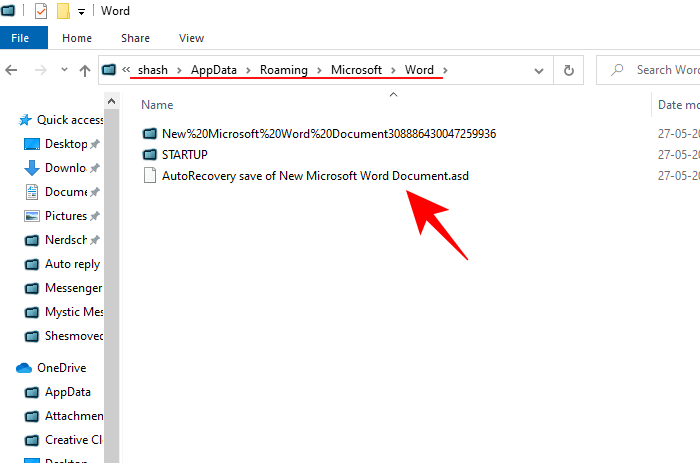
C:\Users\(username)\AppData\Roaming\Microsoft\Word\ - Simply navigate to this folder in File Explorer and find the Word autosave files. If you can’t get to the location because you can’t find the AppData folder, it is because it is a hidden folder and the view settings have to be tweaked to make it visible.
- To view hidden folders, click on View > Show > Hidden items.
- You should now be able to access the folder and the ‘autorecovery save’ file.
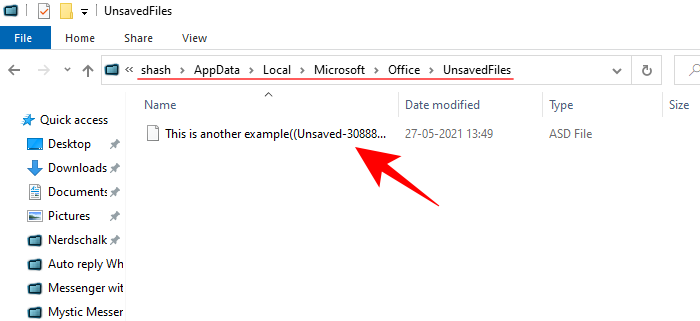
- Depending on your version of Word application, the files could also be located here:
C:\Users\(username)\AppData\Local\Microsoft\Office\UnsavedFiles
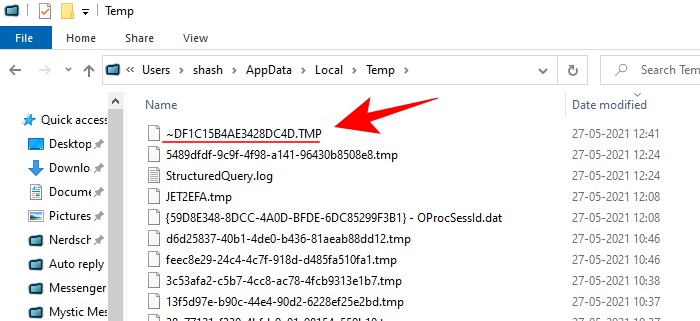
- If you don’t find the files here, there is one other place where temporary files of your unsaved document could be found – the TEMP folder, which is found in
C:\Users\(username)\AppData\Local\Temp.
Whenever a document is created, Word duplicates it and keeps its information stored in the Temp folder, which is not too far from Autorecover’s location.
Search for .asd, .temp, and .wbk files
There are a few different forms of temporary files that Word creates. Though there is a complete list of specific files that Word creates., the following are the ones that you should be on the hunt for:
- Temporary file for Autorecovery: ~wraxxxx.tmp
- AutoRecovery save: (docname).asd
Although not all .tmp files are related to Word, one can easily tell which ones are by the tilde sign (~) in front of them.
Also look out for files with the ‘.wbk’ extension, as these denote Word backup files. Simply searching for .asd and .wbk files in the File Explorer can also help you locate exactly where these files are.
Try looking for a copy of your document in the aforementioned folders and narrow down the search by ordering the file list by ‘Date Modified’. Then, look for files that match the date and time when you were last making changes to your document.
Recover Unsaved documents in Word
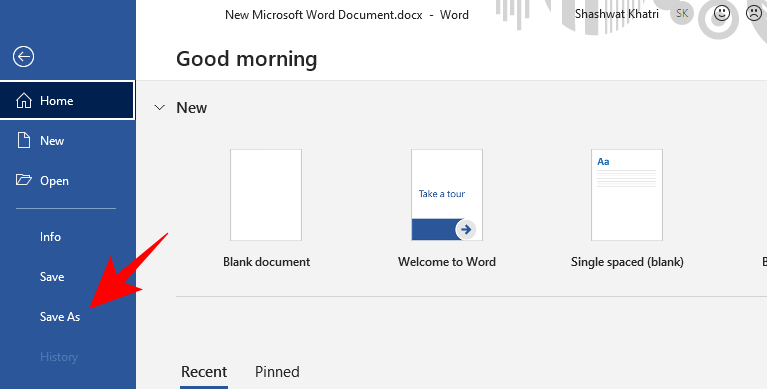
- Open MS Word and click on File.

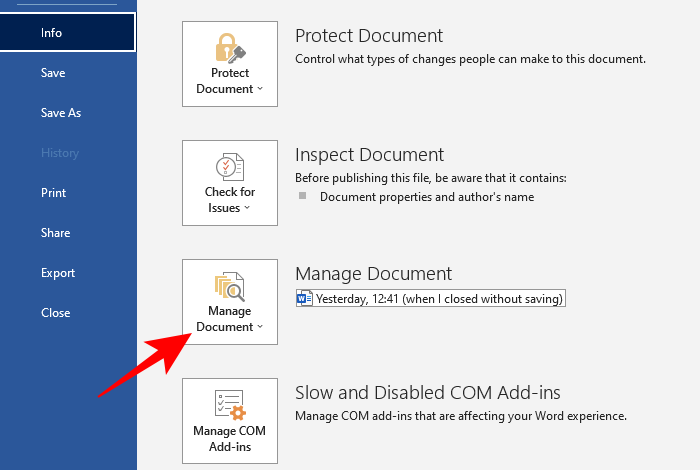
- Then Info.
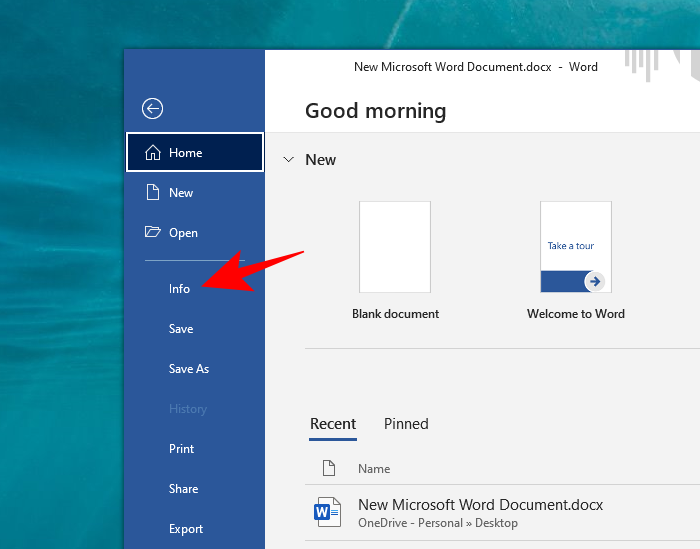
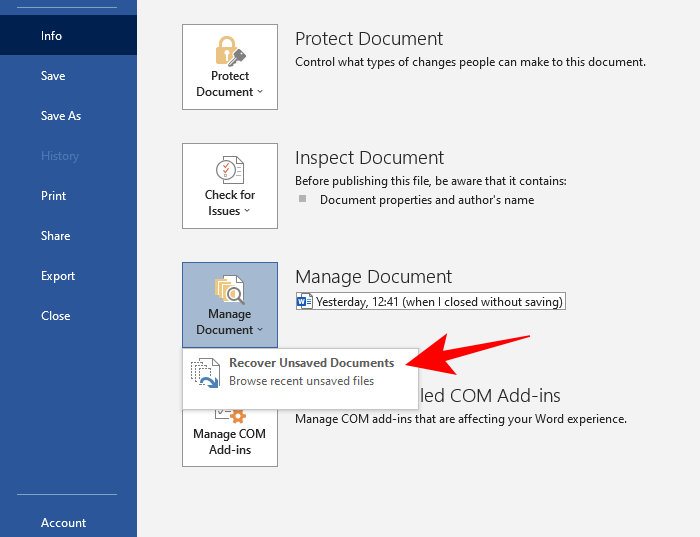
- Click on Manage document.
- Select Recover Unsaved documents.
- Then browse and open the file.
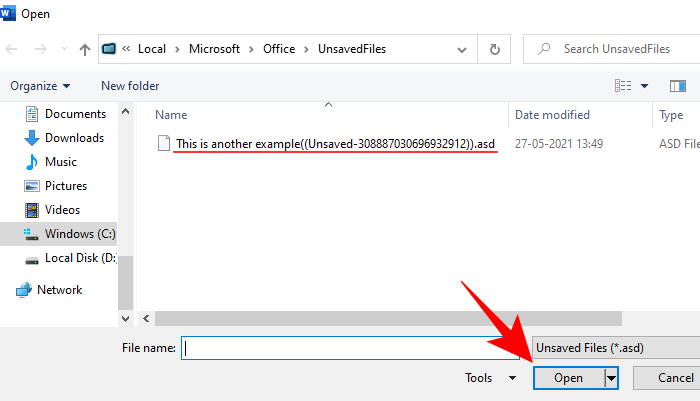
- Now go to File, click on Save as, and recover your work.
How to find MS Word’s Autorecovery files on macOS
Mac users can find out the location of their unsaved documents in a couple of ways. Let’s take a look at them one by one:
Find Autorecovery files
If you’re using Word, the Autosave feature – turned on by default – will frequently save the changes made to the document. The files are saved at the following location: ~/Library/Containers/com.microsoft.Word/Data/Library/Preferences/AutoRecovery
- To access the folder, click on “Go” on your Mac.
- Then “Go to Folder”.
- Then type in the file’s location as given above and click “Go”.
- The files in this folder will begin with the words ‘AutoRecovery save of…’.
Locate Unsaved Document in TEMP Folder
The temporary files created by the macOS are stored inside a TMP folder. The changes made to your document before the document was lost will be found here.
- To get to this TMP folder, click on Applications.
- Then Utilities.
- Then Terminal.
- Enter the following command and press Enter:
open $TMPDIR - The TMP folder will open up. Now, go into the “Temporaryitems” folder.
- Here, search for “~Word Work File”. These files will be in the .tmp extension and can be opened with TextEdit (Mac’s notepad).
Recover Unsaved documents in Word
- Go to the Auto recovery location:
~/Library/Containers/com.microsoft.Word/Data/Library/Preferences/AutoRecoveryand look for files that begin with “AutoRecovery save of”. - Sort the files by ‘Date modified’ and find the most recent file.
- Double-click the most recent file and open it in Word.
- Then save it with a new name so you don’t lose it.
Ensure that MS Word’s ‘Save AutoRecover information’ option is turned On
The Autosave function for document processors is a veritable boon to writers on both Windows and macOS. Although it is always on, you may still want to ensure that the settings are not turned off.
On Windows
- To check AutoRecover’s settings, open a Word file and click on File.
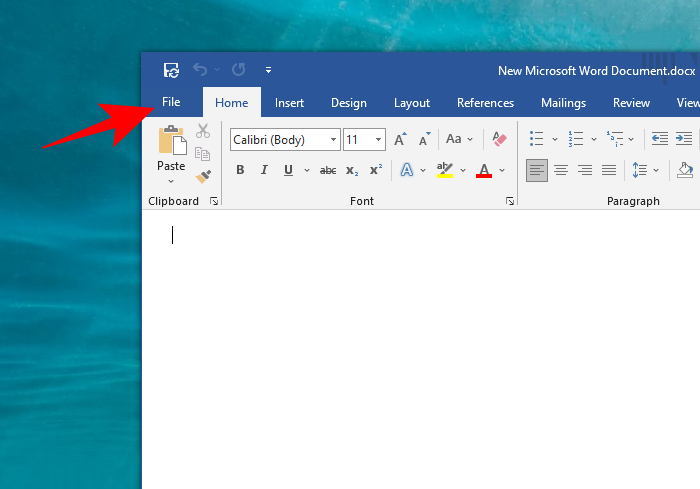
- Then click on Options at the bottom.

- Click on “Save” in the left panel. Then ensure that there is a checkmark placed before these two options: “Save AutoRecover information every” and “Keep the last AutoRecovered version if I close without saving“.
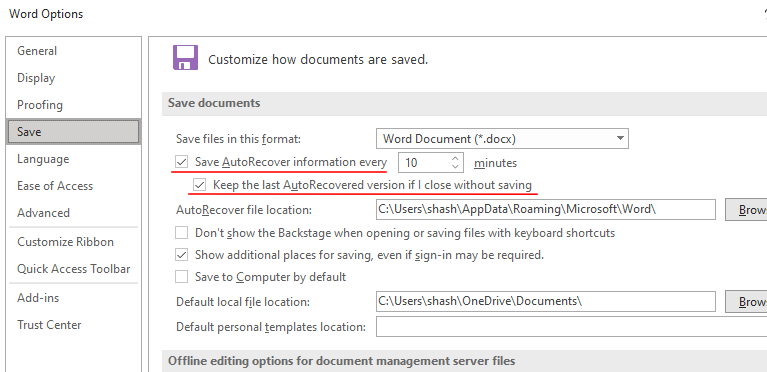
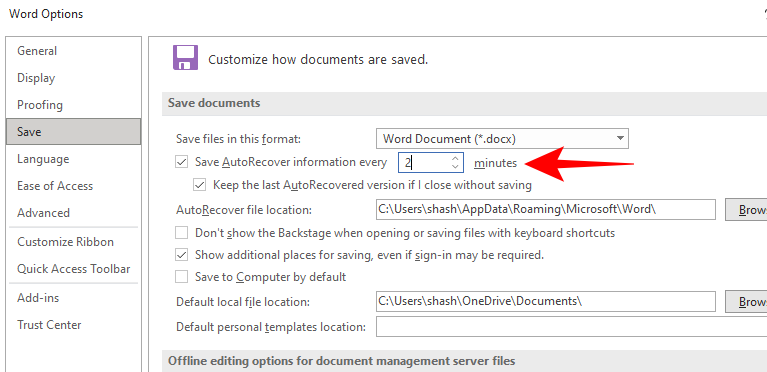
- With these on, Word will generate an Autorecovered file every 10 minutes. You can change this setting here by specifying the time next to the first option.
On macOS
On macOS, the option can be adjusted similarly.
- Open Word > Preferences > Save.
- Then ensure there’s a check next to Save Autorecover info.
- Underneath it, you can tweak how frequently a version of your document is saved.
- There are a few temporary directories created on macOS as well. Some are buried deep and are not meant to be interacted with in most cases, such as the following:
$TMPDIR/var/folders/5j/ngsq010s6s7f3qdrtb76ms140000gn/T/ - Many temporary files for Preview documents are stored in the above location. Temporary directories that are meant to be user-facing also exist, with the main temp folder found in the following location:
~/Library/Caches/TemporaryItems/
How does saving a document work?
As alluded to earlier, as soon as you create a document, its duplicated copy is created in the TEMP (or TMP) folder which regularly saves your work as long as the document is open. These temporary files can sometimes be deleted as soon as you close the document. However, these temporary files do act as a ‘safety net’ that keeps your documents protected in case file-saving encounters an error (or a crash).
The Temporary folder is stored locally on both platforms and one can read as well as write the files here. So, try not to modify files willy-nilly as this can impact files in your other apps and render them useless.
macOS does things similarly, in that it takes ‘snapshots’ of your document and creates and stores versions of it. Regardless of whether you’re using a Word or a Preview document, these temporary versions are saved every time you open a document or duplicate it.
We hope you were able to find where your unsaved documents end up on your computer. Most document processors, such as Word or Preview, allow you to easily revert to previous versions (or copies) of your document so your changes are not completely lost. For future work, keep the Ctrl+S (or Cmd+S) hotkey handy.