iOS 16 gets you numerous new features and improvements, including making it incredibly easy to copy an object or person from an image or even a video. With the new iOS 16 Photo Cutout feature, it takes away the hassle of spending hours isolating subjects from the background and reduces the process to a few simple taps.
Furthermore, you have various ways to use the Photo Cutout feature on a photo or video currently on your screen. Here’s how you can take advantage of the Photo Cutout feature in iOS 16 on your iPhone.
- iOS 16 Photo Cutout: How to use the new feature on your iPhone in 2 steps
- Step 1: 6 ways to create a Photo Cutout
- Step 2: 4 ways to paste your Photo Cutout and use it
- Why your Photo Cutout is getting a background? [Explained]
- How to use the Photo Cutout in unsupported apps and file types: Step-by-step guide
- iOS 16 Photo Cutout Supported devices and file types:
- What subjects can your iPhone take photo cutouts of?
- iOS 16 Photo Cutout: FAQs
iOS 16 Photo Cutout: How to use the new feature on your iPhone in 2 steps
You can use a Photo Cutout in various stock apps and third-party apps where you can access or add supported media files. Here’s how you can get started on your device.
Step 1: 6 ways to create a Photo Cutout
Here are the top 6 ways to use Photo cutout on your device. Use any of the six methods given below to take a cutout of a photo (or video) and then use it using any of the guides given in step 2 below. Yes, you have plenty of choices for both taking a Photo Cutout and then using it. And believe us or not, all the methods under both the steps are fairly simply. So, let’s give it a go!
Method 1: Using Photos
Open the Photos app and tap on the photo or video from where you wish to isolate and copy a cutout.


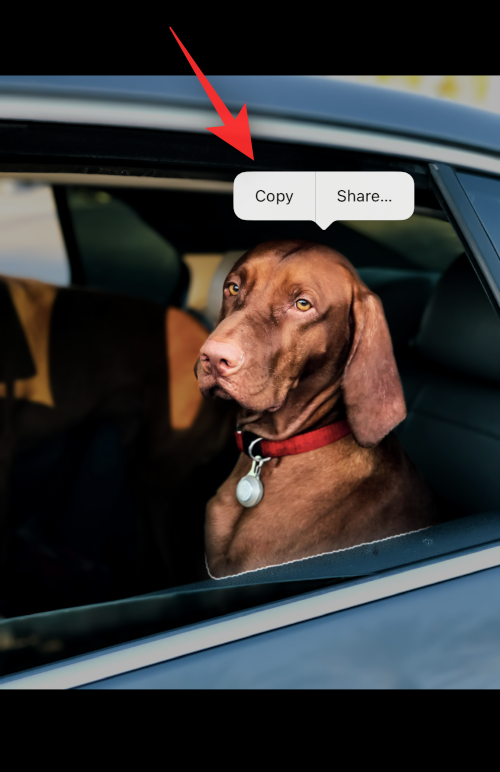
If you selected an image tap and hold on the subject.

If you selected a video, then first scrub and pause at the frame with your subject.

Now tap and hold on the same.

Select Copy from the context menu.


The cutout will now be added to your clipboard. You should now be able to use it in any compatible app on your iOS 16 device.
Related: Visual Look Up Not Working on iPhone? 7 Ways to Fix it
Method 2: Using the Files app (Remove background and create a new image)
Using this method you can create a new image with only the cutout and the background removed. Follow the steps below to help you along with the process.
Open the Files app and tap and hold on the image or video from where you wish to use Photo Cutout.

Select Quick Actions.

Tap Remove Background.

A new image will now be automatically created in the same location without the background.

You can now use this image in any app you like.
Related: How to Edit the Metadata for Multiple Photos on iPhone on iOS 16
Method 3: Using the Files app (copy the subject)
You can also choose to isolate and copy the subject to your clipboard for easy sharing using the Files app and Photo Cutout. Follow the steps below to help you use Photo cutout and copy a subject.
Open the Files app and find the image from where you wish to Photo Cutout. Tap on the image once found.

Tap and hold on the subject and a context menu should pop up.

Select Copy.
The isolated cutout will now be copied to your clipboard. You can now paste and use it in any compatible app.

And that’s how you can isolate photo cutouts using the Files app.
Method 4: Using Safari
Open Safari and navigate to the URL of the image from where you wish to copy your cutout.

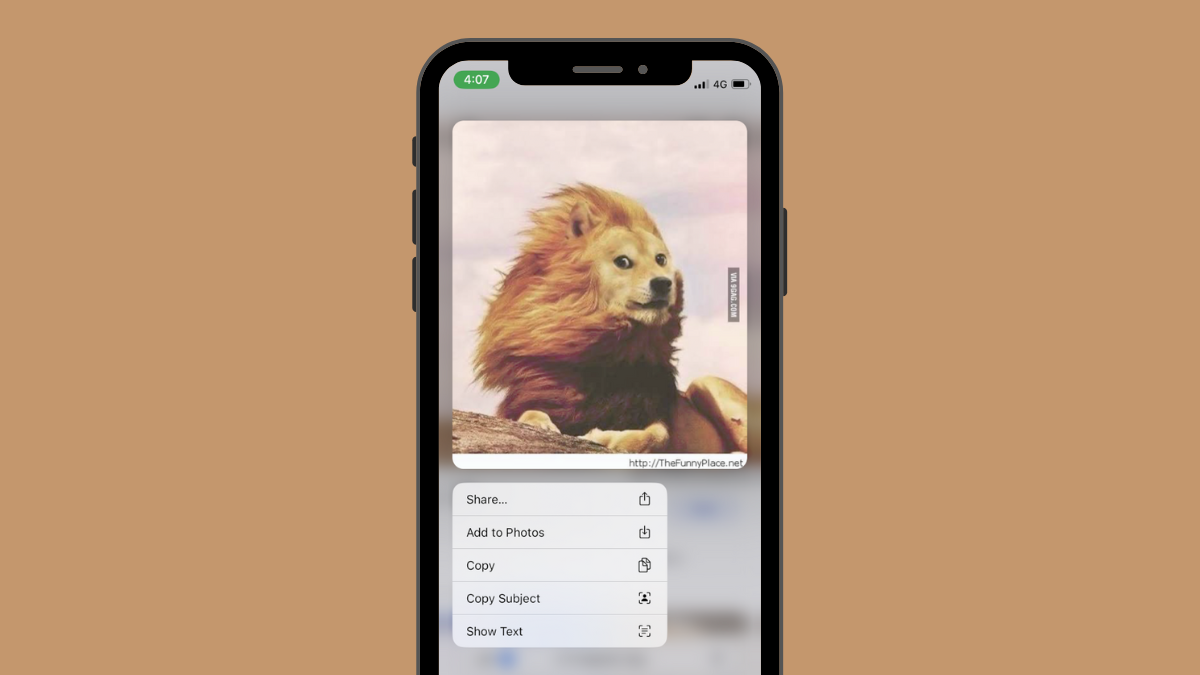
Once the image is open on your screen, tap and hold on the same. Select Copy Subject from the context menu.

Note: If this option is unavailable, open the image in full screen or in a different tab.
The selected cutout will now be copied to your clipboard and you can now paste and share it anywhere you like.

You can even paste the copied image into a photo or video editing app on iOS.
Method 5: Using the Notes app
Open the Notes app and navigate to the note containing the image or video from where you wish to copy a cutout. Tap and open the same.

If you selected an image, then tap on it again.

The background should turn black. Now tap and hold on your subject.

If you selected a video, then scrub to the frame with the subject that you wish to copy.
Tap and hold on the same.
Note: Visual Look Up seems to be facing intermittent bugs in the Notes app. If it fails to activate for you, then try switching to the landscape mode or try restarting the app.
A context menu will appear on your cutout. Select Copy from the same.
The cutout will now be copied to your clipboard. You can now paste and use the same in any compatible app on your device.

And that’s how you can photo cutouts using the Notes app.
Method 6: Using the Messages app
You can also use Photo Cutout from photos shared in the Messages app. Use the steps below to help you along with the process.
Open the Messages app and navigate to the conversation with the concerned image. Tap on the same in your conversation.

Now tap and hold on the subject you wish to copy.

Select Copy from the context menu.

The cutout will now be copied to your clipboard and you can now paste them into any compatible app.
Step 2: 4 ways to paste your Photo Cutout and use it
Now that you’ve copied your cutout, you can now paste it into the desired app you want. There are mainly three kinds of apps where this feature can be exceptionally useful. Let’s take a quick look at each one of them.
Method 1: Paste and use the cutout in Messages, messengers, and social media apps
You can paste the copied cutout into all social media platform apps and instant messengers to send and share the image with your loved ones. Here’s an example of copying and using the subject in the Messages app.
Note: Each platform will convert and compress the pasted image based on its requirements which might lead to unexpected outcomes in some cases.
Open the Messages app and navigate to the concerned conversation where you wish to share your copied cutout. Tap and hold on the text field and select Paste from the context menu.

The copied cutout will now be pasted in your message. Type in additional characters as needed and tap Send.

And that’s how you can text and share your cutouts with your loved ones.
Method 2: Paste and use the cutout in a photo and video editor app
You can also paste cutouts into other image editors, video editors, drawing apps, and more to create composites or just play around with your designs. Let’s take a look at Canva for this example and how you can use your cutouts in your design.
Open the Canva app and create a new design or open an existing one based on your preferences.

Now tap and hold on your base canvas.

Select Paste.

Tap Paste again to confirm your choice.

The copied cutout will now be uploaded as PNG to Canva and will be automatically added to your canvas.

You can add cutouts to your design in other apps using similar steps.
Method 3: Paste and use the cutout in your documents
You can also paste cutouts into your word documents, excel sheets, PDFs for reference purposes, and more. Let’s take a look at Google Docs for example and how you can easily add cutouts to better enhance your documents.
Open Docs and navigate to an existing or new document based on your preferences. Place your cursor where you wish to place your cutout.

Now tap and hold on your cursor and select Paste from the context menu and your image will be added to the document.

As long as your editor or word processor can render images, you can paste your cutouts in it.
Method 4: Drag and drop the cutout between apps
Another great way to add cutouts in compatible apps is by simply using the drag-and-drop feature. It has limitations when it comes to supported apps but is pretty useful where it works. Let’s take a look at how you can drag and drop cutouts between apps.
You need to open a compatible app, preferably an image to trigger the automatic copy for your Photo Cutout. Let’s take a look at the Photos app in this example. Tap and hold on your subject. Once the cutout is generated, keep holding down your finger and drag and move around your subject. Now switch apps using your other hand. Let go off the cutout once you’ve switched apps. The cutout will be automatically pasted in the desired space.

That’s how you can drag and drop cutouts between apps.
Why your Photo Cutout is getting a background? [Explained]
This happens in apps that apply compression to their photos and convert them to a different format. Taking Whatsapp as an example, the platform converts each photo to a JPEG to save on data and reduce response times. This, however, does not work well for cutouts as transparent backgrounds require the PNG file format. Thus when you share cutouts on platforms like Whatsapp, you get an automatic white or black background for your cutouts.
How to use the Photo Cutout in unsupported apps and file types: Step-by-step guide
Photo Cutout is a pretty cool feature however, it is currently only supported in limited apps which makes it difficult to extract subjects from unsupported apps and file types. Thankfully, Apple allows you to extract subjects from screenshots which means that we can use this to our advantage and extract subjects from virtually anything. Here’s how you can get started on your iOS device.
Open the unsupported app or file type from your iOS device from where you wish to copy your cutout. We will be using a GIF for this guide.

Find your subject and simply take a screenshot on your device. You can take a screenshot by pressing the Lock and Volume Up button on your device at the same time.

Now go to the Photos app and open the screenshot we just took.

Tap and hold on your cutout to isolate them.

Now tap Copy.

The cutout will now be copied to your Clipboard. You can now paste them into a compatible app and share them as needed.

And that’s how you can isolate subjects from unsupported apps and files.
iOS 16 Photo Cutout Supported devices and file types:
Visual Look Up and its subsequent feature Photo Cutout is fairly new, and here are a couple of things that you should keep in mind when using this feature.
1. iOS 16 Photo Cutout supported file types
The Photo Cutout feature can only be used with supported file types, these mainly include Photos, Live Photos, and videos. Only the Live Photos taken on your iPhone are supported by Photo Cutout and the same applies to the image file formats and video file formats, too. Here is a list of all the file formats supported by this feature.
- Images: TIFF, JPEG, GIF, PNG, DIB, ICO, CUR, and XBM.
- Videos: M4V, MP4, MOV, and AVI.
2. iOS 16 Photo Cutout unsupported file types
There are bound to be media file formats unsupported by Photo Cutout and here are some prominent ones that you should keep in mind.
- eBooks
- GIFs
- Image file formats unsupported by iOS
- Video file formats unsupported by iOS
3. iOS 16 Photo Cutout supported devices
In addition to the media file format requirements, you will also need an iOS device that is equipped with A12 Bionic or higher.
Photo Cutout uses deep machine learning and onboard AI to process your images. This requires significant hardware components currently only supported by A12 Bionic or higher chips.
The above means these phones are compatible with the Photo Cutout feature on iOS 16 update:
- iPhone XS and XS Max
iPhone XR - iPhone 11 series
- iPhone 12 series
- iPhone 13 series
- iPhone 14 series
- iPad Mini (5th generation) and newer
- iPad Air (3rd generation) and newer
- iPad (8th generation) and newer
- Apple TV 4K (2nd generation)
What subjects can your iPhone take photo cutouts of?
Apple has improved its image recognition algorithm significantly, and you can now isolate the following subjects from your photos apart from people.
- Insects
- Animals
- Birds
- Statues
iOS 16 Photo Cutout: FAQs
Here are a few commonly asked questions about Visual Look Up that should help answer some burning questions.
Are my media files shared with Apple when I use Photo Cutout?
There is very little information on this with only Apple’s Image Processing Privacy Policy to go off of, which implies that some of your data is indeed shared with Apple Servers but never used by the company.
On the other hand, hardware requirements for A12 Bionic and higher imply that image isolation and processing are done on-device with no data being shared to the cloud.
How good is the Photo Cutout feature in iOS 16?
The Photo Cutout feature works pretty well however, in our testing it seems to struggle in images with a lot of text or images using the Greyscale filters.
Can third-party apps on iPhone use photo cutouts?
For now, it seems that Apple hasn’t released an API or SDK for Visual Look Up to third-party developers. This leads many to believe that this feature currently will be unsupported by third-party apps.
We hope this post helped shed some light on the Photo Cutout feature in iOS 16 and how you can use it on your device. If you have any more questions, feel free to drop them in the comments below.
RELATED:


4 responses to “iOS 16 Photo Cutout: Top 6 Ways to Create a Cutout and 4 Ways to Paste and Use it”
Nice thorough article, thanks… Have you noticed that cutout images pasted into iMessage are HUGE in megabytes?
They near the top of my Settings > General > iphone storage > messages > review large attachments -list of biggest offenders just below videos.
How do i copy and paste on another picture?
That’s what I’m trying to figure out too
Difficult to try and find compatible third party apps where you can just drag and drop (or paste) the cutout onto. Wish some article or website had a list of the photo editor apps it works on so far. (I will try Canva mentioned above). I did find an automated Shortcut that allows you to overlay images without using any special apps which was cool. Other option is a simple app like Snapseed although need to learn the steps to overlay.