
What to know
- Windows Snipping Tool is a feature-rich screen capture and screenshot app.
- With Snipping Tool, you can grab screenshots in different modes, record your screen, and even add sounds from the microphone or the system while doing so.
- Its editing abilities are quite varied as it lets you annotate, highlight, crop, extract and redact text from screenshots, add shapes, and much more.
Snipping Tool is Windows’ native screenshot app. The tool allows you to capture your screen in various ways and comes bundled with Windows 11 out of the box. So if you regularly take screenshots, Snipping Tool is the perfect fit for you. You can capture regions, windows, custom areas, and even record your screen.
Like ShareX, which is our favorite software for capturing and annotating screenshots, you can also annotate the screenshots with Snipping Tool software. Here is a comprehensive guide to help you make the most of the Snipping Tool on your PC.
How to use the Snipping Tool in Windows 11
You can use the Snipping Tool to capture your screen or record it. Use the relevant section below, depending on your current requirements, to help you use the Snipping Tool to your advantage.
How to take screenshots using the Snipping Tool
You can take screenshots using either the keyboard shortcut or the dedicated option in the Snipping Tool app. Use the relevant section below to help you capture your screen using Snipping Tool, depending on your preferred method.
Method 1: Using the keyboard shortcut
You can use the Windows + Shift + S keyboard shortcut to activate the Snipping Tool. This will automatically trigger a new snip so you can immediately capture your screen. When using this keyboard shortcut, make sure to select the ‘Camera’ icon.
You get the following various ways of taking a screenshot at the top of your screen.
- Rectangular mode: You can click and drag to create rectangular regions to be captured on your screen when using this mode.
- Freeform mode: This mode will allow you to draw an area manually on your screen that you wish to be captured.
- Window mode: This mode will allow you to select a window open on your desktop that you wish to be captured.
- Full-screen mode: This mode will capture your entire screen.
- Click and select a mode you prefer.

- You can then click and drag on your screen to select the desired area you want to capture.

An exception here is the Full-screen mode. When you click its icon at the top, your entire screen will be automatically captured and saved on your PC. - By default, all screenshots are automatically saved to the following folder on your PC, where [USERNAME] is your current user account name:
C:\Users\[USERNAME]\Pictures\Screenshots
How to use Print Screen to open Snipping Tool
Snipping Tool also gives you the option to use the Print Screen key as well to trigger the tool. If you’re used to using Print Screen Key, then you can customize and set it as the preferred shortcut in the Snipping Tool. Here’s how you can change the keyboard shortcut used by the Snipping Tool.
- Open the Start menu and search for Snipping Tool. Click and launch the same from your search results.

- Now click the 3-dot (
) menu icon.

- Select Settings.

- Click Change in Windows settings beside Print Screen key shortcut at the top.

- Now scroll down on your right and turn on the toggle for Use the Print Screen button to open screen snipping.
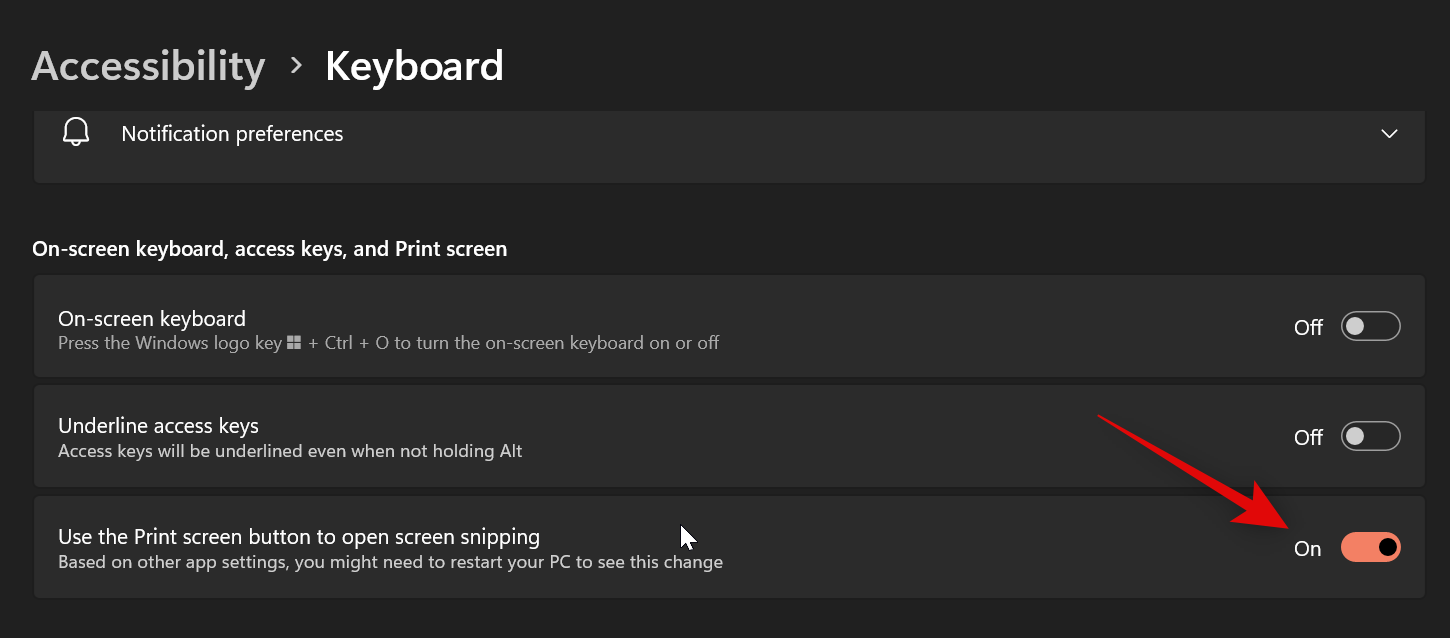
And that’s it! Every time you press the Print Screen key in the future, it will now open the Snipping Tool on your PC.
Related: Where Do Windows 11 Screenshots Go? [Windows 10, too]
Method 2: Using the Snipping Tool app
You can also capture your screen from the Snipping Tool app proper. This allows you to annotate and edit your screenshots directly in the app once captured. Here’s how you can capture your screen using the Snipping Tool app.
- Launch your Start menu, search for Snipping Tool and launch it from your search results.
- Now click New.

- Make sure to select the ‘Camera’ or ‘Snip’ icon, and then choose the preferred capture mode from the choices at the top of your screen.

- Now click and drag to capture your screen.
If you select Full-screen capture, then your screen will be captured as soon as you click the icon. - Once captured, the screenshot will be displayed in the Snipping Tool app for you to edit.
How to record your screen using Snipping Tool
You can also record your screen using the Snipping Tool. Follow the steps below to help you along with the process.
- Open the Snipping Tool using the Start menu search.
- Now click Record at the top.

- Click New.

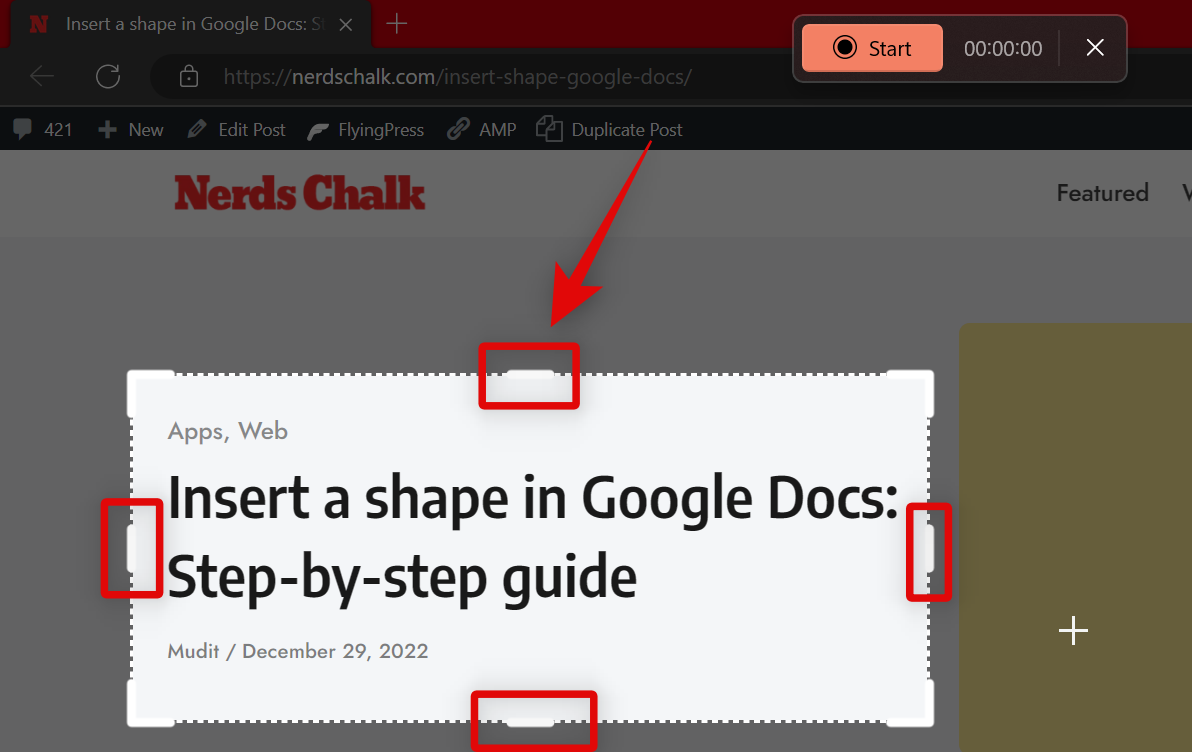
- Now click and drag on your screen and select the area you wish to record.

- You can adjust the area by dragging the marker on either edge of your selection.
- While recording, if you want to add narration or sounds from your microphone, click on the microphone icon and choose your input.

- You can also choose to add or remove ‘System sounds’.

- Once set, click Start at the top.

- Snipping Tool will now record the selected area after a delay of three seconds. You will be shown a countdown for the same in your selected area.
- Once you are done recording your screen, click the Stop icon at the top.
- You can also click the Bin icon to delete the recorded footage and start over again.
- Once you stop recording, it will automatically open in the Snipping Tool app. Switch to the app to view your recorded footage. You can now preview the footage using the Play icon.

- If everything seems up to mark, click the Save icon in the top right corner to save the recorded footage.

- You can also press Ctrl + S on your keyboard to save your recording. Select the desired location on your PC in the pop-up on your screen and click Save once done.

And that’s how you can record your screen using the Snipping Tool in Windows 11.
How to change the Snipping mode
There are two ways to change your snipping mode.
- You can change it when capturing your screen using the icons at the top, as shown below.
- You can also switch capture modes in the app. Click the drop-down menu for Snipping Mode.

- Select your preferred Snipping mode from the choices available to you.

- Now when you click New, your preferred Snipping Mode will be automatically selected.
The perk of selecting your preferred mode in the app is that it is preselected every time you capture your screen.
How to delay snipping in Snipping Tool
You can delay your captures using the Snipping Tool app. Unfortunately, you can’t configure delay when using the keyboard shortcut.
- Open the Snipping Tool app from your Start menu search.
- Now click the drop-down menu for Delay snip at the top.

- Select your preferred delay.

- You can now click New and capture your screen with the delay you selected.

Delaying your captures can help capture elements that are dismissed when you click or interact with your PC. And that’s how you can delay captures when using the Snipping Tool app.
How to annotate and edit screenshots using Snipping Tool
Snipping Tool provides several editing and annotation options. Here’s how:
Crop screenshots
- Once the screenshot is captured using the Snipping Tool, it will automatically be added to the canvas.
- Click on the Image Crop option to start cropping.

- Use the handlebars around the image to crop your image.

- Click on the tick mark at the top to confirm.

Annotate using a ballpoint pen and highlighter
- Click on the ‘Ballpoint pen’ option.

- Select the color and thickness of the pen.

- Then simply annotate as you like.

- If you wish to highlight certain sections, click on the ‘Highlighter’ icon.

- Choose the color and size of the highlighter.

- Then highlight the content of the image.

- Use the ‘Eraser’ in case you make any mistakes and need to correct them.

- You can also use Touch write if you have a compatible input peripheral.

Add shapes
This is one of the more recent features to arrive in the Snipping Tool. Here’s how to use it to add shapes, arrows, and lines to your image.
- Click on the ‘Shapes’ icon in the main toolbar.

- Choose from the available shapes – square, circle, line, or arrow.

- Draw the shape and resize, move, or adjust its placement to your liking.

- To fill in a circle or a rectangle, draw the shape and then click on Fill.

- Then choose a fill color.

- To change the outline color, click on Outline.

- Then choose a color.

- To change the thickness of the shape outline, click on Outline and then drag the slider to change the size.

- To delete a shape, simply use the Eraser option in the main toolbar and click on the added shape to remove it.
Extract or Redact text with ‘Text Actions’
Snipping Tool also lets you extract or redact text from screenshots that contain text. Here’s how:
- Click on the ‘Text Actions’ button in the main toolbar.

- This will highlight all the text in your screenshot.

- Click on Copy all text to copy all the text to the clipboard.

- Alternatively, if you want to copy a particular section of the text, highlight it, then right-click on it and select Copy text.

- On the other hand, if you want to redact and hide text, click on the ‘Text Actions’ option and choose Quick redact.

- Phone numbers and emails will be redacted.

- To change what elements are redacted, click on the down arrow next to ‘Quick redact’.

- And choose which elements you want to keep.

- You can also redact text in your screenshots by selecting it, right-clicking, and selecting Redact text.

- To delete all current redactions, select Remove all redactions from ‘Text Actions’.

How to customize Snipping Tool (Settings to know)
Snipping Tool allows you to customize various settings so you can control its behavior according to your liking and workflow. Here’s how you can do that on your PC.
- Open the Snipping Tool and click the 3-dot(
- Select Settings.
- You can now customize the following settings for the Snipping Tool. Turn each toggle on or off based on your preferences.
- Automatically copy changes: This option will automatically copy any edits you make to your captured screenshot in Snipping Tool directly to the screenshot copied to your clipboard. This allows you to make the edits and then automatically paste the screenshot wherever you like.
- Automatically save screenshots: This option will automatically save all your captures to the Screenshots folder in your Pictures library.
- Ask to save edited screenshots: This option will prompt you to save a captured screenshot or discard it each time you use the Snipping Tool.
- Multiple windows: This option will open multiple captures in separate windows so that you can edit them all later in a single go.
- Add a border to each screenshot: As the name suggests, enabling this option will add a border around each screenshot you capture using the Snipping Tool.
- Include microphone input by default when a screen recording starts – This will enable ‘microphone’ every time you record your screen.
- Include system audio by default when a screen recording starts – This will enable system sounds every time you record your screen.

Changes you make to Snipping Tool settings will be automatically applied to the app.
And that’s how you can customize Snipping Tool settings to better suit your workflow.
We hope this post helped you get familiar with and easily use Snipping Tool on your PC. If you face any issues or have any questions, feel free to drop them in the comments below.
RELATED


