
What to know
- Windows 11 lets you take screenshots using the Print Screen key, the Snipping Tool, as well as the Copilot app.
- Numerous third-party apps like ShareX can also be used for taking screenshots.
- The default screenshot folder for screenshots captured using the Snipping Tool is Pictures > Screenshots.
Windows has always offered a dedicated PrtSc key to capture your screen. But as Windows has progressed over the years, so have the ways in which you can take a screenshot. You now have the ability to use various ways to capture your screen be it the PrtSc key, the Snipping Tool, Copilot, or third-party software. Here are all the ways in which you can take screenshots on Windows 11.
Method 1: Using Print Screen (PrtSc) key
Print Screen key or PrtSc, as it says on your keyboard, is a long-standing dedicated physical key on Windows keyboards that allows you to capture your screen with a simple press of the key. Here’s all you need to know about the PrtSc key and how to take screenshots using it.
What happens when you press the PrtSc key?
Pressing the PrtSc key prompts Windows to capture your screen. Depending on the key combination used by you, you can capture the entire screen, your active window, or a portion of your screen. Use the guide below to easily take screenshots on your Windows 11 PC using the PrtSc key.
Take a full screenshot using the Print Screen key (PrtSc button)
If you wish to take a full screenshot of your entire display, then press the Windows + PrtSc keys on your keyboard simultaneously. This will capture your entire screen and the screenshot will be stored in the following location.
C:/Users/<username>/Pictures/Screenshots
Your screenshots will be automatically named and numbered and will be stored in PNG format.
Capture a portion of your screen using the PrtSc key.
If you wish to capture a portion of your screen using PrtSc, then press Windows + Shift + S on your keyboard.

You will now get a rectangular selection tool, which is part of the Snipping Tool (more on this later). Simply drag the cursor on your screen to capture the area. The screenshot will automatically be saved to the default location for screenshots as given earlier, that is: C:/Users/<username>/Pictures/Screenshots
Capture the active window to your clipboard with PrtSc
You can also capture the currently active window on your Windows 11 PC by pressing the Alt + PrtSc keys simultaneously. This will capture the currently active window and copy it to your Clipboard. You can then use an application like Paint to paste the copied screenshot and save it as an image (shown below). If you wish to upload to a cloud storage site or use it in an IM then simply paste the copied capture in the desired location and it will be automatically uploaded to the servers.
How to save captured Print Screen key screenshots in clipboard as PNG or JPEG
- Capture any active window or a portion of your screen as you normally would. Once captured, open Paint and press Ctrl + V on your keyboard to paste the capture

- Click on ‘File’ in the top left corner and select ‘Save as’.

- Browser to the location where you wish to save your capture. Now enter the desired name and click and select the desired file format from the drop-down menu below it.

- Once you have made your choice, click on ‘Save’.

- And that’s it! The capture will now be saved to the desired location in your chosen format.
Method 2: Use the snipping tool
In addition to the PrtSc key, Windows 11 also comes bundled with the Snipping Tool which has become its native screenshot app.
How to use the snipping tool
- Press ‘Windows + S’ on your keyboard and search for the ‘Snipping Tool’.

- Select the ‘Snip’ or the camera icon. Then choose from the available snipping mode options – Rectangle, Window, Full screen, Freeform.

- Then click on ‘New’.

- Click and drag your mouse on the screen to capture a portion of it depending on the tool selected by you.

- The screenshot will be added to the Snipping tool canvas and you can now edit and save it according to your preferences.
- You can use the following tools below to edit and highlight the screenshot in the Snipping Tool.

- Ballpoint Pen: Click and select ‘Pen’ to add annotations to your screen capture. You can click the drop-down arrow to select one of the default presets for the pen tool. You can also click on ‘Customize’ to change each aspect of the pen according to your liking.
- Highlighter: Click and select this tool to highlight important aspects of your screen capture.
- Eraser: Use this to remove annotations and shapes.
- Shapes: Use this to add shapes, fill color, change outline length and outline color.
- Crop: Use this option to crop your image.
- Text actions: Use ‘Text Actions‘ to extract text or redact text in screenshots.
- Paint: Edit the screenshot in the Paint app.
- Save: Click this icon to immediately save your current screen capture in the Snipping Tool.
- Copy: This option will help you copy your screen capture to your clipboard which can then be pasted in any compatible text field.
Method 3: Use Windows Copilot
Windows Copilot can also take screenshots. Here’s how:
- Press Win+C or click on the Copilot icon in the taskbar.
- Below the prompt box, click on the Add a screenshot option.

- Drag the cursor around the area that you want to capture.

- You can make further changes to the screenshot using the available options. To save it, simply click on the down arrow.

- And choose a location.

ShareX is a comprehensive screenshot app that allows you to capture various forms of content – images as well as GIFs – and the ability to directly upload to Imgur is always welcome if you share a lot of images regularly. Download and install ShareX on your system using the link below and follow one of the guides depending on your current requirements for screen capturing.
- ShareX | Download Link
Default ShareX Keyboard shortcuts
- Capture a specific area: Ctrl + Print Screen
- Capture entire screen: Print Screen
- Capture active window: Alt + Print Screen
- Start/Stop screen recording: Shift + Print Screen
- Start/Stop screen recording in GIF format: Ctrl + Shift + Print Screen
- You can create many more as you want
Note that ShareX will take over the shortcut keys from Windows. If you were copying screenshots to the clipboard as mentioned in Method 1 above, it wouldn’t work anymore. Unless, of course, you change the shortcut combination in ShareX hotkey settings and use different keys.
Take a screenshot and directly upload it to Imgur
- Launch ShareX on your system and click on ‘After Capture Tasks’ on your left.

- Now click and select ‘Upload Image to host’.

- Click on ‘Destinations’ on your left.

- Now highlight ‘Image Uploader’ and select ‘Imgur’.

- You can now capture your screen using ShareX and you should get a window confirming your upload. Click on ‘Yes’ to confirm your choice.

Once the upload is complete, you can access its shareable link by clicking on the notification you get or from the history section in ShareX.
How to screen record using ShareX
- Use the shortcut ‘Shift + PrtSc’ to start screen recording using ShareX on your PC. You will get a notification sound indicating that the screen recording has been started. Carry on with your work and record your screen as desired. ShareX will now open up and prompt you to install ‘FFmpeg on your device. Click on ‘Yes’ to proceed with the installation.

- Once the installation is complete, you will be able to screen record any active window by clicking and selecting it. Press the same key combination again to stop the current recording. Once the recording finishes, you will find it in the following directory:
Documents/ShareX/Screenshots/Date

How to screen record to a GIF using ShareX
MP4 is not an ideal video-sharing format in today’s day and age if you are looking to save data. Instead, you can opt for GIFs which can not only help you save data but also time. ShareX allows you to easily screen record any window on your screen and then automatically save it in GIF format. To start recording your screen as a GIF, press ‘Ctrl+Shift+PrtSc’ on your keyboard.

Click and select the window you wish to record and ShareX should automatically start recording. Press the same key combination on your keyboard to stop recording. You can also click on ‘Stop’ in the bottom left corner of the window to stop the recording.
How to screen copy text from screen using ShareX OCR feature
You can also use the OCR feature in ShareX to capture text from almost anywhere on the screen. This can be quite useful if you are looking to copy text from images, OS elements, or more. Sadly, by default, OCR does not have a dedicated hotkey and instead, you will need to use the taskbar icon to use it.
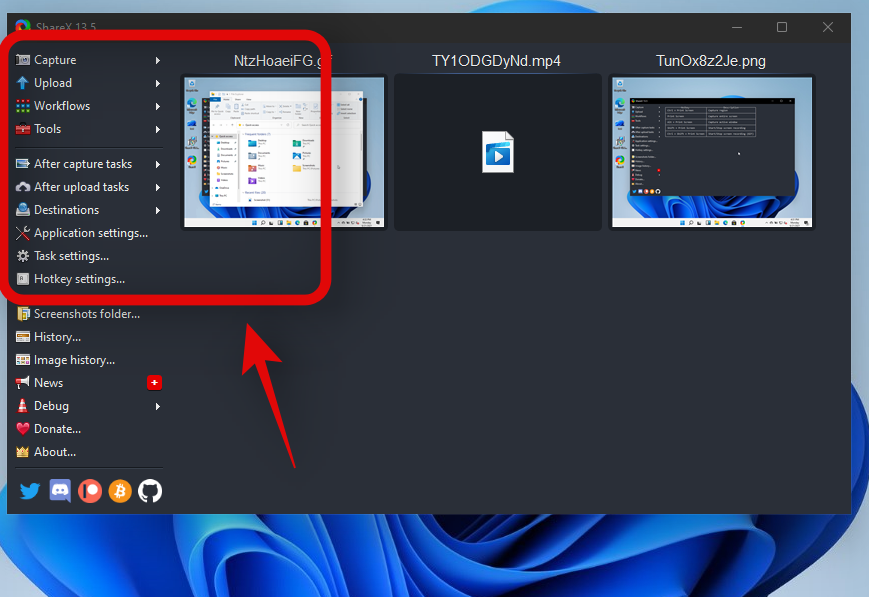
- Right-click the ShareX taskbar icon.

- Select ‘Capture’ and click on ‘Text Capture (OCR)’.

- Click and draw on an area where you wish to source the text.
- ShareX will now automatically identify the text in the selected area and present it to you in a text editor.
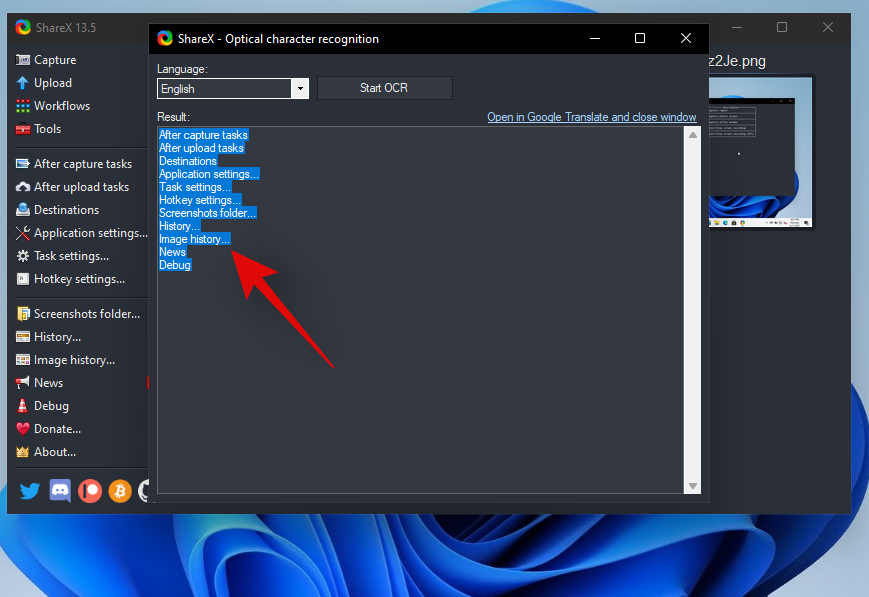
- This text can now be copied to your clipboard and can be pasted in any compatible text field.
How to capture the last region again using ShareX
You can easily capture your last region again in ShareX, The program gives you a dedicated option for the same. Follow the guide below to capture your last captured region using ShareX.
- Right-click on the ShareX icon in your taskbar.
- Select ‘Capture’ and click on ‘Last Region’.

And that’s it! Your last region will be automatically captured and stored in your default Screenshots folder location.
Windows 11 Screenshots: Tips to know
Here are some additional tips that may help you regarding taking screenshots on Windows 11.
Where is the PrtSc key
Well, this can be a bit tricky depending on the type of keyboard that you are using. You can use a section below relevant to your device to find the PrtSc key on your keyboard.
- Full-Sized Keyboards: It’s the easiest to find your PrtSc key on a full-sized keyboard. Look towards the top of your arrow keys near the ‘Delete’ key and you will find the PrtSC & SysRq key at the top beside the Scroll Lock key.
- Compact Keyboards: On most compact keyboard, you will find the PrtSC key located near your arrow keys at the bottom, usually wedged between your RAlt & RCtrl. If you do not find your PrtSc there, then it is likely wedged in the Fn key row or the Number key row.
- Laptops: This is the trickiest part. Each laptop has its own slightly different keyboard unless you opted for an industry-standard specifically. In most cases, you will find the PrtSc in the top right corner of your keyboard but if you do not, you will need to search the entire keyboard. In some cases, the PrtSc is clubbed with another key under a single keycap and you might be required to press the Fn key to activate it.
RELATED: How to Take a Screenshot on Windows 11 on 60 Keyboard
I can’t find the PrtSc key on my keyboard
Well, if you can’t find the PrtSc key on your keyboard then you will have to get in touch with your OEM. While it is highly unlikely that the key was omitted from your keyboard, there is a slight chance of this in case you opted for an extremely compact keyboard for your setup. In addition to this, many keyboards tend to club the PrtSC with another key so you might find it clubbed together with another key on your keyboard like scroll lock or more. Hence we recommend getting in touch with your OEM to find the PrtSc key on your specific model.
We hope this guide helped you learn about all the ways in which you can take a screenshot in Windows 11. If you face any issues or have any more questions for us, feel free to reach out to us using the comments section below.


