Whenever you connect to a network, Windows will autosave the passwords and other connection data so that you can log back into it again when it is within range. But what if you want to forget a Wi-Fi network?
Though it is not something that people generally do, you may end up in a situation where you have no other choice but to forget a network. Well, here’s everything you need to know about it and when you should be doing it.
How to forget Wi-Fi networks and network profiles [6 ways]
There are a few ways by which you can forget the Wi-Fi networks that your Windows PC saves. Let’s start with the simplest ones first and progress gradually to the more technical ones.
Related: How to Wipe a Hard Drive on Windows 11
Method 1: Forget a network within the range from Quick Settings
There is a conveniently placed network option in Quick Settings that lets you access all the Wi-Fi connections that are currently within range, and delete their profiles, provided you have connected to them earlier.
- Click on the Wi-Fi icon in the system tray (towards the right of the Taskbar).
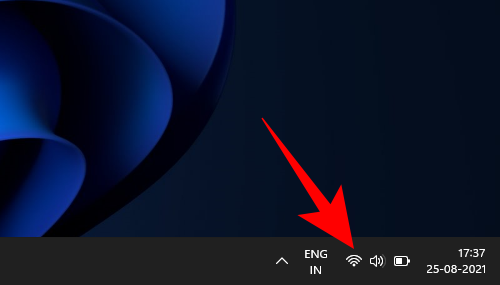
- Click on the arrow next to your Wi-Fi.

- Right-click on a Wi-Fi network that you’ve connected to before and select Forget.

You can even forget the network that you’re currently connected to. You can’t, however, forget networks that you’ve never connected to before as there is nothing there to forget.
Also, do note that the network will still be discovered by Windows and, when within range, will show up in the list of available networks so that you have the option to connect to it later if you want to.
Method 2: Forget a saved network from the Settings app
If you want to forget a network that is not within range presently, you can find that saved network from within the Settings app. Here’s how:
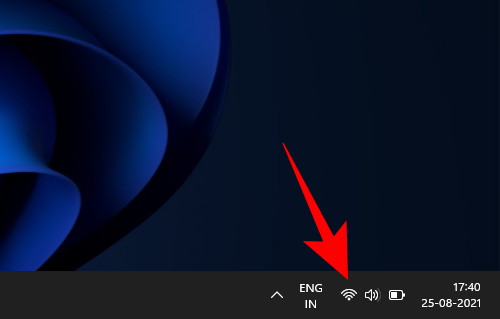
- Right-click on the Wi-Fi icon in the Action Center (right of the Taskbar).
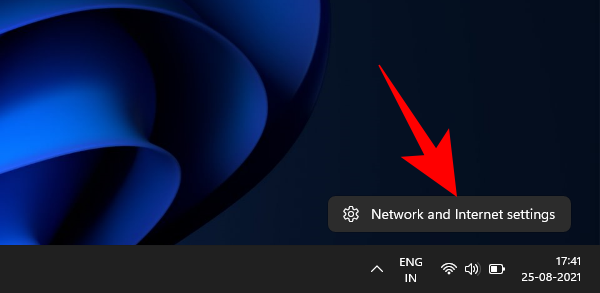
- Click on Network and Internet settings.
- Click on Wi-Fi.

- Click on Manage known networks.

- Here, you will find all the networks that you have connected to before. Click on Forget next to the one that you want to remove.

Related: How to Repair Windows 11 [15 Ways]
Method 3: Forget a network from Command Prompt
Using the command prompt is a surefire way of getting things done, and forgetting a network is a breeze. Here’s how to go about it.
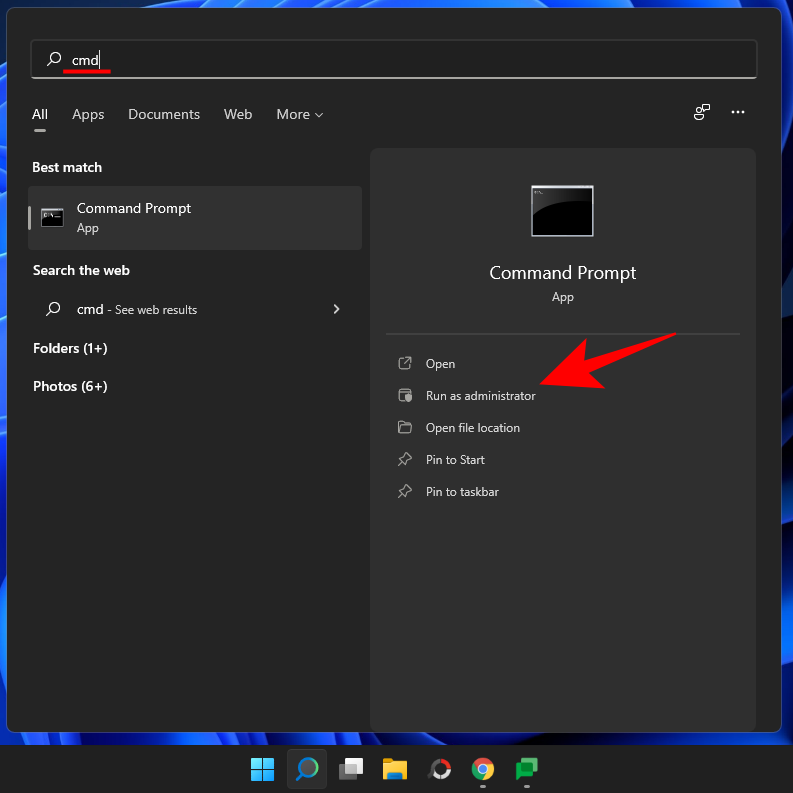
- Press Start, type cmd, and click on Run as administrator.
- Now, type the following command to get a list of all your saved Wi-Fi networks:
netsh wlan show profiles

- Press Enter. The Command Prompt will now list all saved network profiles.

- To forget one, type this command:
netsh wlan delete profile name='network name'
Make sure to change ‘network name’ to the actual name of the network that you want to forget. Then press Enter.

- You will get a confirmation message telling you that the network profile “is deleted from interface ‘Wi-Fi'”.

Method 4: Forget a network from PowerShell
The steps to forget a network for PowerShell are the same as on the Command Prompt.
- Press Start, type PowerShell, and click on Run as administrator.

- To get a list of all saved Wi-Fi profiles, type the following command: netsh wlan show profiles

- Then press Enter. Just as with the Command Prompt, you will get a list of Wi-Fi network profiles that you’ve connected to before.

- To delete a network, type this command:
netsh wlan delete profile name="network name"

As before, replace ‘network name’ with the actual name of the network that you want to delete. Then press Enter.
Related: How to Install Fonts on Windows 11
Method 5: Delete all known network profiles instantly from the Command Prompt
You can also delete all saved networks in one go. Here’s how:
- Open an elevated instance of the Command Prompt (from Start) and type the following command:
netsh wlan delete profile name=* i=*

- Press Enter to remove these networks. All the removed networks will be listed here.

Method 6: Remove network profiles from the Registry Editor
You can also delete saved networks from the registry editor. Follow the steps below to know how:
- Press
Win+Rto open the RUN box, type regedit, and press Enter.

- Then navigate to the following Registry address:
Computer\HKEY_LOCAL_MACHINE\SOFTWARE\Microsoft\Windows NT\CurrentVersion\NetworkList\Profiles

- On the left, under the Profiles folder, you will see a long list of subkeys with scrambled numbers and letters. Each one is linked to a specific Wi-Fi network profile.

- To find out the actual name of the Wi-Fi profile, select one and then look at the ‘ProfileName’ key on the right. The name will be shown under the ‘Data’ column.

- If it is a network profile that you want to delete, right-click on the subfolder in the left panel and select Delete.
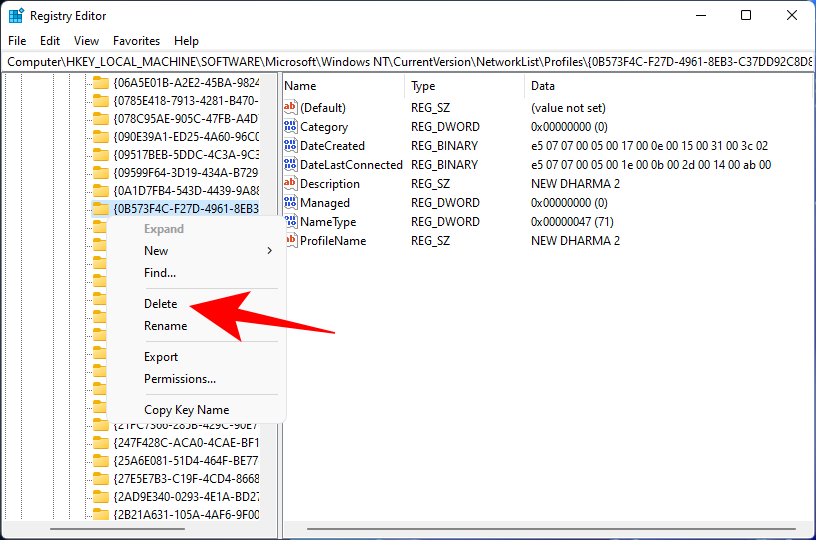
- Click Yes to confirm.
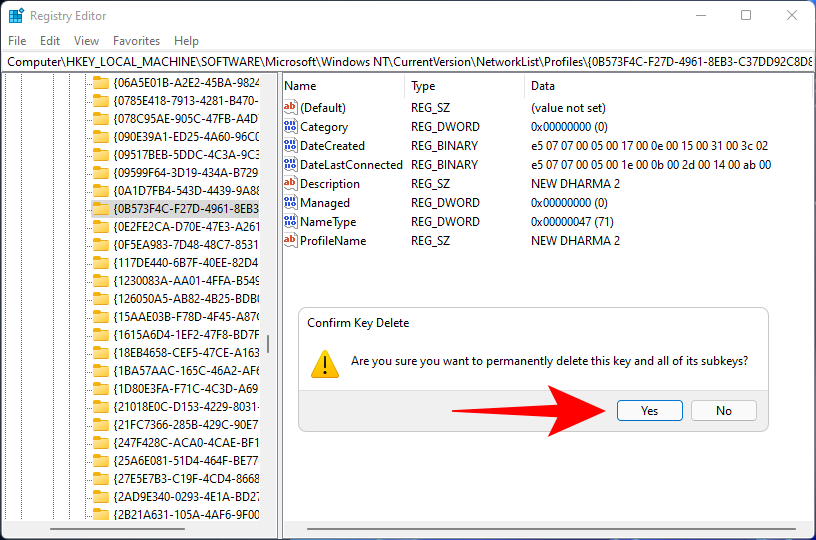
All the information about this wireless network will be forgotten.
Related: How to Stop Pop Ups on Windows 11
How to remove LAN or ethernet connection
Though it makes more sense to delete Wi-Fi network profiles, you may sometimes want to remove prior LAN or ethernet connections as well, if only to clear the clutter. Here’s how to do so:
- Right-click on the Start menu and select Device Manager.

- Once ‘Device Manager’ opens up, click on Network adapters to expand its branch.
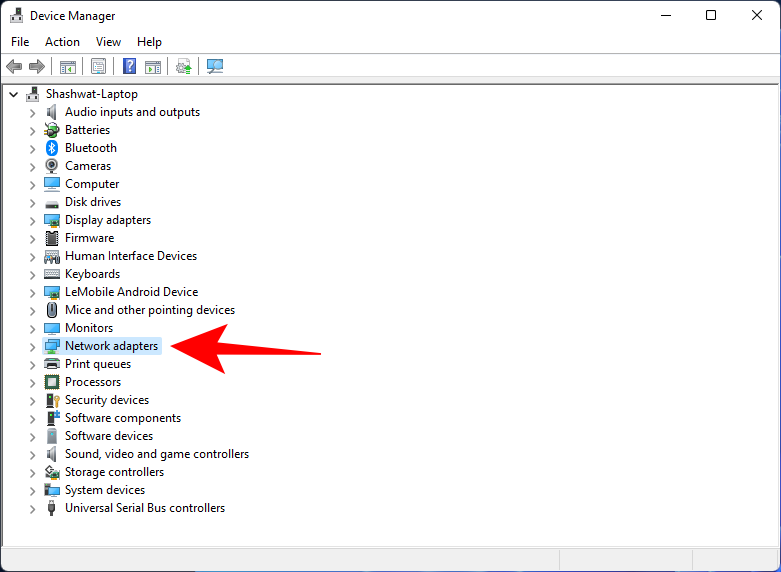
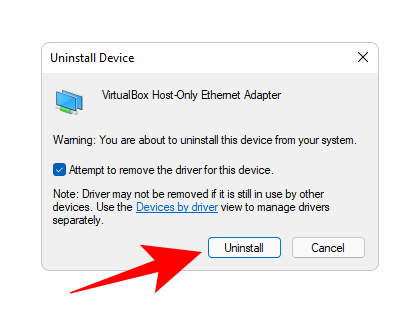
- Then find the LAN connection that you want removed, right-click on it and select Uninstall Device (confirm).

- When prompted, place a check next to Attempt to remove this driver for this device, and click Uninstall.
How to reconnect to a forgotten network
Deleting or forgetting a network profile doesn’t mean that it won’t be discovered by Windows again. It only deletes its password and other connection data saved on your computer. So, if you want to reconnect, just connect to it as you would to any other network for the first time. The fastest way is through the Action Center.
- Click on the Wi-Fi icon in the taskbar.

- Click on the arrow next to the Wi-Fi icon.

- Select your Wi-Fi connection and click on Connect.
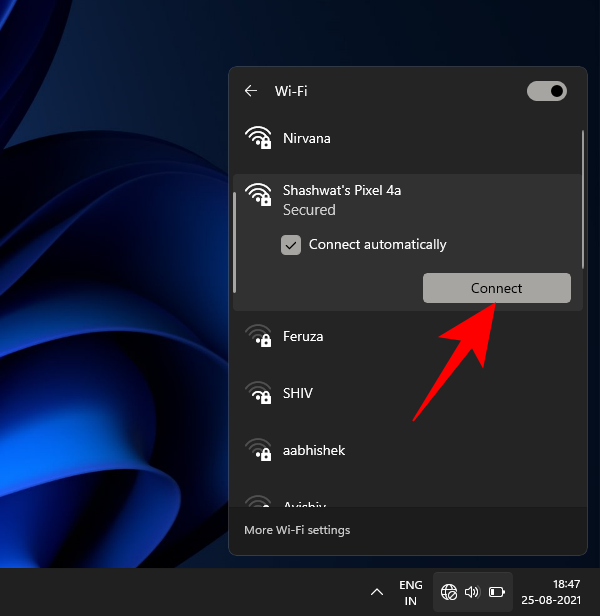
- Enter your password and click Connect.

And that’s it. Your network is reconnected and the data is saved again.
What happens when you forget or remove a network
When you forget or delete a network, its password and connection data are deleted. Windows also won’t automatically connect to the network when it is within range. You will still be able to connect to it if you want to, but you’ll have to do so manually, not least because you’ll have to type in the password again.
Why should you forget a network on Windows 11
There are a number of scenarios where forgetting a saved network is the prudent thing to do. For instance, if Windows keeps connecting to the same network every time it is within range, forgetting the network will keep it from doing and you’ll be free to choose which network you actually want to connect to.
Another instance when you may want to forget a network is if you’re letting someone else borrow your device for a while but don’t want them accessing your wireless network. Unless you’ve given them the password, they won’t be able to connect to the network.
Forgetting a network that you used before is also a good security measure to prevent hackers and malware from accessing your network information.
Frequently Asked Questions (FAQs)
Here we answer the commonly asked queries related to forgetting saved network profiles.
How do I find the password of a saved network profile?
Because Windows is saving the passwords for us, many of us tend to forget them over time. So if you’re wary of forgetting a profile because you are worried you won’t be able to connect again, here’s how to find your Wi-Fi network password on Windows 11:
- Press
Win+Rto open the RUN window, type control panel, and hit Enter.

- Click on Network and Internet.
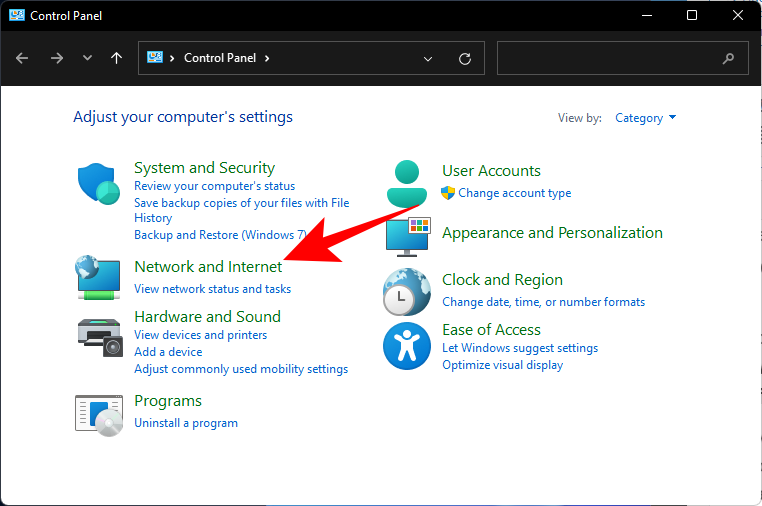
- Then click on Network and Sharing Center.

- On the left, click on Change adapter settings.

- Double-click on your network.
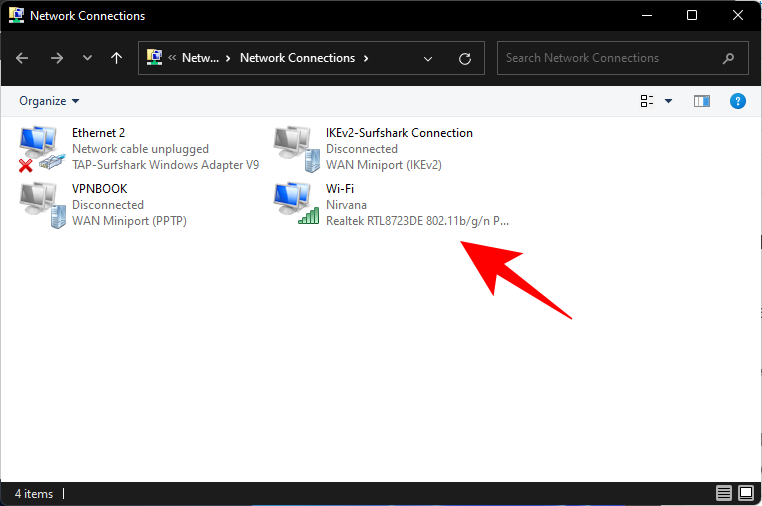
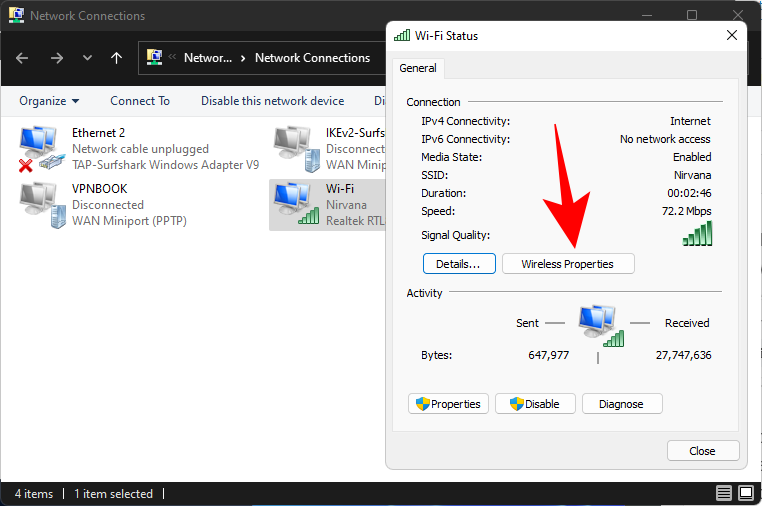
- Click on Wireless Properties.
- Switch over to the ‘Security’ tab.
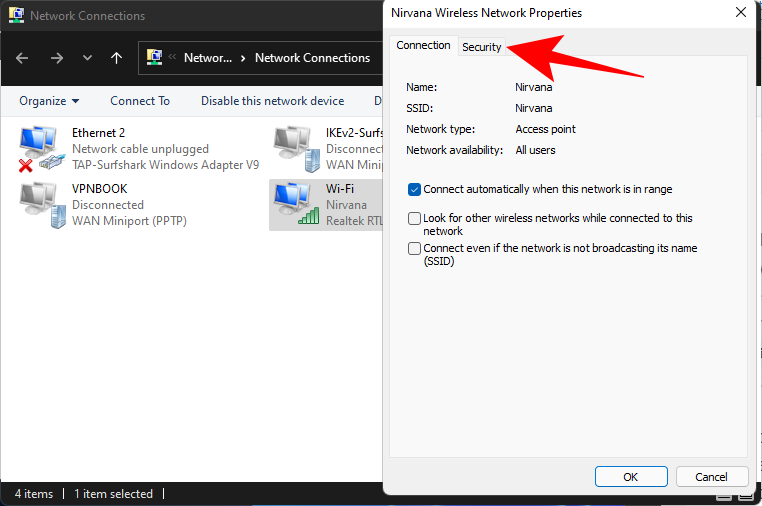
- Here, check Show characters to reveal the password above.
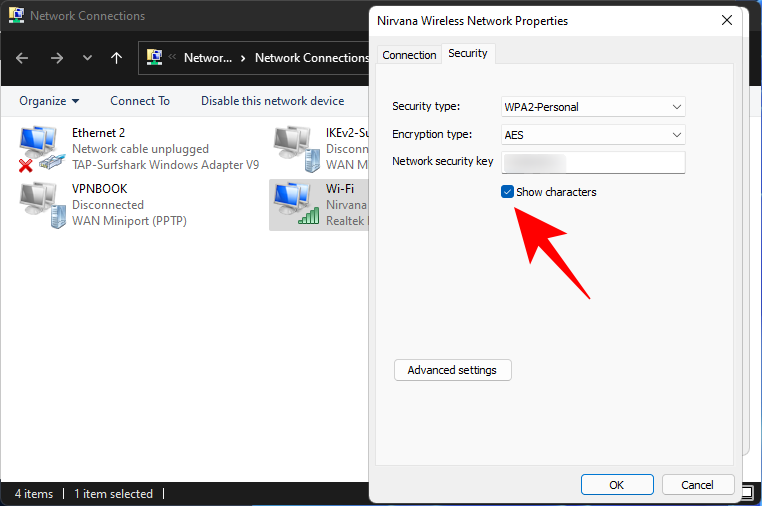
Note down the password and save it somewhere so you can reconnect to the network later if you want.
How do I completely forget a network in Windows?
All the methods mentioned in this guide help forget a network in its entirety. But if you really want to make sure of it, you can count on the methods involving Windows terminals like CMD or PowerShell, or deleting it from the registry (Methods 3-6).
Being able to forget network profiles is a handy little know-how that gives you more control over your Wi-Fi settings and how you want it to behave. We hope the methods shown in this guide helped you achieve it.
RELATED
- How to Uninstall Apps on Windows 11: Everything You Need to Know
- Windows 11 Shortcuts: Our Complete List
- How to Find Product Key on Windows 11
- How to Use Focus Assist on Windows 11
- How to Fix 100% Disk Usage issue on Windows 10 or 11 [18 Ways]

