
Zipping files has been a long-standing tradition with leftover data that many Windows users are familiar with. It helps you free up space, archive files, and most importantly transfer data easily without the risk for corruption. Windows 11 brings some noticeable changes to the UI, but this also makes it difficult to find your older options and features.
If you are having trouble zipping files on Windows 11 then you can use our comprehensive guide below. Let’s get started.
Related: How to Unzip Files on Windows 11
How to ZIP files on Windows 11
You can ZIP files in tons of ways in Windows 11. You can either use the in-built native tool in Windows or opt for a third-party one based on your preferences. We recommend you try the native tool if you are just looking to compress a few files. However, if you are looking to create multiple archives, then we recommend you use a third-party utility for more robust compression. Follow one of the guides below depending on your current requirements.
Method #01: Using Windows Explorer
Windows’s native compression tool is now more ingrained in the new Windows 11 UI with dedicated options available in the new File Explorer ribbon. You can use one of the guides below depending on the number of files you wish to compress.
Zip a single file using Windows Explorer (3 Ways)
Option #1: Using ‘New’ menu
Navigate to the concerned file and click and select it.

Now click on ‘New’ and select ‘Compressed (zipped) Folder’.

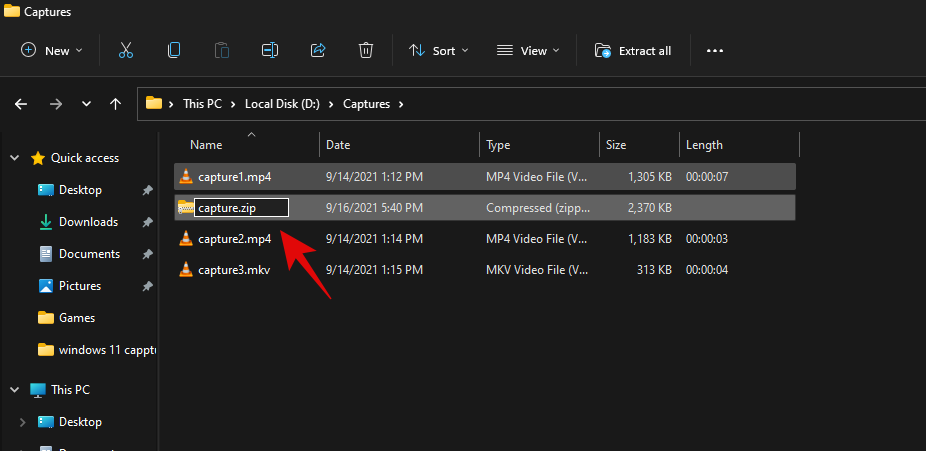
Enter a name for the new compressed folder and press Enter on your keyboard.

You will now have a new .ZIP archive folder containing the file you selected.
Option #2: Using ‘More’ menu
Select the file you wish to compress on your local storage by clicking on it.
Now click on the ‘3-dot’ menu icon in the top right corner and click on ‘Compress to .ZIP file’.

The file will now be compressed to .ZIP format. Enter a relevant name for the file and press Enter on your keyboard once you are done.

And that’s it! You will now have compressed the file itself instead of a folder containing the file.
Option #3: Using right-click context menu
Find the concerned file you wish to compress on your local storage and right-click on it.
Select ‘Compress to ZIP file’.

Type in the desired name for the new archive and press Enter on your keyboard once you are done.

You will now have compressed the desired file.
Zip multiple files using Windows Explorer (3 Ways)
You can compress multiple files in various ways. Use one of the desired methods listed below.
Option #1: Using ‘New’ menu
Select all the files you wish to compress from your local storage and click on ‘New’ in the top left corner.

Click on ‘Compressed (zipped) Folder’.

A new folder archive containing all the selected files will now be created in the same location. Type in the desired name and press Enter on your keyboard.

A folder archive containing all the selected files should now be available in the same location.
Option #2: Using ‘More’ menu
Navigate to the folder containing all the files you wish to compress and select them.

Now click on the ‘3-dot’ menu icon in the top right corner and select ‘Compres to ZIP file’.

A new ZIP file will now be created. Enter the desired name for it to save it on your local storage.

Option #3: Using right-click context menu
Navigate to the desired location on your local storage and select all the files you wish to compress.

Right-click on any single file and select ‘Compress to ZIP file’.

Type in the desired name for the archive and press Enter once you are done.
An archive containing all the selected files will now be created in the same location.
Using third-party tools:
Many popular third-party tools can help you make ZIP archives on Windows 11. We recommend using 7-Zip or WinRAR. If however, you wish to use another alternative you can select one from the dedicated section at the bottom of this post. Select your preferred third-party utility and follow the relevant steps to get you started.
Method #02: Using 7-Zip
7-Zip is — for us – -the best third-party software that helps you compress and uncompress files on Windows 11. 7-Zip is popular for introducing the 7z compression format but is compatible with most popular formats out there. Download and install 7-Zip using the link below on your system and follow one of the relevant guides below to get you started.
- 7-Zip | Download Link

Zip a single file using 7-Zip
With 7-Zip installed on your system, navigate to the file you wish to compress and right-click on it.
Select ‘Show more options’.

Select ‘7-Zip’.

Click on ‘Add to “ABC.ZIP”‘ where ABC is the name of the file you selected to compress.

A new archive with the same name will be automatically created. If however, you wish to name the archive something else then select ‘Add to archive’ instead.

Enter your desired name and save location at the top.

Select ‘ZIP’ as your ‘Archive format’.

You can also set a password for the archive at this point if needed.

Once done, click ‘Ok’.

And that’s it! You will now have compressed a single file using 7-Zip. Use the guide below if you wish to compress multiple files.
Zip multiple files using 7-Zip
Install 7-Zip using the link above and select all the files you wish to compress.

Right-click on any file and select ‘Show more options’.

Click on ‘7-Zip’.

Now click on ‘Add to “ABC.ZIP”‘ to create an archive with the name of the current directory.

An archive should now be created with all the selected files.

However, if you wish to add a custom name, click on ‘Add to archive’ instead.
Now enter a custom name for your archive at the top.

Select ‘ZIP’ as your ‘Archive format’.

Enter and set a password for your archive if needed.

Click on ‘Ok’ once you are done.

And that’s it! You will now have compressed multiple files into a .ZIP archive using 7-Zip.
Method #03: Using WinRAR
WinRAR is another long-standing open-source utility for Windows from the makes of WinZip. WinRAR supports multiple compression formats, self-extracting archives, password-protected files, and much more. This makes it a trusted compression utility for Windows users. Follow the guide below to use WinRAR to ZIP files on your PC.
- WinRAR | Download Link
Compress a single file using WinRAR
To compress a single file, navigate to the concerned file on your local storage, and right-click on it.

Select ‘Show more options’.

Click on the ‘Add to archive’ listing by WinRAR in your context menu.

Enter a custom name for your archive at the top. You can also select a custom save directory for the archive by clicking on ‘Browse’.

Select ZIP as your compression method.

Click on ‘Set password’ and follow the on-screen instructions if you wish to set a password for the archive.

Click on ‘Ok’ once you are done.

WinRAR will now compress the selected file and create an archive for the same in the current location for the original file.
Zip multiple files using WinRAR
Navigate to your local storage and select all the files you wish to compress.

Right-click on them and select ‘Show more options’.

Now click on ‘Add to archive’.

Enter a custom name if needed and then select ZIP as your compression format.

Click on ‘Set password’ and follow the instructions if you wish to add a password to the new archive.

Click on ‘Ok’ once done.

The new archive will now be created and should be available to you in the same location.
What is .ZIP?
ZIP is a compression format for lossless data compression that has been widely used since the early days of Windows. It helps you compress files, folders, directories, and more. These files can then be uncompressed wherever you like to retrieve your original files. It commonly uses the DEFLATE compression algorithm to compress files in the background however a wide variety of algorithms can be used when compressing files in the ZIP format.
Alternative to Zip
There are tons of other compression formats out there that help you achieve a higher compression rate, reduce the archive size further, and compress unsupported files as well. You might have come across some of these popular compression formats when browsing the web. Here are some other formats that we recommend you try as an alternative to the ZIP format.
- 7z
- RAR
- tar
- bzip2
- gzip
Other third-party tools you can try
Apart from 7-Zip and WinRAR, there are tons of other compression tools out there that you can try for free in case these two don’t seem to fit your requirements. Here are our top alternative file compression tools for Windows 11.
- WinZip | Download Link
- ExtractNow | Download Link
- jZip | Download Link
- B1 Free Archiver | Download Link
- PeaZip | Download Link
- Bandizip | Download Link
Apart from the other linked utilities, there are tons of dedicated compression tools available in your browsers as extensions as well. You can opt for such extensions in case you are using a Chromium-based browser like Google Chrome or Microsoft Edge.
We hope the guide above helped you easily ZIP files on Windows 11. If you face any issues or have any questions for us, feel free to reach out using the comments section below.
Related:


