
In Chapter 5, “Desolation It Wrought,” open Sophia’s journal and match each of the three doorways’ black floor symbol to its red partner, then rotate the central pillar’s dial to that red symbol — enter all three correctly and the sealed gate opens.
The Second Trial in Chapter 5 drops Sophia and Leni into a round chamber built around a central pit, ringed by three symbol-marked doorways with a single dial pillar in the middle. The lock only opens once all three doorway symbols are dialed correctly, and the puzzle quietly hides its own answer in plain sight — everything you need is already sketched in Sophia’s journal.
The circular chamber and how its symbol lock works
You’ll know you’re in the right place when the quest reads “V – DESOLATION IT WROUGHT” in the top-right corner with the objective “Enter the symbols” beneath it. There’s no code to memorize from outside the room — the whole solution lives in Sophia’s book.
Key The mechanic splits into two colors. The black symbols in the journal tell you which doorway you’re dealing with — each one matches an engraving carved into the floor at a doorway’s entrance. The red symbols sitting next to them tell you what to dial on the central pillar. So the loop is always the same: identify a door by its black floor mark, find that black mark in the book, and dial the red symbol paired beside it.
The three doorway-to-pillar symbol pairings
| Doorway floor symbol (black) | Symbol to dial on the pillar (red) |
|---|---|
| Circle with dots | Insect-like circle |
| Square filled with dots | Backward-P shape |
| Circle with lines | Chair-like shape |
These shape names are just what the icons look like — the game gives them no official titles — but they’re distinct enough to tell apart at the dial. Solve the doorways in this order and the lock falls into place cleanly.
How to enter all three symbols in Resonance: A Plague Tale Legacy
Solve the doorways in the order the room presents them, and always read the floor engraving before you touch the dial.
STEP 1/7
Open Sophia’s journal
Bring up the book and find the paired columns — black symbols on one side, red on the other — where each black symbol marks a doorway and its red partner is what you dial.
STEP 2/7
Read the first doorway’s floor engraving
Walk to a doorway and look down at the mark carved into the floor at its entrance — here it’s the circle-with-dots engraving — then match it to the same black symbol in the book.
STEP 3/7
Dial the insect-like red symbol
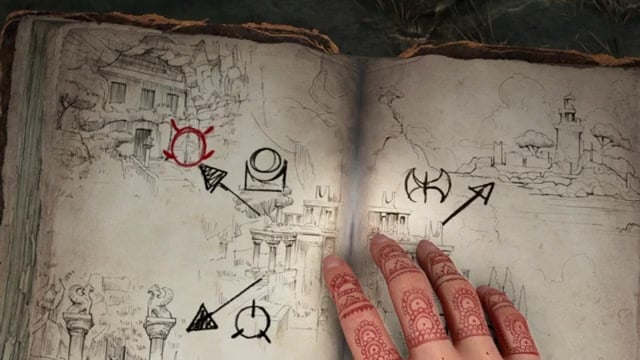
Go to the central pillar and rotate the dial until the red partner, the insect-like circle, sits at the top; a latch clicks in the room when it locks in.
STEP 4/7
Check the second doorway’s floor
Move to the next doorway and read its floor mark, the square filled with dots, then find its red partner in the journal before you head back to the pillar.
STEP 5/7
Dial the backward-P symbol
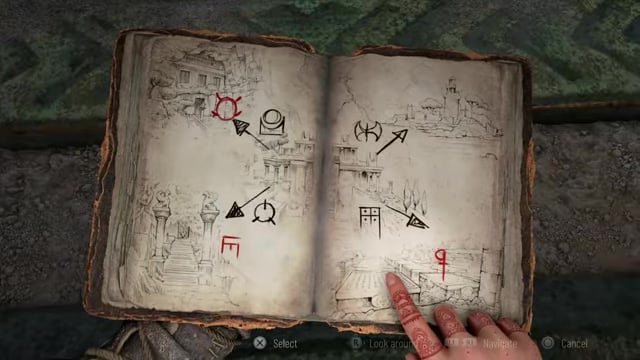
Rotate the dial to the red backward-P shape paired with that door and lock it in with the same latch click.
STEP 6/7
Check the third doorway’s floor
At the last doorway, read the circle-with-lines engraving on the threshold and confirm its red partner in the book.
STEP 7/7
Dial the chair-like symbol
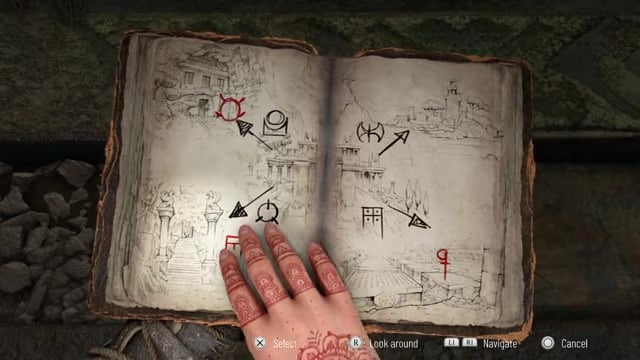
Set the dial to the red chair-like shape; with all three entered, the sealed gate by the original pedestal swings fully open.
Read the black symbol on the doorway floor first, then dial its red partner — confirming at the door before you touch the pillar is the entire trick to this lock.
Video help
Why the symbols seem not to work
Almost every player who gets stuck here is dialing the right symbols for the wrong door. Because the room is circular and every doorway looks similar, it’s easy to lose track of which entrance you last inspected and line up a symbol meant for a different one. The fix is mechanical: physically walk to a doorway, read the black engraving on its floor, and only then cross to the pillar to dial its red partner.
Guessing carries a real cost. Input a symbol incorrectly and a spike trap erupts from the ground, killing Sophia and sending you back to the last checkpoint — so the floor-check habit is worth the extra few seconds every single time.
Other “Desolation It Wrought” puzzles nearby

This doorway-and-pillar lock is only one of several challenges packed into Chapter 5’s Second Trial, and it’s easy to blur them together. Keep them separate in your head, because their solutions have nothing to do with one another.
The spike-floor pattern puzzle is a different room entirely: there you cross a grid of symbol-marked tiles by following a safe sequence — Dots → Kraken → Dots → Flower → Kraken — where the icons are read as tile types, not the doorway shapes above. The colour reflector chamber has you angle mirrors so red, green, and blue beams each strike their matching charge point on a central column. And the light-splitting chamber tasks you with routing a single beam through a splitter to hit the correct blue gemstone. Each is its own self-contained solve.
Related A Plague Tale: Requiem guides
Frequently Asked Questions
Are the three symbol answers the same for every player?
The pairing is read straight from Sophia’s journal, which fills in as you progress the Second Trial, so the method is identical for everyone — match the black floor mark to its red partner in the book and dial that red symbol. The shapes described here (insect, backward-P, chair) are informal descriptions of what the icons look like rather than named symbols, so trust the book over any nickname.
Is this the same as the Chapter 5 spike-floor pattern with Dots and Kraken?
No. The Dots → Kraken → Flower sequence belongs to the separate spike-floor tile puzzle elsewhere in “Desolation It Wrought,” where you walk a safe path across marked panels. It has no bearing on this doorway lock — here you’re only pairing floor engravings to red dial symbols on the central pillar, so don’t try to dial “Kraken” or “Flower” at this puzzle.





Leave a Reply