

Jubilee is a resource-management Strategist who plays best at mid-range by keeping Blooming Ball active, charging it through healing, detonating it for team buffs or enemy disruption, and saving Firework Finale for objective fights.
Jubilee is not a stand-still healbot. She is a Strategist with real damage pressure, but her value comes from cycling orbs, marks, cooldowns, and tempo windows instead of relying on primary fire alone.
Play her from safe mid-range, keep teammates inside Blooming Ball whenever possible, and think of every fight as a choice between sustain, speed, blind, vulnerability, and burst pressure.
- Jubilee’s role and ideal range
- Jubilee’s kit and key numbers
- Jubilee’s orb rotation for fights
- Detonating for allies or enemies
- Primary fire and shift tempo
- Firework Finale for objective fights
- Jubilee Team-Ups with Blade and The Hood
- Positioning for maps and teamfights
- Jubilee mistakes that cost fights
- Jubilee’s repeatable fight plan
- Frequently Asked Questions
Jubilee’s role and ideal range
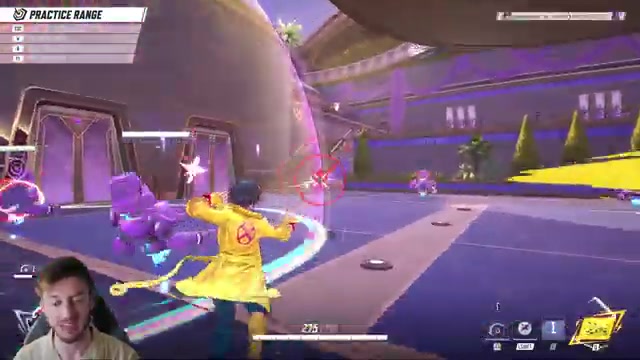
Jubilee is a support-DPS hybrid with 275 HP and a 4-star difficulty rating, which means she rewards planning more than panic healing. Her strongest moments happen when she is close enough to see the frontline and nearby supports, but not so close that a dive tank can erase her before she uses shift.
Your first job is to keep Blooming Ball active in places where teammates will actually fight. Your second job is to charge it, detonate it at the right time, then use the attack-speed window to either stabilize allies or punish enemies.

Do not treat her primary fire as the whole healing plan. It matters, but Jubilee’s real power is the flow between orb healing, detonation effects, movement-speed bursts, and short windows of aggressive pressure.
Jubilee’s kit and key numbers

| Ability | Use | Key numbers |
|---|---|---|
| Lumikinetic Blasts | Primary fire for healing allies, damaging enemies, charging orb flow, and applying pressure. | 14 healing per hit, 10 damage per hit, about 8 shots per second; attack-speed buff adds about 40%. |
| Sparkle Mark | Passive mark layer that feeds Jubilee’s detonation-based sustain and burst. | Cash out through detonation effects instead of ignoring the orb cycle. |
| Blooming Ball | Place an orb where allies can stand; it heals, grows stronger as you work, and sets up detonation. | Starts around 35 HPS, reaches around 50 HPS when charged; about 12-second cooldown, with a shorter recall cooldown around 5 seconds. |
| Dazzling Detonation | Detonates Blooming Ball for allied healing and speed or enemy disruption. | Allies get 65 burst healing, 25 healing over 3 seconds, and 40% movement speed for 3 seconds; enemies take 50 damage, suffer about 1.5 seconds of blind, and can take 10% extra damage. |
| Shift mobility resource | Short mobility, tempo, ammo, charge, and escape tool. | Drains about 4 energy per second, regenerates about 1 energy per second, and can be sustained for roughly 3 seconds. |
| Firework Finale | Objective-control ultimate with healing, orbiting clusters, adjustable radius, and disruption. | Lasts 10 seconds; allies inside can receive about 150 HPS; clusters heal for 40 or deal 25 damage on hit. |
The mark language to remember is Sparkle Mark: Jubilee can build marks through her normal fight flow, then cash them out through detonation effects for allied sustain or enemy burst. The orb is the center of that loop, so your cooldowns should revolve around keeping one useful Blooming Ball in play.
The ultimate is Firework Finale. Some text may pluralize it as Fireworks Finale, but the play pattern is the same: a 10-second zone around Jubilee that heals allies, hits enemies, and can be adjusted to control space.
Jubilee’s orb rotation for fights
Run this loop whenever a normal fight starts so Blooming Ball is healing, charging, and paying out instead of sitting unused.
STEP 1/6
Place Blooming Ball where your team will stay
Aim it at the ground or a protected mid-fight spot, preferably where tanks and supports can remain inside the dome.
STEP 2/6
Heal to charge the orb
Use primary fire and short shift bursts to build the orb from about 35 HPS toward about 50 HPS.
STEP 3/6
Watch the detonation timer
Let the orb work until the countdown and cooldown line up instead of popping it the moment it lands.
STEP 4/6
Detonate for the team burst
Press E when allies need the burst heal, healing-over-time, and 40% movement-speed boost.
STEP 5/6
Use the attack-speed window
Fire into allies for faster sustain, or pressure a close target if the team is already healthy.
STEP 6/6
Place the next Blooming Ball
Keep one orb active and usually hold one in reserve so you can answer the next push.
Keep one Blooming Ball active and one in reserve; Jubilee loses tempo when both orbs are gone and the team starts moving out of her healing dome.
Detonating for allies or enemies
Detonate on allies when your team needs sustain, speed, or a clean engage or disengage. The allied detonation is not just a heal button; the 40% movement-speed buff can help your tank start a brawl, help your team rotate through danger, or save a group that is backing out under pressure.
Detonate near enemies when they are already brawling in range and your team can punish the disruption. The enemy version adds damage, blind, and vulnerability, which can flip a close fight if it lands on grouped targets.
Narrow hallways, chokepoints, and objective scrambles are Jubilee’s best detonation zones. If both teams are stacked in the same space, one good orb can heal your side while making the enemy side much easier to collapse on.
Primary fire and shift tempo

Jubilee’s primary fire is useful, but it is weak as a full healing plan by itself. At its base rate, it heals for 14 per hit and deals 10 damage per hit, so you want it layered with Blooming Ball instead of replacing the orb cycle.
Use primary fire to keep allies topped, charge your orb, and take close damage opportunities. Damage falls off at longer range, and without The Hood Team-Up, the primary attack does not critically hit, so mid-range pressure is much better than trying to duel from far away.
Your shift is a tempo tool. Use short bursts to reach a teammate, dodge pressure, avoid reload downtime, refill your flow, help charge Blooming Ball, or escape when a diver forces you out of position.
Because shift only lasts a short time, avoid spending the whole bar just to travel. Pop it when it changes the fight: saving an ally, finishing a charge cycle, refreshing ammo timing, or getting you out before the frontline collapses on you.
Firework Finale for objective fights
Use Firework Finale when a point or payload fight is already forming, not as a solo chase tool.
STEP 1/6
Enter with teammates nearby
Make sure allies can stand inside the field immediately, because the strongest value is sustain and space control.
STEP 2/6
Activate Firework Finale
Use Q to start the 10-second zone around Jubilee.
STEP 3/6
Adjust the radius for the fight
Keep it smaller when allies and enemies are close so the orbiting clusters hit faster, then expand or retract to control space.
STEP 4/6
Keep allies inside
The field can deliver about 150 healing per second inside, while clusters heal allies for 40 per hit.
STEP 5/6
Disrupt enemies without ruining combos
Expand to knock enemies up and back, but avoid pushing targets out of allied ultimates.
STEP 6/6
<
p class=”vg-step-title” id=”layer-orb-pressure-after-the-ult-starts” style=”margin:16px 0 6px”>Layer orb pressure after the ult starts
Fire Blooming Ball and detonation into the same brawl when enemies are grouped and your team can follow.
Video help
Jubilee Team-Ups with Blade and The Hood
| Partner | Effect |
|---|---|
| Blade | Vampiric Kin creates a Vampiric Field where allies gain Life Steal; with Blade, allies inside also receive Continuous Healing. |
| The Hood | Jubilee’s enhanced attack-speed state turns Energy Plasma into a hitscan attack, adds self-healing on hit, enables critical hits, and keeps Void Magic Mark from clearing. |
Jubilee has two very different Team-Up directions. Blade leans into sustain and life steal, while The Hood pushes her toward aggressive hitscan pressure and critical-hit damage.
For damage potential, The Hood is the stronger offensive pick because it changes how dangerous Jubilee’s boosted firing windows can become. Blade is still useful when your team wants more constant sustain, especially for high-damage allies who can make life steal matter during long fights.
Positioning for maps and teamfights
Jubilee wants safe mid-range sightlines. Stand where you can see your tank, your other support, and the enemy brawl without becoming the closest target. If you are forced into the frontline, your 275 HP disappears quickly; if you stand too far back, your orb placement and damage pressure get worse.
She gets stronger when teammates are grouped around objectives, corners, payload paths, and chokepoints. Brawl tanks are especially comfortable partners because they naturally keep enemies and allies inside the areas where Blooming Ball and detonation do the most work.
Place orbs where the fight is going, not where it used to be. Teammates will often run out of the dome during a push or retreat, so aim slightly ahead of the movement path and be ready to recall or replace a bad orb instead of waiting for it to expire.
Jubilee also sustains other supports well. A charged orb near your backline can keep them stable while you use primary fire, shift, or a detonation window to help the frontline.
Jubilee mistakes that cost fights
| Mistake | Fix |
|---|---|
| Detonating Blooming Ball too early | Charge it first, watch the timer, and detonate when allies or enemies are grouped. |
| Using primary fire as the whole healing plan | Pair primary fire with orb uptime, detonation healing, and attack-speed windows. |
| Spending both orbs at once | Keep one active and one in reserve unless the fight clearly needs both immediately. |
| Wasting shift as travel only | Use short bursts for teammate access, ammo flow, orb charging, or escape. |
| Using Firework Finale away from objectives | Hold it for point fights, payload contests, emergency sustain, or grouped pushes. |
| Playing too close to the frontline | Stay mid-range, use cover, and make enemies spend resources to reach you. |
| Knocking enemies out of allied ultimates | Expand and retract Firework Finale carefully when teammates have AoE combos running. |
Most Jubilee mistakes come from breaking her flow. If you detonate too early, spend both orbs, or use shift with no purpose, you lose the chain that makes her healing and damage feel oppressive.
Jubilee’s repeatable fight plan

KEY!The clean Jubilee checklist is simple: keep Blooming Ball active, charge it before detonation, and use shift to keep the loop moving. When the orb is charged, decide whether your team needs healing and speed or whether the enemy team is grouped enough to punish with blind and vulnerability.
Save Firework Finale for grouped objective fights where its healing field, orbiting clusters, and knockback can actually decide space. Between ultimates, keep playing mid-range, keep one orb in reserve, and swap between healing and aggressive pressure whenever your team is stable.
Frequently Asked Questions
Is Jubilee a healer or damage hero in Marvel Rivals?
Jubilee is a Strategist, so she is a support first, but she plays like a support-DPS hybrid. Her best value comes from healing through Blooming Ball and detonation while using attack-speed windows, enemy blinds, vulnerability, and Team-Up effects to add pressure.
What is Jubilee’s basic rotation?
Place Blooming Ball where allies will fight, heal to charge it, watch the timer, detonate when the team needs the burst, use the attack-speed buff, then place the next orb. In most fights, keep one orb active and one available instead of dumping both at once.
When should you detonate Blooming Ball?
Detonate on allies when they need healing, movement speed, engage help, or disengage help. Detonate near enemies when they are grouped in a brawl so the damage, blind, and vulnerability can swing the fight.
How should you use Firework Finale?
Use Firework Finale for objective fights and emergency team sustain. Start it with teammates nearby, keep allies inside the healing area, shrink the radius for faster close-range hits, expand or retract to disrupt enemies, and avoid knocking targets out of allied ultimates.
Which Jubilee Team-Up is better, Blade or The Hood?
The Hood is the more aggressive damage option because it gives Jubilee hitscan pressure, self-healing on hit, critical-hit potential, and sustained mark value. Blade is the sustain option through Vampiric Kin, Life Steal, and Continuous Healing inside the Vampiric Field.
More questions⤵
Should you use Jubilee’s primary fire for healing by itself?
No. Jubilee’s primary fire heals for 14 per hit, so it helps, but it should not be your whole healing plan. Use it alongside Blooming Ball, detonation healing, attack-speed buffs, and shift tempo to keep the team alive.




Leave a Reply