Thanks to its recent autofill feature update, Microsoft Authenticator is now capable of remembering and automatically filling in your usernames and passwords for you. This feature works across devices and platforms – as an extension for Chrome and an app for mobile devices.
Setting up and using Microsoft Authenticator is a simple procedure and can be done in a trice. But how does one go about importing passwords into it from other autofill services and password managers? Find out below.
Related: How To Set Up and Use Microsoft Autofill
On Chrome browser on PC
For this method, you need to have the Microsoft Autofill extension installed. Once you’ve done so, open Google Password Manager. Sign in to your Google account if you haven’t already.
Then click on the gear icon to get to Password settings.

Click on Export.

When prompted, click on Export again. Type in your Google account password to confirm your identity and download your password csv file.

Now, click on Extensions (puzzle-piece icon) to the right of the address bar.

Click on the Microsoft Autofill extension.

Click on Settings.

Click on Import data.

Click on Choose file.

Select the csv file that you downloaded before and click Open.

You will get a message box telling you how many passwords have been imported.

On Android
In the Microsoft Authenticator Android app, there are a couple of ways you can import your passwords.
Directly from Chrome Android app
Open Chrome on your Android phone and tap on the three-dot menu icon at the top right corner. 
Tap on Settings.

Tap on Passwords.

Tap on the menu icon at the top right corner.

Select Export passwords…

When prompted, tap on Export passwords…

Select the Authenticator app.

And just like that, all your Chrome passwords are imported to the Authenticator app.
Using CSV file
For this method, you will need to have the .csv file containing your username and passwords already on your Android device. Once you’ve transferred the file, follow the steps below to import your passwords to the Microsoft Authenticator app.
Open the Microsoft Authenticator app, tap on the three-dot menu button at the top-right corner of your screen, and tap on Settings.

Then scroll down and tap on Import Passwords.

Tap on Import from CSV.

Select the .csv file stored on your phone.

Provide your PIN, fingerprint, or facial recognition to confirm your identity. Once your passwords are imported, you’ll get a dialog box telling you about it.

On iPhone and iPad
Just as in Android phones, so too in iOS devices you get a couple of options to import your passwords to the Microsoft Authenticator app. Here’s how you can do so…
Directly from Chrome iOS app
Open Chrome and tap on the three-dot menu at the bottom right corner.
 Tap on Settings.

Tap on Passwords.

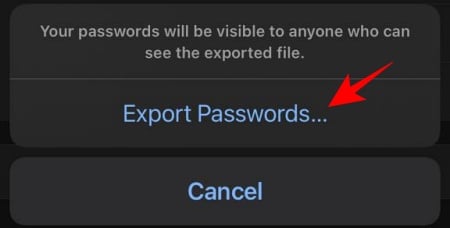
Scroll all the way down to get to Export passwords.

Tap on Export passwords again when prompted.

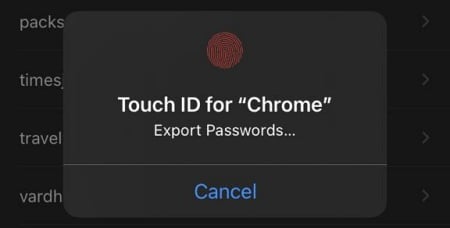
Provide your PIN, fingerprint, or facial recognition to confirm your identity.

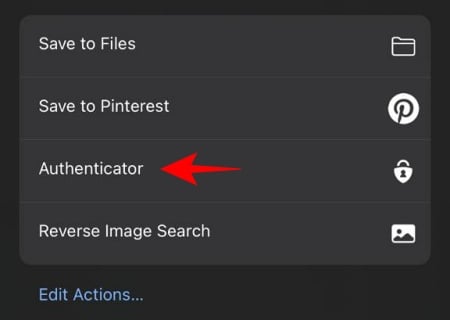
Your passwords are now ready to be exported. When prompted, tap on Authenticator.

Once complete, you’ll get a confirmation message about the same.

Using CSV file
This method is similar to what we have on Android devices, in that the .csv file containing your username and passwords should already on your iOS device.
Open the Microsoft Authenticator app and tap on the three horizontal lines at the top left corner.

Tap on Settings.

Tap on Import Passwords.

Tap on Import from CSV.

Browse for and select your .csv file. Your passwords will now be imported to the Microsoft Authenticator app.

Import passwords from other Password Managers
Most password managers will let you export the complete list of your username and passwords in the form of a .csv file. You will generally find the option to do so in the Settings or the Menu option (depending on your password manager).
Once the .csv file is saved to your device, use the method given above to import it to the Microsoft Authenticator app. Some password managers may even have the option to directly export your passwords to the Authenticator app so do check if that’s available to you.
Create and import CSV manually
If the aforementioned methods don’t work for you and you don’t have an exported .csv file, you may have to take the longer route – create a .csv file yourself and type in the username and passwords manually. Follow the steps given below to do so.
Create a .csv file (as shown in the image below) or download this import template.
Keep the first row as it is. Do not delete or make any changes to it. Under the “url” column, type in the complete web address of the site’s login page. Type in your username under “username” and passwords under “password”. Make sure that these three columns contain a value and are not left blank.

Once you’ve entered in all the username/passwords you wish to save for the sites, click on the Save (floppy icon) at the top left corner.

Now your .csv file is ready to be imported into Microsoft Authenticator, the method for which is already shown above.
The autofill feature provides a huge upgrade to Microsoft Authenticator and simplifies logging in to apps and sites. Importing the passwords from Chrome and from .csv files is a cinch (as can be gleaned from the methods shown in this guide), and you will never have to rack your brains to remember complex, multi-charactered passwords again.
RELATED


I tried this method, and unfortunately it does not work anymore.