In case Windows Search is using exceptionally high CPU or disk resources, then you can use the following troubleshooting methods on Windows 11. The methods to fix the issue include simpler methods like restarting your PC to restarting or rebuilding search services, using DISM and SFS commands, and much more.
8 Ways to fix Windows Search High CPU or Disk Usage Fix Issue on Windows 11
Method #01: Using troubleshooter
Windows 11 has a dedicated troubleshooter to help fix Windows Search issues on your system. In most cases, the troubleshooter should help identify and solve background issues which should reduce the overall disk usage of Windows Search. Use the guide below to get you started.
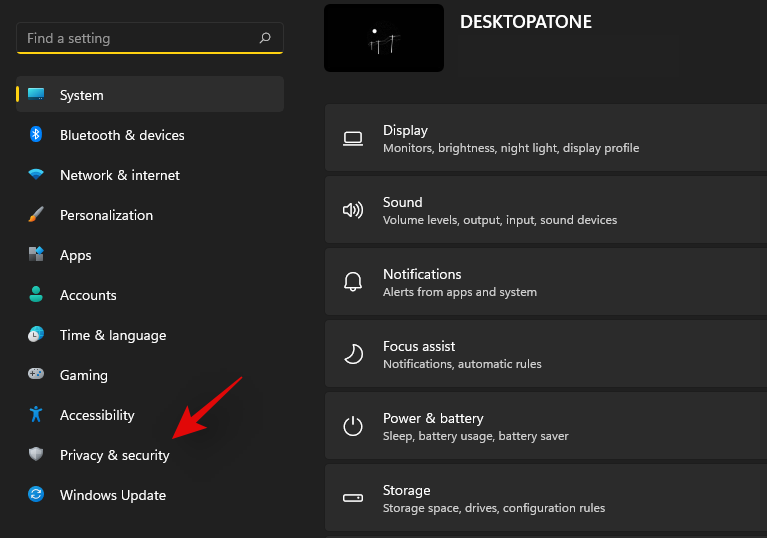
Press Windows + i on your keyboard and click on ‘Privacy & security’ on your left.
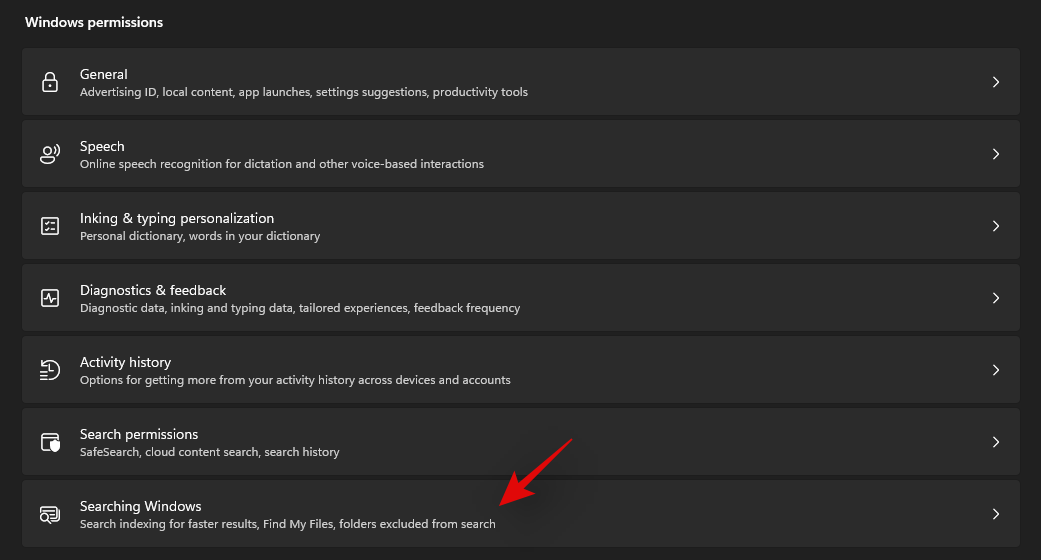
Select ‘Searching Windows’.
Scroll to the bottom and click on ‘Indexer troubleshooter’.

Check the box for ‘My problem isn’t listed above’.
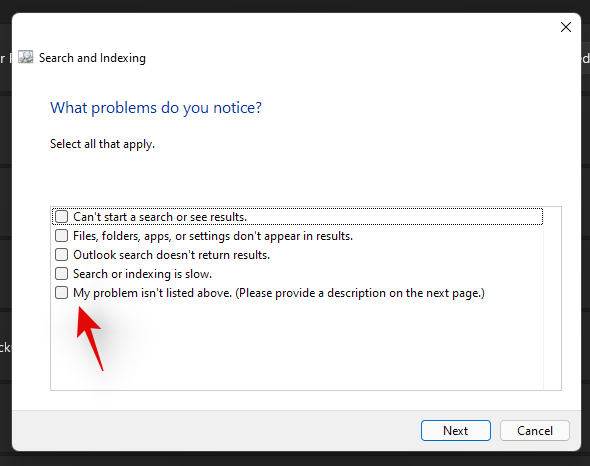
Click on ‘Next’.

Leave the text box blank and click on ‘Next’ again.
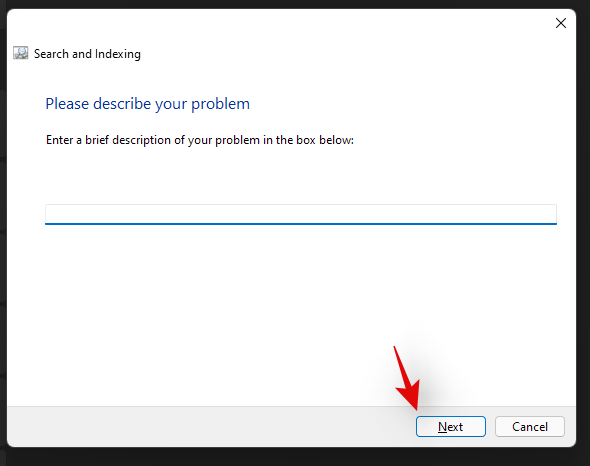
Now let the troubleshooter do its thing. If a fix requires administrator permission, then click on ‘Try these repairs as an administrator’ as shown below.

Windows Troubleshooter will now try and apply fixes to reduce your disk usage. Restart your system if prompted.
And that’s it! Windows troubleshooter will now have fixed high disk usage by Windows Search on your PC.
Related: How to Open Control Panel in Windows 11
Method #02: Restart your PC
Restarting your PC can sometimes fix most issues. Restarting will restart the Windows Search services and tasks in the background which should get Search back up and running on your PC again. If however, restarting your PC does not help, then you can try manually restarting Windows Search services on your Windows 11 PC using the guide below.
Method #03: Restart Search services
Press Windows + R on your keyboard and type in the following and press Enter on your keyboard.
services.msc
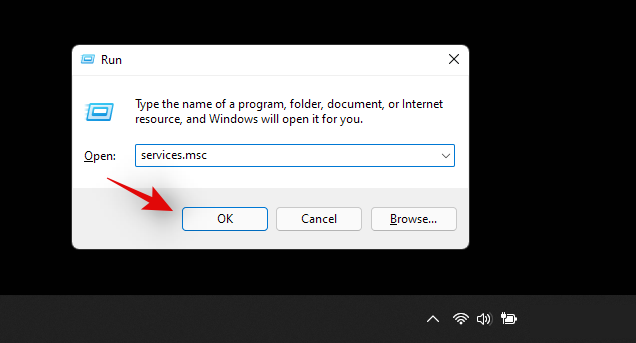
Right-click on ‘Windows Search’ and select ‘Restart’.
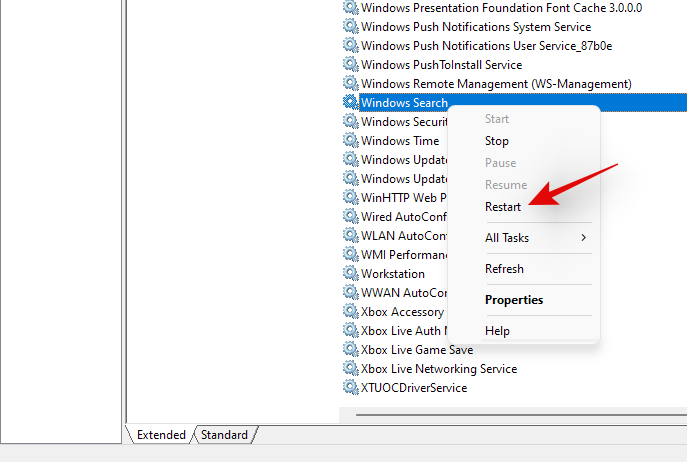
Try and check your disk usage in the Task Manager now. If a background conflict for the search service was causing high disk usage on your PC then this should help fix your issue.
Related: How to Disable Updates on Windows 11
Method #04: Reduce indexed locations on your PC
In case your PC is using older hardware or an HDD then it is likely that your disk is getting overloaded with continuous indexing tasks in the background which is causing high disk usage. Additionally, if you have drives larger than 1TB in size then this could also be the case for you regardless of the fact if you are using an SSD or an HDD. In such cases, you can try reducing the number of indexed locations for Windows Search and see if that fixes your issue. If it does, then we recommend you increase your indexed locations slowly so that it does not overwhelm your disk in the background. This should be a rare case scenario considering how Windows Search works but it is worth a shot nonetheless. Use the guide below to reduce your indexed locations.
Add locations to exclude
Press Windows + i on your keyboard. Select ‘Privacy & security’.

Click on ‘Searching Windows’.

Click on ‘Add an excluded folder’.
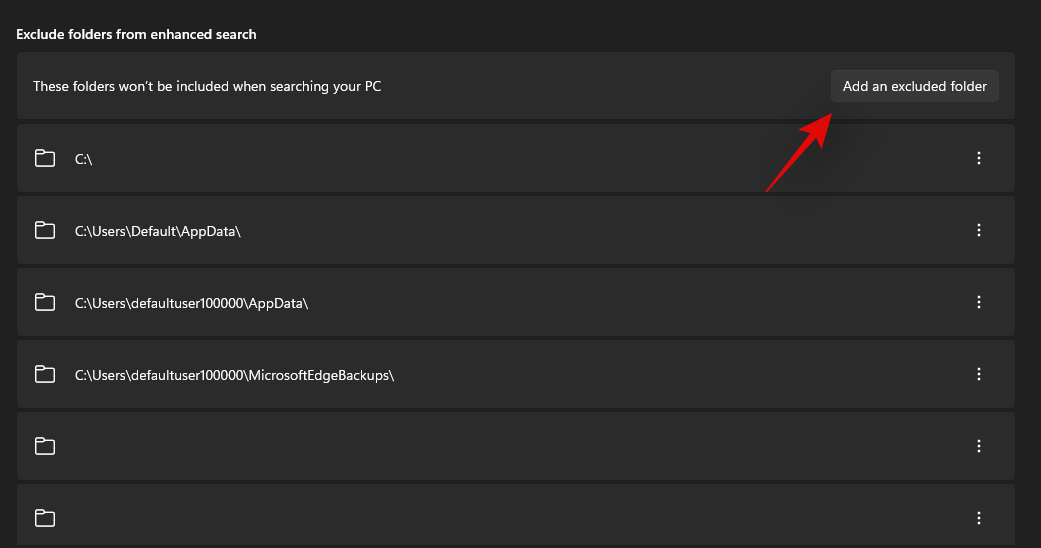
Browse to the location/folder you wish to exclude and click and select it. Once selected, click on ‘Select folder’.
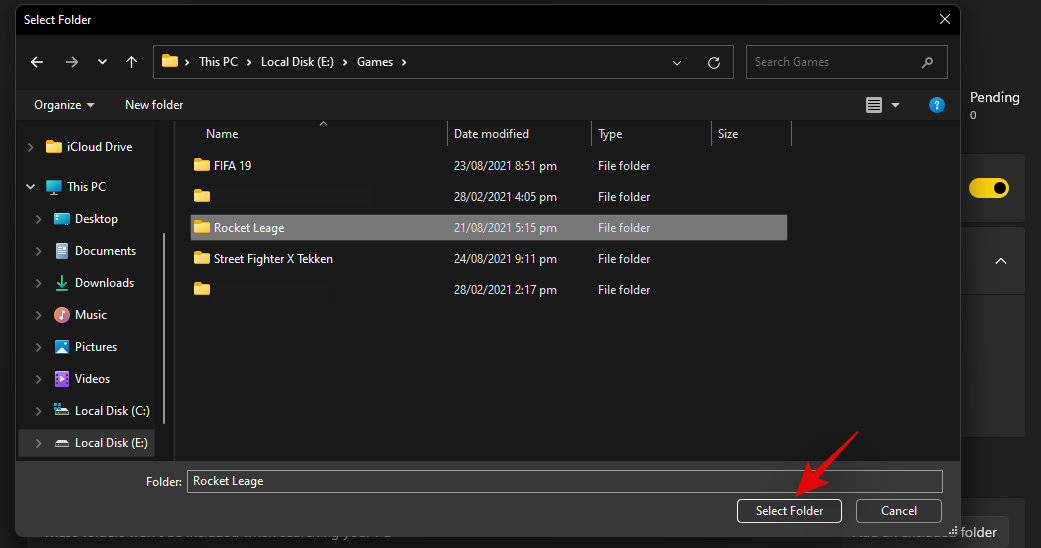
The folder will now be added to the exceptions list and it will no longer be indexed by Windows Search. Repeat the steps above for all the folders and locations you wish to exclude from Windows Search.
Remove already indexed locations
Press Windows + i on your keyboard and select ‘Privacy & security’.

Click and select ‘Searching Windows’ on your right.

Now click on ‘Advanced indexing options’.

Click on ‘Modify’.

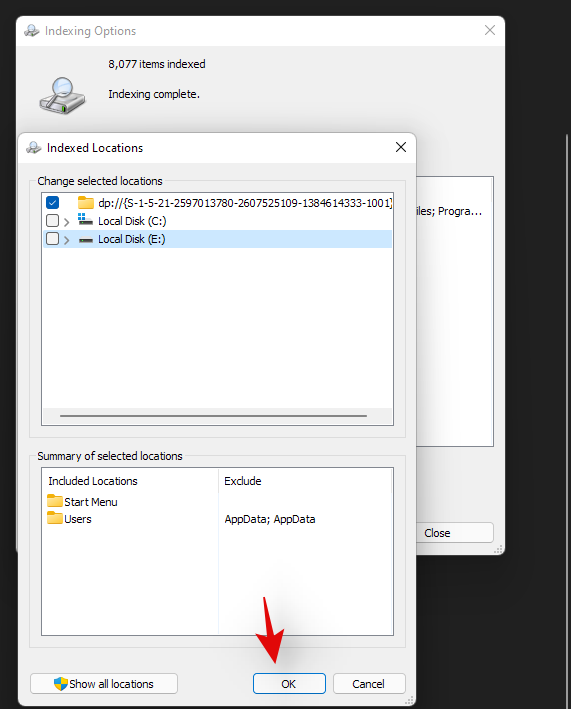
Uncheck the boxes for locations or drives already added to Windows Search indexing.

Click on ‘Ok’ once you are done.
Click on ‘Close’.
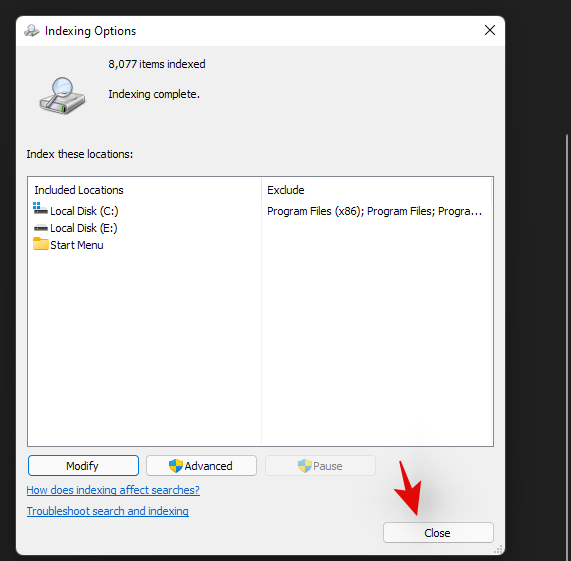
Selected locations will now be removed from the indexing list of Windows Search. This should also help fix high disk usage on your PC if your disk was being overwhelmed by background indexing in Windows 11.
Method #05: Rebuild your search index to get rid of conflicts
If you recently added a folder, changed drives, or renamed your partitions then it is likely that Windows Search has been experiencing conflicts in the background due to existing indexed locations. In such cases, you can use the guide below to rebuild your search index on Windows 11. Follow the guide below to get you started.
Press Windows + i on your keyboard and select ‘Privacy & security’ from your left sidebar.

Click on ‘Searching Windows’.

Now click on ‘Advanced indexing options’.

Click on ‘Advanced’.
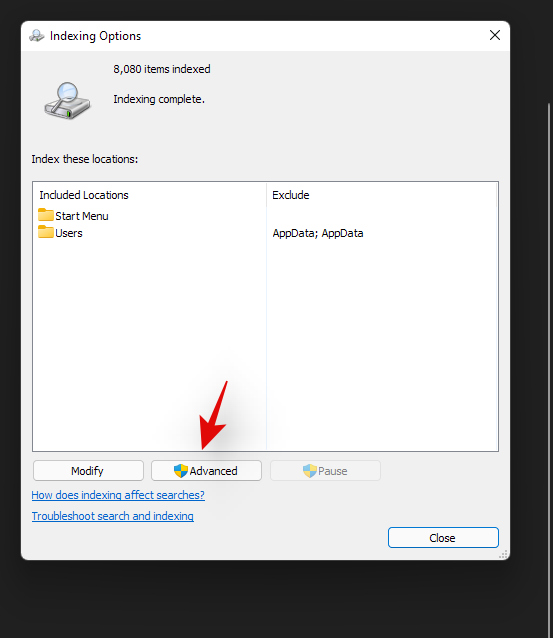
Click on ‘Rebuild’.
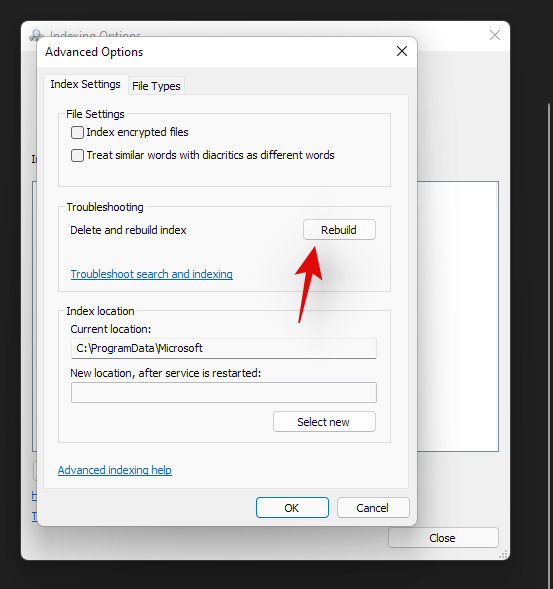
Windows will now warn you that rebuilding the index could take a lot of time depending on your drive size and indexed locations. Click on ‘Ok’ to confirm your choice.

Click on ‘Ok’ and you will see a rebuilding index notification at the top of the advanced options window. You can track the progress of your index being rebuilt on your PC using this notification.

Once completed, we recommend you restart your PC and check your disk usage. If your disk is no longer being overwhelmed then a faulty or old search index was likely the cause of it.
Method #06: Use the resource monitor to check for culprits
By this point, if you haven’t been able to fix high disk usage on your PC then let’s verify if this problem is being actually caused by Windows Search. Follow the guide below to use Windows Resource Monitor to look for culprits that are causing high disk usage on your system.
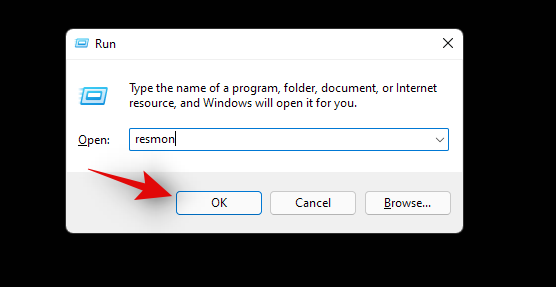
Press Windows + R on your keyboard and type the following in the text box. Press Enter or click on ‘Ok’ once you are done.
resmon
Switch to the ‘Disk’ tab as shown below.
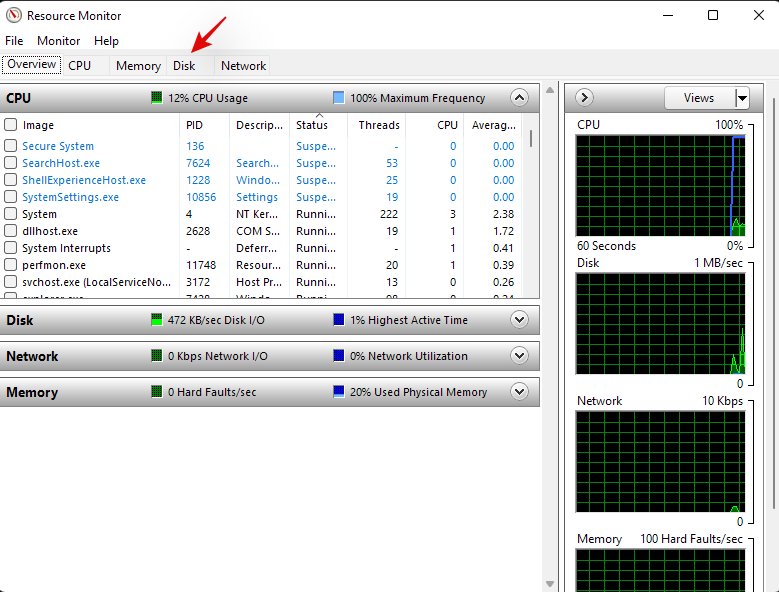
If a process named the following is using your disk, then click on it and check the amount of your disk being used by the process. If any of these processes seem to be misbehaving then you can be sure that high disk usage is being caused by Windows Search on your PC. However, if none of these processes show up in the list or they are using very few disk resources, then your high disk usage problem is likely caused by another program. You can look at other processes in the list to identify the culprit.
- SearchHost.exe
- SearchIndexer.exe

And that’s it! If you have verified that your high disk usage is being caused by Windows Search then you can continue using one of the fixes below. If not, you can use this guide by us to fix high disk usage on your PC.
Method #07: Run DISM and SFC commands on your disk
DISM and SFC command help fix general disk errors and defragmentation issues with your system. If none of the methods above worked for you, then it might be time to try and fix errors with your disks and system files. The DISM command helps fix your Windows image while the SFC commands scan for corrupted files and replace them with usable ones. Use the guide below to run DISM and SFC commands to fix your disks in Windows 11.
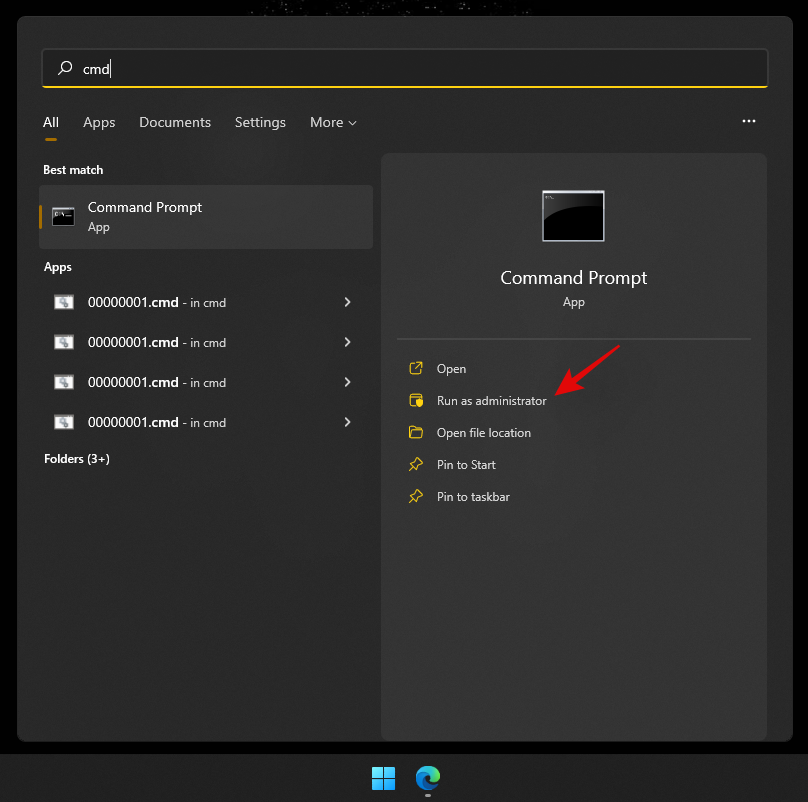
Press Windows + S on your keyboard and search for CMD. Click on ‘Run as administrator’ once it shows up in your search results.
Now type in the following to repair your system image.
DISM.exe /Online /Cleanup-image /Restorehealth

Once the process completes, type in the following and press Enter on your keyboard.
sfc /scannow

Windows will now scan and replace corrupted system files on your system. This command will also replace corrupted protected files which should help solve most high disk usage issues on your system. Once the process completes we recommend you restart your system and check your disk usage. High disk usage should now be fixed on most modern systems.
Method #08: Get in touch with your OEM/Microsoft Support
If you are still facing high disk usage issues due to Windows Search then it might be time to get in touch with a support team. This could be an issue unique to your system hardware or windows installation and the respective team could help you solve this issue. Use the link below to get in touch with the Microsoft Support team in your region. If you are looking to get in touch with your OEM support team then we recommend you use your OEM support app instead.
That’s all.
RELATED
- Laptop Hotkeys Not Working on Windows 11? How to Fix and Why Is This Happening
- How to Reset BIOS in Windows 11
- How to Buy Windows 11
- How to Disable Updates on Windows 11
- How to Map a Drive in Windows 11
- How to Uninstall McAfee on Windows 11 [5 Ways]
- How to Fix ‘Windows 11 Start Menu Not Working’ Issue? [17 Ways]
- How to Change a Wallpaper on Windows 11


