
By default, Android devices rely on the network providers to relay the time correctly. Andriod devices also rely on the network provider, to determine which time zone you are in. Your network provider tracks your location and updates your time zone when you travel. This is how your device mostly displays the correct time.
If your service provider glitches or you lost your network when traveling, you may get the incorrect time displayed. Your device does not have to rely on your network provider to tell the time. It can also be set to different time zones, without your location being tracked. To do this, you can manually set your time and time zone. Here is how you can manually change the time and time zone of your Android device.
How to change the time manually on Android
You can change time on your Android device either through the Settings app or through the Clock app. Let’s take a look at both the procedures.
Method #1: Change time via the Clock App
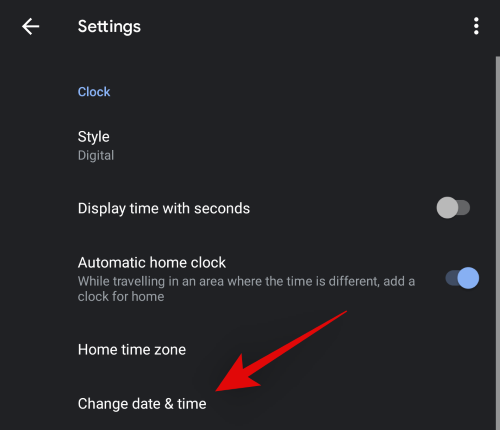
Open the Clock app on your device and tap on the ‘3-dot’ menu icon in the top right corner.

Tap and select ‘Settings’.

Now tap on ‘Change date & time’.
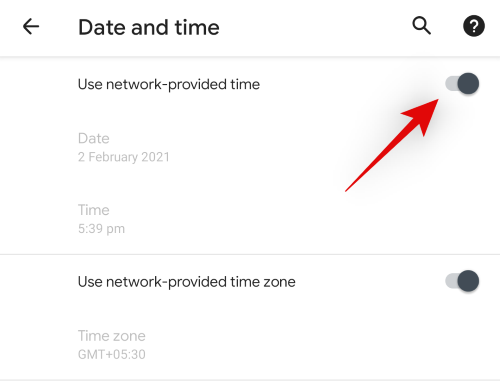
Disable the toggle for ‘Use network-provided time’ at the top.
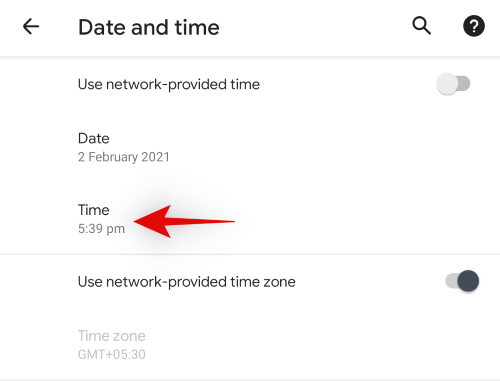
Tap on ‘Time’ which shouldn’t be greyed out anymore.
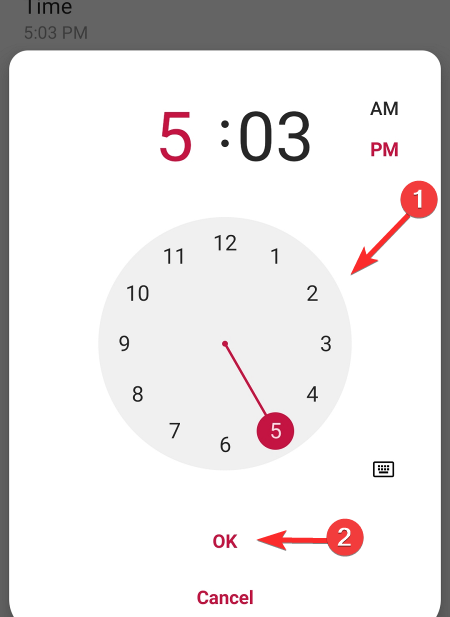
Set your desired time by dragging around the highlight on the clock.

You can also tap the keyboard icon to manually enter the correct time.

Tap on ‘Ok’ to set the manually entered time.

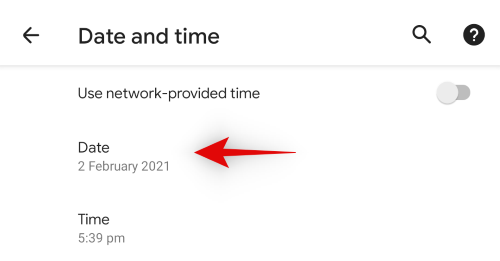
Additionally, tap and set the correct ‘Date’ in case it is wrong to keep your clock in check.
And that’s it! You will have now set your time manually on your Android device.
Method #2: Change time via the Settings App
To change your device’s time manually, first, open your device setting.
Scroll down and tap on System.
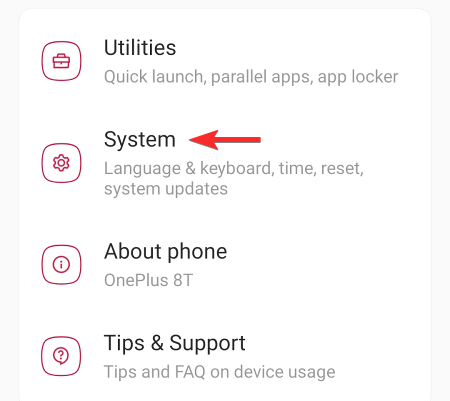
Tap on Date & time.

Note: On Samsung phones, the Date & time settings can be found by opening General management and not System settings. Additionally, depending on your OEM, the location for this option can be slightly different.
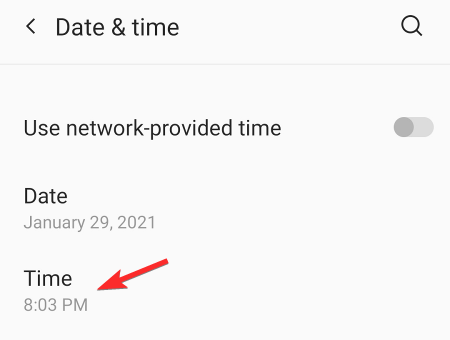
Switch off “Use network-provided time”, using the toggle on the right side of the screen.

This will allow you to edit the time. Tap on Time.
Change the time and tap on OK.
This will change the time displayed on your device.
How to change the time zone manually on Andriod
When changing time manually there is the risk of setting an incorrect time. To reduce the risk of being off-time, manually set the time zone of your device. Setting the time zone, allows your device to not rely on the network provider. You can either set a manual time zone using the Settings app or the Clock app. Let’s take a quick look at both of these methods.
Method #1: Via the Clock app
Open the clock app and tap on the ‘3-dot’ menu icon.
Now tap and select ‘Settings’.
Tap on ‘Change date & time’.
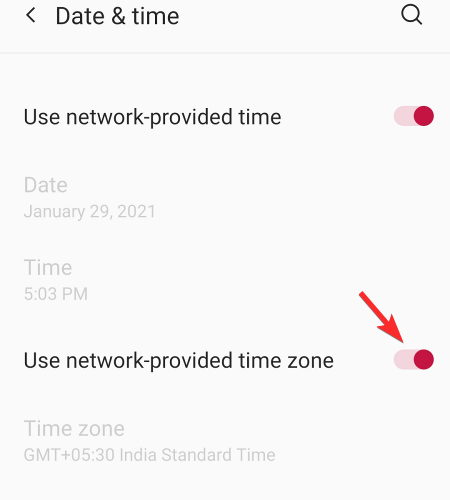
Now turn off the toggle for ‘Use network-provided time zone’.

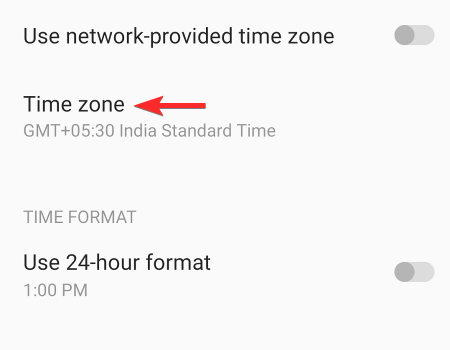
Tap on ‘Time Zone’.
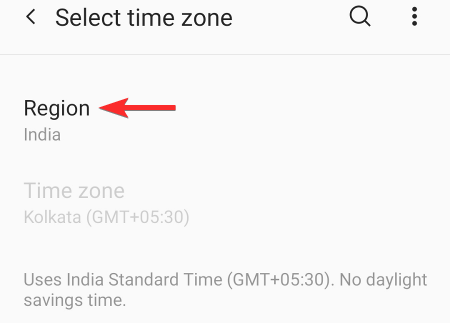
Tap on ‘Region’ to select a region manually.

And that’s it! Your time zone will now be automatically changed based on the region selected by you.

If you find the ‘Time Zone’ section greyed out, do not worry as you only get to select this if your selected region has multiple timezones.
Method #2: Via the Settings app
Open the settings of your device and tap on System.
To open time settings, tap on the Date & time option.
Slide off the toggle on the right side of the screen, to disable “Use network-provided time zone”.
This enables you to select the time zone manually.
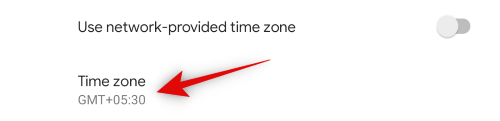
Tap on Time zone.
Tap on Region.
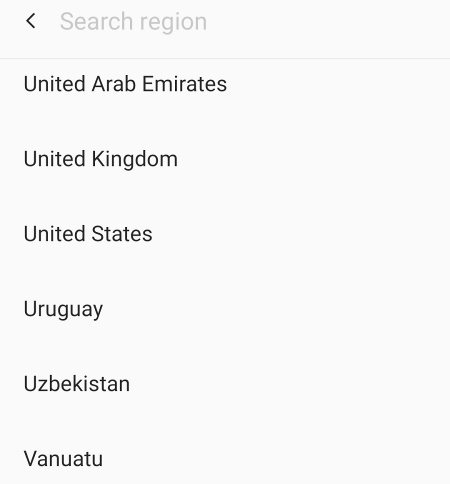
From the list, you can scroll or search for the region for your time zone. Select the Region.
If the region has multiple time zones, you will be shown a list of them. From the list, select the time zone you want to set on your device.

This will change the time on your device.
Note: The time you set manually always overrides the time zone. This means that if you set the device’s time manually, it will display that time irrespective of the set timezone. If you want your device to show your time zone’s time, then switch “Use network-provided time” back on and set the time zone manually.
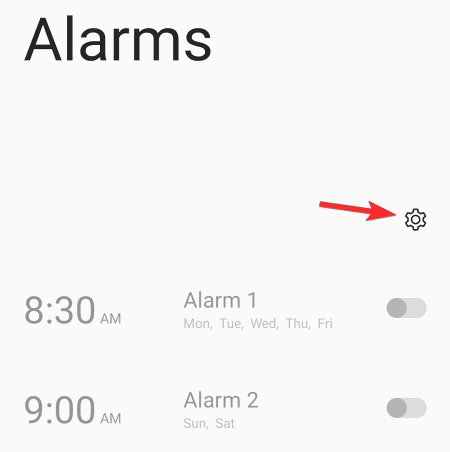
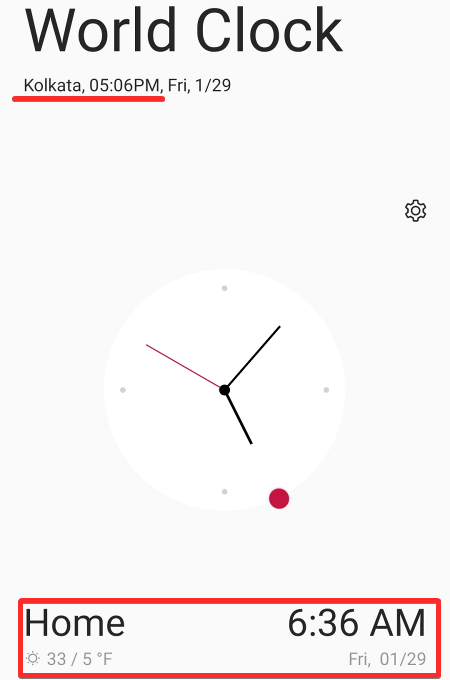
How to set a home clock on Andriod when traveling
When you travel, your phone can help you keep track of the time at your destination as well as back home.
Open the Clock app on your Andriod device.

Tap on the settings icon.
Turn on the Automatic Home Clock feature, by sliding on the toggle on the right side.
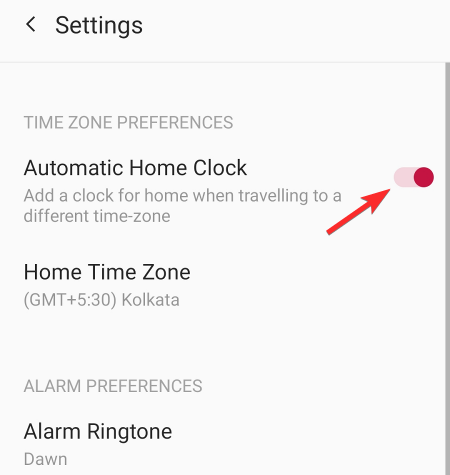
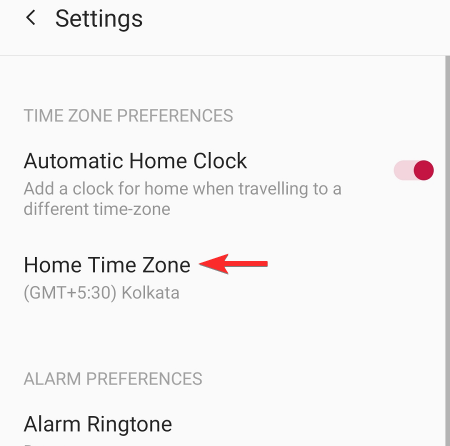
This will allow you to select Home Time Zone. Tap on Home Time Zone.
Scroll through the list of time zones, or use the search option, to find the time zone of your home. Select that time zone.
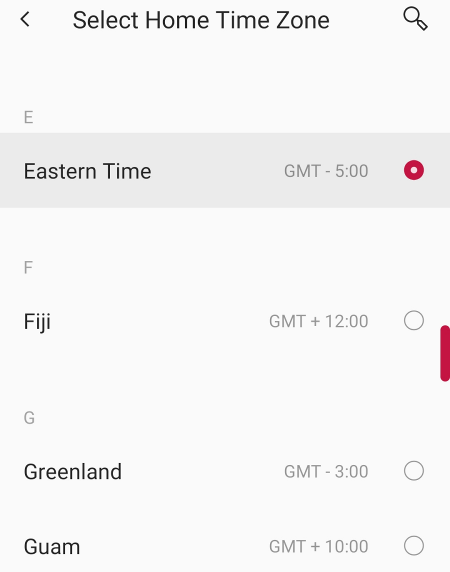
The time zone will be set as your home time zone.
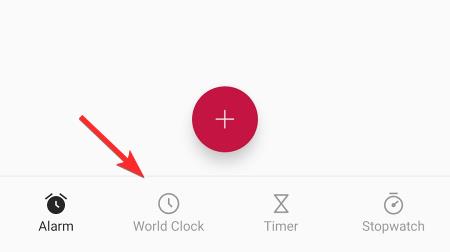
Now, when you travel you can check your home time zone. To do this go to the Clock app and tap on world clock.
This is how you can manually change the time on your Andriod device and set a home time zone as well.
If you have any more questions, feel free to reach out to us using the comments section below.
Related: