Zoom allows you to change the background of your video call to a picture of your choice. The ability to apply virtual backgrounds not only gets you a fresh way to present yourself in a meeting but also adds a sense of privacy to what’s around you.
Besides being able to change the background image, remote collaboration tools have also started including a background blur option. But can you use background blur on Zoom? That’s what this post is all about.
- Does Zoom allow you to blur your background?
- How to Use Blur effect on Zoom on PC
- Can you use Blur Effect on Zoom app on iOS or Android?
- How to Use Blur effect on Zoom on Phone
- Blur Effect not working on Zoom? Here’s Why
- Other options to blur the background on Zoom
- Which video conferencing app lets you blur your background
Does Zoom allow you to blur your background?
Yes. Although Zoom was the first in the video conferencing game to allow users to change their backgrounds, the ability to apply a blur effect to your existing background didn’t come to Zoom until February 2021.
In contrast, Microsoft Teams and Skype already have the means to blur the background of your video feed while Google is planning to roll it out to its Meet service in the near future.
How to Use Blur effect on Zoom on PC
With recent updates to its desktop apps on Windows and Mac, Zoom has added the option to blur your current background directly from the app, thus negating the need for an alternative.
Update the Zoom Desktop Client
Before you get started, you need to make sure you have updated the Zoom desktop client on your Window or Mac computer. To do this, open the Zoom desktop client on Windows or Mac, click on your profile picture on the top right corner.

Now, select the ‘Check for Updates’ option from dropdown menu.

If you haven’t updated the Zoom desktop client recently, you will be notified of a new update straight away. When an update is available, click on the ‘Update’ button at the bottom and when an update has been downloaded, click on ‘Install’.
Wait for the update to get installed and when it does, you can be sure that Zoom’s new Blur feature has been enabled. When the update is installed, you will be shown a message that reads “You are up to date”.
Enable Blur effect inside Zoom
After you’ve updated Zoom’s desktop client, you can enable the Blur effect to your background on Zoom. For this, click on the Cogwheel icon at the top right corner of the main Zoom window.

This will load up Zoom’s Settings window on your computer. Here, click on the Backgrounds And Filters tab from the left sidebar.
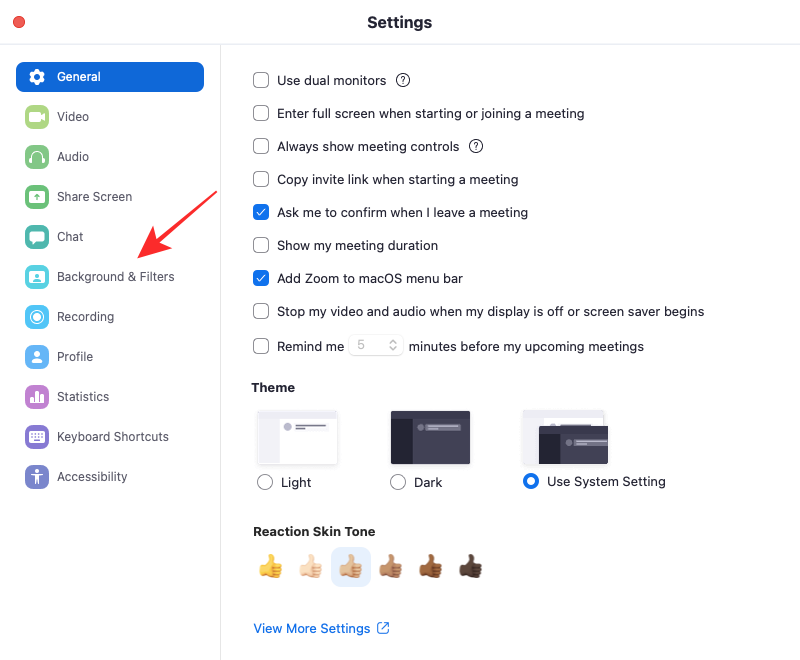
Now, click on the Blur option under the ‘Virtual Backgrounds’ tab on the right pane. This should trigger the Blur effect to your surroundings and only your face will be highlighted in the camera view.

All the meetings you host and join will now have the Blur effect enabled by default unless you change it inside Zoom’s settings.
Can you use Blur Effect on Zoom app on iOS or Android?
Yes, it is now available (as updated on May 28, 2021). As promised, Zoom’s Blur effect is coming to its mobile apps on iOS and Android as part of the version 5.6.6 update that released on May 24, 2021, for both iOS and Android. Since rollouts like these are gradual, some might be able to enable this before others but the Blur feature should appear on the Zoom in a couple of days.
How to Use Blur effect on Zoom on Phone
Since the Blur effect is releasing as one of the features of the version 5.6.6 update of the Zoom app on iOS and Android, you need to make sure that you have updated the Zoom app on your phone to the latest version from App Store and Google Play Store.
Note: Before you move on to trying the Blur effect, you should know that the feature requires that your phone meets the requirements for applying virtual background on Android and iOS. For instance, users of iPhone 7, 4th Generation iPad, or older devices will be disappointed to know that the Blurred background option won’t be available on their devices. That’s because the Blur effect, like virtual background, runs only on iPhone 8, 5th Generation iPad, and newer models. Likewise, Android users of Zoom will have to own a device that has at least 3GB of RAM, Android 8, an octa-core processor, and a compatible graphics processor to be able to use the Blurred background option.
If your iPhone or Android phone gets the green light in terms of system requirements, we can now move on to enabling Blur Background on your device. After you have updated the Zoom app to its newest version, open it on your phone and start or join a meeting. Follow the on-screen instructions to get to the meeting screen.

Inside the Meeting screen, tap on the More button (3-dots icon) on the bottom right corner.

When an overflow menu pops up, select the ‘Virtual Background’ option (on Android) or the ‘Background and Filters’ option (on iOS).

On the next screen, you should be able to see your face in the camera preview alongside options to enable different background. From here, tap on the ‘Blur’ option on the screen.

All your surroundings will now be blurred and only your face will be highlighted in the camera view. You can go back to the meeting screen and everyone in the meeting should be able to see you in your newly blurred environment.
Blur Effect not working on Zoom? Here’s Why
If you aren’t able to get the Blur effect to work inside the Zoom client (Windows or Mac) or on the Zoom app (iOS or Android), there’s one reason why. Since blurring your video background requires some additional computing power for Zoom, you need to make sure that your desktop or phone meets the requirements for using Virtual Background and Blur. You can check out the comprehensive list of system requirements by going to this Zoom support page.
To put it in layman’s terms, using Blurred background on Zoom requires different supported processors for macOS and Windows. An easy way to check whether your computer is capable of using the Blur effect is to go to the Backgrounds And Filters screen (after following the guide above) and unchecking the ‘I have a green screen’ box under ‘Virtual Backgrounds’. If unchecking the box, fades out Zoom background presets instantly, then it means that your computer doesn’t support Zoom’s background blur.

Safe to say, we tested this on our Early 2015 MacBook Air where the Zoom client was failing to show the Blur option and it’s true, unchecking the ‘I have a green screen’ box disabled the presets.
Unfortunately, there’s no way to get around this other than either upgrading your hardware or switching to a whole different collaboration app that lets you use Background blur on limited hardware, which both Google Meet, and Microsoft Teams do.
Comment
byu/kosikutioner from discussion
inZoom
Other options to blur the background on Zoom
If you’re not satisfied with the results from the guide above, you can check out the methods below to apply the background blur effect on Zoom.
Click a picture and add Blur
If you want other participants to not see the room that you’re in but do not want to completely change it, there’s a way you can do that. While Zoom doesn’t natively have a background blur option, it does let you change backgrounds easily. You can achieve a similar effect to that of a blurred background by capturing your background, manually blurring that picture, and then applying it as your virtual background.
Here’s you can do it:
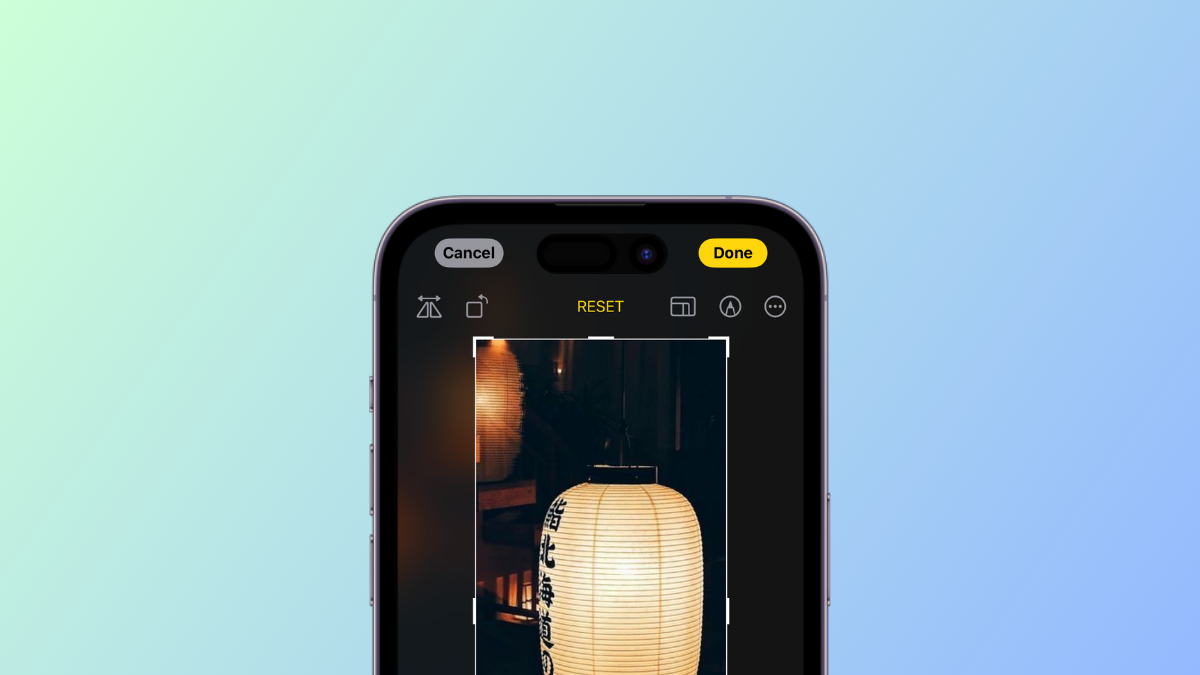
Step 1: Snap a picture of your empty background or the view that’s usually visible to others when you’re in a meeting. You can click the picture using your PC’s native webcam or through a smartphone but ensure that it’s positioned at the same place where your webcam is.

Also, make sure you follow these checkmarks:
- The captured picture should NOT include you
- Elements that are usually moving aren’t in the frame like your chair, clock, etc.
- The setup is well lit and not THAT shabby
Step 2: Head over to the Kapwing editing tool and create an account for free.
Step 3: After you’re signed in, click on ‘New Project’ and then select ‘Start with Studio’.

Step 4: On the next page, click on ‘Start with a blank canvas’.

Step 5: Now you need to upload the picture that you clicked earlier. You can do so by clicking on ‘Upload’ at the top left and dropping the picture you clicked in Step 1.

Step 6: After your picture is loaded onto the canvas, click on the ‘Adjust’ button on the right-hand side of the screen.
Step 7: You can now proceed to blur the image the way you want. To do so, you can slide through the ‘Blur’ adjustment at the bottom and adjust the blur effect the way you want. A preview of the blurred image will be shown on the left side of the screen.
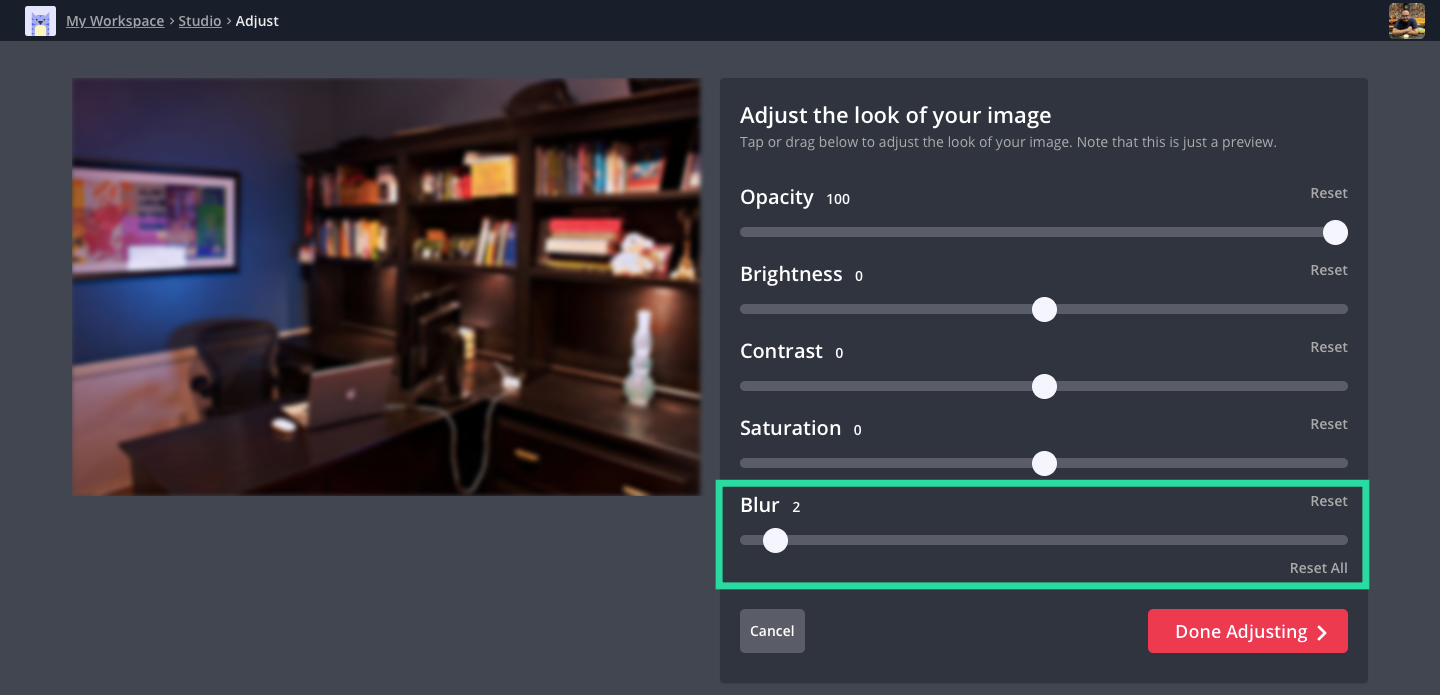
For best results, we suggest you keep the Blur setting at ‘2’. After the adjustment is done, click on the ‘Done Adjusting’ button at the bottom right.
Step 8: To save the edited picture, click on the ‘Publish’ button at the top right, and then click on Download.

Step 9: You can now apply the edited picture as your virtual background inside Zoom. To do so, open the Zoom client, click on your profile picture at the top right and head over to Settings > Virtual backgrounds. You follow the guide in the link below to add the blurred image to your Zoom virtual background.
▶ How to add a Virtual Background on Zoom
Virtual background effect using ManyCam
ManyCam offers you to replace your background during a video call using the Chroma Key feature. After installing ManyCam on your PC, open the Chroma key tab, and toggle the switch adjacent to ‘Virtual Background’. After switching ON the Virtual Background feature, select the Blur option.

Glow In The Dark lens on Snap Camera
Snap Camera is a neat utility that gives you more raw power if you want a different background. Developed by Snapchat, the tool can be installed as a virtual camera to be used with any video collaboration platform including Zoom, Hangouts, Skype, and more.
Snap camera offers you different looks using lenses and one such lens that it offers is the Glow In The Dark lens. Although the lens highlights your face in green, it offers the cleanest look by toning down the background, especially when your surroundings are shabby. Check out the links below to apply this lens using Snap Camera on Zoom.
▶ How to enable Snap Camera on Zoom
▶ How to choose Glow In The Dark lens on Snap Camera
Use backgrounds from across the internet as your background

Although Zoom doesn’t have a native feature to let you blue your background, the company suggests that you may download and set any image on the internet to use as your background for all video calls. You can download royalty-free images from any of these websites: Pexels, Unsplash, Pixabay without paying a dime and even search for the images you want categorically.
For instance, you can search for backgrounds by typing “office” or “work from home” and you will be able to find and download tons of images. This way, you can change your background from time to time and give your video calls a refreshing look. In addition to that, you can also blur the downloaded backgrounds using the method we mentioned above.
Which video conferencing app lets you blur your background
If you’re not satisfied with the results from this guide, you might want to switch to another video conferencing app for your background blur needs. Take a look at the apps that offer custom backgrounds from the link below.
▶ Best video calling apps with blur and custom background features
Both Microsoft Teams and Skype offer an option to blur the background on a video call. You can use an extension to blur the background on Google Meet but it doesn’t have an official feature yet.
RELATED
- Can You Be On Two Zoom Calls At Once?
- How to Permanently Change Name on Zoom
- Best Immersive View Scenes for Zoom [Download]
- Immersive View in Zoom: Everything You Need To Know
- Zoom Cat Filter: How To Get It, Turn On And Turn Off
- How To Leave Zoom Meeting and What Happens When You Do So
- How To See Multiple Screens on Zoom