

Beat Panthalus by mounting a flying Electric Pal, staying above the water near the boss’s front, using fully charged Turret Prisma Swords to auto-hit its head crystal, and throwing a sphere once it reaches 1 HP.
Panthalus is a timed Water-type boss encounter, so the fight is won by staying airborne, keeping Electric damage active, and avoiding wasted movement. The name and weak-point wording may vary around the 1.0 update, but this guide uses Panthalus for the Deserted Islet Echoing Flute fight and follows the head-crystal damage route.
Fast Panthalus fight plan
| Need | Use |
|---|---|
| Boss type | Water-type |
| Location | Deserted Islet encounter started with the Echoing Flute |
| Timer | 10 minutes |
| Best mount | Helzephyr Lux, Beakon, or another flying Electric Pal |
| Main weapon trick | Fully charged Turret Prisma Sword attacks automatically |
| Weak point | Blue head crystal |
| Capture rule | Throw a Pal Sphere once Panthalus reaches 1 HP |
Charge the Turret Prisma Sword before you start the encounter, mount Helzephyr Lux or another flying Electric Pal with its saddle, then fly to the front of Panthalus and attack once to begin. Stay above the water, hug the boss’s front, and let the swords keep firing into the blue crystal on its head while you dodge forward through bubble patterns.
Panthalus facts and loadout

KEY!Panthalus is a level 70 Water-type legendary Pal with roughly 350,000 HP. The encounter runs on a 10-minute timer, so your build needs steady damage, not just survival. Electric damage is the natural answer, and a flying mount keeps you out of the water where your damage drops.
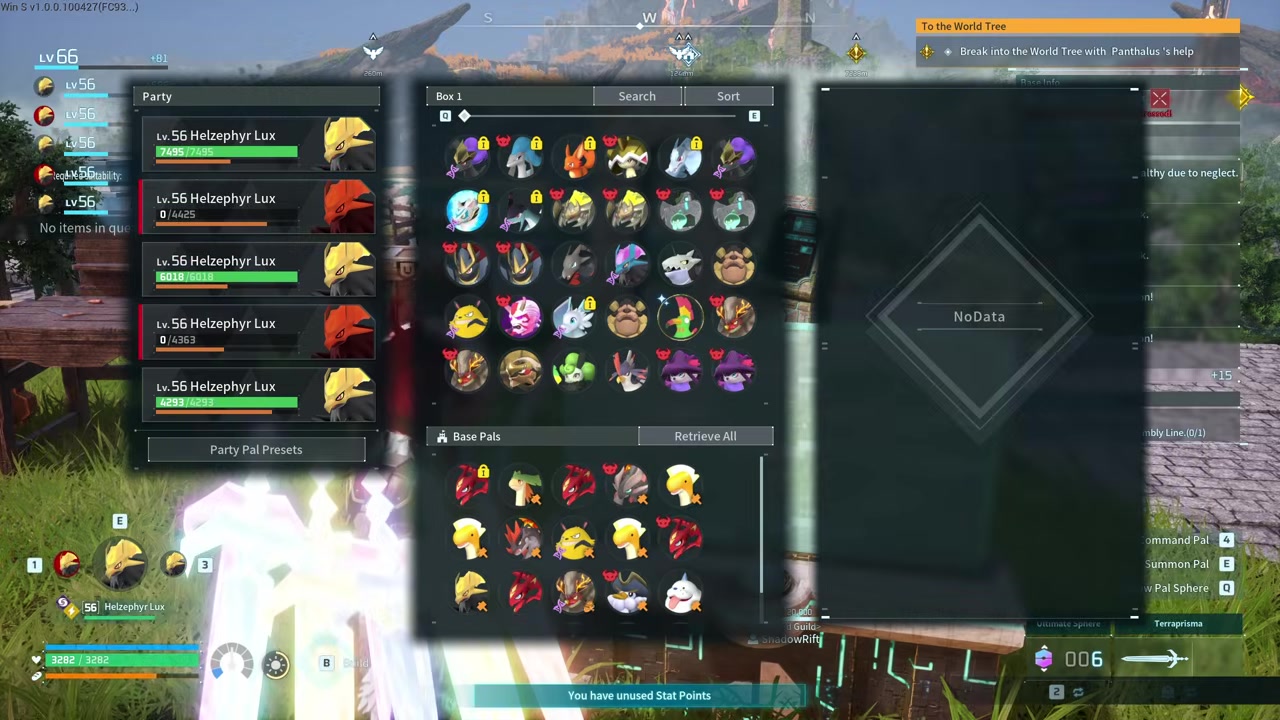
The cleanest setup is a Helzephyr Lux with its saddle, a charged Turret Prisma Sword, backup ranged weapons such as a Plasma Cannon or Multi Guided Missile Launcher, and a Ring of Mercy so Panthalus stops at 1 HP instead of dying. Bring Pal Spheres as well; once the boss is at 1 HP, even a basic sphere can finish the capture.
How to beat Panthalus in Palworld
This route keeps you mounted, airborne, and close enough for the Turret Prisma Sword to land repeated hits on the head crystal.
STEP 1/17
Charge the swords first
Charge the Turret Prisma Sword several times before combat until it is full and ready to attack automatically.

STEP 2/17
Mount a flying Electric Pal
Ride Helzephyr Lux with its saddle equipped so you can stay airborne and reduce the pressure from Water attacks.
STEP 3/17
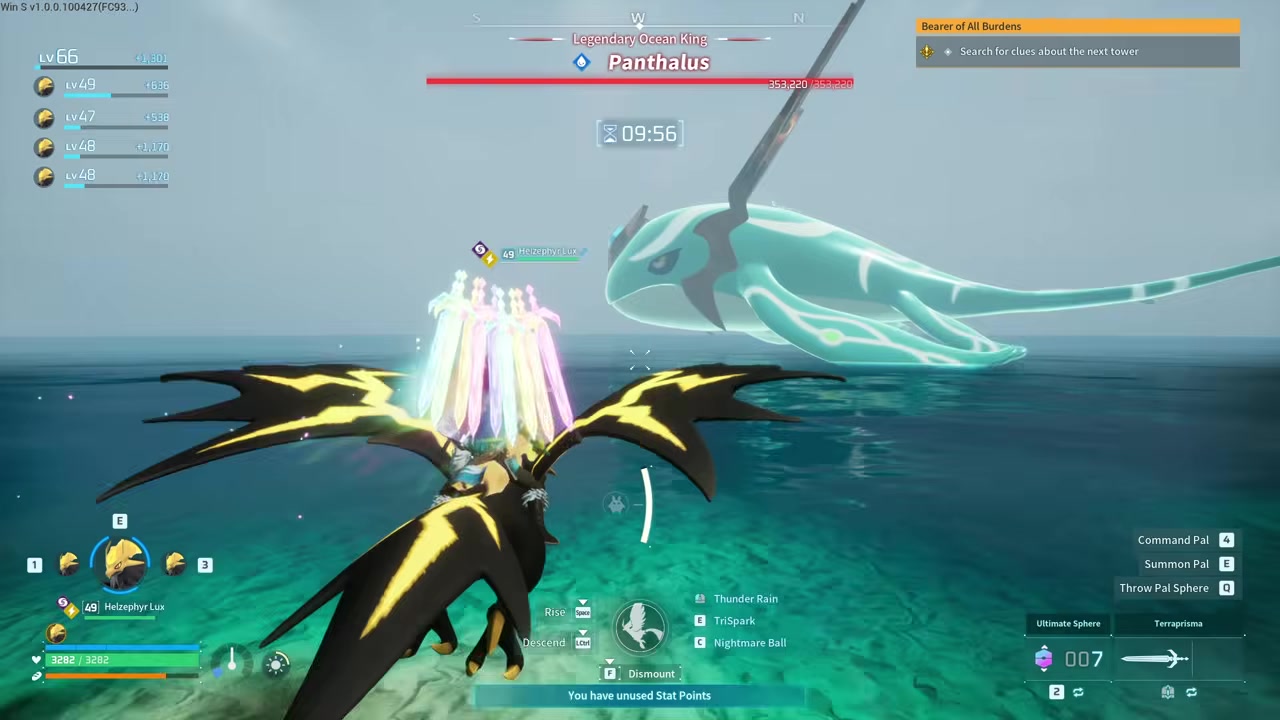
Fly to Panthalus
Approach the boss while mounted and do not waste damage or positioning before the fight actually begins.
STEP 4/17
Let Panthalus wait
Panthalus does not attack until you attack first, so use this moment to line up at the front.
STEP 5/17
Start from the front
Attack once from the front to trigger the fight and activate the sword damage.
STEP 6/17
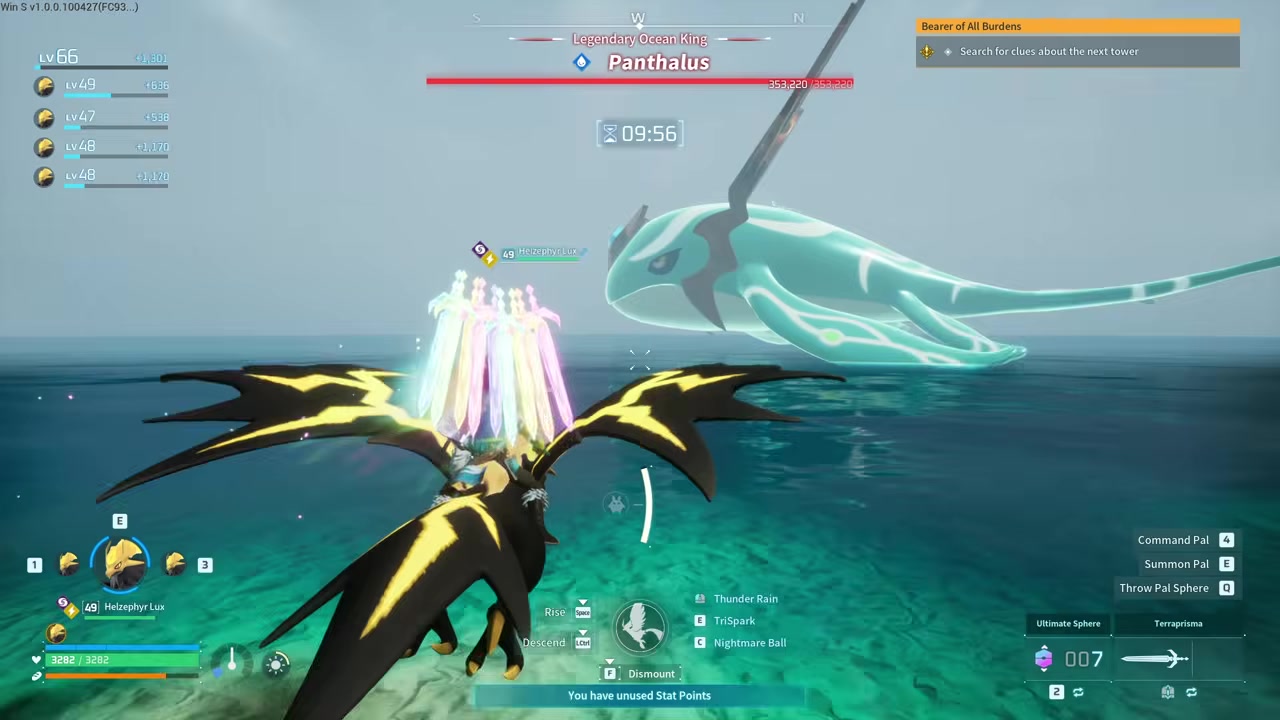
Stay close to the head
Keep yourself near the front of the boss because the sword method works best at close range.
STEP 7/17
Stay above the water
Fight while flying above the water because being in the water lowers your damage.
STEP 8/17
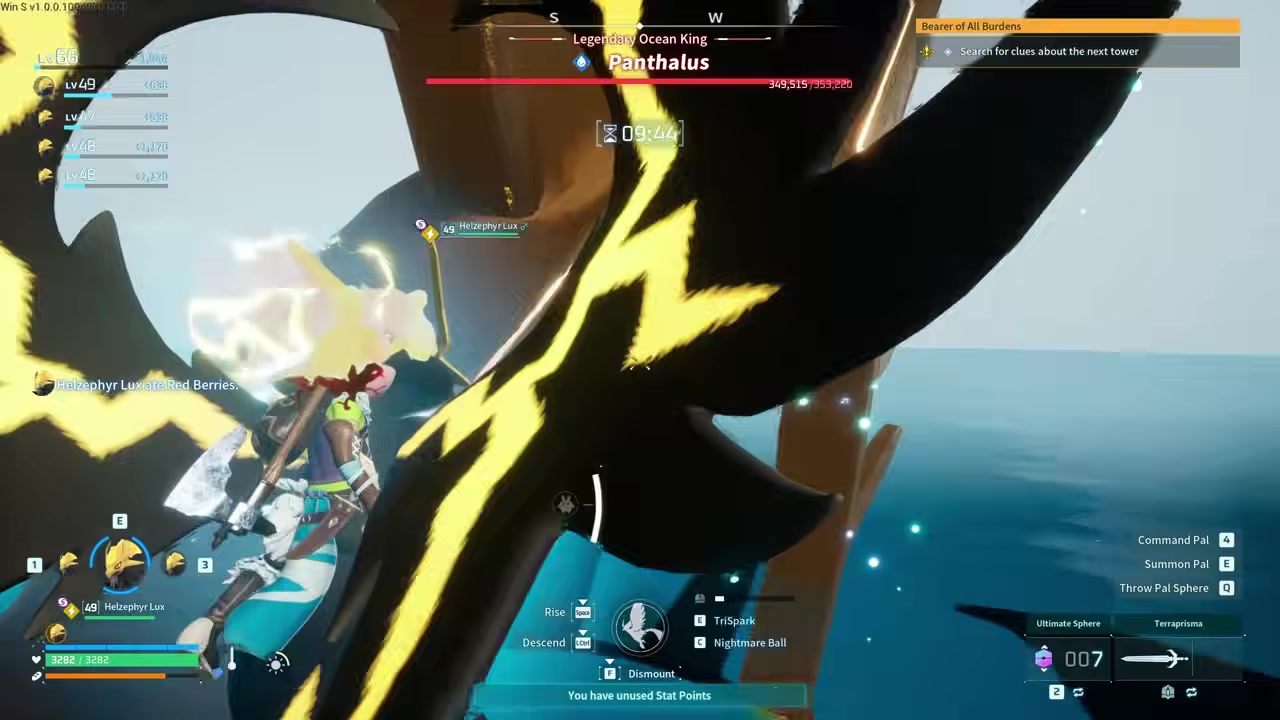
Dodge bubbles forward
When bubble projectiles come out, move forward so the pattern misses instead of drifting backward into it.
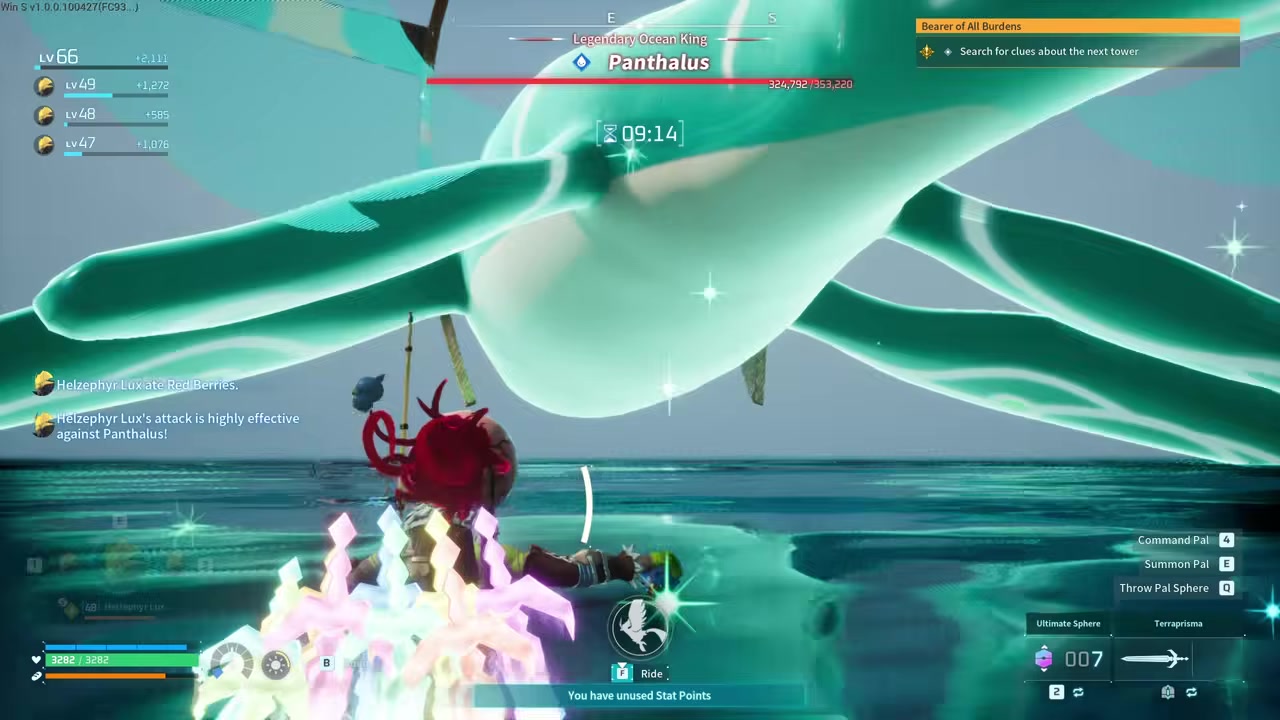
STEP 9/17
Return to the front
Move back toward the boss’s face after dodging so the swords keep hitting automatically.
STEP 10/17
Intersect when safe
Push close enough to overlap the boss’s front when the projectile pattern allows it to keep damage high.
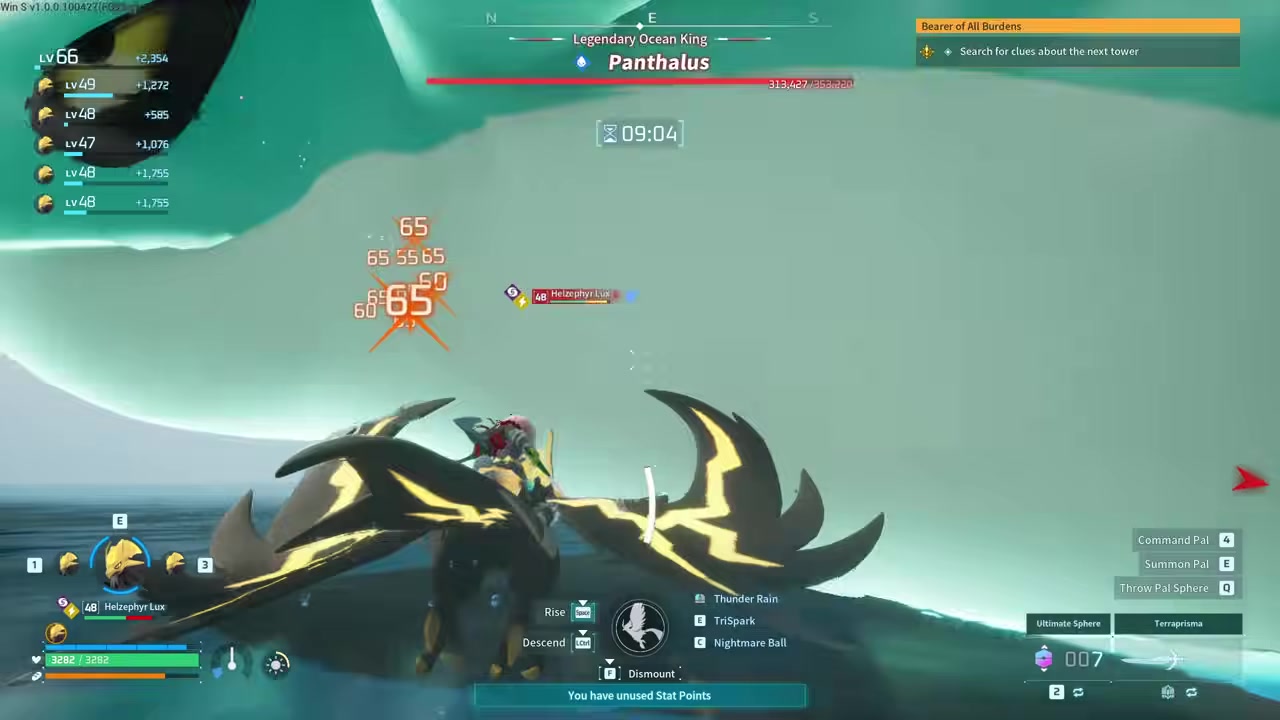
STEP 11/17
Watch every projectile
Keep tracking the bubbles and other incoming Water attacks because your mount can still be worn down.
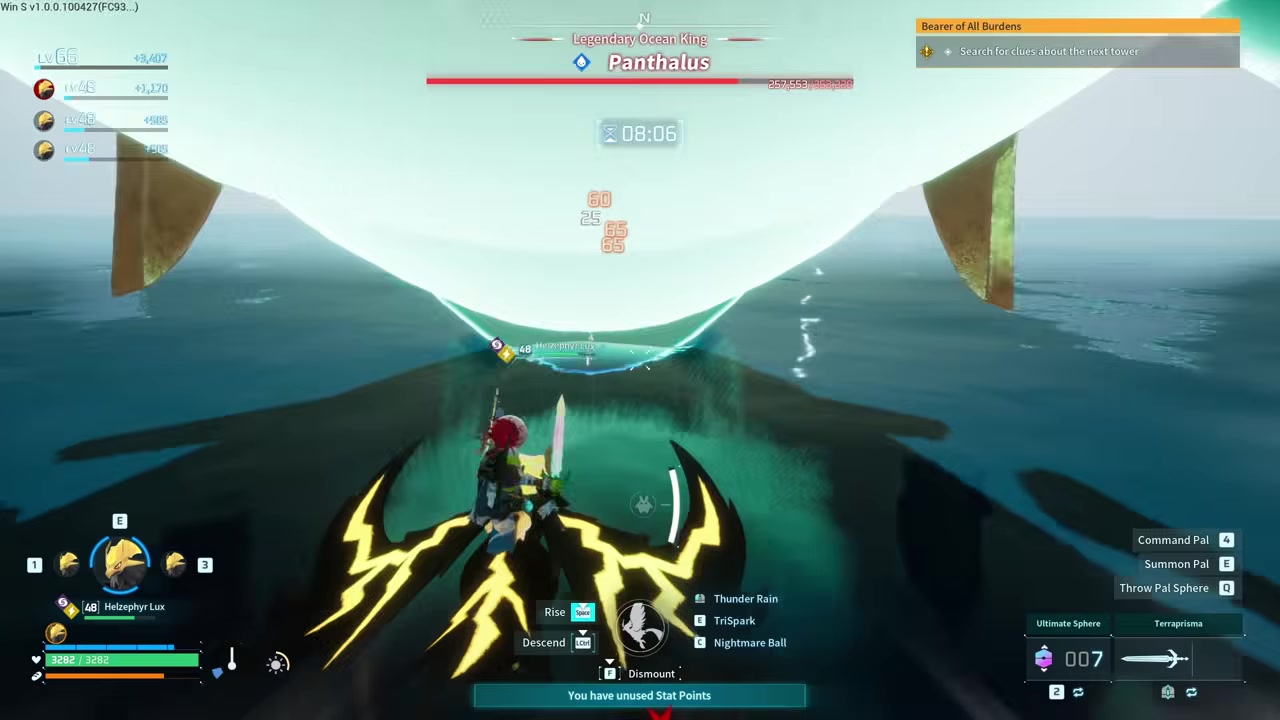
STEP 12/17
Stop recharging mid-fight
Once activated, the swords keep attacking automatically, so focus on positioning instead of charging again.
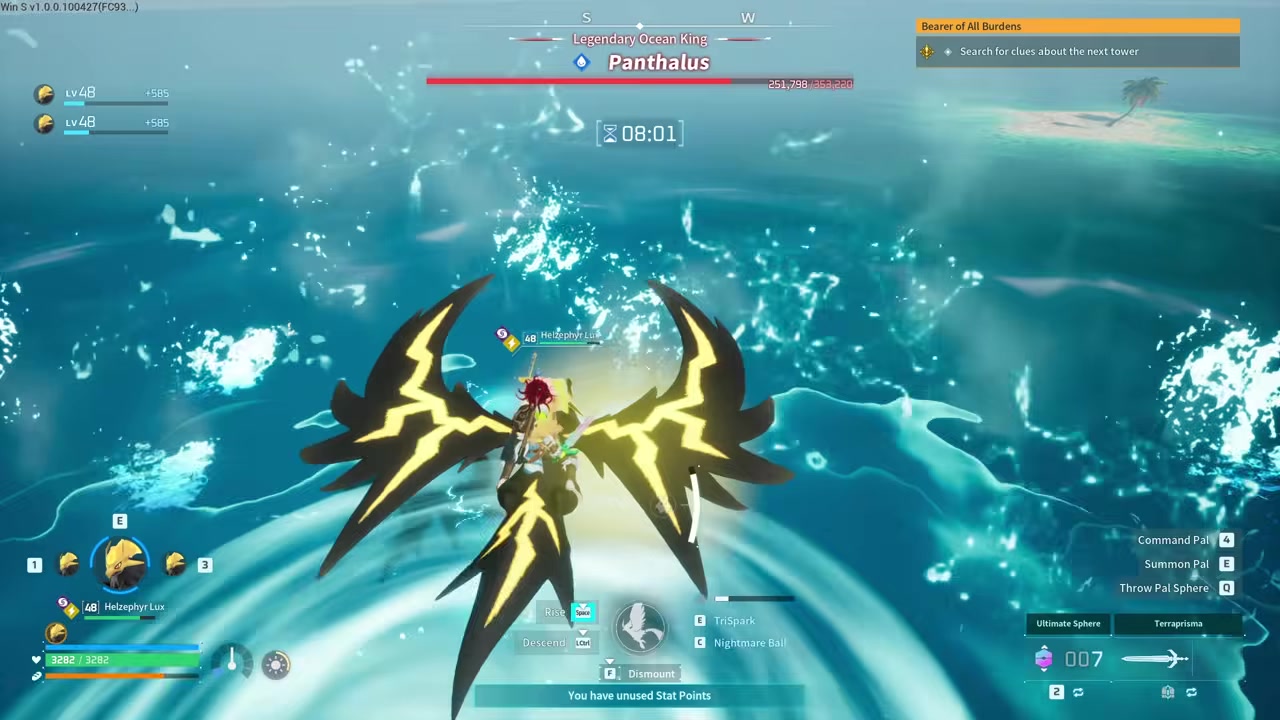
STEP 13/17
Target the head crystal
Aim the pressure at the crystal on top of Panthalus’s head for maximum damage.
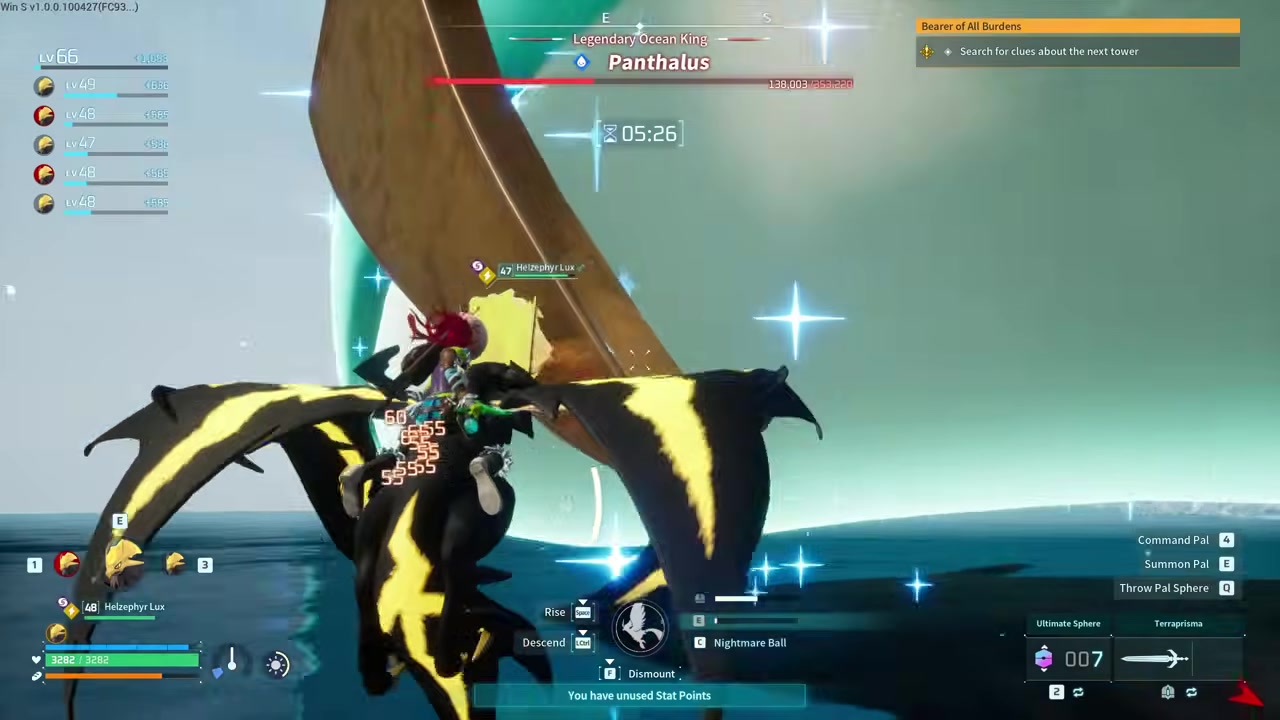
STEP 14/17
Track the blue crystal
Use the blue crystal as your visual target whenever the boss turns or shifts.
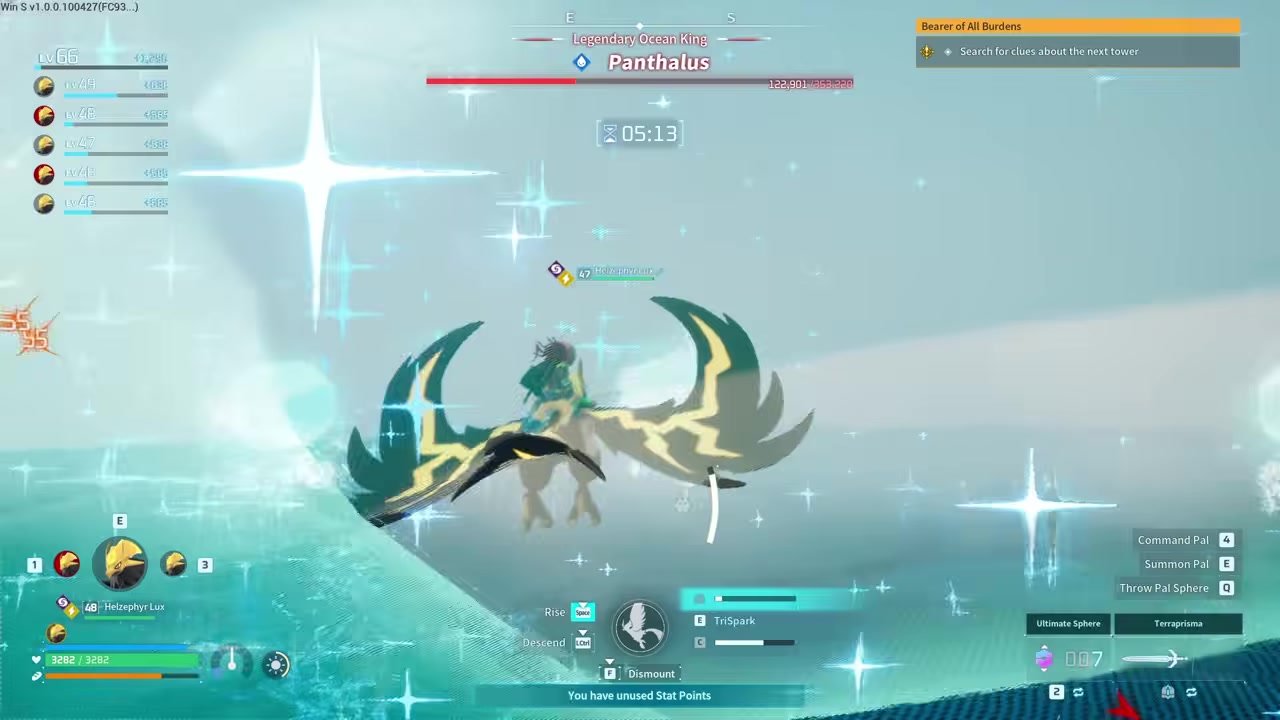
STEP 15/17
Stay mounted for damage
Do not rely on dropping your Pal beside the boss as the main plan, because mounted close-range pressure does better here.
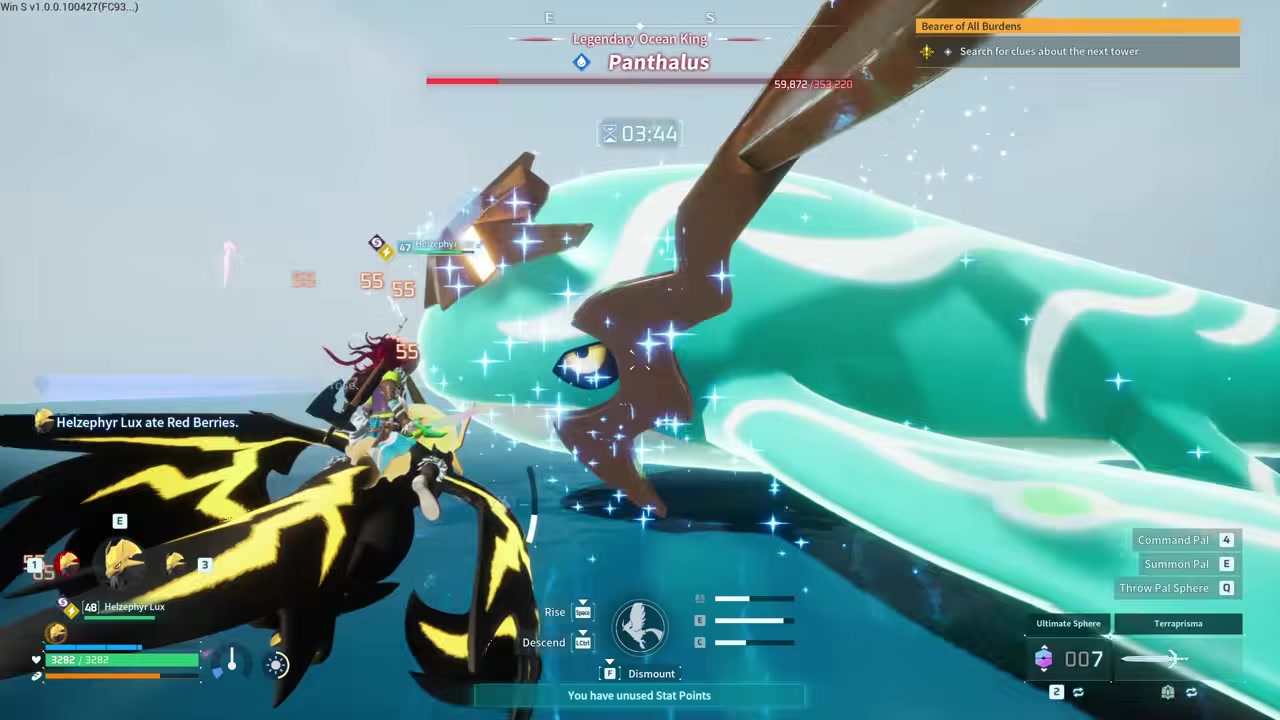
STEP 16/17
Bring a capture sphere
Have a Pal Sphere ready because Panthalus must be captured after it is defeated.
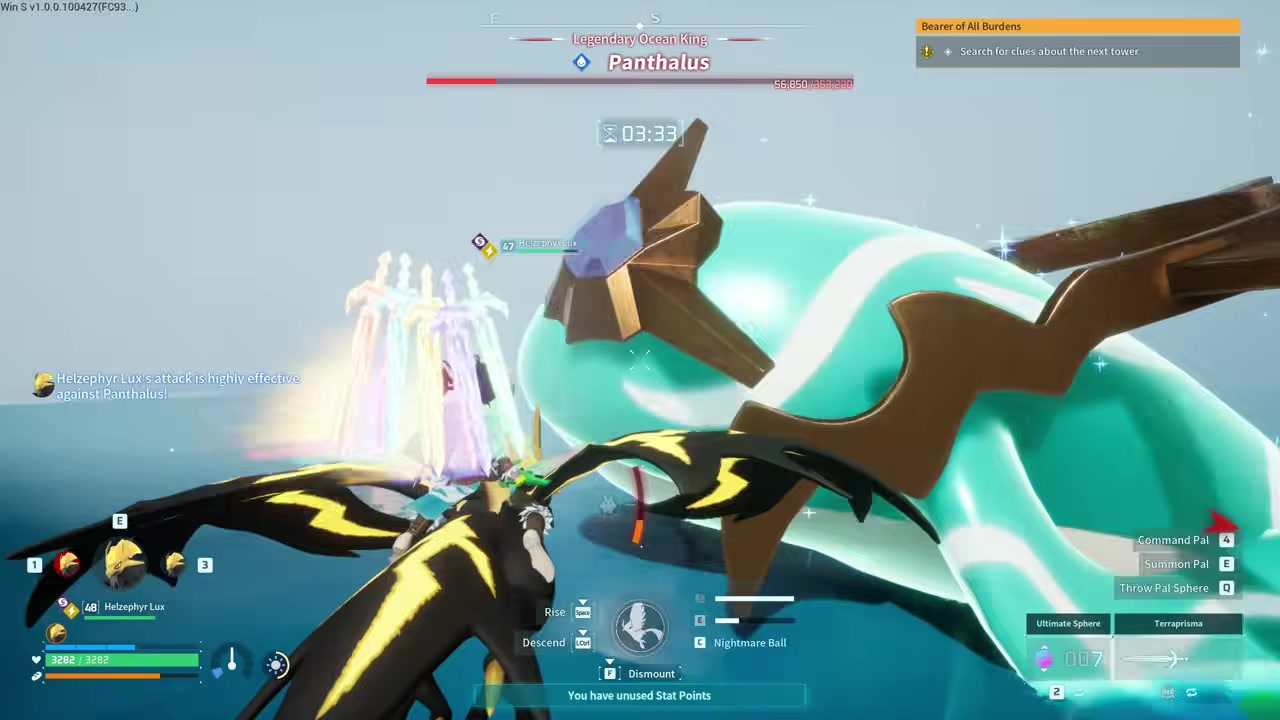
STEP 17/17
Throw after the KO threshold
Once Panthalus is at 1 HP, throw a sphere immediately instead of spending more high-end ammo or spheres.

Video help
Preparation before the Echoing Flute
| Item or Pal | Purpose |
|---|---|
| Helzephyr Lux with saddle | Flying Electric mount for staying above Water attacks |
| Turret Prisma Sword | Automatic damage once fully charged before the fight |
| Plasma Cannon or Multi Guided Missile Launcher | Backup ranged DPS for the 10-minute timer |
| Ring of Mercy | Keeps Panthalus from dying before capture |
| Pal Spheres | Captures Panthalus once it reaches 1 HP |
| Healing and repair resources | Keeps your mount, gear, and attempt alive through long patterns |
| Open fight space | Gives you room to fly forward through bubbles and reset at the front |
Use the Echoing Flute only after your loadout is ready, because the Deserted Islet encounter starts immediately when you interact with the shrine or tablet. If you still need a flying Electric mount, Helzephyr Lux can be found in the sandy desert area shown on the map, with several flying around there.
Charge the Turret Prisma Sword before touching the fight trigger; once Panthalus is active, your job is mostly to stay airborne, close, and pointed at the blue head crystal.
Capture-focused Panthalus procedure

How to capture Panthalus after winning the fight
Use this version of the route when your goal is to beat Panthalus and leave with the capture instead of accidentally killing it.
- Fill the sword charge — Charge the Turret Prisma Sword before combat until it cannot be charged further.
- Ride Helzephyr Lux — Mount Helzephyr Lux with the saddle equipped so you can fly and apply Electric pressure.
- Approach without attacking — Fly toward Panthalus and hold your first attack until you are ready to begin.
- Trigger from the front — Start the fight with a front-facing attack so the automatic swords immediately have a good angle.
- Hold close range — Stay as close to the front and head as possible to keep the sword hits connecting.
- Keep out of the water — Remain above the water because grounded or swimming damage is noticeably worse.
- Push through bubbles — Move forward through the early bubble patterns so they pass behind you.
- Re-enter the boss’s space — Intersect with Panthalus when it is safe, since close mounted positioning keeps the damage stream active.
- Let the swords work — Do not spend the fight trying to recharge; once active, the swords attack on their own.
- Aim at the head crystal — Keep your pressure on the crystal on top of the head for the best damage route.
- Avoid dismount-focused damage — Staying mounted works better than leaving your Pal near the boss as your main damage source.
- Prepare the sphere — Keep a Pal Sphere ready before the final sliver of HP so you do not scramble after the timer pressure.
- Capture at 1 HP — Stop burst damage near the end, let the Ring of Mercy hold Panthalus at 1 HP, then throw the sphere.
Panthalus attacks and weak point
The attacks that matter most are the bubbles, other Water projectiles, wide tidal waves, and heavy body slams. Staying mounted and airborne handles much of the danger because you can keep moving while the boss commits to large patterns.
The head is your main target in this method. Aim the Turret Prisma Sword hits and any backup fire at the blue crystal on top of Panthalus’s head; some weak-point wording points to the body or upper body, but the head crystal route is the one this strategy is built around.
Panthalus mistakes to avoid

Do not use the Echoing Flute until your mount, weapon charge, spheres, and Ring of Mercy are ready. The encounter starts immediately, and wasting the opening with bad positioning can turn the 10-minute timer into the real boss.
The biggest damage mistakes are fighting in the water, standing too far away for the sword method, bringing a non-flying or non-Electric Pal, and relying on your Pal fighting beside Panthalus instead of riding it. The biggest capture mistakes are skipping Ring of Mercy, killing Panthalus instead of leaving it at 1 HP, and burning Legendary or Ultra Spheres when a 1 HP capture can be finished with any Pal Sphere.
After capturing Panthalus
After the capture, take Panthalus to the World Tree gate terminal to open the World Tree region. From there, rebuild supplies and tune your Electric team for the later World Tree and final-story encounters that follow.
Frequently Asked Questions
Can you capture Panthalus after the fight?
Yes. Panthalus is meant to be captured after it reaches 1 HP, so bring Pal Spheres and use a Ring of Mercy to avoid killing it by accident.
What is the best Pal type to use against Panthalus?
Electric Pals are best because Panthalus is a Water-type boss. A flying Electric mount such as Helzephyr Lux or Beakon is ideal because it lets you stay above the water while attacking.
Where is the Panthalus boss fight started?
The fight is started on the Deserted Islet by using the Echoing Flute at the shrine or tablet tied to the encounter. Some quest paths point players there after talking to Auri, while others route through the Ancient Civilization Researcher on the Deserted Islet.
Do you need Legendary or Ultra Spheres to catch Panthalus?
No. Once Panthalus is at 1 HP, the capture can be finished with any Pal Sphere, so you do not need to waste Legendary or Ultra Spheres at the end.
What should you aim at for the most damage?
Aim at the blue crystal on Panthalus’s head. Keep your flying mount close to the front so the Turret Prisma Sword’s automatic hits connect with that spot as often as possible.
More questions⤵
Why am I doing low damage during the fight?
You are probably fighting in the water, standing too far from Panthalus, missing the head crystal, or failing the Electric damage check. Stay airborne on a flying Electric mount, move close to the front, and keep the Turret Prisma Sword focused on the blue head crystal.






Leave a Reply