Snapseed has grown into a powerful photo editor on Android and there are more than a handful of reasons why the editing app is widely used. You can enhance images with one-touch tools, tune images with sliders, get double exposure effects, add filters, create great selfies, apply cool text effects, create a color pop effect manually, and give pictures a new look in just a matter of minutes.
The app isn’t only free but also offers features that don’t come with most of the image editing tools available on the PC side of things. One such tool is the ability to add watermarks to pictures directly on your Android device. Watermarks can be added as logos and texts on a picture and this article will help you add both of them to your pictures using Snapseed.
How to watermark your photos using Snapseed
The following guide will help you create images with a watermark of your choice so that your image remains true to you.
Watermark using a logo image
You can add a logo image as a watermark over your current image though this guide.
1Download and install the
Snapseed app from Google Play.
3 Tap anywhere on the app’s home screen to load a picture.

4 Select a picture you want to add a watermark on.
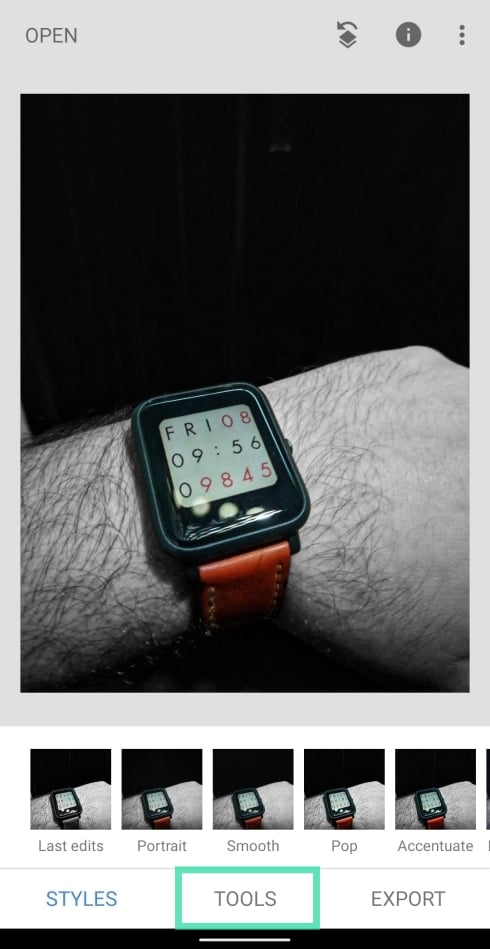
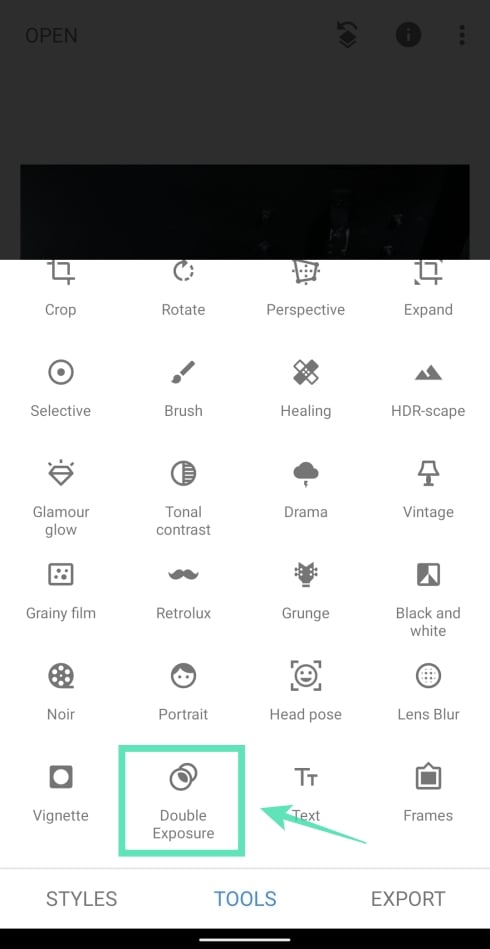
5After the picture is loaded, tap on the
Tools tab at the bottom.

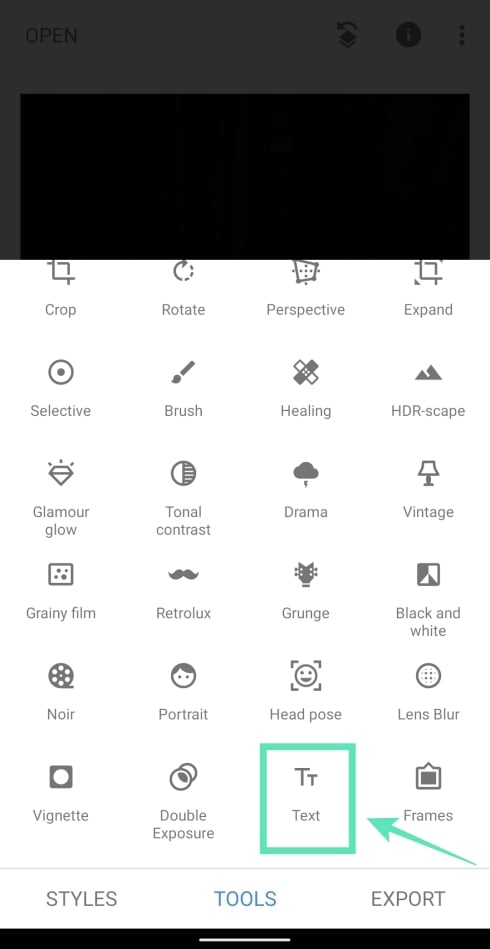
6Select the
Double Exposure tile from the menu.
7Tap on the
add image icon from the bottom toolbar.

8Select the image you want to use as a watermark over the current picture. If the watermark is a logo, the file will be in PNG format.
9Make the necessary modifications to the watermark by resizing and moving it to the position of your choice.
10Tap the Blend button to choose from different blending modes for your logo that is placed on top of the image. For best results, use Lighten to show both the main image and watermark properly.
11Change the opacity of the logo by tapping the droplet icon at the bottom and adjusting the opacity on the slider.
The Opacity should be adjusted in such a way that the main image isn’t obstructed in any way.
12Tap on the
tick mark icon at the bottom right corner to apply the changes.

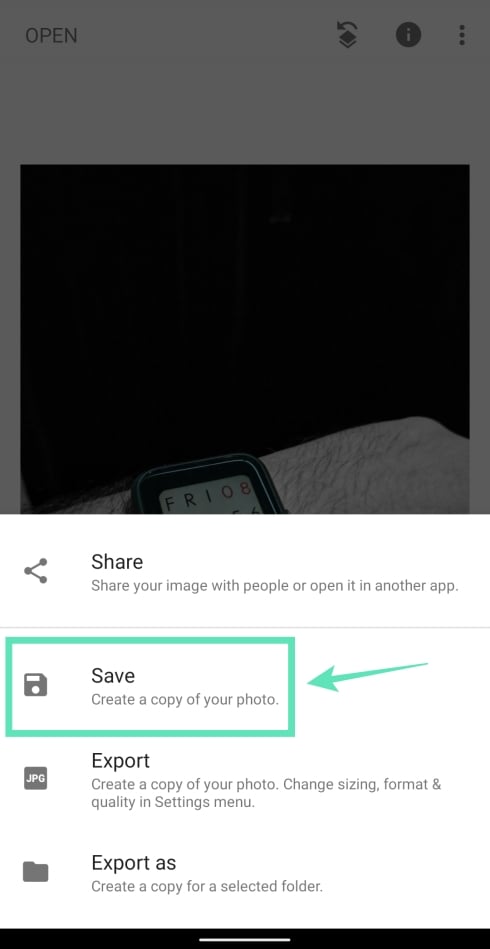
13 To save the edited picture, tap on the Export tab at the bottom and select Save. You can also share this picture directly from Snapseed by tapping on Share and then select an app or contact to share to, from the Share menu.
Watermark using a text
In case you don’t have a logo, you can add a text as a watermark over your image by following these steps on Snapseed.
1Follow steps 1 through 5 from the guide above.
2Tap the Text tile upon opening the Tools menu.
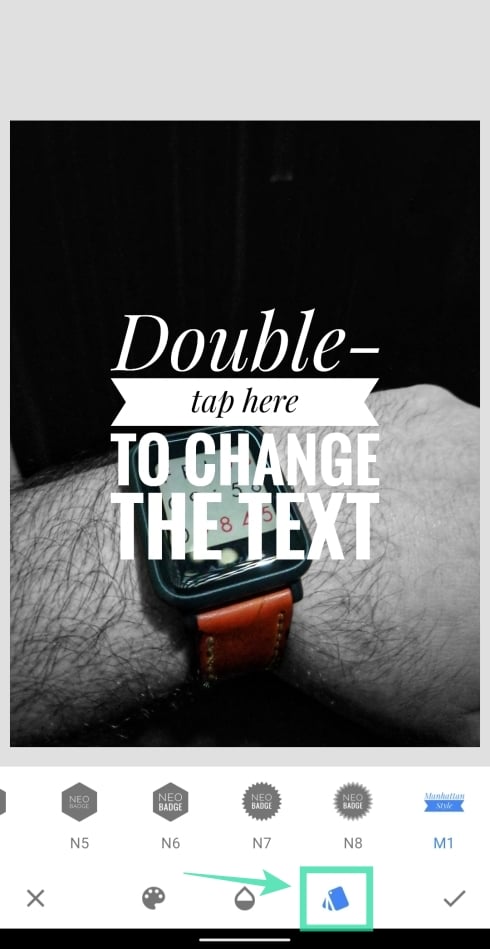
3Choose the text style by tapping on the style icon from the bottom and selecting from the options.
4Tap the
droplet icon from the bottom and
adjust the opacity of the text by sliding through the slider.

5Tap the
paint icon from the bottom toolbar and
choose the color of the text you want to add as a watermark.

6Now double-tap on the text box to enter a text and after typing the desired text, tap OK.
7Reposition and
resize the text box as you wish by pinching and dragging the element to the desired location.

8Once all the edits are done, tap on the
tick-mark at the bottom right.

9To save the edited picture, tap on the Export tab at the bottom and select Save.
Your photo will now be saved to your library. You can also share this picture directly from Snapseed by tapping on Share.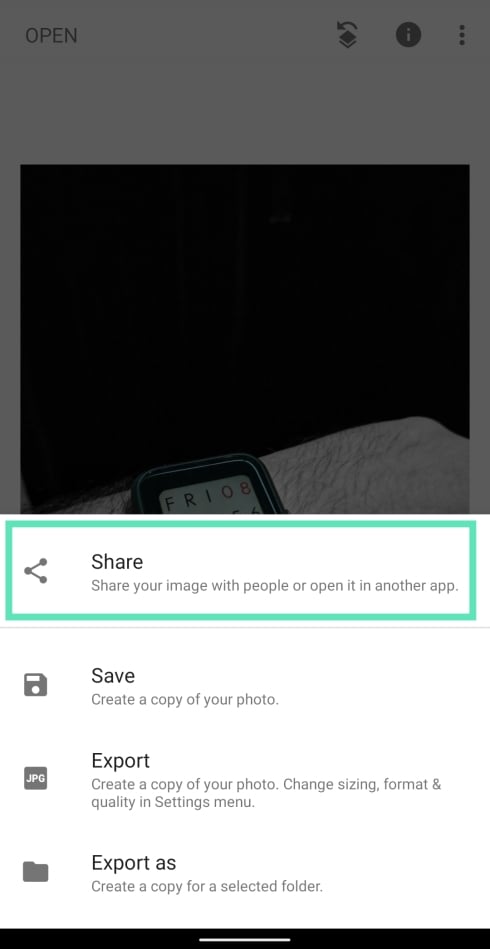
That’s it! You have successfully created a picture with a watermark.
Do you often add watermarks to your pictures? If yes, how do you do it? Let us know in the comments below.
RELATED: