There are a plethora of photo editing apps available on the Google Play store (APK download), all attempting to deliver you the best tools to let you customize your photos to cool effects and transformations.
Many photo editing apps just slap a filter on your photo and leave it at that. However, if you’ve ever seen a double-exposure image and thought “wow! this must take some serious Photoshop skills to achieve”, we are here to tell you that you could turn your photos with that beautiful effect easily within a few minutes, just by using your Android smartphone.
So what is Double Exposure?
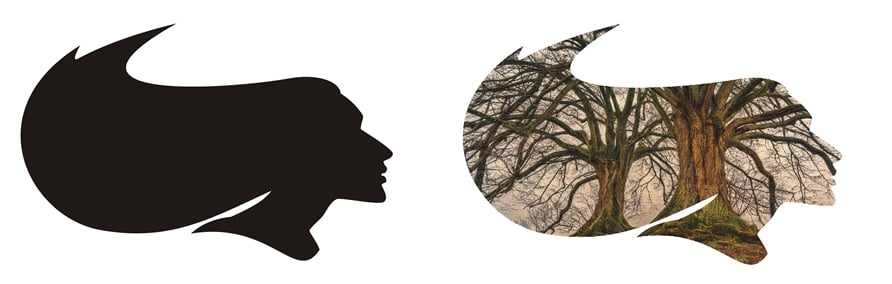
Double Exposure is basically superimposing two images to create a unique effect.
There is a ton of image editing apps available on the Play Store that offer you an ability to create Double Exposure image, but we have done some homework of our own to save you time and give you what we think are the best apps for this.
Also read:
So, these are the three best apps to create a Double Exposure effect. We have provided a ste-by-step guide for each one of these to help you edit your photos for Double Exposure effect easily.
Using ToolWiz
Although ToolWiz does not have as many downloads as the other two apps on the list, it’s probably one of the best apps available on the Play Store for creating the Double Exposure effect. It is the easiest of the bunch to use, and lets you create great Double Exposure images in just a few steps.
How to get Double Exposure effect using ToolWiz Android app
- Install the Toolwiz app from the Play Store.
- Open the app and load the image you want to work with.
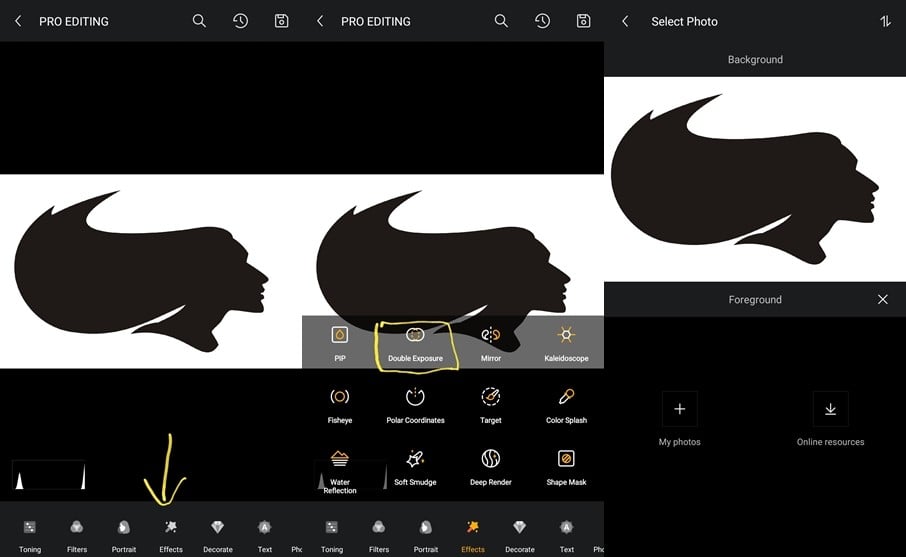
- Scroll through the bottom toolbar and find the ‘Effects’ option and tap on it.
- Once a list of effects pops up, tap the ‘Double Exposure’ icon.
- Now tap on ‘My Photos’ if you want to use an image from your own gallery, or tap on ‘Online resources’ to check out other images.
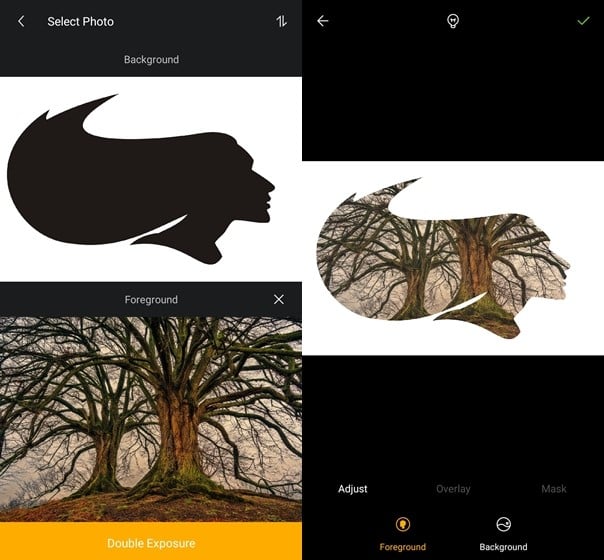
- Select the image of your liking to create a Double Exposure effect and then tap on ‘Double Exposure’ option highlighted in yellow.
Voila, you’ve just got a cool Double Exposure image within a few seconds.
Using PicsArt

If you’ve ever tried searching for an editing app on the Play Store you would have probably come across the PicsArt app. It has almost each and every feature you could need from an editing app.
The Double Exposure effect can be achieved easily with the PicsArt app too in just a few steps. Editing photos with Double Exposure style usually works the best when the primary image is a nearly-total black or white, and white and high in contrast.
How to get Double Exposure effect using PicsArt Android app
- Install the PicsArt app from the Play Store.
- Open the PicsArt app and load the image you want to use for the effect.
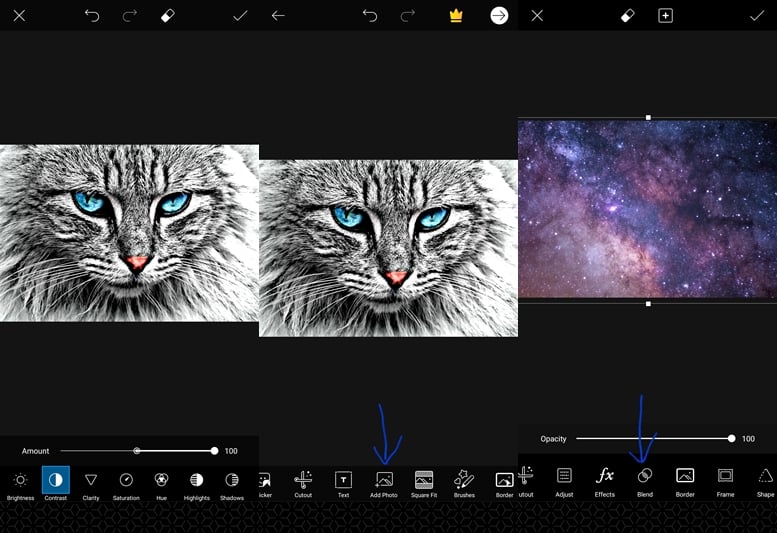
- Once loaded, select the ‘tune image’ option and increase the contrast.
- Scroll through the toolbar at the bottom till you find the option to ‘Add Photo’ click the add photo.
- Select the image you’d like to superimpose and position it over the previous image according to your liking.
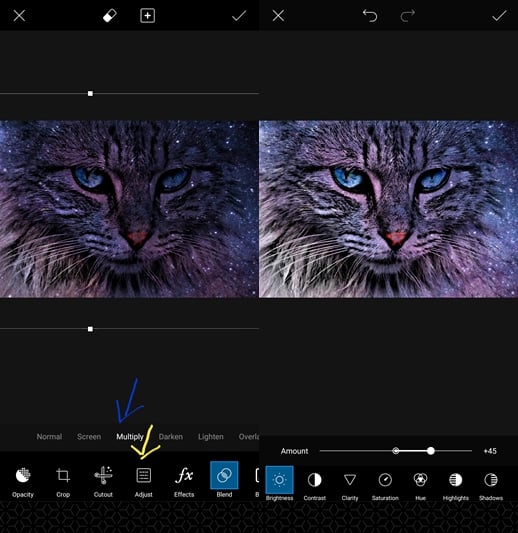
- Head over to the ‘Blend’ option and select the blending mode that works the best, in this case, ‘Multiply’
- The last step is to adjust the brightness slider according to your preference.
Related: How to create a video slideshow of photos
Snapseed
Snapseed is one of the best photo editing apps available on Android. The app is from the Google itself and offers a vast array of features. ‘Double Exposure’ is one of them. Here’s how you can achieve the cool effect.
How to get Double Exposure effect using Snapseed Android app
- Install the Snapseed app from the Play Store.
- Load the image you want to use for the effect.
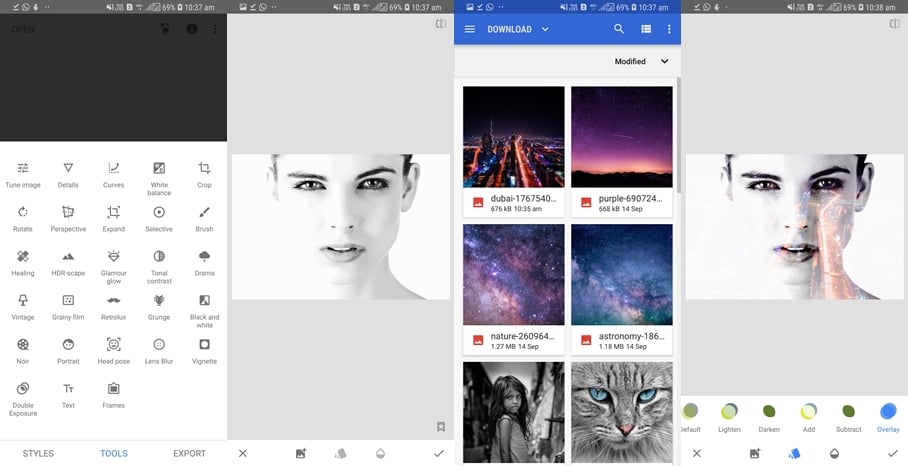
- Head over to the ‘tools’ section.
- Tap the ‘Double Exposure’ option then tap the ‘add photo’ icon at the bottom.
- Select the image you want to use for superimposing.
- Once the image is added. You can choose the blending mode. In this case, ‘Overlay’ was used.
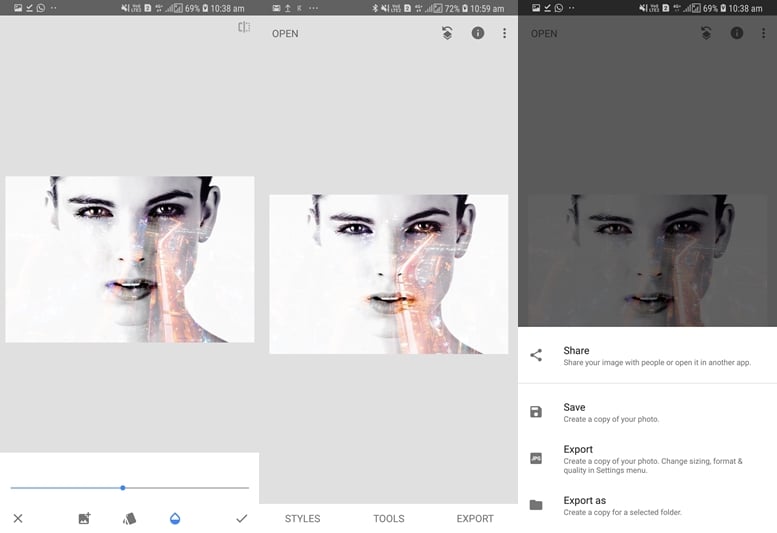
- Adjust the intensity of the effect according to your preference by using the slider at the bottom.
- Tap the tick mark icon to save changes.
- If you’re satisfied with the result, tap the ‘Export’ option and then tap on ‘Save’.
The saved image would appear in your Gallery.
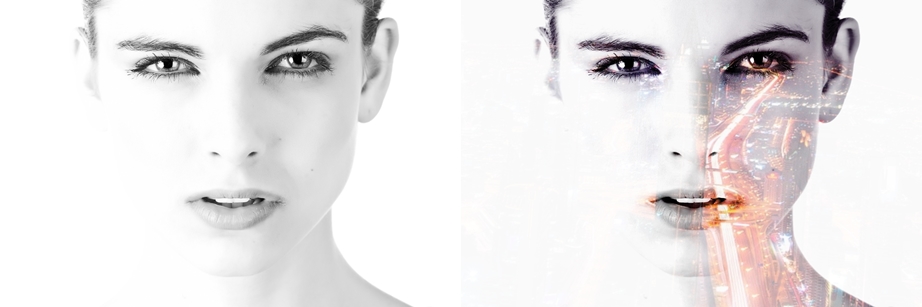
Some example images with Double Exposure effect!
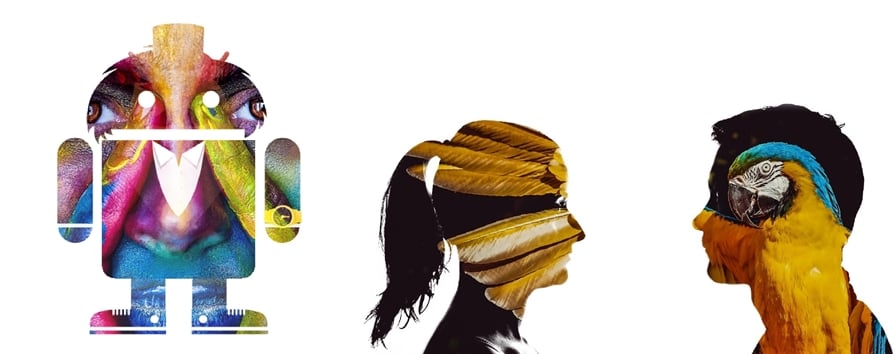

We hope this tutorial helps you create cool Double Exposure images without having to even use Photoshop for a second. Go ahead, have fun, and be creative.
So those were some easy to follow guides to create a cool Double Exposure effect using the best apps available on the Play Store. We hope you like them and are able to create some really cool Double Exposure images of your own. Do share with us in the comments section below.