
You may need to add some text to a photo for a lot of reasons. It could be a greeting, or a question about the product in the photo, whatever. Here’s how you can add stylish text to a photo using your Android phone using the popular Texty app.
BTW, you can also add text on a video, and check here if you are looking for some special text effects for a photo.
- How to add text on photos
- How to customize the text
- How to add graphic shapes
- How to quickly center the image, text, graphic
- How to use the eraser tool
- How to save and share the image after adding text
- How to make texts pop up in a picture
- How to create a fade text effect
- How to make text overlap effect in a picture
- How to add a glowing text effect
How to add text on photos


How to customize the text
Assuming that you have added the plain text using the above steps, let’s get into the customization part using various features available in Texty app.


Note: Instead of adding multiple texts to the background, try adding one text because once we add the second text, we will not be able to edit the first text.


Note: By default, stroke and glow are added to the text. But it is not visible because all are in default white color. We need to change the color and increase its value in order to display those effects correctly.


Try different fonts or use the Pen/Draw tool to write the text in your own handwriting and use different colors to improve the look of the added text.
Here are some more styles:


How to add graphic shapes
Adding texts to an image makes it look good because a proper message is being delivered. But shouldn’t we make it better by adding some graphics too?


How to quickly center the image, text, graphic
We are adding and editing the design of images, texts, and graphic shapes. But what if we wish to reset the editing of the specific image, text or graphic to its default? There is a simple and easy way to do this in the Texty app.


How to use the eraser tool
After adding multiple texts using the steps under “How to add text on photos”, let see how to delete one of the texts or a part of the text using the Eraser Tool.


Note: We can export the image after adding text/handwriting or after adding graphic shapes which will save only a copy of the working image. The original image which is in editing can be modified completely using the Eraser tool. Refer to the above image.


How to make texts pop up in a picture
Sometimes when adding texts to a picture, you might fail to make it visible and distinguishable from the picture you added it to. If you wish to make the texts pop out in the picture, you can use the Spotlight feature inside the iMarkup app that you can download through Google Play.


To do this, you can open the app, add a picture, and then select the ‘Spotlight’ tab from the bottom toolbar. You can use the handwriting tool inside this mode to doodle your text over the picture in such a way that that the text is visible on the foreground. A detailed guide on this is available below:
➤ How to Highlight Text in a Picture
How to create a fade text effect
Google’s own Snapseed app is quite impeccable on its own and is rich in features. You can add various effects when adding texts on the app and one of them is to give it a fade effect. The fade effect lets you erase a portion of the text you added but with a gradient-like look so that parts of it appear to get blended with the picture.
To add a fade effect on SNapseed, open the app, select a picture you want to add text to, and head over to Tools > Text. Enter the desired text in the box available and reposition it and when done, go to Stack icon > View edits > Text > Brush to start giving the text a fade effect.


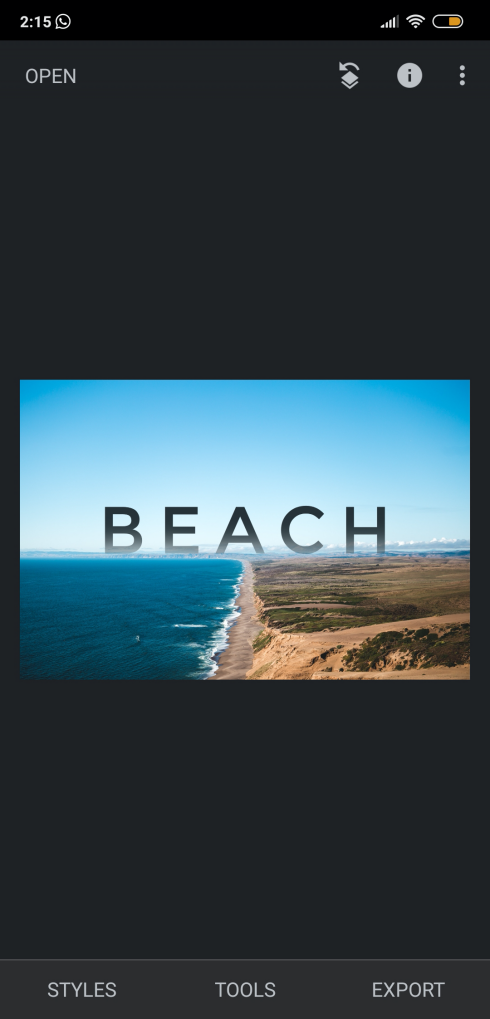
A detailed guide on this can be read below:
How to make text overlap effect in a picture
Snapseed also lets you create a text overlap effect, meaning you can superimpose parts of the text over elements inside your photo while letting the other parts stay in the background.
You can do this by first adding a text to a picture by going to Tools > Text and entering the desired text. After that, go to the text editor by heading over to Stack icon > View edits > Text > Brush. The idea is to set the opacity of the brush to 0 and then brushing in and around the text to hide a part of it.


Here’s a detailed step-by-step guide on this:
➤ How to do Overlap Text Effect
How to add a glowing text effect
Another simple way to define texts in a picture is by adding a glow effect on the Snapseed app. With this effect, while you’re adding a text in a simple way, you’re slightly tweaking the text’s background so much so that the text has significant visibility in the picture without overpowering it.
You can add a glow effect on Snapseed by going to the ‘Text’ tool inside Stack icon > View edits once you have entered the desired text to your picture and then inverting the text. When you do that, only the text area will show parts of the picture while the rest of the picture will be colored. You can use the Stacks tool to brush over a particular area of the text to give it the glow effect.


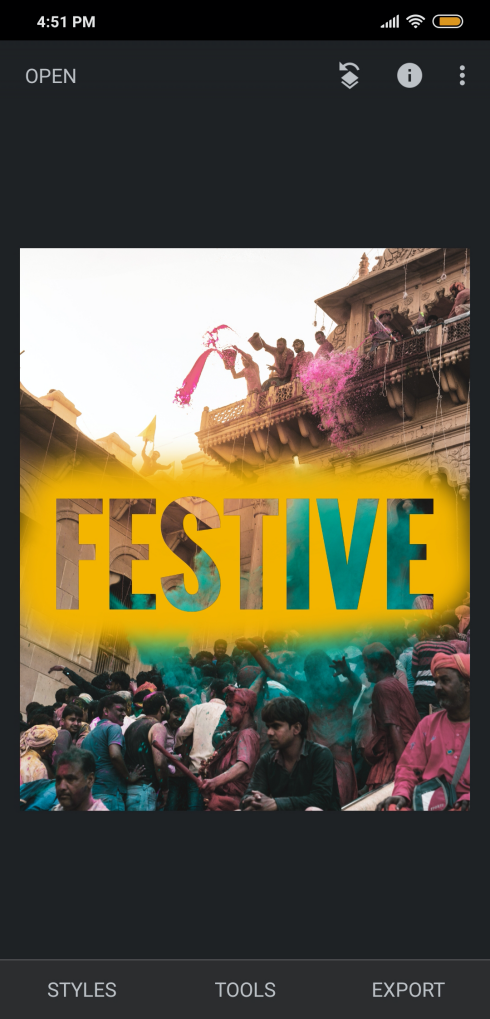
Read the guide below to get a clear idea of how to do this.
➤ How to do Glowing Text Effect
So, that was our tutorial on how to write some stylish text on your photos using your Android phone or tablet using the Texty app. Let us know how did you like it.
RELATED: