Instagram reels is a new feature added to the already feature-packed Instagram app. The feature lets you create 15-second, 30-second, or 60-second videos within the app with a host of customization options. In this article, we will cover how to reverse a video in Instagram reels to make it stand out against the rest.
Can you Reverse a video on Instagram?
While there was a short stint during which Instagram has introduced a reverse setting for recorded videos on the app, they have since removed it. reels too does not have a native setting to reverse a video. This is unfortunate, as we would have liked to see one, given that Snapchat has had it for years now.
Related: How to Create a Reverse GIF
How to Reverse a reels video on Instagram
So, since Instagram does not have a native function to reverse a video, we will be using our old trusted Snapchat instead. Luckily, Snapchat lets you save a recorded video. This means you can record the video in reverse in Snapchat, then upload it to your Instagram reels! You can also use other third-party apps to achieve the same effect. We have also covered InShot and Reverse below, you can use them as well to reverse your reels on Instagram. Follow one of the relevant guides below to get you started.
Method #01: Use Snapchat to reverse a video
Here’s how you can use Snapchat to reverse a reel and then post it to Instagram.
Step 1: Record a video on Snapchat
Launch the Snapchat app on your phone. Use the Snapchat camera to record your video.
Once done swipe to add filters to your video. The motion filters are after the color filters. Swipe left seven times to reach the reverse filter.

Once you have applied the Reverse filter, you can download the video by tapping the save button in the bottom left corner.

Step 2: Upload the video to reels
Now it’s time to upload that video to Instagram reels. Launch the Instagram app, and swipe right to reach your camera screen. Alternatively, you could tap the Story button in the top left corner. Now select the ‘reels’ tab from the bottom panel.
To upload a video from your gallery, tap the button in the bottom left corner. Select the video to upload it.

Once you have your reversed video, you can easily post it to your profile. This is the same as posting an image or video. Tap the arrow button in the bottom right to bring up the sharing page.
Use a third-party app to reverse a video:
If you do not have Snapchat or just don’t want to use its incredibly bad camera, you can use a third-party video editing app to reverse your video. This way you can shoot a video from your native camera app and then reverse it. Use one of the apps below depending on your preferences.
Related: What Happens When You Temporarily Disable Instagram?
Method #02: Using Reverse Movie Fx app
We will be using the app ‘Reverse Movie FX’. Use the link below to download the app to your phone.
Download Reverse Movie FX app: Android | iOS
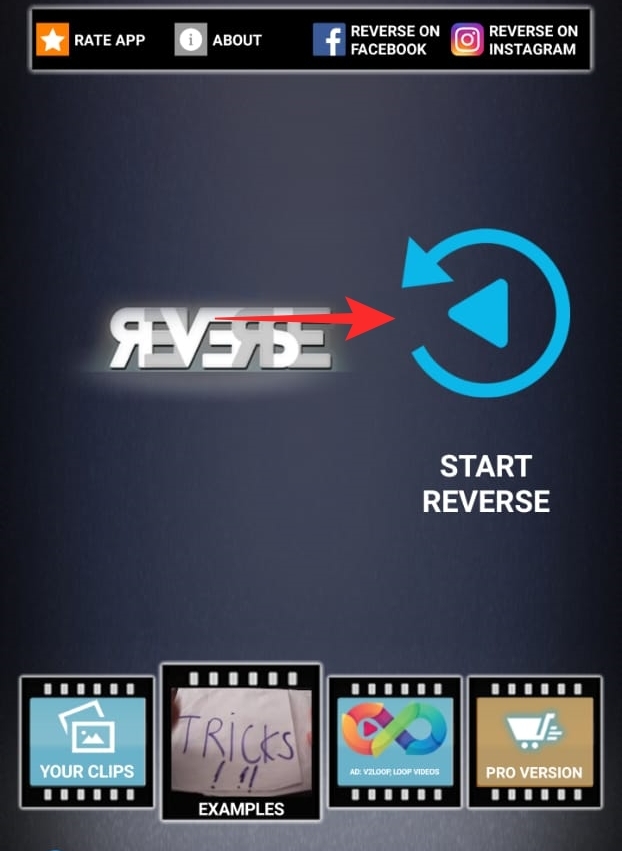
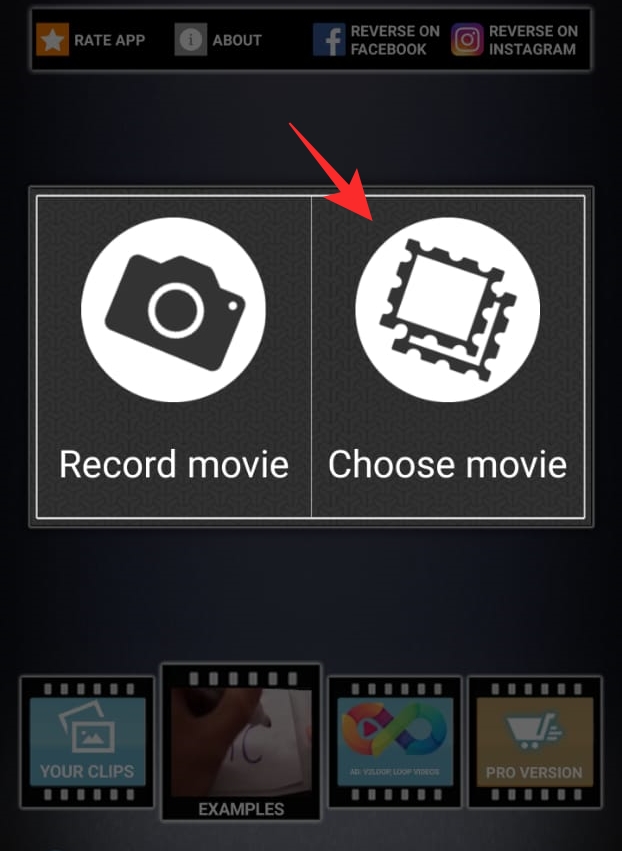
Go ahead and record your video using your phone camera. Now launch the Reverse Movie FX app. Tap ‘Start Reverse’, then ‘Choose movie’.
Select the video clip that you would like to reverse from your gallery. Tap ‘Start’ to reverse the clip.

Once you have your video reversed, use the above method user ‘Upload the video to reels’ to add your video to Instagram reels.
Method #03: Using InShot
- Inshot | Download Link: For iOS & For Android
Guide for Android Users
Download and install Inshot on your device using the relevant link above. Tap on ‘Video’ once the app is open.

Select a video from your local storage.

Tap on the ‘Check mark’ once you are done.

Scroll the tools at the bottom and tap on ‘Reverse’. The video will now be processed and reversed.

Once done, tap on ‘Save’ in the top right corner of your screen.

Select your resolution and frame rate by tapping on the same.

Tap on ‘Save’ once you are done.

You will now be shown an ad that can be skipped. Your video should be automatically saved once the process is complete. You can now tap the Instagram icon to directly share the reel to your Instagram profile.

Tip: You can turn off mobile data and Wi-Fi for InShot to avoid ads in the future.
Guide for iOS Users
If you’re on iOS then download InShot using the relevant link above. Once downloaded to your local storage, open the app and tap on ‘Video’.

Select the desired video from your gallery.

Tap the ‘Check Mark’ once you are done.

Scroll the tools at the bottom and tap on ‘Reverse’.

The video will now be processed and reversed.

Once the process is complete, tap on the ‘Share’ icon in the top right corner of your screen.

Select your resolution and frame rate by tapping on the respective options. Once you are done, tap on ‘Save’.

The video will now be saved to your local storage and you should be able to access it after watching an ad. You can now tap the Instagram option and post the reel to your profile.

Tip: You can disable internet access for InShot to avoid watching ads in the future.
Related: How To Save Instagram reels Without Posting — Keep reels In Drafts
More third-party apps to reverse your reel
It’s not just InShot or Reverse Movie FX, there are tons of apps out there for Android and iOS that allow you to reverse your video. If you have any of these installed on your device then you can use them to reverse your reels as well.
- Kinemaster: Android | iOS
- VN video editor: Android | iOS
- Filmora Go: Android | iOS
- Vita: Android | iOS
- Power Director: Android | iOS
Reverse an Instagram reel on Desktop
Yes, you can also use desktop apps to reverse your video directly from your PC. You can use an online video editor or use an app locally to reverse the desired video. We recommend checking out the following utilities to help reverse your video from the desktop if you are interested.
- Kapwing (Webapp) | Link
- Clideo (Webapp) | Link
- EzGif (Webapp) | Link
- FFmpeg | Download Link
- Adobe Premier Pro (paid) | Download Link
- Davinci Resolve (free) | Download Link
FAQs
Here are some commonly asked questions that should help you get up to speed when it comes to reversing your reel on Instagram.
What happened to Instagram Rewind?
Instagram Rewind has sadly been removed from Instagram. Rewind was a dedicated filter in Instagram that allowed you to reverse your videos however, this was shortly removed with the introduction of Stories and reels in Instagram last year. Rewind as of now, is still missing from Instagram.
Will Instagram bring back Rewind?
No, it doesn’t seem that Instagram has any intention of bringing back Rewind in the app. While many users believed that the same would be introduced with Effects for reel that were recently launched but that wasn’t the case. It seems that Facebook has no intention of adding Rewind to Instagram for now and this seems to be due to legal reasons for now.
Why is there no native Reverse feature?
The reverse feature requires proprietary code or tie-ins with video libraries which Facebook seems to be unwilling to do so, and hence there is no native feature in Instagram. It also seems that Instagram has been adding a slew of new features and effects which quite resource-heavy. Adding the native ability to reverse videos in real-time will increase the resource consumption of the app making it incompatible with low-powered smartphones. Hence it seems that Instagram is shying away from the REverse feature in favor of effects, music, and more when it comes to creating reels.
How to manage length when reversing videos?
You can check the length of your clip in the timeline, check export values and even add timers to your videos to keep the length for your reels in check. Some video editors also allow you to dictate a fixed length for your timeline which can also come in handy to manage the length of your reels. You can use all these features to make sure that your Instagram reel is within the desired length.
What is the maximum length of reels allowed on Instagram?
Instagram previously allowed only reels up to 30s on the platform. Since then, Instagram has revised its policy, and the maximum length now allowed on the platform is 60s. You can create your reel in the following time formats on Instagram.
- 15s
- 30s
- 60s
You can create some cool effects when you reverse a video. Go ahead and play around with the option to make your reels video really stand out. If you have any queries, feel free to reach out to us in the comments below.
Related:
- How To Duet On Instagram reels
- How To Turn Off Instagram reels
- How To Make reels On Instagram
- Instagram reels Not Working or Showing Up: Fixes Explained!
- How to copy Instagram caption and comment and paste as required
- Is There Any Way To See How Many Times Someone Views Your Instagram Story?
- How To Share Instagram reels As A Story Or DM
- How to Save or Download Instagram reels to Your Phone Gallery, Camera Roll or Storage


