‘Reverse Image Lookup’ is a tool that lets you find what the image is about. Thanks to Google and its Reverse Image Lookup tool, you can use an image to search for and identify the person or product in the featured in the image. While it’s super easy on Desktop to use the tool, that’s not the case on Android phones. However, with a little trick, you can easily perform reverse image lookup on your Android phone. Let’s take a look.
How to do a Reverse Image Search on Android
A reverse search of images on smartphones is a bit more complicated process. There are two ways that you can do this, either using a native browser or by using a dedicated third-party app. Let’s have a closer look at each one of these methods.
Reverse Image Lookup Using a Mobile Browser
Step 1: Open the browser app on your phone.
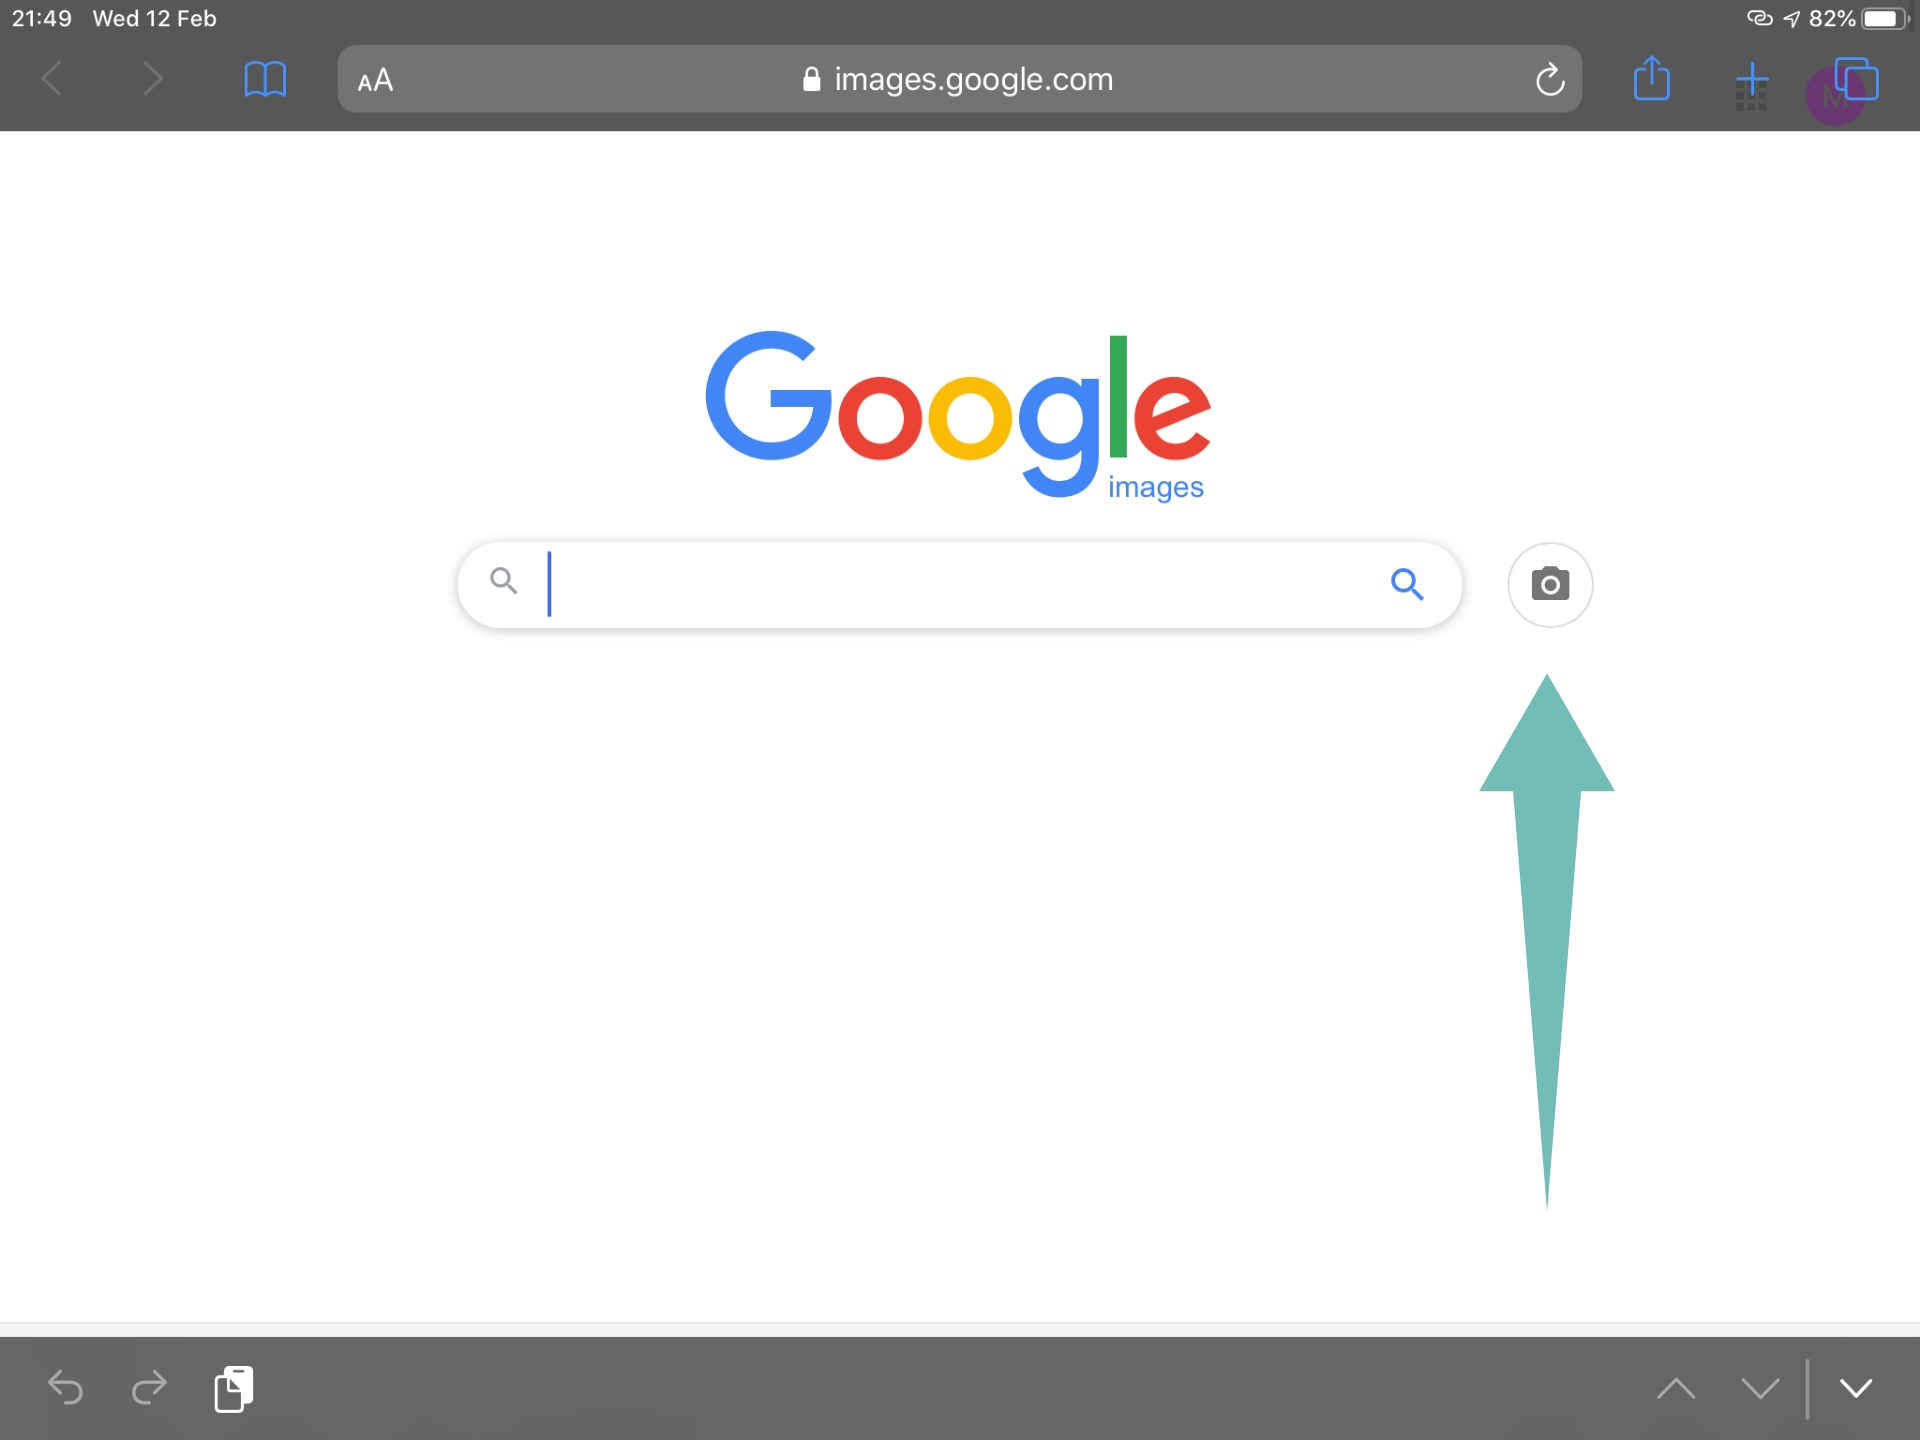
Step 2: Visit images.google.com.

Step 3: Tap on the 3-dot menu icon in the top right corner, and then tap ‘Show Desktop Site’.

Note: Depending on your browser, this could also be called ‘Show Desktop Version’ or ‘Visit Desktop Site’ or ‘Visit Desktop Page’
Step 4: You will now be redirected to a Desktop version of the same image search page.

Step 5: Zoom in and find the ‘camera’ icon beside the google image search bar and tap on it.

Step 6: Now either upload the image that you want to ‘reverse lookup’ from your phone’s local storage or paste a URL in the provided search bar.

Step 7: You will now be redirected to a results page where Google will display all the similar images to your image. You will also be shown possible search queries as well as web pages that are hosting similar content.

Using an App to Reverse Lookup an Image
There are many third-party apps that are currently available on the market which can help you reverse lookup images on your phone easily — a bit easier than loading the desktop version of the Google Images domain as we saw right above. Most of these apps tie in with Google’s reverse image lookup tool to show you results but many utilize other reverse image search engines as well. This could prove to be advantageous for you if you are unable to find the desired results using Google. Let’s learn how to use each one of these apps.
Using ‘Reverse Image Search’ app by Think Free
This is a simple yet powerful app from the house of Think Free that combines a basic photo editor with a reverse image search app. This allows you to search portions of images as well as crop and edit the results according to your desire. Here is how you can reverse image lookup using Reverse Image Search App.
Step 2: Click on the ‘+’ button in the bottom right corner.

Step 3: Provide the image you want to reverse search on Google. You can capture an image using the Camera menu or upload an image saved on your phone’s storage.
Step 4: Tap the Search button in the middle to initiate the search. However, if you wish to edit the image (crop, rotate or flip), then click the edit button. Click the + button (right bottom) to add another image as a layer.
Step 5: When the search is done, you will see the results screen showing the info Google has on the image. You can also switch to results from Yandex and Bing using the options at the bottom of the screen.

Using ‘Photo Sherlock’ app by The Hippeis
Photo Sherlock is another simple to use app for reverse image search with excellent UI and intuitive controls. The app is only 3.2MB in size which ensures that it does not take a toll on your smartphone’s resources. Follow this simple step by step guide to reverse lookup an image using Photo Sherlock.
Step 2: Click a picture that you would like to reverse lookup or simply click on the ‘Photos’ icon at the bottom left corner of the screen. This will take you into your phone gallery where you can select the image that you want to reverse lookup.

Step 3: Tap the Crop button if you to crop the image. You may ignore this step if you do not wish to crop the image.

Step 4: Tap the ‘Use This Picture’ button to initiate the search.

Step 5: The app will display the search results from Google. You can tap on the Yandex option in the bottom bar to see results from Yandex, or tap Other for any other search engine.

You will now have reverse searched your desired image using Photo Sherlock.
Using ‘Google Lens’ app by Google
Google lens is one of the more popular apps in this category. Initially, it was available only on Pixel devices but the company has now made the app available for everyone. Follow this simple step by step guide to reverse lookup your desired image using Google Lens.
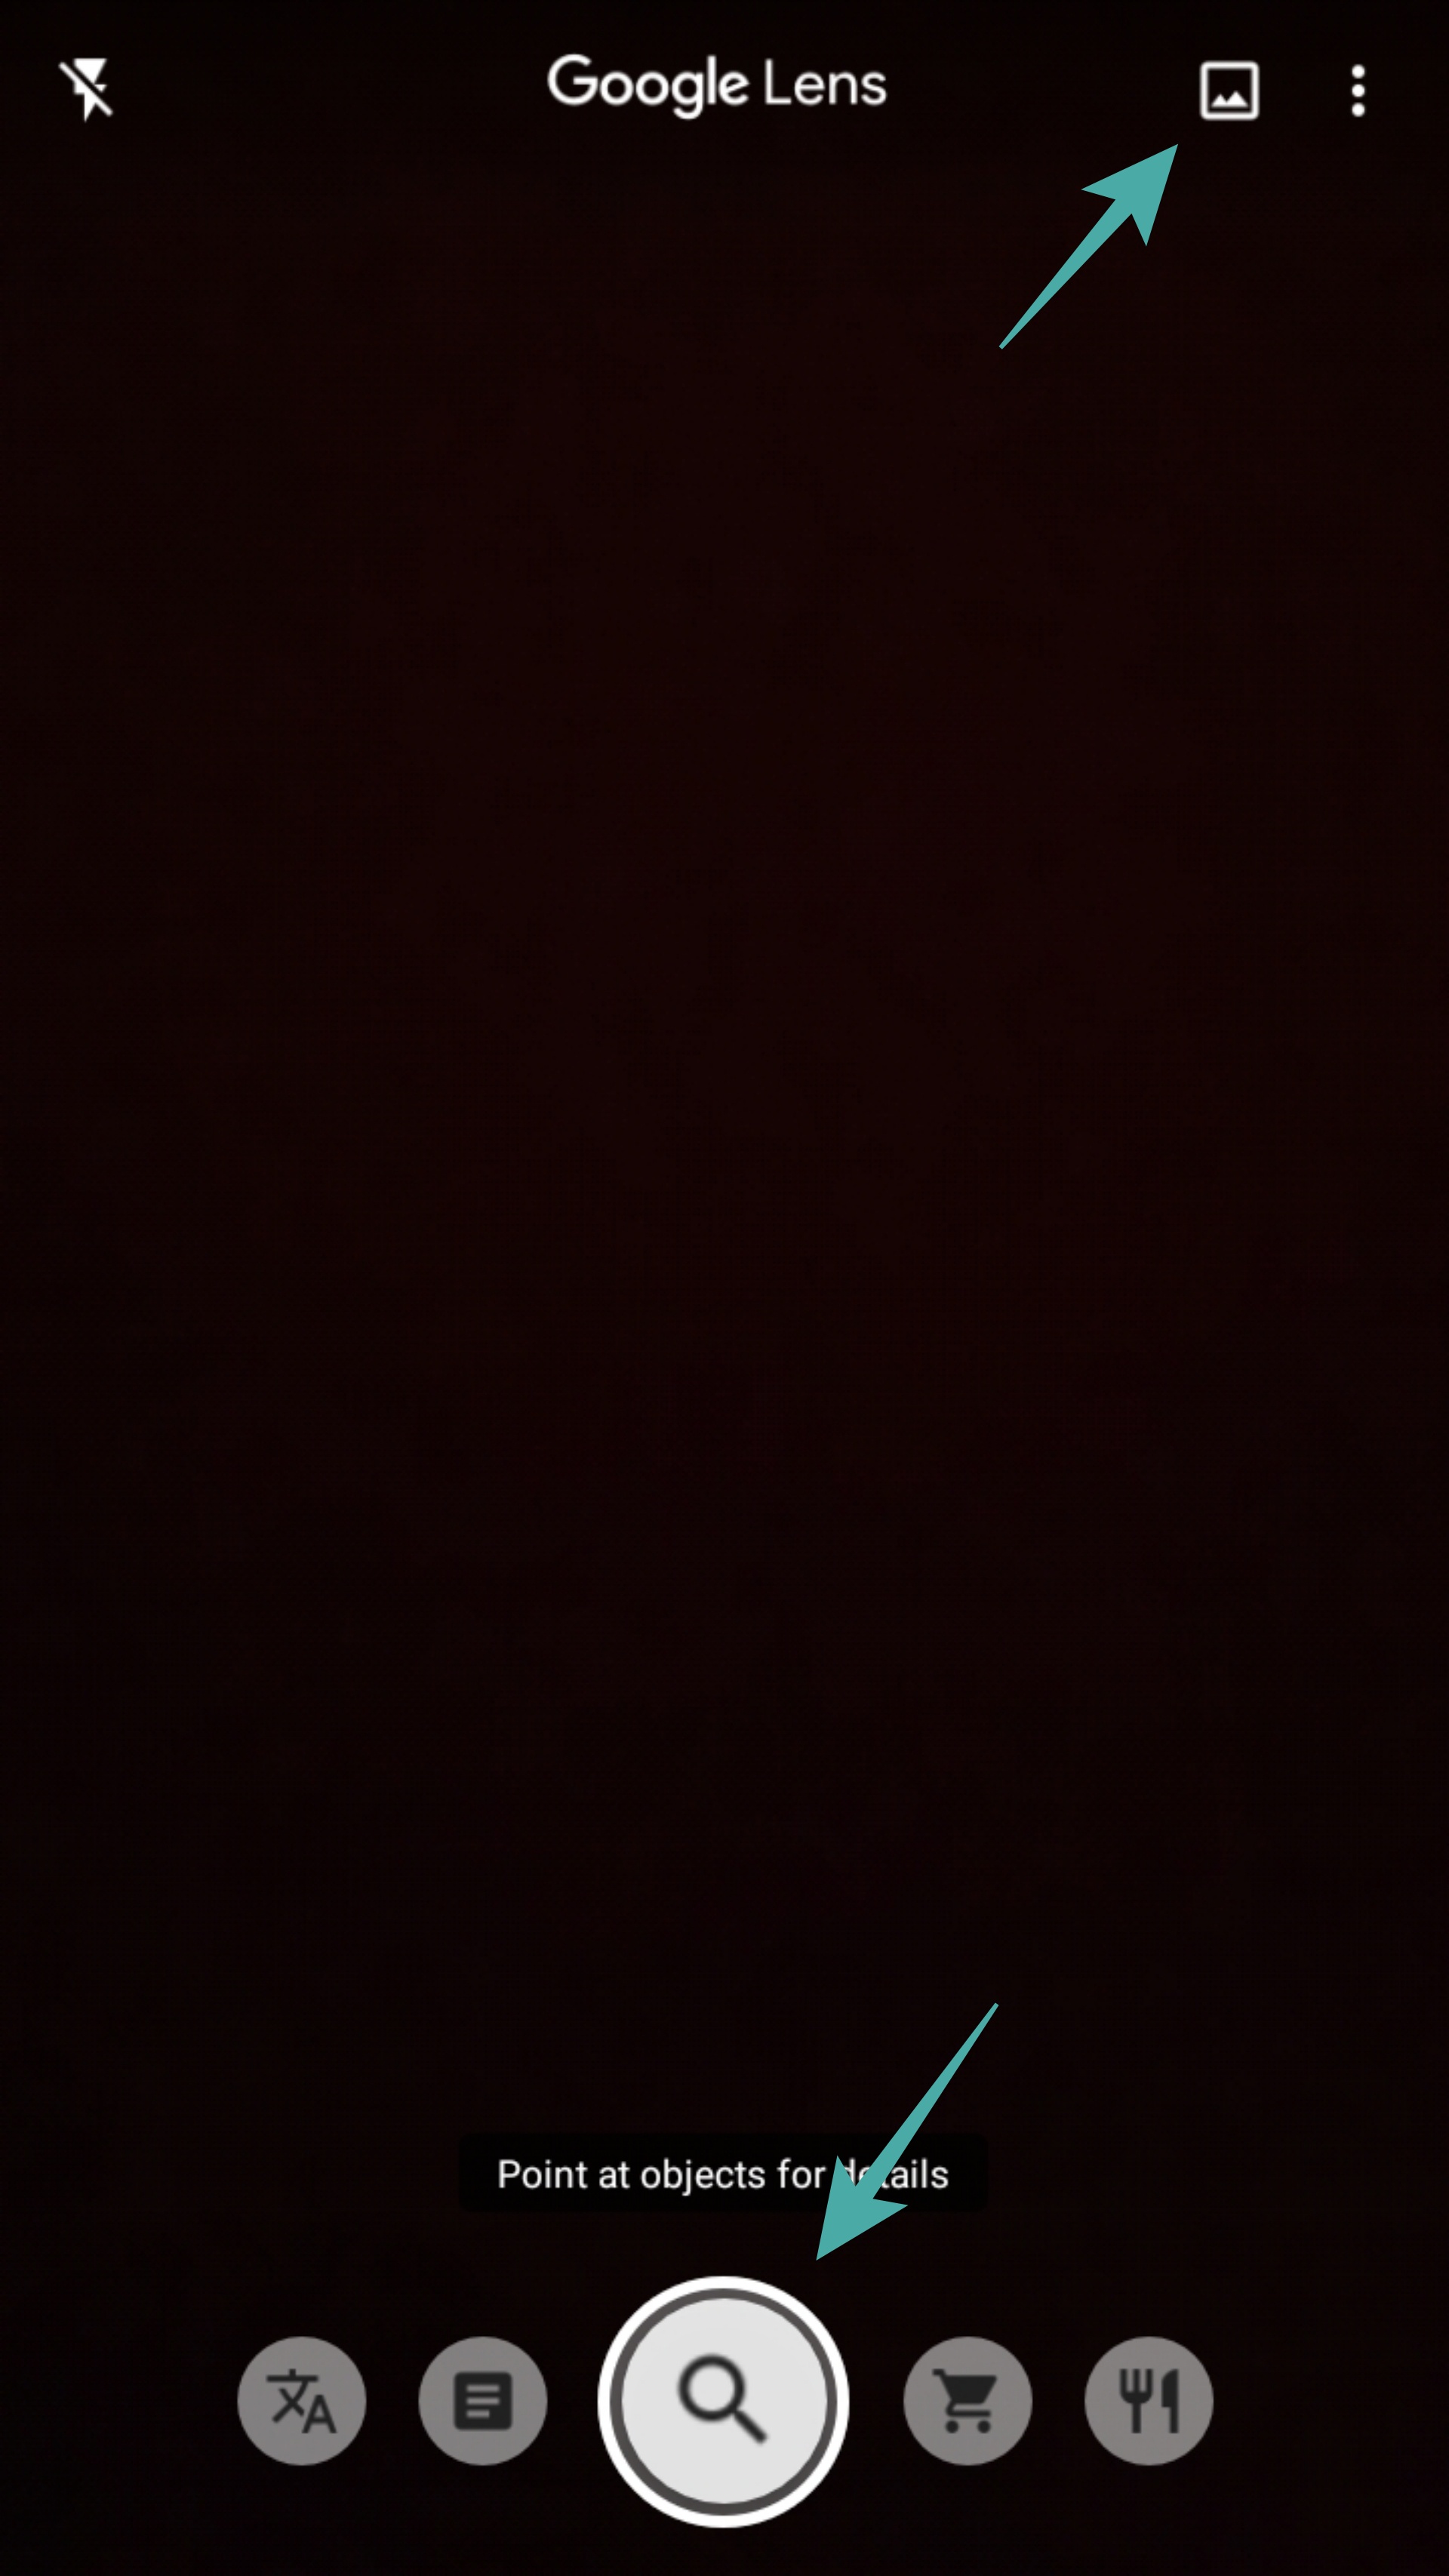
Step 1: Download the Google Lens app from the Play Store and then open the app. Accept and provide the permissions asked for.
Step 2: Tap the Image button at the top right to select an image from the storage of your phone. Or, if you want to use the camera to capture an image for reverse lookup, tap the Lens button in the middle at the bottom bar of the screen.
Step 3: The app will show you the results from the search.

Step 4: If you need to crop the image for focusing the search on any part of the image, then you can use the crop button here.

Step 5: Drag the results page up, to see a full-screen view of the results page. Google will show you similar images with relevant search terms.
Done!
How To Reverse Image Search On Desktop
There are two easy ways to perform a reverse image search on Desktop. Here are both of them.
Using the ‘Search Google for Image’ menu on Chrome

Using Google Images domain
Performing a reverse image search on the desktop is also simple with the Google Images domain. Here’s how you can do that.
Step 1: Open your favorite browser software.
Step 2: Visit ‘images.google.com‘.
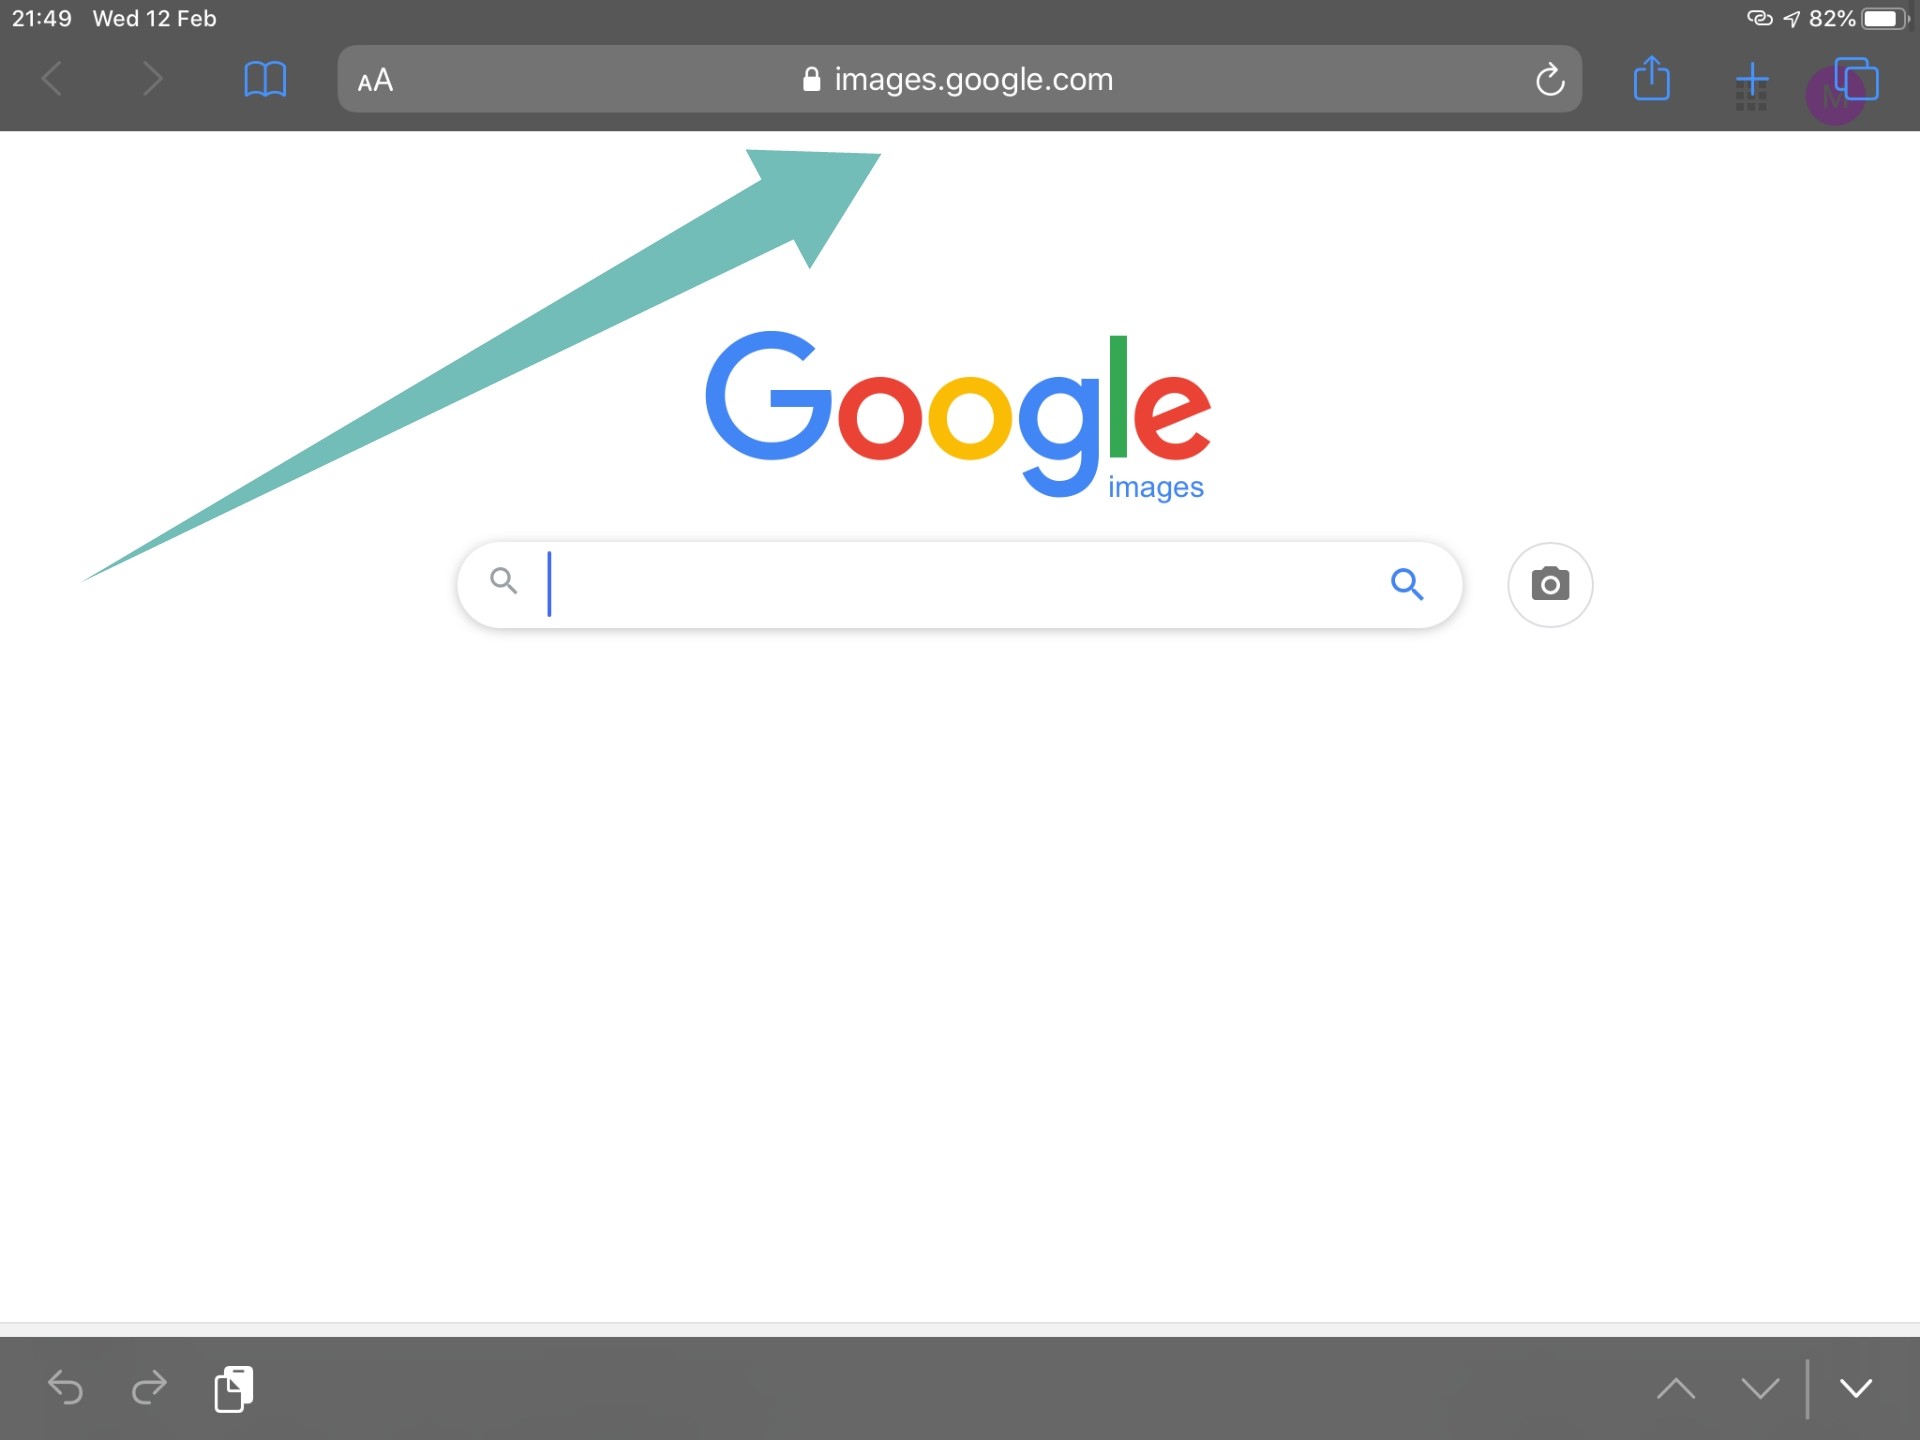
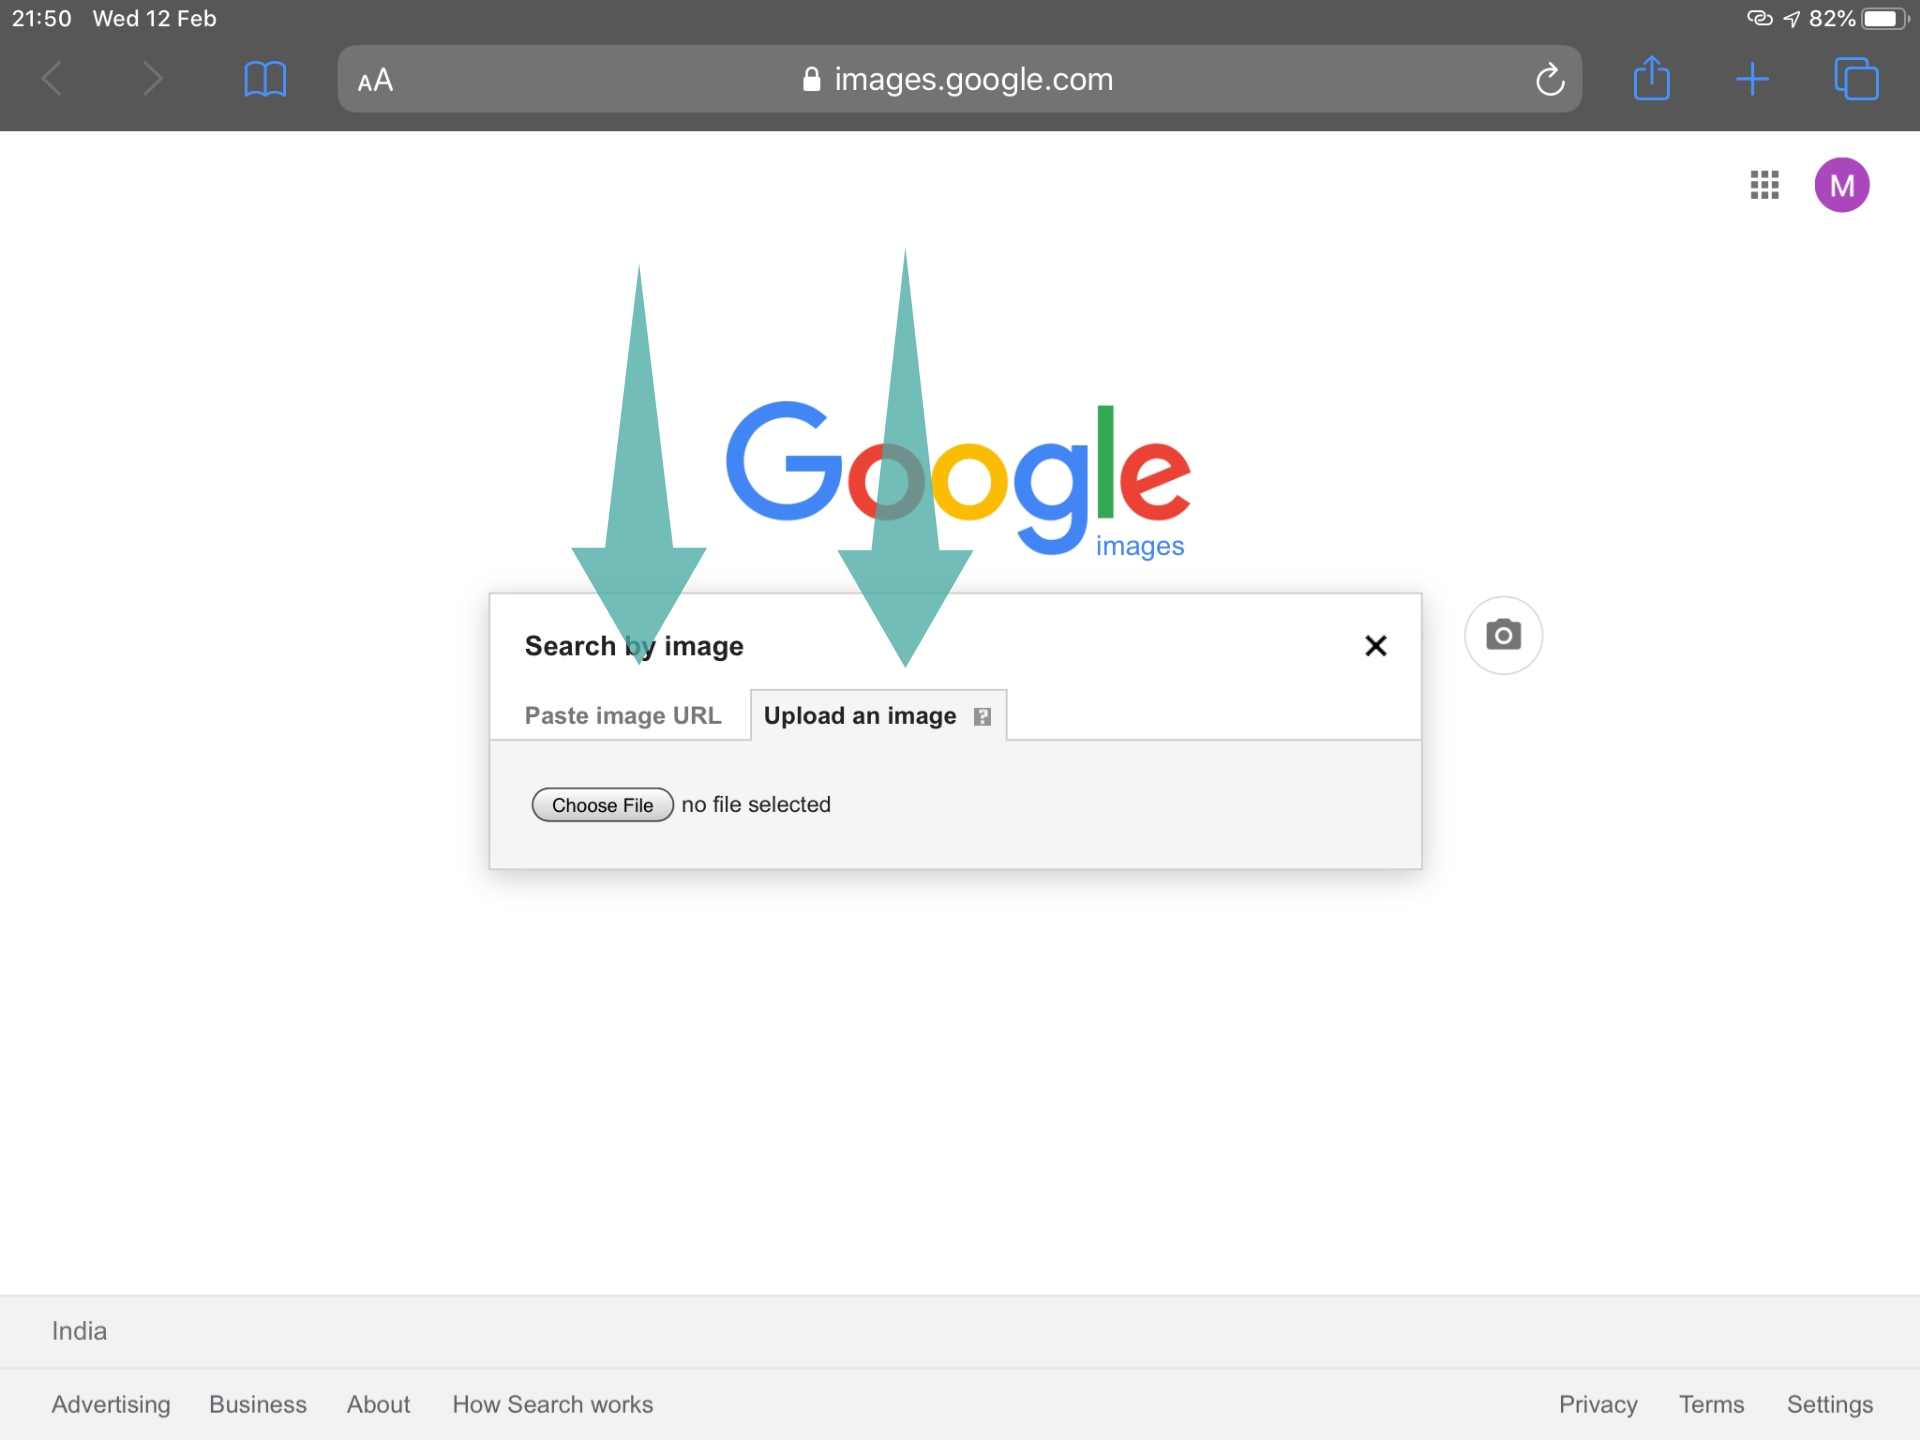
Step 3: Click on the ‘camera’ icon beside the search bar.
Step 4: Now, you need to provide the image to Google. You can either upload it by using the ‘Upload an image’ option or provide the URL of the image in the ‘Paste image URL’ option. To get the URL of an image from the web, right-click on the image and select ‘copy image address’.
Step 5: Once you upload the image or provide the URL, Google will begin to reverse search it. In just a few seconds, you will get similar images as well as related searches.

You will now have successfully reverse searched an image on your Desktop.
Do give us a shout in the comments section below if you need any help from us in this regard.
RELATED: