
There’s nothing more annoying to a Windows user than having to face a blue screen error, especially one that is accompanied by a system crash. The srttrail.txt error is one of them. Though not technically a BSOD, an error in the Automatic Repair environment is still symptomatic of a deeper problem that is derailing Windows and will require intervention yet.
Here’s everything you need to know about the srttrail.txt error: its causes, possible solutions, and the last few resorts.
What is the srttrail.txt error?

The srttrail.txt text file mentioned in the message is simply a log maintained by Windows of all the instances when it failed to boot properly, and will continue to come up if Windows is stuck on boot.
This error message mostly occurs while the system is booting up, but it can also appear while Windows is operational. The only two options provided on the screen are to either “Shut Down” or use “Advanced options”. The former isn’t a viable solution as the error (and whatever’s causing it) will most probably still be there when the PC is turned back on. The latter is the only doorway to different solutions and fixes.
Related: How to Fix Copy and Paste on Windows 11
What causes the srttrail.txt error on Windows 11?
There are a number of things that could go wrong for this error to occur. Some of the possible causes could involve the following:
- Hardware issues (incompatible or corrupt hardware, drivers, etc.)
- Malware or virus infestation
- Installing corrupt software
- Corrupted system files
- Corrupted Windows registry
- Damaged or corrupted Windows Boot Manager files
Any of these issues could lead to the srttrail.txt error. The resulting failure could manifest in a variety of ways as well. Apart from receiving the “Automatic Repair couldn’t repair your PC” blue screen, you could also find yourself staring at a black screen that is stuck on “Preparing Automatic Repair” or “Diagnosing your PC”.
All this means that the automatic repair utility is unable to fix the underlying cause of the error and you will be required to apply one of the fixes mentioned below to bail your system out.
Related: How to Change Brightness on Windows 11 [Step-by-step Guides and Fixes]
How to fix srttrail.txt error on Windows 11
Multiple possible causes will necessitate multiple possible solutions. Here are all the fixes that you need to know about in order to get your PC back to its functional state again.
Fix 1: System Restore
Performing a system restore will revert any changes made to the device, including settings, system files, drivers, registry keys, etc., and return your PC to the state it was in at a prior time. You may lose some of your current settings and data, but you would at least have gotten out of the error screen.
If your computer is failing to boot and you only have access to the Automatic Repair window with the error, here’s how to perform a system restore:
- Click on Advanced options.

- Click on System Restore.

- Click on Next.

- Here, select a point in time to which you want your system to restore. Then click Next.

- Click Finish.

- Wait for the restoration process to finish.
If that didn’t solve the issue, refer to the other fixes below.
Fix 2: Soft Reset your PC: Remove your battery and place it back
For laptop users, the issue can sometimes be resolved simply by taking the battery out, waiting for a minute or two, and then placing it back. Although it is not the most elegant solution, because the issue is known to also be caused by a power supply overload, resetting the battery can sometimes do the trick.
Fix 3: Disconnect non-essential devices
For this fix, disconnect all your peripheral and non-essential devices, such as printers, USB devices, cameras, etc. Then restart your computer and check if the issue persists. If you don’t get the error message, then the fault lies with one of these devices (and its drivers). Reconnect the peripherals one by one and restart your system to find out the exact culprit. Once the malfunctioning device is found, you will have to update the drivers. If the driver update doesn’t work, you may need to get the peripherals repaired or replaced.
If you’re unable to boot to Windows to update the drivers, refer to the next fix.
Fix 4: Update Device Drivers from Safe Mode with Networking
Device drivers can also be updated from the Automatic Repair error screen from Safe Mode (with Networking). Here’s how to do so:
- Click on Advanced options from the error screen.
- Go to Startup Settings.

- Click Restart.

- Now select Enable Safe Mode with Networking.

- Once the system is in safe mode, download and update the drivers from your PC manufacturer’s website.
Fix 5: Scan the system for Malware
Being a common reason for the Srttrail.txt, virus and malware infestation can only be rooted out by running a full scan from the Safe Mode. Here’s how to go about it:
- From the error screen, go to Advanced options.
- Then select Startup settings.
- Click on Restart.
- Press 4 to enable Safe Mode.

- In Safe Mode, Press Start, type Windows Security and open it.

- Select Virus & threat protection in the left pane and click on Scan options.

- Select Full scan.

- Scroll down and click on Scan now.

- Wait for the scan to find and fix issues. Then restart your system to check if the issue is resolved.
Fix 6: Rebuild Boot Configuration Data (BCD) and fix Master Boot Record (MBR)
Problems with Boot Configuration Data (BCD) and Master Boot Record (MBR) can also be responsible for the srttrail.txt error. Windows won’t boot up if these are missing or corrupted. You would have to rebuild the BCD and fix the MBR. Here’s how to do so:
- Select Advanced options from the error screen.
- Click on Troubleshoot.

- Select Advanced options.

- Then click on Command Prompt

- Here, type the following command:
diskpart

- Hit Enter. This will open the Diskpart utility. Now, type the following:
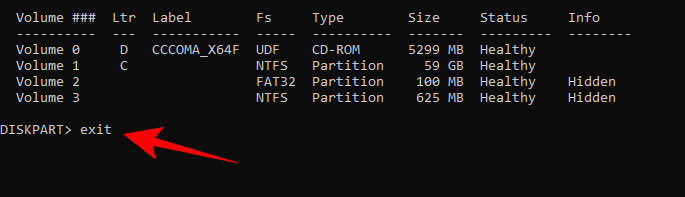
list volume

- Hit Enter. Here, you will see your disk partition type.

- If you see any FAT32 (Fs) partition, your system is UEFI based. If all the partitions are labeled NTFS, yours is a BIOS/Legacy based system. Both of these will require different command instructions.
UEFI System Commands
- For the UEFI systems (FAT32 partition), take note of the volume number and the drive letter that holds the operating system. Then type the following command:
select volume 'X'
Replace ‘X’ with whichever volume Windows is installed in.

- Press Enter.

- Then assign a new letter to this. To do so, type the following:
assign letter=Z
Make sure you assign a letter that is not being used by the system.

- Press Enter.

This will assign the letter “Z” to the selected volume. - Now type
exitand press Enter to close the Diskpart utility.

- Now, to fix BCD, type the following in the command prompt:
bcdboot C:\Windows /s Z: /f ALL
Make sure to replace the letter ‘C’ with where Windows is installed. Press Enter.

- Once you get confirmation that boot files are successfully created, close the command prompt and restart your system to check if the srttrail.txt error is resolved.
BIOS/Legacy System Commands
For those with BIOS/Legacy based systems, here’s what to do:
- Close the diskpart utility if it is still open.
- Then type the following command:
bootrec /fixmbr

- Hit Enter.

- Then type the following:
bootrec /fixboot

- Hit Enter. Finally, type:
bootrec /rebuildbcd

- Hit Enter. Once the operation is completed successfully, close the command prompt, restart the system and check to see if the issue is resolved.
Fix 7: Run SFC and Check Disk (CHKDSK) Command
Running the System File Checker and Check Disk utility will repair corrupted system files that might be causing the error. To do so, follow the steps below:
- Choose Advanced options.
- Then Command Prompt.
- In the command prompt, type the following command:
sfc /scannow

- Then hit Enter.

Wait for the scan to finish. - Close the command prompt and restart your PC for the repair changes to take effect.
- If that doesn’t work, open the Command prompt again (as shown earlier) and type the following:
chkdsk /f /r /x C:
Press Enter.

- Wait for the scan to finish, then close the Command Prompt and restart the PC to see if the problem still persists.
Fix 8: Disable early launch anti-malware protection
Disabling the early launch anti-malware protection can also do the trick. Here’s how to go about the process:
- Click on Advanced options from the Windows Recovery environment.
- Then select Startup Settings.
- Click on Restart.
- Once the computer restarts, you will get a list of Startup options. Here, select Disable early launch anti-malware protection by pressing the (number) key.

- Restart your PC to see if the issue is resolved.
Fix 9: Disable Automatic Startup Repair
It is possible that the Automatic Startup Repair window is the cause of the problem itself. If other things haven’t worked out so far, this is the next fix to try out.
- From the Windows recovery environment, click on Advanced options.
- Then select Command Prompt.
- Here, type the following command:
bcdedit /set {default} recoveryenabled No

- Then press enter.

- Once the operation is completed successfully, close the command prompt.
- Restart the PC to check if the fix has worked for you. Otherwise, move on to other fixes.
Fix 10: Check and fix the Device Partition
The srttrail.txt error can also occur if your device partitions don’t have the correct values. Here’s how to fix that:
- From the error screen, click on Advanced options.
- Then select Command prompt.
- Type
Bcdeditand press Enter.

- If you see the device value as partition=C:, then its value is set correctly.

- If not, then type the following command:
bcdedit /set {default} device partition=c:

- Then press Enter.

- Now type this command:
bcdedit /set {default} osdevice partition=c:

- Press Enter.

- Close the command prompt and restart your PC. Does that resolve the issue? If not try the following methods.
Fix 11: Check Boot Priority in BIOS
Improper configuration of boot priority can also lead to the error in question. This can happen if you have multiple hard disks or have installed new ones recently. The first boot priority should be the hard disk where Windows is installed. To check if that is so, follow the steps below:
- Click on Advanced Options.
- Choose UEFI Firmware Settings.

- Click Restart.

- Now, you will get a Startup menu that will have the option to change boot device options. Note that this screen may differ based on your PC manufacturer. Press the key that will lead you to Boot Setup.

- Once in the BIOS, move to the “Boot Options” tab with the arrow keys.

- Now, under “Boot order”, select your hard drive or the OS boot manager and make it the primary boot option.

- Now, move to the “Exit” tab. Go to Save and Exit and hit Enter.

- Restart the device to see if the issue is resolved.
Fix 12: Disable Secure Boot
Disabling secure boot is touted as one of the fixes on various community pages and blogs and, thus, should be considered a viable option. Here’s how to do so.
- Enter the BIOS (as shown in the previous method) and go to Boot options.
- Find Secure Boot and hit Enter on it. Then select Disable and hit Enter.

Depending on your PC manufacturer, this option can also be under the “Security” settings. - Once disabled, save the settings and exit BIOS.
- Check if the issue is resolved by restarting the PC.
Fix 13: Disable Driver Signature Control
The driver signature control feature in Windows 11 ensures that only the proper drivers are loaded. If Windows finds any problems with the device drivers, it can lead to problems such as the one in question. Here’s how to disable driver signature control.
- On the Automatic Repair screen, click on Advanced options.
- Then select Startup settings.

- Here, select Disable driver signature enforcement by pressing 7.

If Windows starts and you don’t see the error again, you have found the cause of the problem. The next step is to permanently disable driver signature enforcement. Here’s how:
- Press Start, type cmd, right-click on Command Prompt, and select Run as administrator.

- Now type the following command:
bcdedit -set loadoptions DISABLE_INTEGRITY_CHECKS

- Hit enter. Now type the following command:
bcdedit -set TESTSIGNING ON

- Hit Enter. Now close the command prompt and restart your computer.
Fix 14: Remove and reconnect RAM and Hard Disk
Often the issue can be caused by essential hardware such as RAM and hard disk that’s come undone. If the aforementioned fixes have failed, you may want to consider this possibility. The way to fix it is to disconnect these modules and reconnect them. But doing so can be tricky, especially if you’re not sure what you’re doing. So do take the help of a technician and achieve the following:
- Power off your PC, disconnect the cable and remove the battery.
- Unscrew the computer case and disconnect the RAM modules and the hard drive one by one.
- Then reconnect them and make sure they’re placed securely.
- Put all the screws back into place and make sure they’re nice and tight.
- Put the battery back in place and plug in the power cable.
- Finally, boot up the PC and check if the issue persists.
Fix 15: Reset your system
When all else fails, resetting your system is one of the last resorts that you should go to. Here’s how:
- From the Windows Recovery Environment, click Advanced options.
- Then choose Troubleshoot.

- Select Reset this PC.

- Here, choose Keep my files.

- Choose Local reinstall.

- Click on the Reset button and wait for Windows to finish its job.

Fix 16: Reinstall Windows
Finally, if nothing works, and you’re at the end of your tether, unfortunately installing a fresh copy of Windows is the only option left. To reinstall Windows, you will first need to create a bootable USB device on a different computer. We have a complete guide on how to make Windows 11 bootable USB that you can refer to for the same.
- Once you have the bootable USB, plug it in and go to Advanced options from the Startup Repair error window.
- Click on Troubleshoot.
- Then click on Advanced options.

- Select UEFI Firmware Settings.
- Click on Restart.
- On the next screen, select Boot Device options by pressing the corresponding key.

- Select your USB device with the arrow keys. Then press Enter.

- Once Windows Setup starts, click Next.
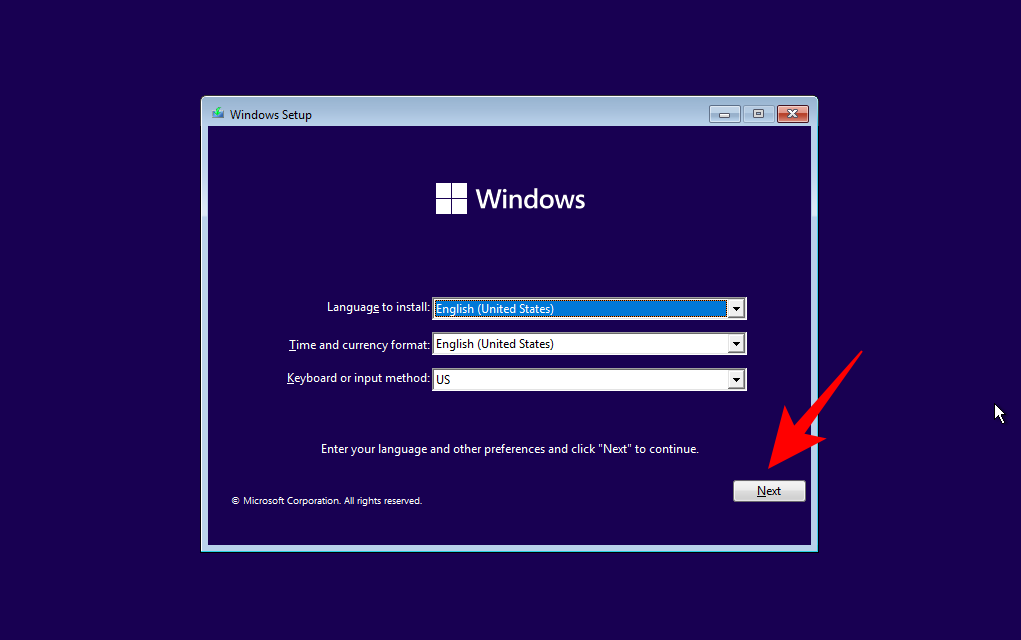
- Then follow the on-screen prompts to continue the installation.
So these were some of the solutions for the problematic srttrail.txt error displayed on the Automatic Repair screen when your computer fails to boot up. We hope that you were able to fix your PC with one of the many solutions offered here. Until next time.
RELATED


