It’s a bitter fact that Windows 10 updates can often cause more problems than they solve, hence we wouldn’t be surprised if you were looking to uninstall a recently installed Windows update.
Right off the bat, though, we should warn you that uninstalling major Windows updates is not something you should take lightly. While this article will show you how you can do so, we take no responsibility for any damages that may occur as a result of it.
Related: How to recover files using Winfr Windows File Recovery tool on Windows 10
How to prepare for uninstalling a Windows update
Here are some things to do before jumping the gun as uninstalling a Windows update may not turn out as planned.
1. Find the update KB number
The first thing you want to do before uninstalling a Windows update is figuring out which update you actually want to uninstall. Microsoft pushes out updates in four basic categories: Quality Updates, Driver Updates, Definition Updates, and Other Updates.
To get a list of the latest updates installed on your device, follow this simple guide.
Click on the Windows icon to open your Start menu, then click on ‘Settings’.
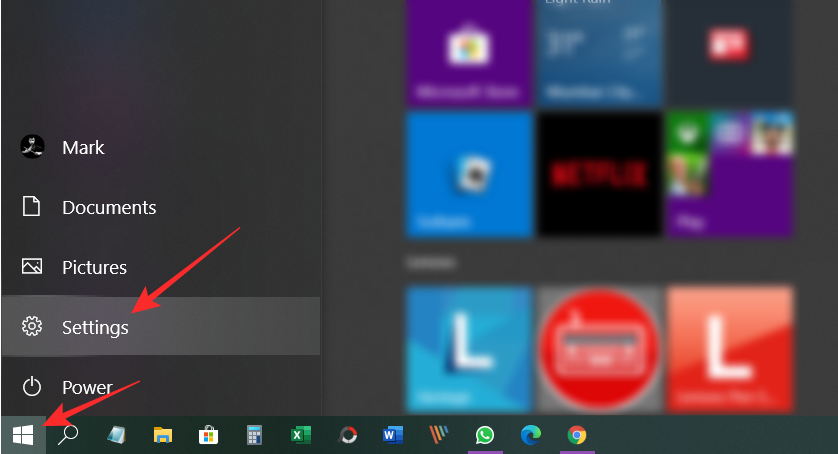
From the Settings window, select ‘Update & Security’.

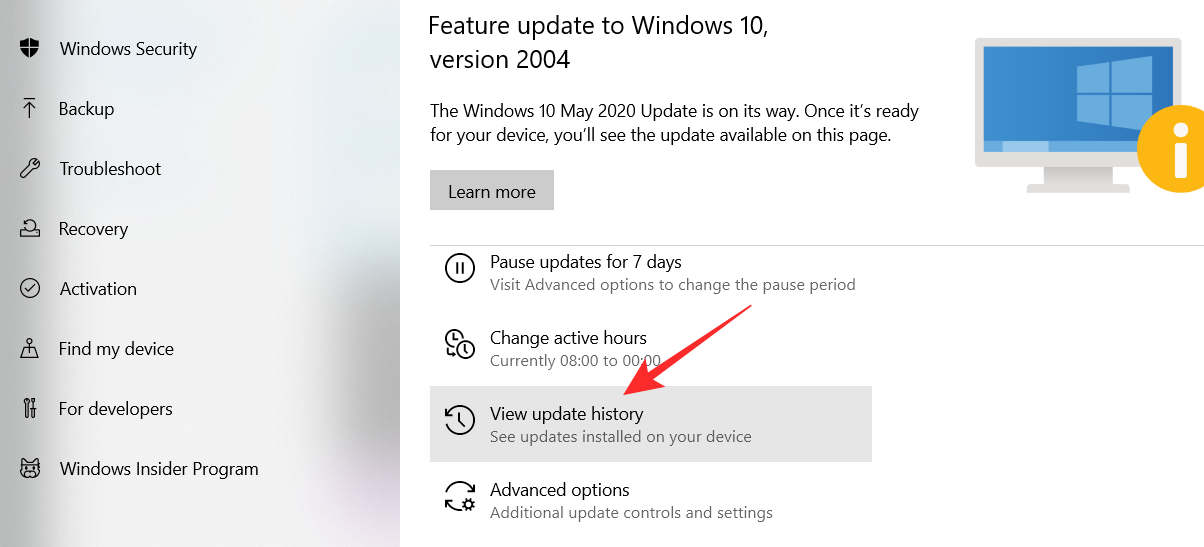
Click ‘View update history’ for a list of all the recent updates. The list generates from the most recent updates installed at the top.
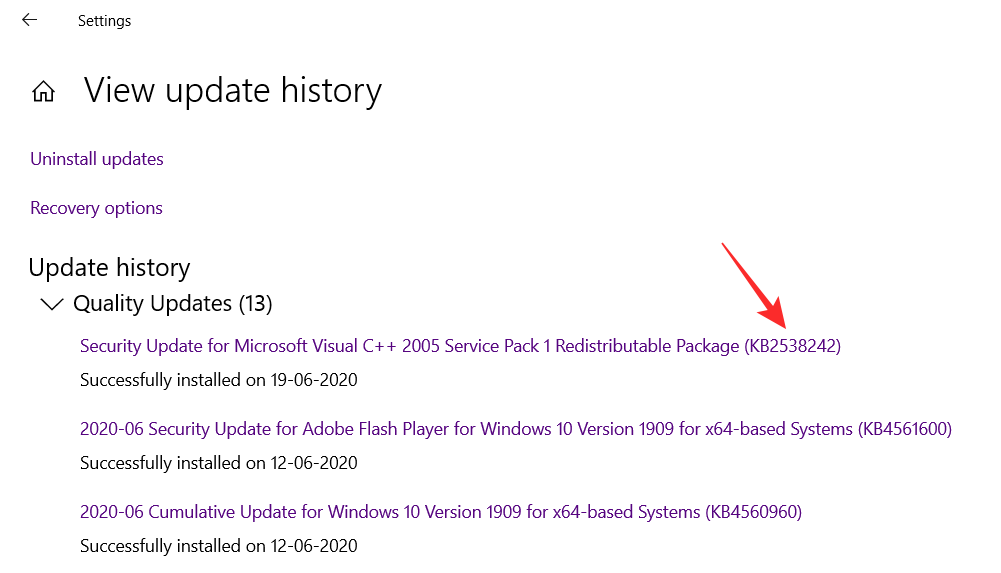
At the end of the update title, you will find the KB number of the update. Take note of the KB number for the update that you want to uninstall.
2. Back up your device
This is probably the most important step. Since you are in fact tinkering with the device’s operating system, it is always a good idea to back up all your files to a drive. The easy way to do this is by simply plugging in an external storage device and copying the files you want to back up.
To back up your files, follow the above guide to go to Settings > Update & Security. Now from the left side panel select ‘Backup’. Select the drive that you would like to back up your files to (C: Drive ideally). This may take a while, depending on how many files need to get backed up.

Even if you don’t want to use the Backup option as given above, simply copy the important files and folders you have to a pen drive or portable drive to have a one-time secure backup with you before playing with Windows update.
3. Create a restore point
Another important thing to do (if you haven’t already), is to create a restore point. Creating a restore point enables you to return to this point, should anything untoward happen to your device.
To create a restore point, click the start button and search for ‘Create a restore point’. This will open your System Properties. Select the drive that you would like to create your restore point in, then click ‘Create’.
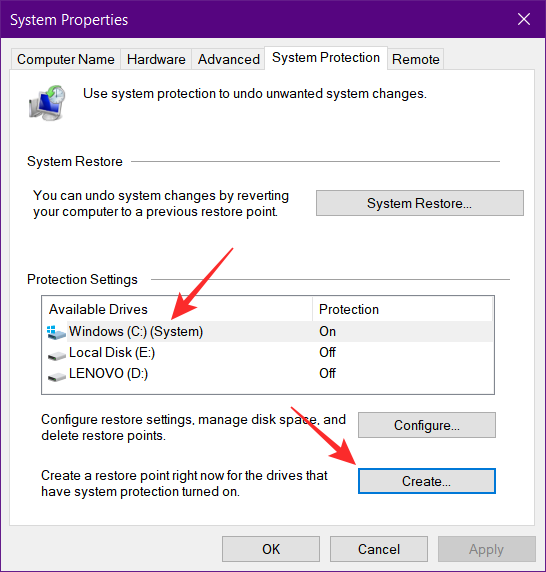
Note: If the ‘Create’ option is greyed out, you need to first enable System Protection on that drive. To do so, select the drive then click ‘Configure’ Click ‘Enable System Protection’.
4 Ways to uninstall Windows update
Here are different methods to know if you are looking to uninstall Windows update.
1. Uninstall minor updates
You can uninstall any minor updates to your system quite easily. Now that you have your KB number, follow this simple guide below.
Go to your System Settings > Update & Security > Windows Update > View update History.
Now click on ‘Uninstall updates’.

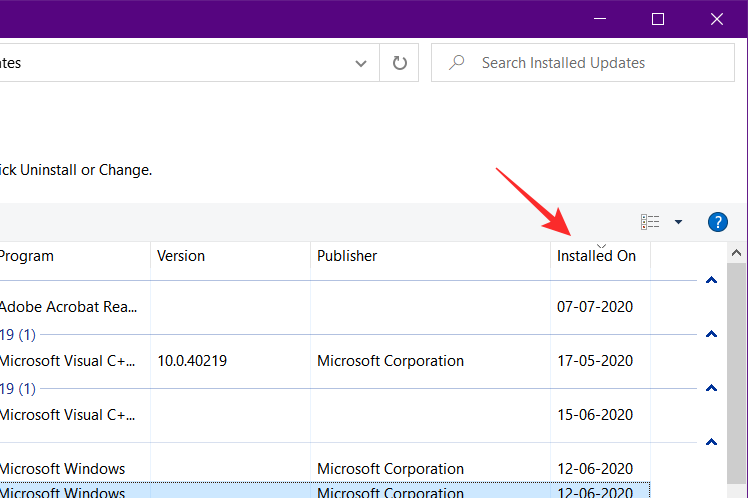
The following window will show you all the updates that have been installed on your device. You can organize them by their date by clicking on ‘Installed on’.
To uninstall an update, simply select it and click ‘Uninstall’.
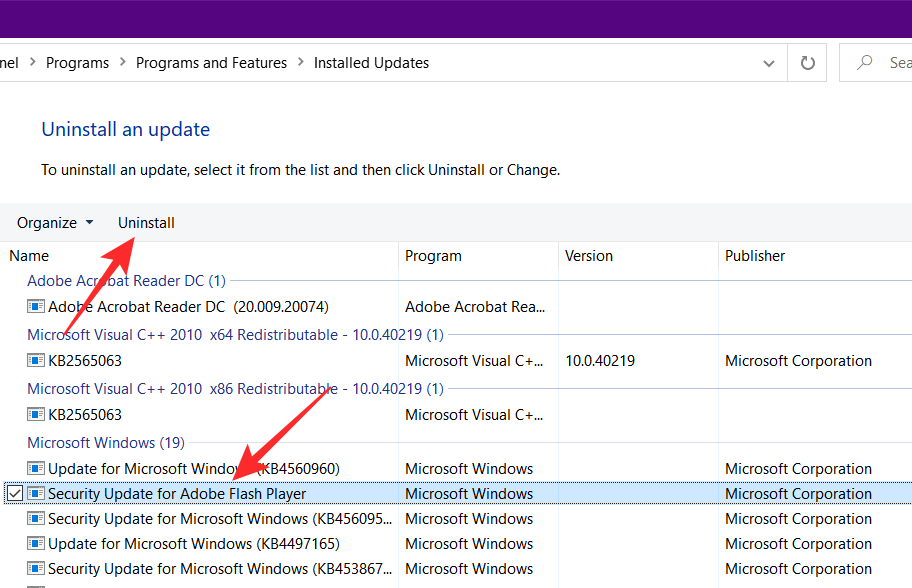
Once you uninstall an update, you should always restart your device for the changes to take effect.
Note: You will notice that not all updates give you the option to uninstall them. Some updates are stubborn. Read on to learn how to uninstall these updates too.
2. Rollback a Windows update with System Restore
If you already had a System Restore Point set up, you can use it to roll back your device to a previous Windows version. Rolling back a Windows update will not affect your personal files, but it is still a good idea to backup your files.
To restore your system to a previous version, follow this guide below.
Click on the Start button and search for ‘Recovery’.
In the new window select ‘Open System Restore’.

Now select the restore point that you had created previously. The System Restore Point will have the date of creation in its title, so you know which one you are restoring.
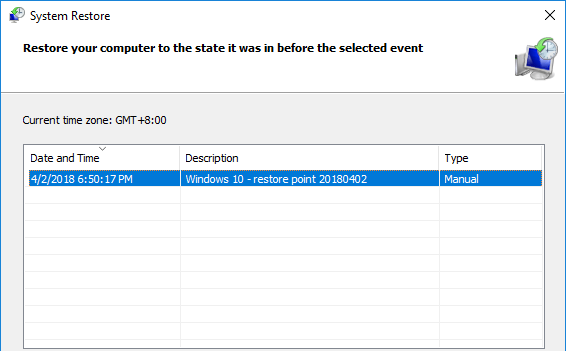
Follow the onscreen instructions and click ‘Finish’ at the end. Restart your PC for the settings to take effect.
3. Use Advanced startup
Advanced Startup is part of Windows’ troubleshooting options. You can do a lot with Advanced Startup. It is primarily used if your Windows has problems booting up. Using Advanced startup, you can restore your device to a previous Restore point, or even create a system restore point itself. Note: Using Advanced Startup will restart your PC. Make sure you save your work before going ahead.
To boot in Advanced Startup, open the start menu and click ‘Power’. Now hold down the ‘Shift’ key on your keyboard and click ‘Restart’.
Your device will shut down and then restart in Advanced Startup.
Choose Troubleshoot > Advanced options > System Restore.
Choose the System Restore Point that you have created, and follow the onscreen instructions. Click Finish to initiate the process. It will take a few minutes to restore your PC to that restore point. You will be asked to restart your PC once it is completed.
4. Use Command Prompt
Using Command Prompt is the fastest way to uninstall a Windows update. However, since it provides no graphical user interface, you need to know the exact KB number of your update. To uninstall a Windows update using Command Prompt we will be using WUSA (Windows Update Standalone Installer)
Click on the start menu and search for ‘cmd’. Right-click on Command Prompt and select ‘Run as administrator’.
Now type in the following command.
wusa /uninstall /KB:Update number
Input the KB update number of the update that you would like to uninstall and hit enter. For example:
wusa /uninstall /KB:4561600

WUSA will uninstall the update and let you know when it is completed.
How to avoid Windows updates
You can actually prevent updates from installing automatically. Here’s how to disable automatic updates on your Windows PC.
Prevent automatic updates
While it is inadvisable to completely stop Windows from updating your system, you do have the option to suspend it for a period of time. This is especially helpful if you know there is a patch coming soon.
To prevent Windows from updating your system, follow this guide below.
Go to your system Settings > Update & Security > Windows Update. Now click Advanced options.
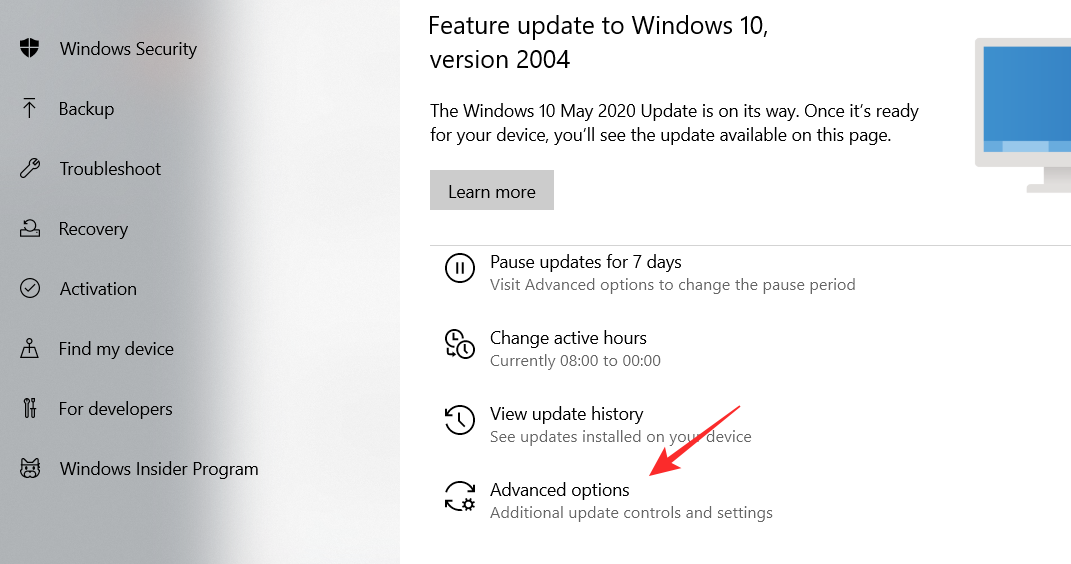
Under ‘Pause updates’ select the date till which you would like to prevent Windows from updating. The maximum you can set is 35 days. After that, you will have to install updates before pausing them again.

Well, now you know how to uninstall a Windows update on Windows 10. Remember, it is always advisable to backup your data before attempting to uninstall Windows updates. Since Windows updates are often built on one another, uninstalling one may cause the next one to malfunction. If you have any queries, feel free to reach out to us in the comments below.
Related:
- Common Windows 10 2004 issues and available fixes
- How to fix DISM ‘incorrectly reporting corruption’ error on Windows 10 version 2004
- How to recover files using Winfr Windows File Recovery tool on Windows 10


