Cache files are absolutely necessary to provide you faster user experience. But there are times when you need to remove the cache, especially when you have trouble loading a new/updated version of a webpage or if you are short on storage space or RAM.
Deleting the cache files can improve your PC’s performance too, especially when it frees RAM and storage space significantly. This is also one of the reasons your PC needs a periodic restart as that resets the system cache appropriately.
But worry not, because cache files on your system are fairly easy to delete. This article will guide you through the various types of caches that exist on your system and how you can remove them. So, without further ado, let’s get started.
- What is cache?
- Why should you clear cache on Windows 11
- Is clearing cache safe?
-
How to clear the cache on Windows 11 in 14 ways
- Method 1: Delete temporary cache files [%temp%]
- Clear temporary files in system storage
- Disk Cleanup
- Flush the DNS [get rid of DNS cache poisoning]
- Clear Microsoft Store’s Cache
- Clear web browser cache
- Clear location cache
- Clear your activity history
- Delete prefetch files
- Clear File Explorer cache
- Clear System Restore Cache
- Automatically delete cache with Storage Sense
- Clear clipboard cache
- Clear the display cache
- FAQs
What is cache?
A cache (pronounced ka·shay) is a specialized high-speed hardware or software component that stores frequently requested data and instructions that in turn can be used for faster loading of websites, apps, services, and other parts of your system. Cache makes the most frequently accessed data readily available.
Cache files are different from Cache memory. Cache files refer to frequently needed files like PNGs, icons, logos, shaders, and more that can be needed in multiple programs. These files are stored on your physical drive space and are usually hidden.
Cache memory on the other hand is a faster type of memory than your main memory and or RAM. It reduces the data access time tremendously, as it is located closer to your CPU when compared to your RAM and is much faster. Cache memory helps speed up the calculations of your processor which in turn makes your PC faster.
Cache memory is a relatively small storage type and is further graded into 3 levels:
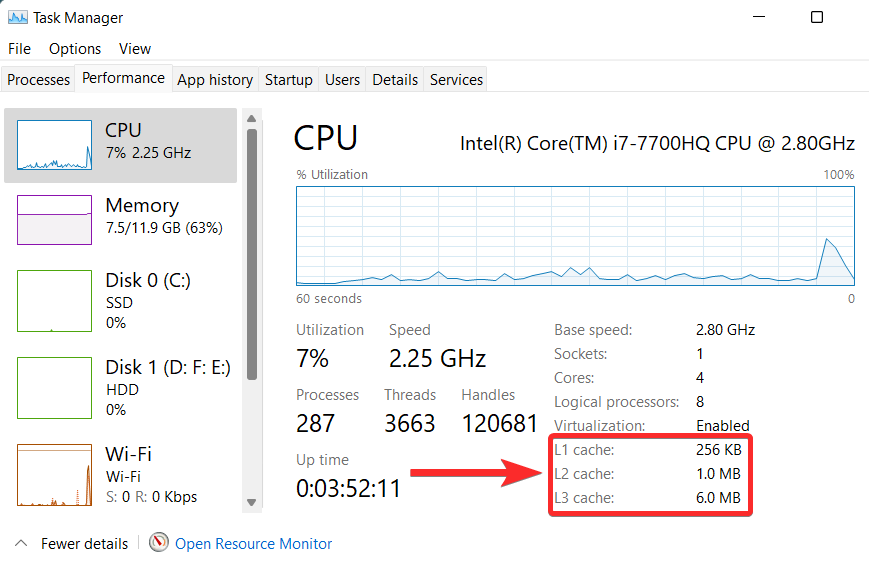
- Level 1 (L1): L1 is the smallest (usually between 8KB and 64KB) and the quickest cache.
- Level 2 (L2) and Level 2 (L3): L2 and L3 are larger and slower caches when compared to L1.
You can view cache sizes on your system from the Windows Task Manager.
Why should you clear cache on Windows 11
- Caches can be corrupted: Corrupted cache files can cause an app or your system to behave badly, or even crash in the worst cases. Hence, removing these corrupted cache files is recommended before you resume using your PC.
- Clear storage space: While cache files are typically small in size, the accumulation of a large number of these files over a significant period of time can take up more free space on your system than you would expect. The solution is to remove this large chunk of cache files and recover the free space on your device.
- Performance: The growing size of your cache files can directly impact the overall performance of your system. Cache storage getting filled more than it should can cause your system to run slower than you would typically expect.
- Outdated information: Sometimes older cache files can prevent you from accessing the latest version of apps or websites on your system. You can fix this by clearing your cache files.
Is clearing cache safe?
Clearing cache is safe. This is because clearing cache is not a permanent solution if you plan on revisiting the apps or websites concerned. At some point, these websites and apps will re-cache data on your system again.
Regardless, cache stores non-essential files, and deleting these files will not impact the general functioning of the apps or websites concerned. It will, however, impact how quickly these apps or websites load. To be clear, these load times will reduce once the app or website recreates caches on your system again.
How to clear the cache on Windows 11 in 14 ways
Clearing cache on Windows 11 takes a lot less time than you would think. However, cache files on Windows 11 can be of various types based on the source of their origin. This also leads to a scattered distribution of cache files on your system.
Follow the step-by-step guides below for the specific cache type you wish to delete from your PC.
Method 1: Delete temporary cache files [%temp%]
Press Windows + R on your keyboard to launch the Run command.
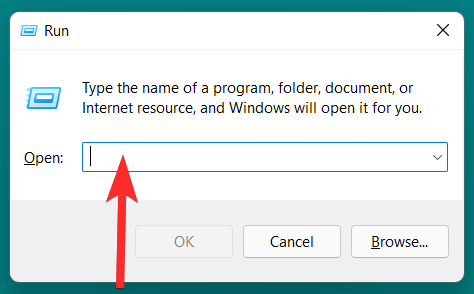
Enter '%temp%' and press 'Enter' on your keyboard.

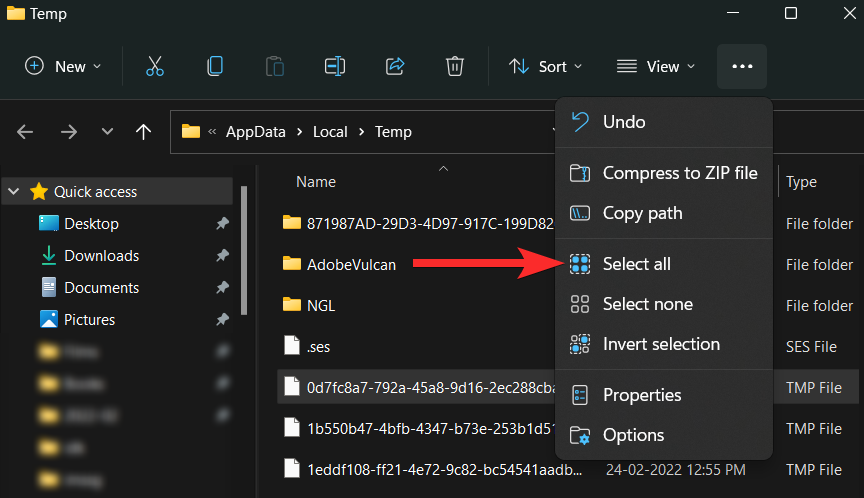
Now click on the ‘3-dot’ menu icon.

Click on ‘Select all’.
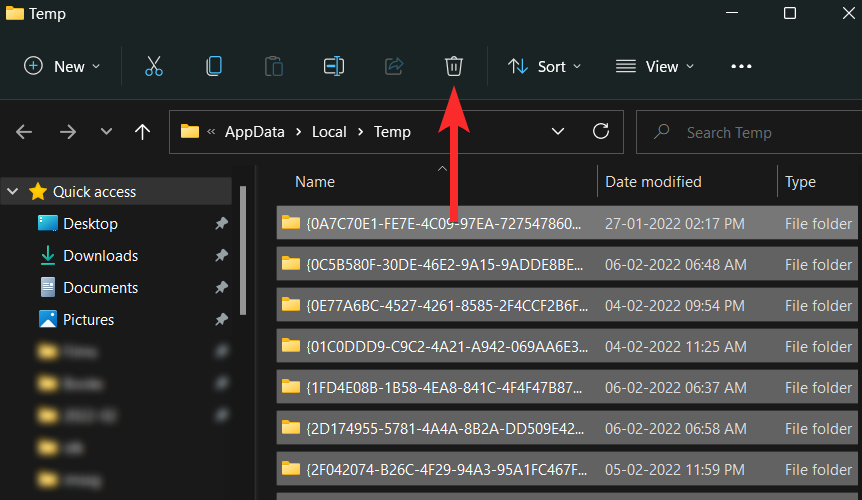
Click on the trash bin icon.
If you see the following prompt, check the ‘Do this for all current items’ and click on ‘Continue’.
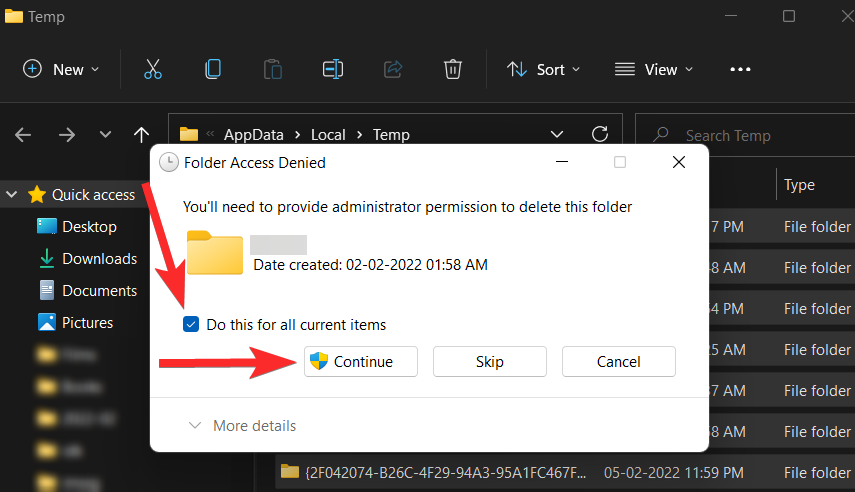
If you see the following prompt, check the ‘Do this for all current items’ checkbox and click on ‘Skip’.

That’s it. Cache files in the Temp folder will now be deleted.
Clear temporary files in system storage
It’s possible that some cache files are not present at one location like the Temp folder. Follow the following step-by-step guide to delete these scattered system cache files from settings.
Press the Windows key on your keyboard to open the start menu.
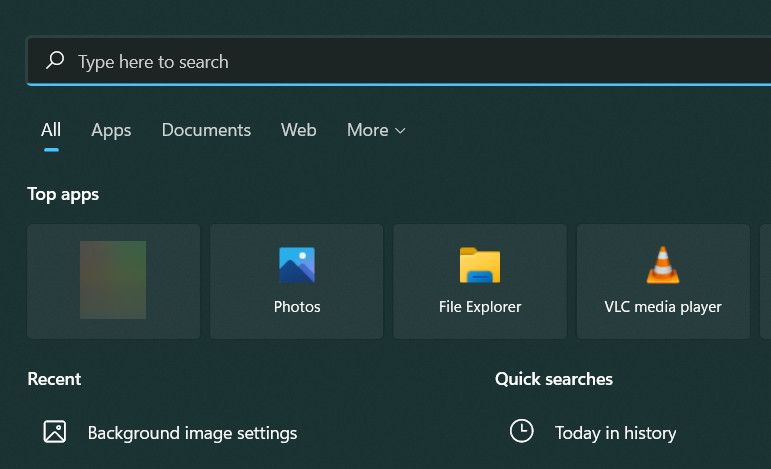
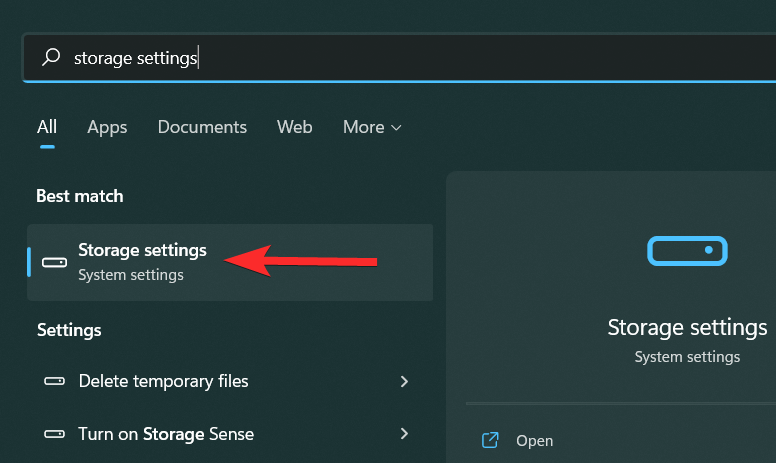
In the start menu, search for ‘Storage settings’ and click on the same from your search results.
Click on ‘Temporary Files’.

Scroll down and click on the checkboxes next to the specific files you would like to delete.
Note: Each file type is followed by a brief description. Do read this description before adding the file type to your delete list.

Now click on ‘Remove files’.

Click on ‘Continue’ to confirm your choice.
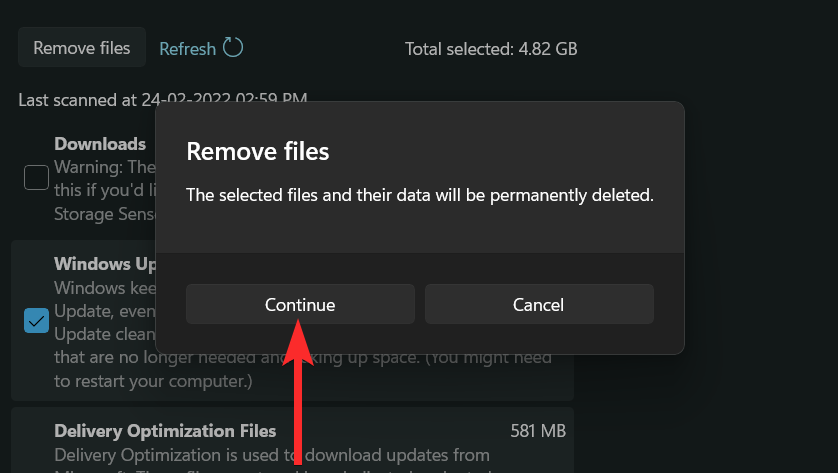
The selected files will now be removed from your device.
Disk Cleanup
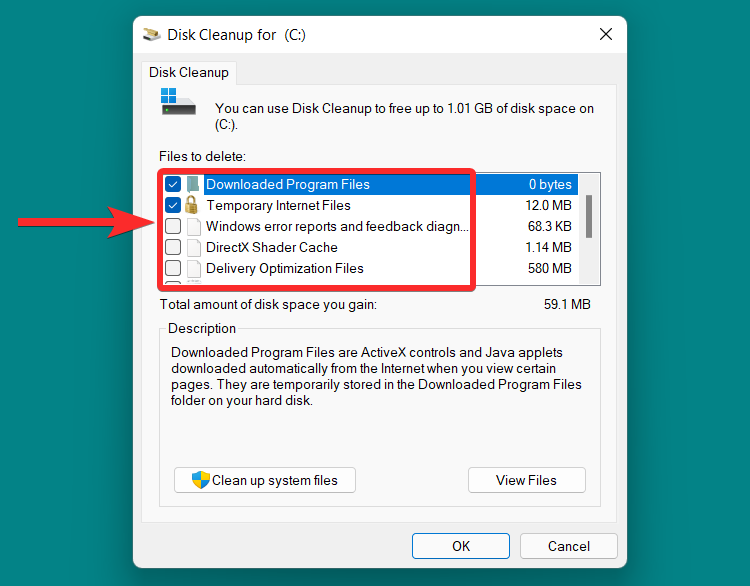
Microsoft’s Disk Cleanup is a built-in tool that can scan cache and other temporary files on your system. This includes things like DirectX Shader Cache, Delivery Optimization Files, Windows error reports, and more.
Let’s see how you can use the Disk Cleanup tool.
Press the Windows key on your keyboard to open the start menu.

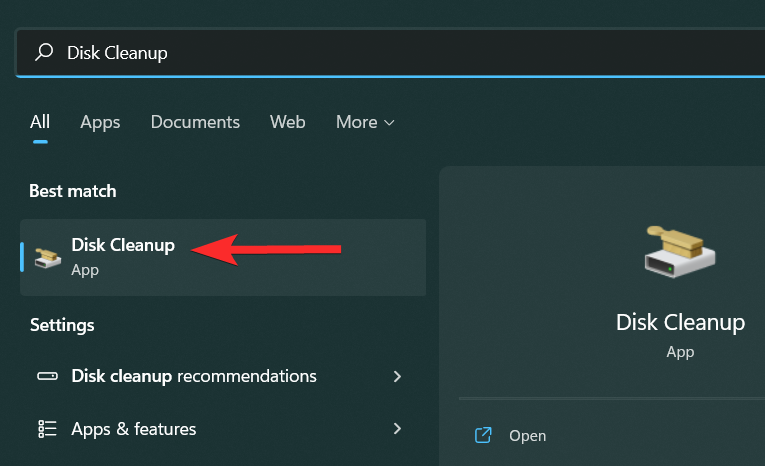
In the start menu, search for ‘Disk Cleanup, and click on the same from your search results.
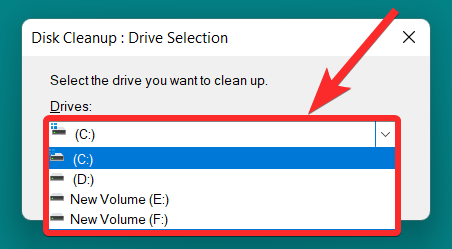
Click on the drop-down menu.

Now click on the drive you wish to clean up.
Scroll down and click on the checkboxes next to the specific files you would like to delete.
Note: Each file type is followed by a brief description. Do read this description before adding the file type to your delete list.
Click on ‘OK’.

Click on ‘Delete Files’.

If you see the following prompt, check the ‘Do this for all current items’ checkbox and click on ‘Continue’.

Wait for the cleaning up process to finish.

Your selected files have now been removed from your system.
You can also use the Disk Cleanup tool to clean up system files. To clear system files, follow the below-mentioned steps.
In the Disk Cleanup tool, click on the ‘Clean up system files’ option.

Select the Drive which contains your system files. In most systems, this will be labeled the ‘C’ drive.

Scroll down and click on the checkboxes next to the specific files you would like to delete.

Click on ‘OK’.
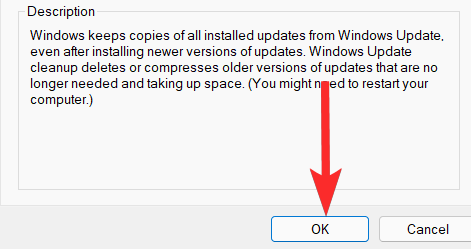
Click on ‘Delete Files’.
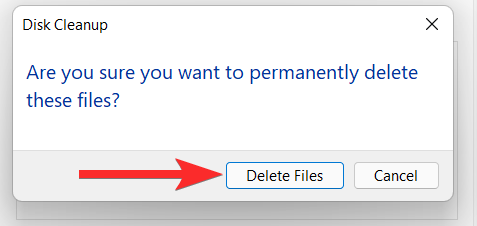
Your selected system files will now be deleted.
Flush the DNS [get rid of DNS cache poisoning]
The Domain Name System (DNS) is like a phonebook for the websites you visit on your computer. Specifically, DNS translates domain names (for example, www.google.com) to IP addresses (8.8.8.8).
While the DNS cache allows your computer to load websites readily, it is possible that with time the number of these cache files has grown large. In worse cases, you can also encounter DNS cache poisoning, an event where a malicious agent has attacked and altered these stored IP addresses. In such cases, it makes sense to flush the DNS. So, let’s see how you can do it.
Press the Windows key on your keyboard to open the start menu.

In the start menu, search for ‘cmd’ and click on the same once it shows up in your search results.

In Command Prompt, type the following command, press Enter on your keyboard once you are done.
ipconfig /flushdns
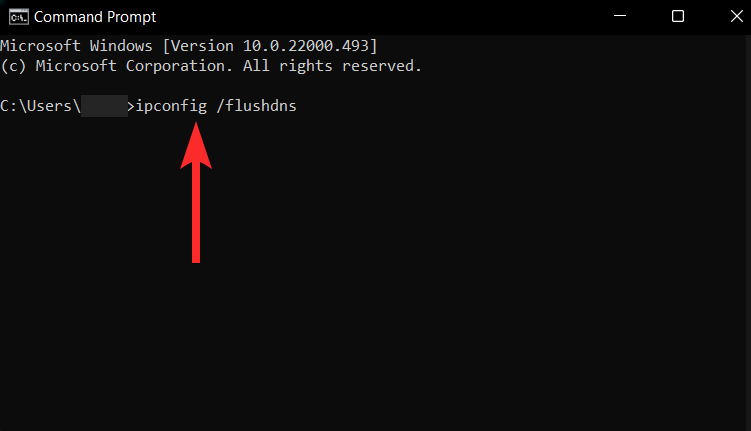
The DNS cache has now been cleared.

Clear Microsoft Store’s Cache
Similar to other apps on your system, Microsoft Store also stores cached data on your PC and additionally, allows you to delete these files using the wssreset.exe file. This can help you in case you are having purchase issues, download issues, or an issue where Store apps simply won’t load. Use the steps below to help you clear your Microsoft Store cache.
Press Windows + R on your keyboard to open the Run command window.

Type in ‘wsreset.exe’ and press ‘Enter’ on your keyboard.
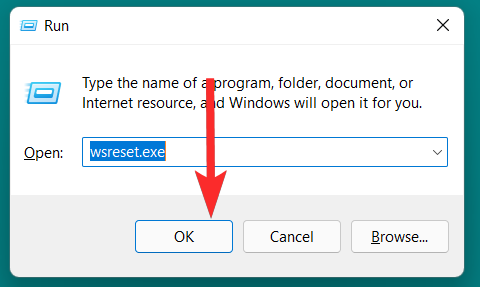
The wsreset.exe file will clear the Microsoft cache without asking you for any permissions and then close automatically.

Clear web browser cache
Web browsers store ‘static assets’ of the web pages you visit frequently on your PC so you can access these websites faster on subsequent visits. Precisely, ‘static assets’ are assets of a website that remain more or less the same on each visit.
However, it is possible that the version of cached data of a website stored on your PC is an outdated one. This can further lead to issues every time you try to access this specific website. In that case, clearing your browser cache can be the perfect fix.
Let’s see how you can clear the cache on 2 of the most popular web browsers used on PC: ‘Google Chrome’ and ‘Mozilla Firefox’.
Google Chrome
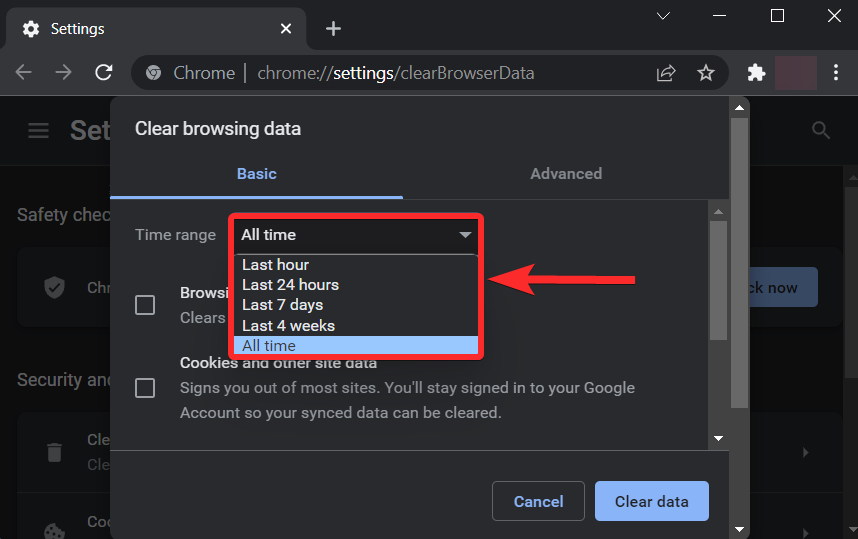
Open Google Chrome on your PC and press Ctrl + Shift + Delete on your keyboard. This will open the Clear browsing data settings.
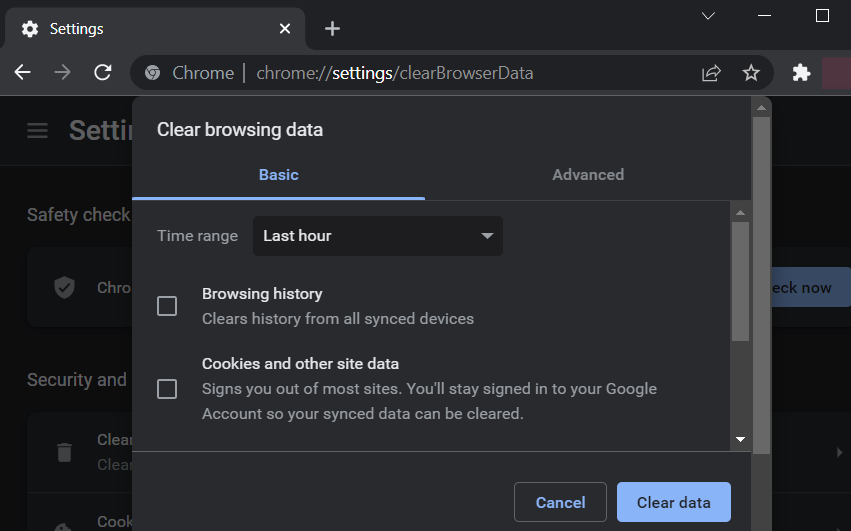
Click on ‘Time range’ and select the time range you want to delete Google Chrome’s cache for.
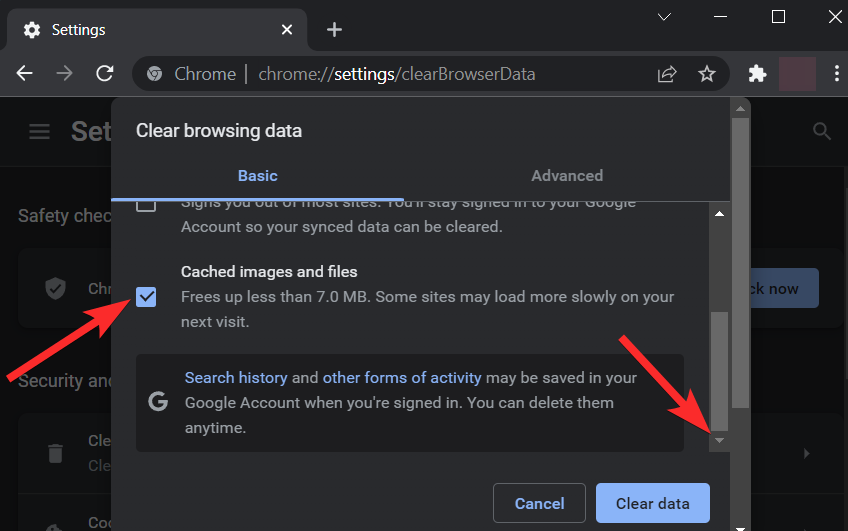
Scroll down and make sure only the ‘Cached images and files’ checkbox is checked.
Click on ‘Clear data’.
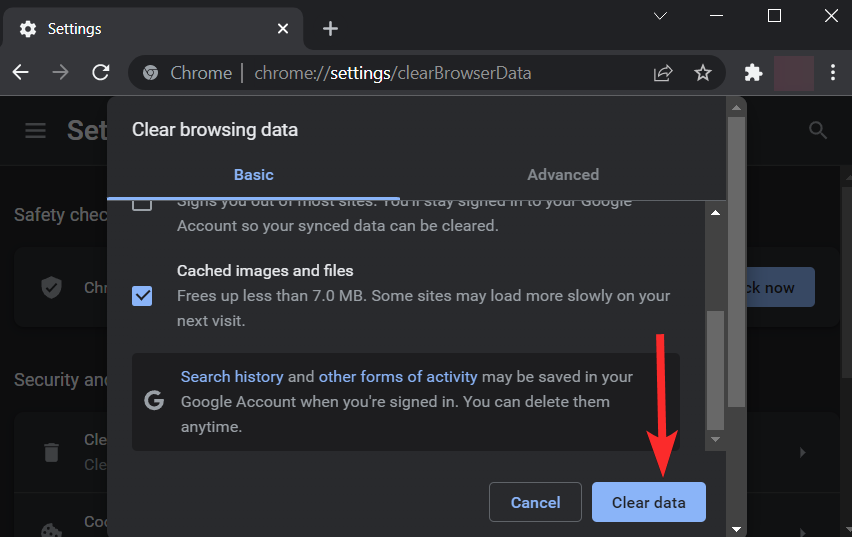
Your Google Chrome cache is now deleted.
Mozilla Firefox
Open ‘Firefox’ from your PC and press Ctrl + Shift + Delete on your keyboard. This will open the Clear Recent History settings.
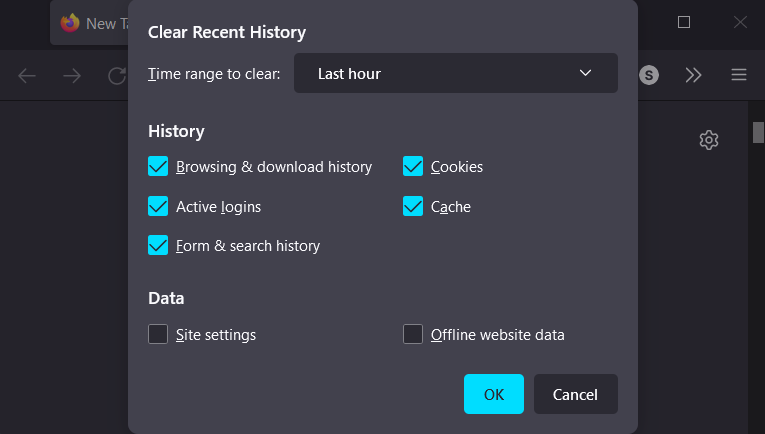
Click on the ‘Time range to clear’ option and select the time range you want to delete your Firefox browser’s cache for.

Make sure that only the ‘Cache’ checkbox is selected.

Click on ‘OK’.

And that’s how you can clear your browser cache on your PC!
Clear location cache
Your location history is stored on your Windows PC as cache files. To remove these files, follow the following steps.
Press Windows + i on your keyboard to open Settings.

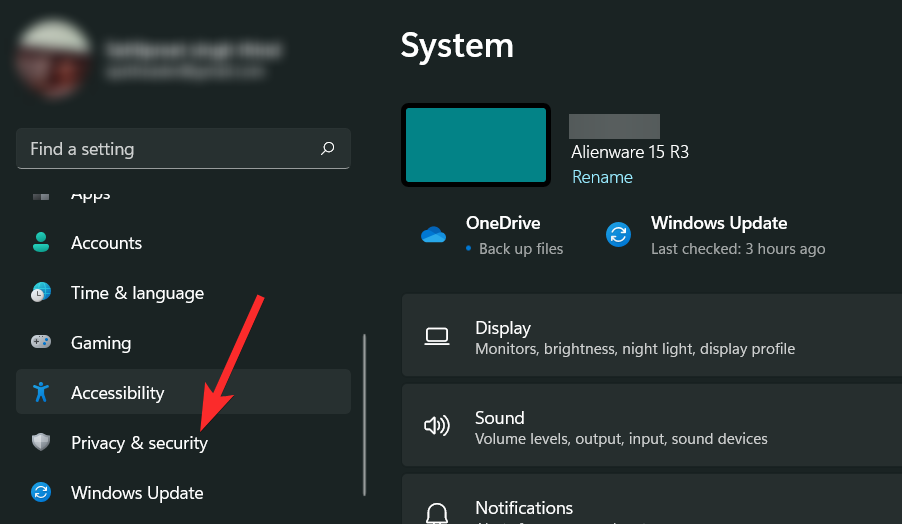
Click on ‘Privacy & Security’ in the left sidebar.
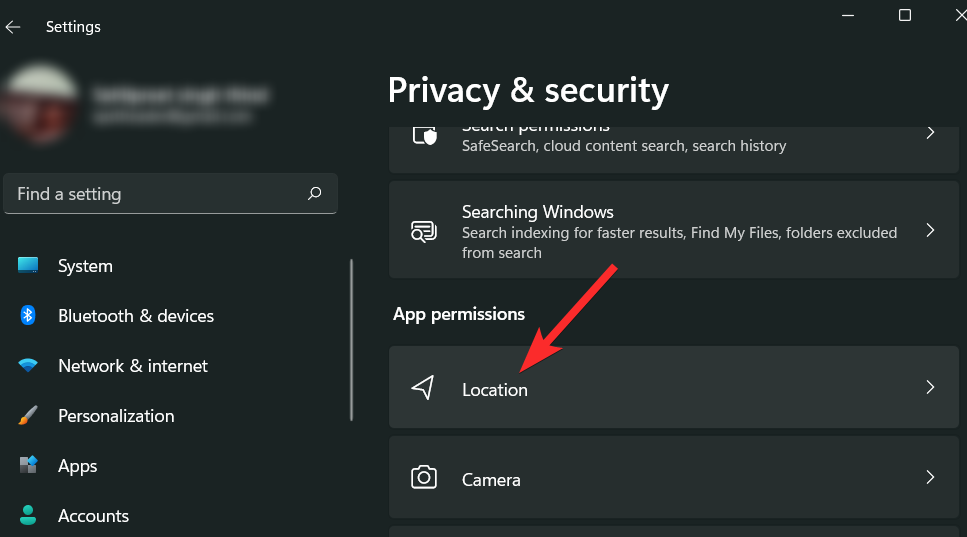
Scroll down on your right and click on the ‘Location’ option under the ‘App permissions’ section.
Now scroll down to find the ‘Location History’ option. Click on ‘Clear’ beside it to clear the same.

Location cache has now been cleared from your PC.
Clear your activity history
Windows uses your activity history in order to personalize your experience. The activity history can be data like the websites you visit or even how you use different apps and services on your PC. This activity history is linked with your Microsoft account.
However, if you want to delete your activity history, follow the guide below to help you along with the process.
Press Windows + i on your keyboard to open Settings.

Click on ‘Privacy & Security’.
 Scroll down on your right and click on ‘Clear’ under ‘Clear activity history’.
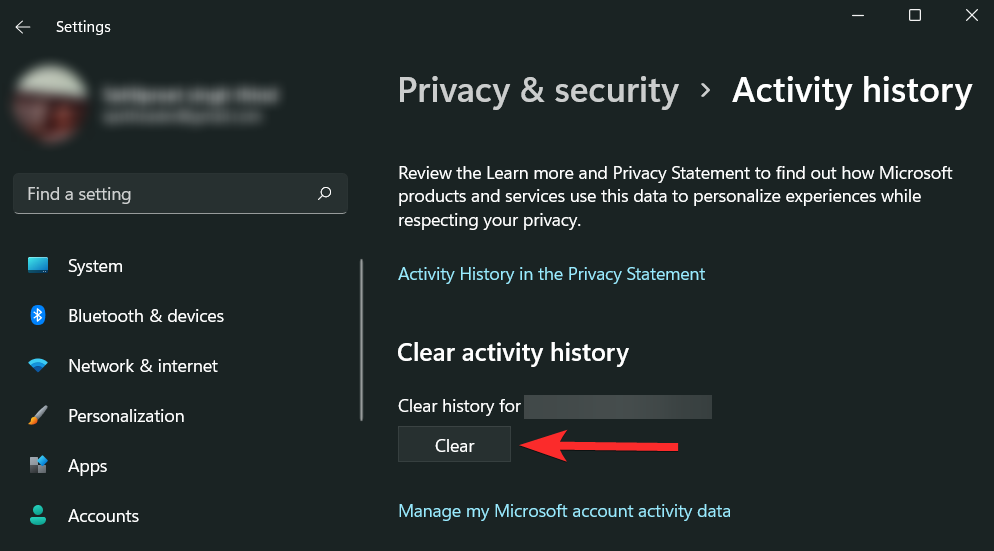
You can also disallow Microsoft to store your activity history on your device by making sure the checkbox shown below is unchecked.

Delete prefetch files
First introduced with Windows XP, the Prefetch files are used to reduce the time it takes to start up your Windows PC. It’s entirely possible that you might want to delete the prefetch files if, in case, your system is infected with malicious software and you’re having issues while booting your system.
Note: Remember that the prefetch files are used to reduce the boot time of your system. Removing them will have an effect on your subsequent boot times.
So, with that in mind, let’s see how you can clear prefetch files in Windows 11.
Press Windows + R on your keyboard to open the Run command window.

Type prefetch in the Run command and press ENTER on your keyboard. This will automatically delete the prefetch files.
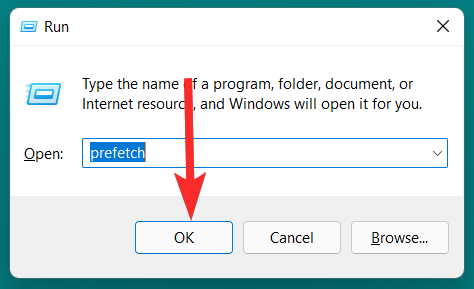
However, this can also open the prefetch folder. In that case, select all files by pressing Ctrl + A on your keyboard and then press Delete to remove the prefetch files.
Clear File Explorer cache
File Explorer remembers the files and addresses frequented by you on your system. The quick access menu is a great example of it.
Like other apps, Windows also allows you to delete the cache files that store this data. Let’s see how you can do it.
Press the Windows key on your keyboard to open the start menu.

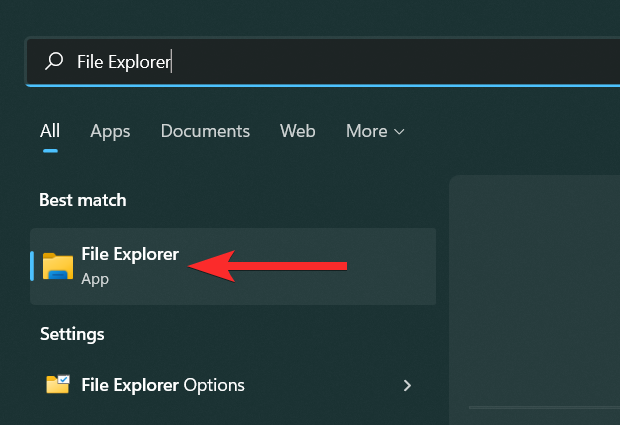
In the start menu, search for ‘File Explorer, and click on the same once it shows up in your search results.
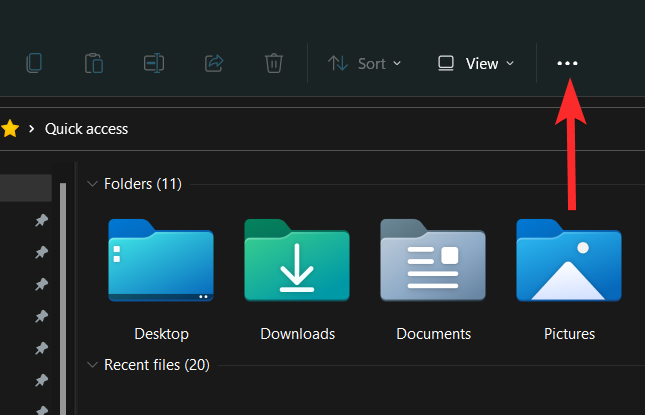
Click on the 3-dot icon located near the top of the File Explorer window.
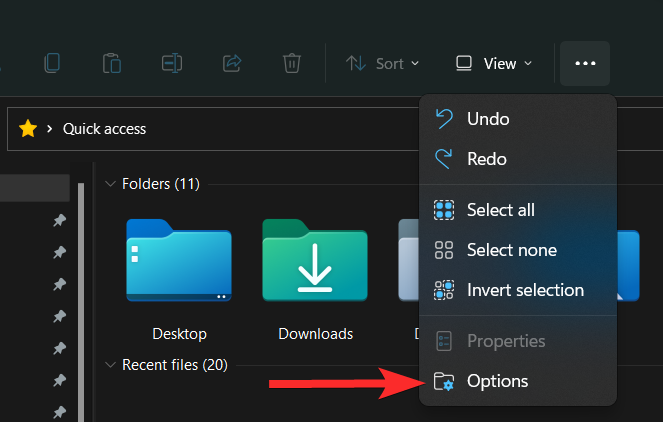
Click on ‘Options’. This will open the Folder Options.
Click on the ‘Clear’ option in the Privacy section.

Clear System Restore Cache
Removing the system restore points in Windows 11 will automatically delete the cache files associated with them. However, we recommend caution since this method involves the removal of restore points which will prevent you from recovering windows in case you face a BSOD in the future. Follow the steps below to help you along with the process.
Press the Windows key on your keyboard to open the start menu.

In the start menu, search for ‘File Explorer, and click on the same once it shows up in the search results.

In the System Properties, click on ‘Configure’.
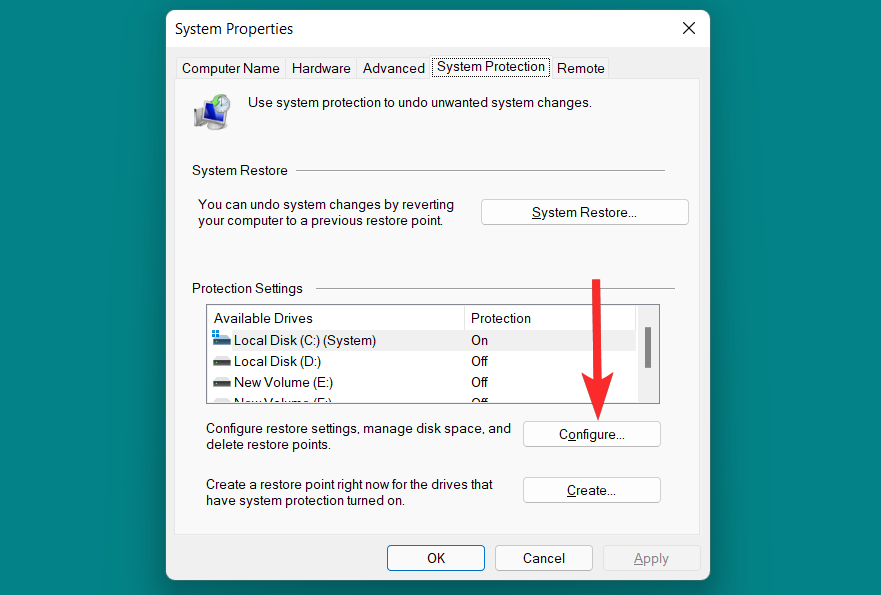
In the System Protection options, click on ‘Delete’.

Click on ‘Continue’.
Note: Keep in mind this will delete the restore points. Hence, proceed with caution.

The restore points and the cache files associated with them have now been deleted.
Automatically delete cache with Storage Sense
If you don’t want to remove the various types of caches on your computer individually, Windows 11 has a built-in feature for you. This feature is called Storage Sense and it can be used to automatically clear cache at a set interval periodically.
Let’s see how you can use Storage Sense on Windows 11 to delete cache automatically.
Press Windows + i on your keyboard to open Settings and click on ‘System’.

Scroll down on your right and click on ‘Storage’.

Scroll down and click on ‘Storage Sense’.
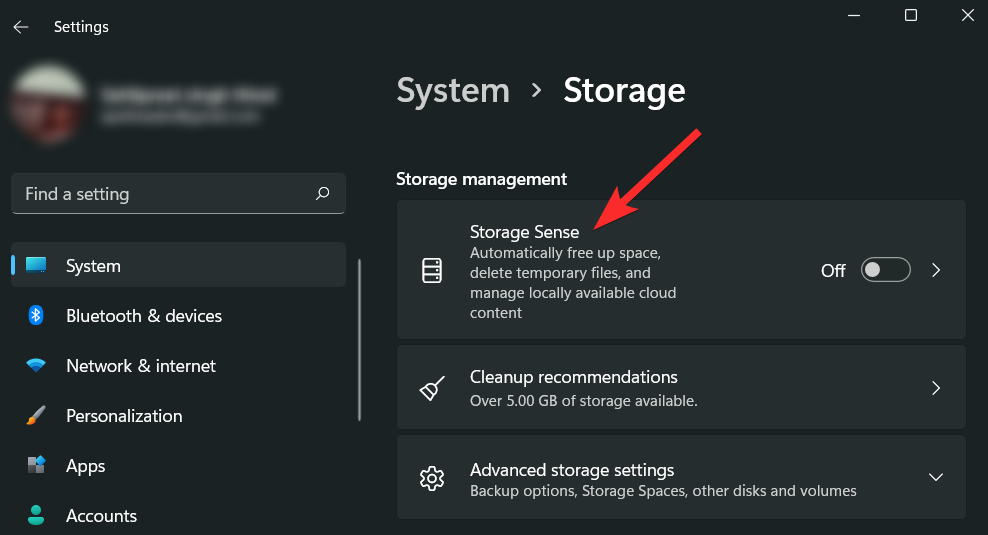
Make sure the checkbox under the ‘Cleanup of temporary files’ is checked. Then, click and turn on the toggle under the ‘Automatic User content cleanup’ section to enable Storage Sense.

Click on the ‘Run Storage Sense’ option and select the time period after which you want the Storage Sense to run periodically.
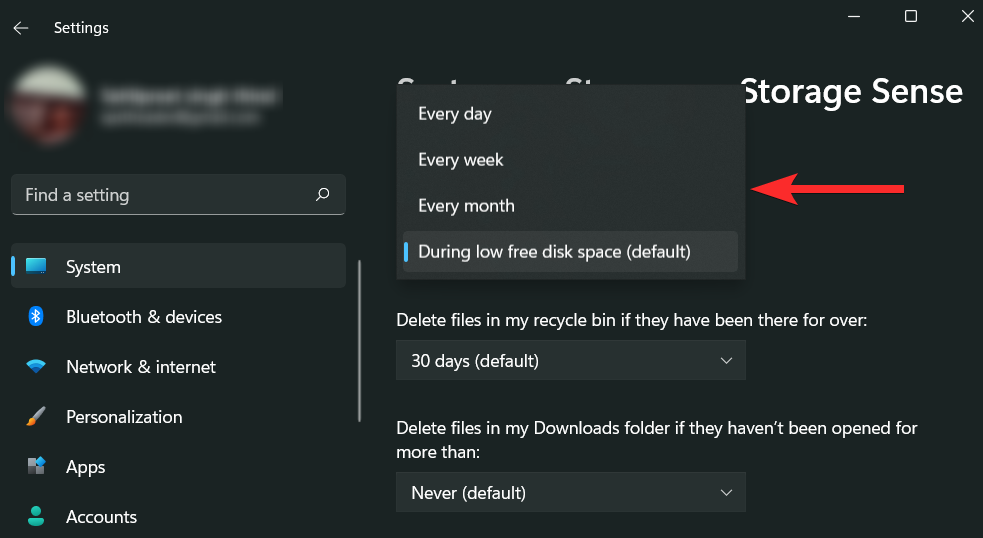
Similarly, choose a suitable time for the ‘Delete files in my recycle bin if they have been there over’ option.

Finally, choose a suitable time for the ‘Delete files in my downloads folder if they haven’t been opened for more than’ option.

That’s it. Storage Sense is now active and will run according to the time periods set by you.
Clear clipboard cache
Windows 11 allows you to delete the clipboard cache in a few clicks. Let’s see how you can do it.
Press the Windows key on your keyboard to open the start menu.

Search for ‘Clipboard settings’ and click on the best match.
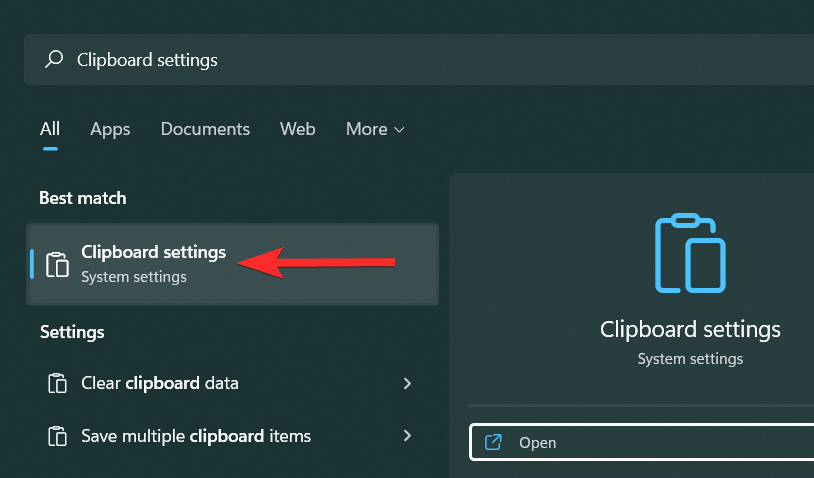
In the right panel, scroll down and locate the ‘Clear clipboard data’ option. Click on the ‘Clear’ option next to it.

Clear the display cache
The display cache on Windows 11 is used to store the information related to your system display. This data can be anything, ranging from your last used resolution to color mode, etc. However, display cache is not free of issues that occur with other forms of cache. Additionally, you might just want to clear the display cache and reset your display settings if you encounter issues with your system display.
Let’s see how you can do it.
Press the Windows key on your keyboard to open the start menu.

Search for ‘Registry Editor’ and click on the same from your search results.

Navigate to the following path. You can also copy-paste the same in the address bar at the top.
HKEY_LOCAL_MACHINE\SYSTEM\CurrentControlSet\Control\GraphicsDrivers
Note: Before proceeding ahead, it is recommended that you create a restore point.
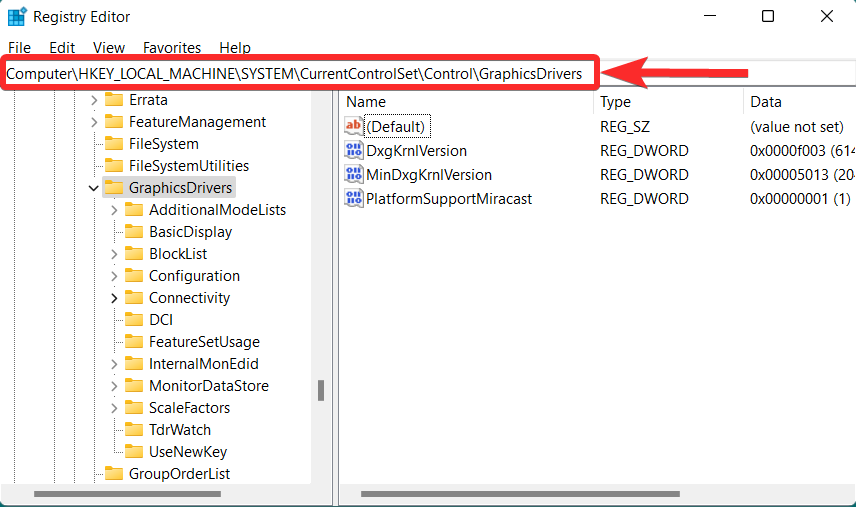
Right-click on the ‘Configuration’ key and click on ‘Delete’.
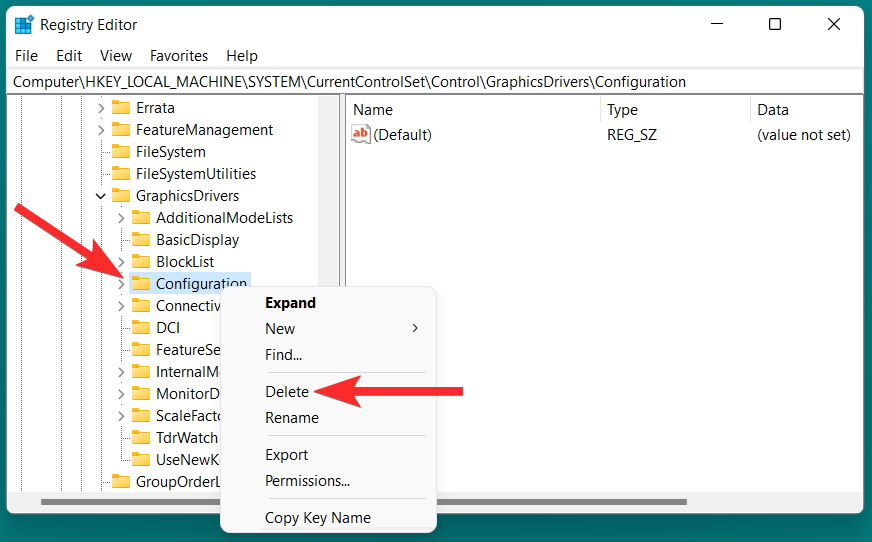
Repeat the above step for deleting 2 more keys: ‘Connectivity’ and ‘ScaleFactors’.

Finish the process by restarting your PC.
FAQs
What is the difference between cache and cookies on a web browser?
A browser cache saves information like pictures, files, and HTML data for a specific website so the same website can be loaded faster on subsequent visits.
Cookies, however, are used to store relatively small pieces of data, for example, user names, emails, sign-in data, shopping cart data, etc.
What is the file type of a cache file?
On most web browsers, the .cache extension is used to store the cached data. While this extension is not exactly a file format, it does, however, tell the user about the primary function of the file.
How can I open a cache file?
In order to open a cache file, you need software that can open a Snac-1.3 VDA file. You can, however, also use online websites like fileproinfo to analyze a cache file and see the text stored inside it.
Is cache memory fast?
Yes. Cache memory is one of the, if not the fastest memory on a PC. It is even faster than the RAM.
This is because the cache is typically an extremely small physical storage that is located very close to the CPU. Thus, it takes a very small number of clock cycles (unit of time in the CPU) for data to transfer from the cache memory to the CPU.
What happens after I delete cache on a web browser?
After you delete cache from a web browser, you will notice that some settings on specific websites have been deleted. Some websites will also load slower.
However, with time, as you visit these websites again, the web browser will create the required cache files again.
Related:




As it turns out “cache” in this context is pronounced “cash”