Those who have to deal with image files daily often have to resize them to fit the demands of their projects and work. But if there are too many images to handle, going about resizing them individually consumes a lot of time and effort.
In such situations, a tool like PowerToys can come in handy that can – among other things – resize image files in bulk with its Image Resizer utility. Here’s how you can set up Image Resizer settings and start resizing images in bulk using PowerToys.
Related: How to Extract Text on Windows Using PowerToys
How to bulk resize images with PowerToys
PowerToys is an all-in-one program with various utilities and features that help speed up your day-to-day tasks. One of its utilities is Image Resizer which, as the name suggests, lets you resize images in bulk based on your pre-determined settings and preferences.
Before we begin, make sure to install PowerToys on your Windows PC to access Image Resizer as well as its other utilities. Once done, follow the steps given below to set up your image resizing preferences and start resizing images in bulk.
Step 1: Enable Image Resizer
Although the Image Resizer utility is enabled by default, make sure that that is the case.
- To do so, launch PowerToys and click on Image Resizer on the left.
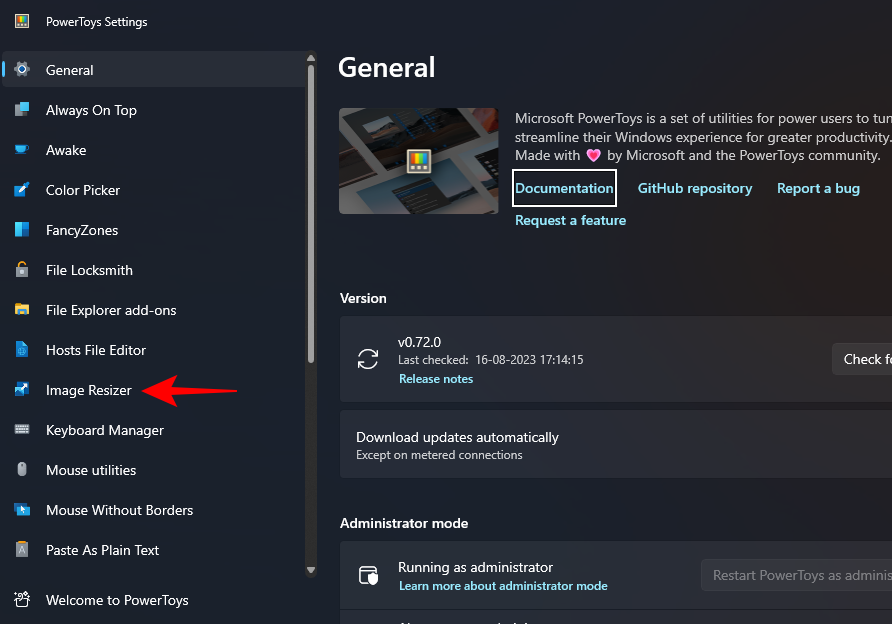
- And make sure that Enable Image Resizer is enabled on the right.

Step 2: Resize your images in bulk
- To begin resizing your images, navigate to the folder with your images. Select all images that you want to resize, right-click on them, and select Resize pictures.
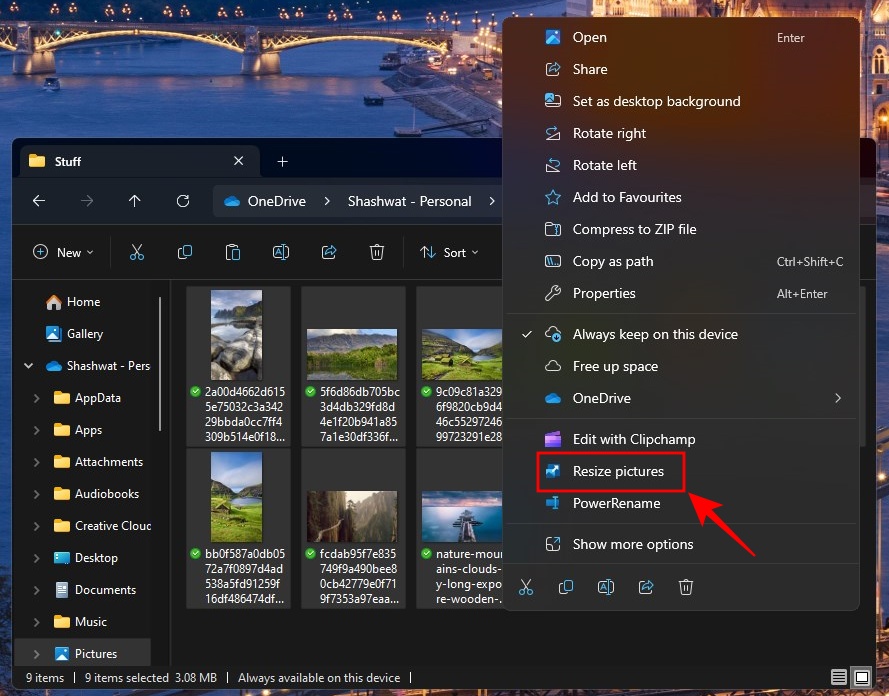
- This will open the “Image Resizer” window. Click on the drop-down menu under “Select a size”.
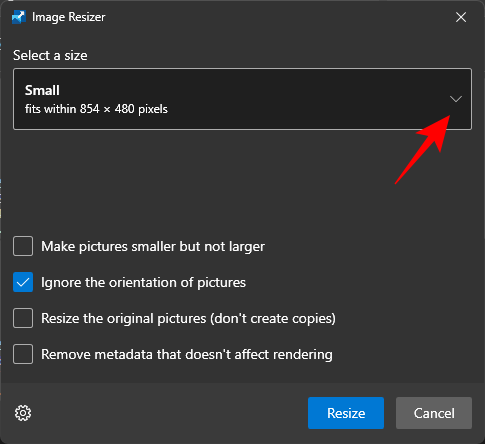
- And select from one of the available presets.

Note: All these can be configured from within PowerToys for future use so you get your most-used presets here. Refer to the next section for the same. - If the preset sizes don’t fit the bill, you can also choose a ‘Custom’ size if you have a particular image dimension in mind.
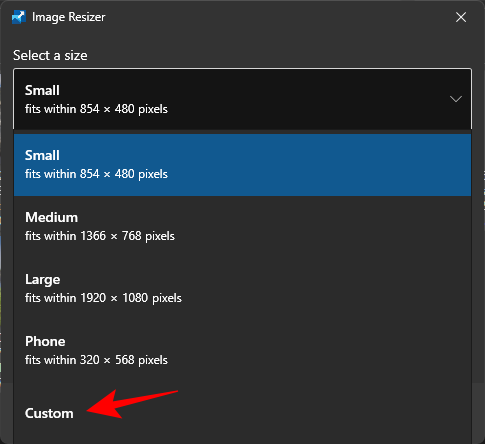
- Then use its options to resize your images.
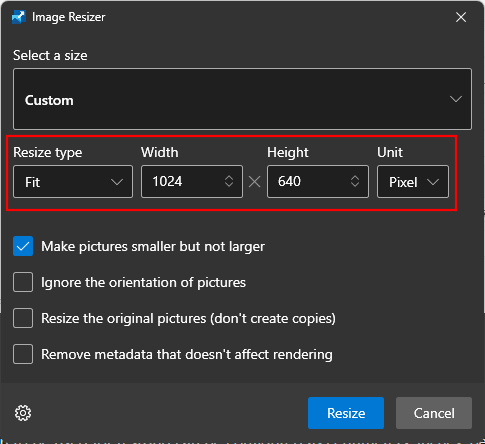
- The Image Resizer window will have a few additional options that you can enable or disable based on your images and how you want to resize them.
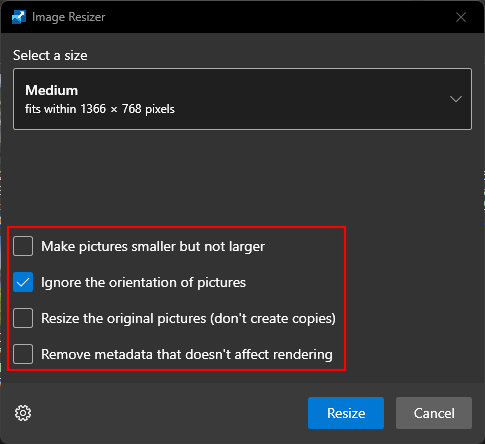
- If some of your files are smaller than your selected image preset size, choose “Make pictures smaller but not larger” so they don’t get blurry and pixelated in the process.
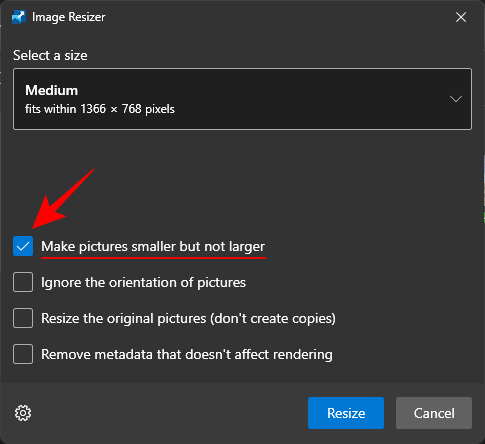
- By default, the “Ignore the orientation of pictures” option is selected which ensures that all images will be of the same size, regardless of their orientation. However, if you have some of your pictures in portrait mode, this option may swap the height and width in the preset to match the orientation such that the smallest number in the preset is applied to the smallest dimension of the picture. If you don’t want this to be the case, uncheck this option so the images don’t get contorted to fit the preset in disproportionate ways.

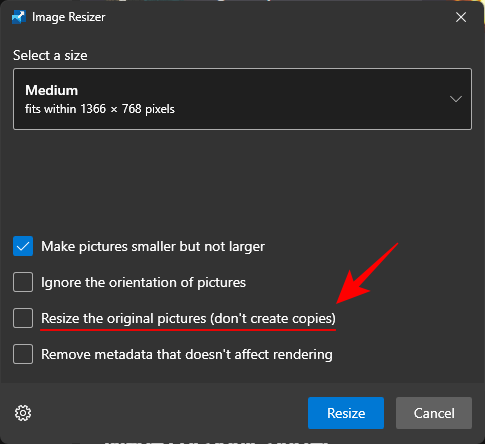
- Image Resizer, by default, creates copies of your image files to resize them. This way, your original files remain untouched and remain in their original size in case something goes wrong. So, unless you want to make changes to the original image file, keep the “Resize the original pictures (don’t create copies)” option unchecked.
- Once your preferences are set, click on Resize.

Related: How to Highlight Mouse Clicks on Windows
Customize Image Resizer: How to change its settings and preferences
Image Resizer lets you change the available presets or add new ones that more closely match your preferences. This way, you can select your custom presets without having to create a new one every time you want to resize images. Here’s how:
1. Add and change preset image sizes
Image Resizer has a few size presets with which you can quickly resize images in bulk. These are:
- Small – 854 x 480 pixels
- Medium – 1366 x 768 pixels
- Large – 1920 x 1080 pixels
- Phone – 320 x 568 pixels
Each of these can be edited or deleted as you see fit.

1.1 – Edit an image size preset
- To edit one of the default presets, click on the pencil icon next to it.

- Change the name as you see fit.

- Then, click on the “Fit” drop-down menu to configure how the image should be scaled.

- The ‘Fill’ option will fill the specified dimensions with the image and crop it if necessary. ‘Fit’, the default option, will not crop the image and fit the image into the dimensions. And ‘Stretch’ will fill the specified dimensions with the image. It doesn’t crop the image but may lead to disproportionate scaling.
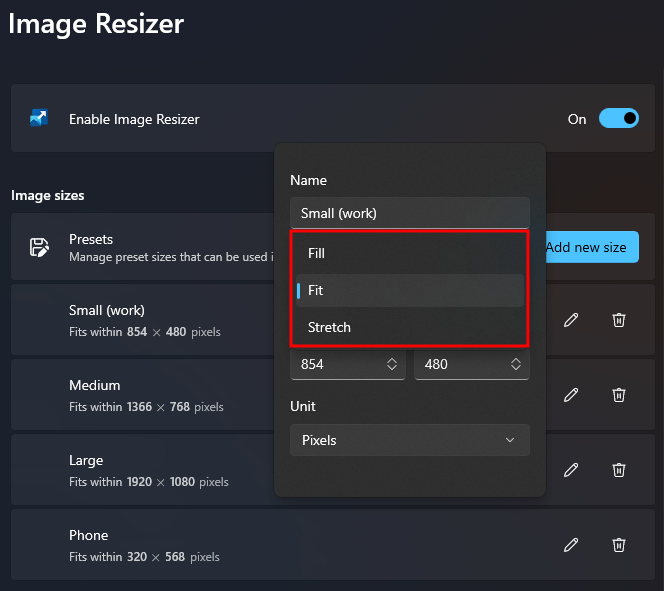
- If you’re not sure which one to choose, stick with the default ‘Fit’ option.
1.2 – Specify resize dimensions
- Next, enter the width and height of the final output of your resized images. Use the arrows or enter the dimensions manually.

- To enter dimensions according to a different unit, click on the “Unit” drop-down menu.

- And choose your unit.

Ideally, it would be best to stick with the pixel unit as that is what you’ll see mostly in the descriptions of files as well.
1.3 – Add a new Image size preset
- Image Resizer already gives you four presets to work with. But if you want additional presets, you can add one by clicking on Add new size.

- It will be added to the list of presets. Click on the pencil icon next to it to start editing.

- You’ll be able to make the changes to the preset settings as shown before.

2. Change image encoding settings
Image Resizer lets you change the image quality percentage or add a fallback encoder in case your output images cannot be saved in their original format, such as Windows Meta Files.
- To change the fallback encoder, click on the drop-down menu next to Fallback encoder.

- And select a format.

- Next, use the slider next to JPEG quality level (%) to change the quality of the output files relative to the original.

This can come in handy when you’re looking to reduce the size of the files.
3. Choose Filename format and timestamp
By default, the resized files get the name of the original file followed by the size of the output file in brackets. So, for instance, a file called image that is resized with the Medium preset will be renamed as image (Medium).
This is determined by the Filename format where “%1 (%2)” relates to the parameters that are used for file names.

- Click on the information button (i icon) next to the filename format field to see the available parameters.

- To change how your files are named, enter the parameters in your format of choice. In our example below, we have included the original filename (%1), the preset (%2), as well as the new width (%3) and height (%4) as the filename of the resized image:

- Finally, you can also change the timestamp of the resized file’s properties by clicking on the drop-down next to File modified timestamp.

- Choose between the timestamp of the original file or the resized file.

All the changes made to the settings and preferences are applied instantly. So once you’re done, the Image Resizer will use these settings whenever you’re resizing images.
FAQ
Let’s consider a few commonly asked questions about using PowerToys to resize images in bulk.
Does fallback encoding convert the image file?
No, the fallback encoding option in Image Resizer is not a file converter. As the name suggests, it only allows Image Resizer to fall back on another encoder, such as JPEG, when the original files are not supported by it.
How do I undo images resized using PowerToys?
To undo image resizing done via PowerToys, simply press Ctrl+Z in the folder that contains the resized images. However, this will only work if resizing files is the last task you did. If you do anything afterward or come back later to the same resized files, simple undoing with Ctrl+Z won’t work.
Image Resizer is one of the many useful utilities within PowerToys that serve an important basic function that is otherwise not covered by Windows natively. The quick presets and preferences that it allows you to configure lets you customize exactly how you want to resize your images, and do so quickly in bulk. We hope this guide helped you with the same. Until next time.
RELATED
- How to Highlight Mouse Location on Windows
- Windows PowerToys: How to Batch Rename Files and Folders Using PowerRename
- How to Disable a Keyboard Key on Windows 11 Using PowerToys from Microsoft


