
What to know
- Text Extractor is a new tool in PowerToys that allows you to extract compatible text from anywhere on your screen. The extracted text is automatically copied to your clipboard and you can paste it in any compatible app.
- You will first need to install a compatible OCR language pack along with PowerToys.
- To extract text, activate Text Extractor using
Windows + Shift + T(changeable) and then simply click and drag on your screen to select the area you want text from. - Text is copied to the clipboard automatically.
When Windows 11 was first released, many advanced users were disappointed with the lack of tools offered by the OS. Microsoft has long developed PowerToys with the same caveat in mind as it offers far more powerful tools to perform various tasks on your PC. Over the years, many features and tools have been added to PowerToys and the latest addition is Text Extractor. This new power tool allows you to copy text from anywhere on your screen, be it a blog post, an image, a website, or even an application. So if you’ve ever found yourself typing text that you can’t copy, then Text Extractor is the perfect tool for you. Let’s take a quick look at it and how you can use it on your PC.
What is Text Extractor and what can it do?
Text Extractor is a new tool in PowerToys that can copy text from anywhere on your screen. Text Extractor uses OCR to identify text from the selected area and then convert it to identifiable characters that can be used on your PC. Once you activate Text Extractor, you get to choose an area on your screen from where you wish to extract the text. When you click and drag to select the area, the text will be automatically identified and copied to your clipboard. You can then paste the text wherever you like depending on your preferences.
Related: How to Edit Registry Files With Registry Preview in Windows PowerToys
How to Extract Text on Windows Using PowerToys from Microsoft
Now that you’re familiar with Text Extractor in PowerToys, here’s how you can use it on your PC. You will first need to install the relevant OCR language pack for your PC. Once done, you can then install PowerToys and use Text Extractor as needed.
Step 1: Install an OCR language pack
Text Extractor uses OCR to identify text from your selection on your screen. Thus you need to have the relevant language pack installed on your PC so Text Extractor can work as intended. Follow the steps below to help you install the relevant OCR language pack on your PC.
Open Run by pressing Windows + R on your PC.

Type the following and press Ctrl + Shift + Enter.
powershell

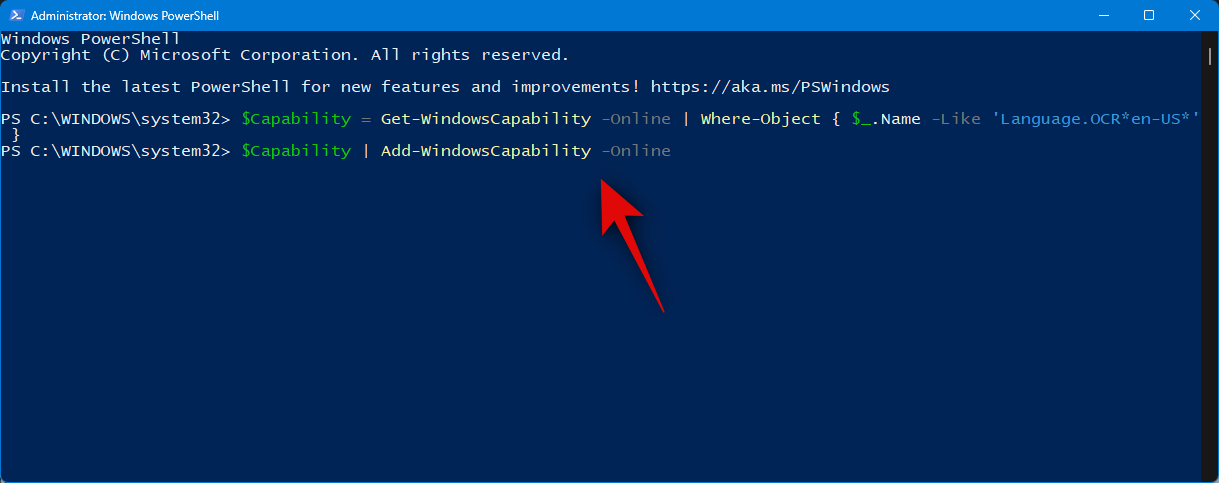
Now use the following command to source your OCR Language pack. Replace [Language Code] with the relevant code for your language from one of the choices below.
$Capability = Get-WindowsCapability -Online | Where-Object { $_.Name -Like 'Language.OCR*[Language Code]*' }

| Language | Language Code |
| Arabic – Saudi Arabia | ar-SA |
| Chinese – Taiwan | zh-TW |
| German – Germany | de-DE |
| Greek | el-GR |
| English – United States | en-US |
| Spanish – Spain (Traditional Sort) | es-ES |
| Italian – Italy | it-IT |
| Japanese | ja-JP |
| Korean | ko-KR |
| Russian | ru-RU |
| Swedish | sv-SE |
| Urdu – Pakistan | ur-PK |
| Hindi | hi-IN |
Note: If your language is not listed above, you can find a comprehensive list of all language codes from Microsoft at this link.
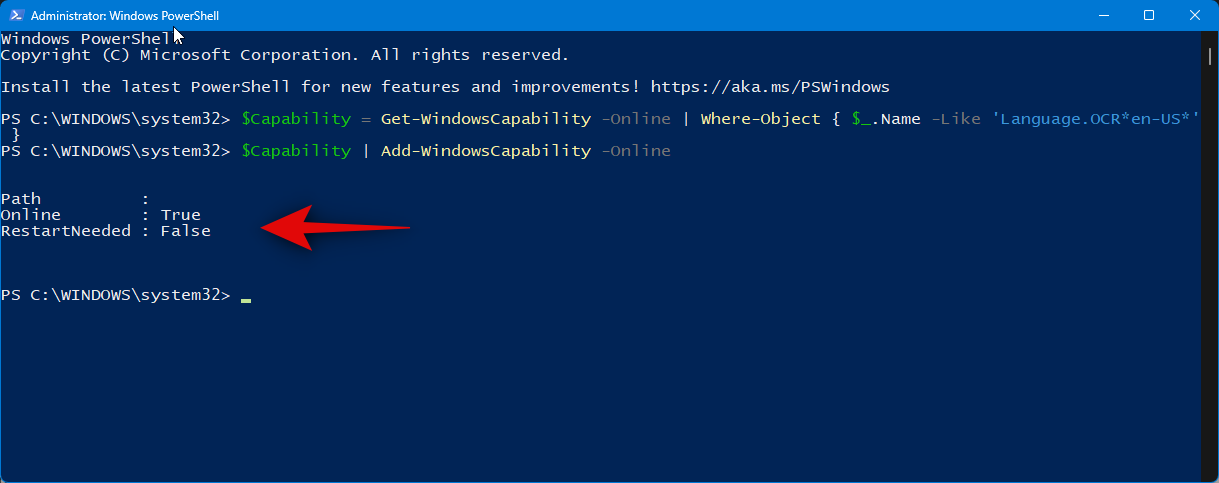
Once done, use the following command to install the pack.
$Capability | Add-WindowsCapability -Online
Once done, you should get an output that resembles the one below.
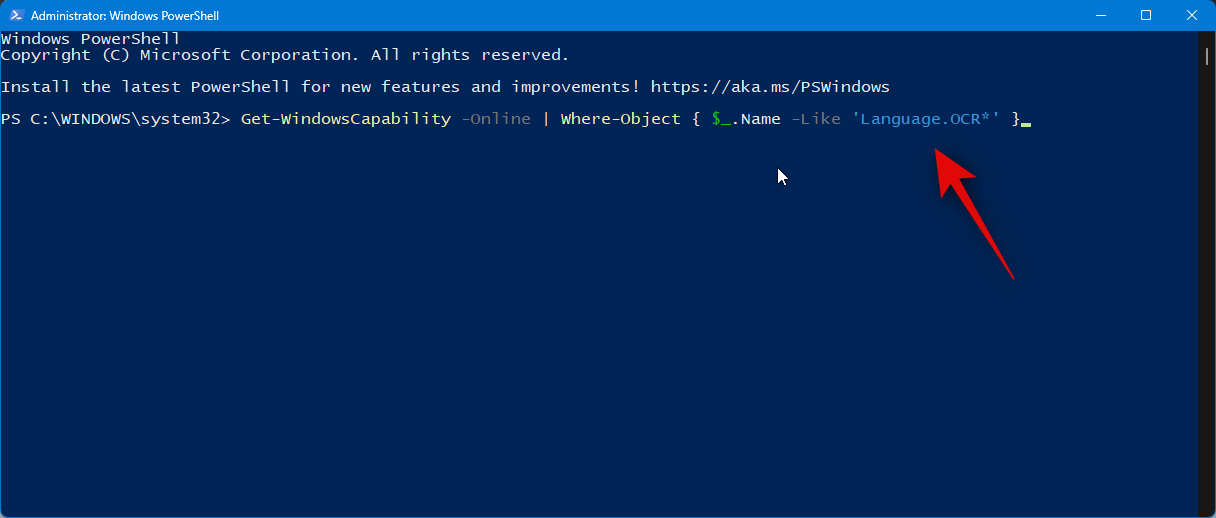
Now use the following command to check if the OCR language pack is installed and detected.
Get-WindowsCapability -Online | Where-Object { $_.Name -Like 'Language.OCR*' }

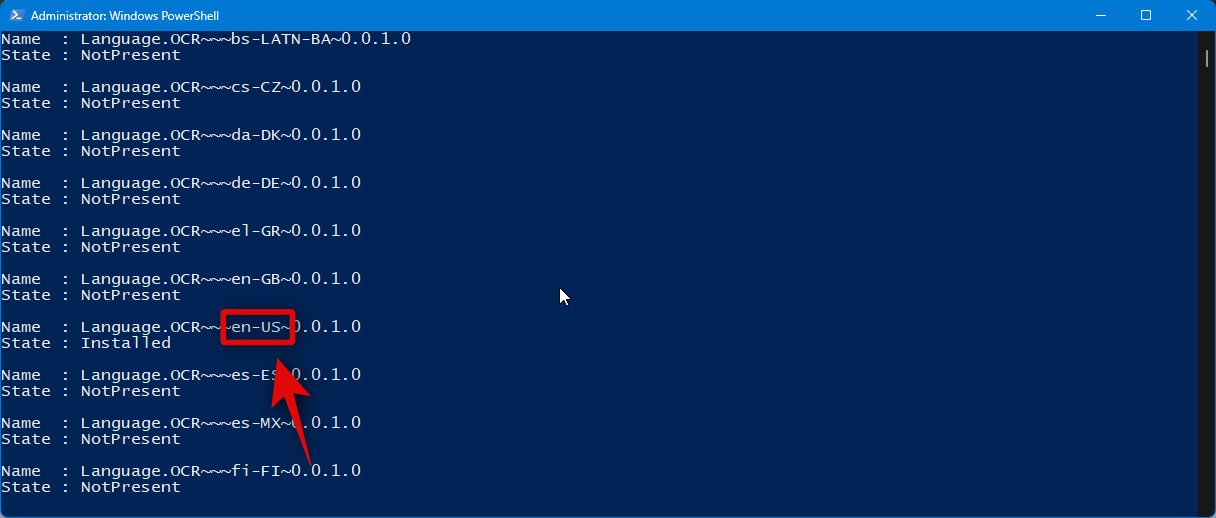
You will now get a list of language packs and whether they are installed or not. Check for the language pack you installed using the steps above. It should read Installed beside State.

Now use the following command to close PowerShell.
exit

And that’s it! You will now have installed the relevant OCR language pack on your PC.
Related: How to Hide, Disable or Uninstall Widgets on Windows 11 (and Disable Windows+W Shortcut)
Step 2: Install PowerToys and use Text Extractor
We can now install PowerToys and use Text Extractor on your PC. Follow the steps below to help you along with the process.
Visit this link to the GitHub releases page for PowerToys. Scroll down and click on PowerToysUserSetup-0.71.0-x64.exe to download it to your PC. If you own an ARM-based PC, click and download the relevant executable instead. Additionally, you can download the .ZIP file if you wish to use a portable copy of PowerToys.

Once the download is initiated, save the setup to a convenient location on your PC. Double-click and launch the setup once it has been n downloaded.

You will now be shown the license agreement for PowerToys. Check the box for I agree to the license terms and agreement.

Click Options.

Click Browse to choose where you wish to install PowerToys.

Choose your preferred location and click OK.

Click OK again.

Now click Install to install PowerToys.

PowerToys will now be installed on your PC.

Once done, click Close.

Now open the Start menu by pressing the Windows key on your keyboard and search for PowerToys. Click and launch the app once it shows up in your search results.

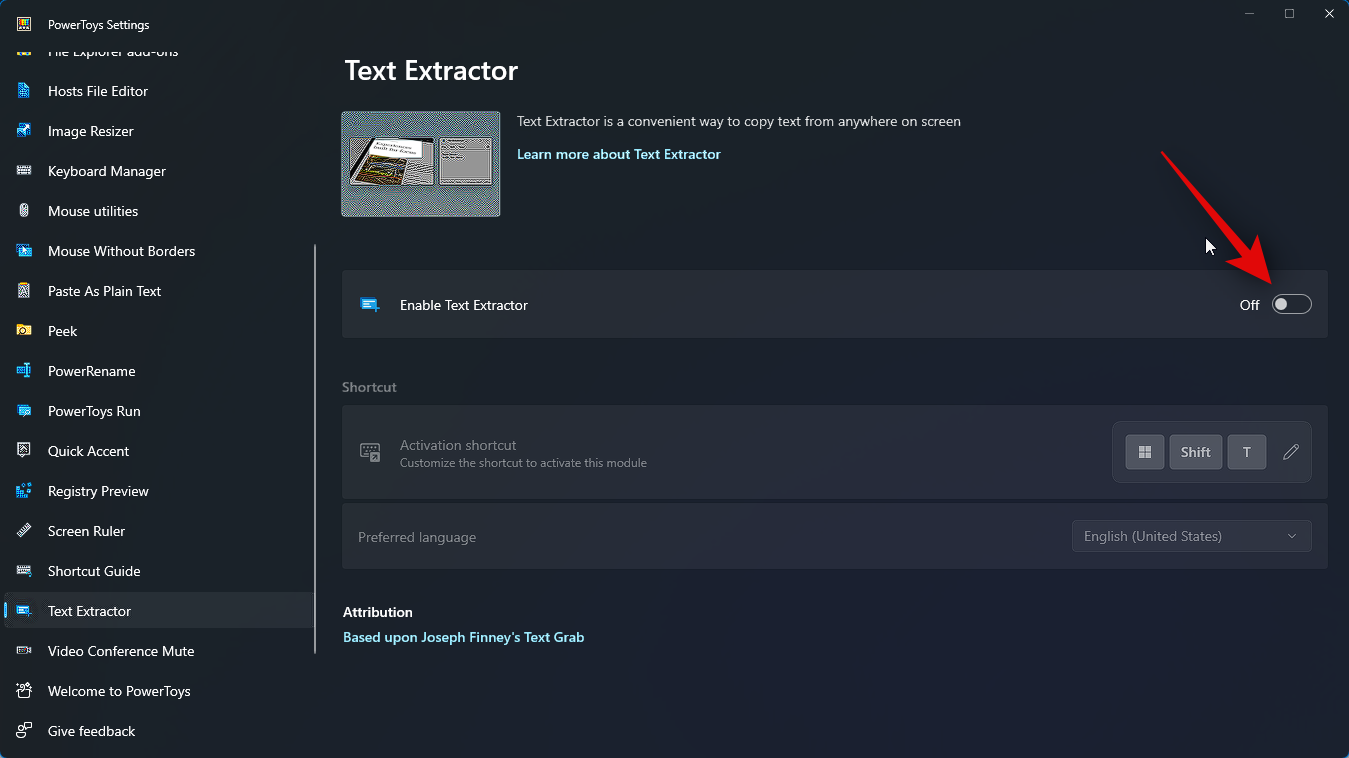
PowerToys has tons of tools and options to customize. You can adjust these settings and activate the tools that you need based on your preferences. Let’s take a look at how you can customize and use Text Extractor for this guide. Click Text Extractor in the left sidebar.

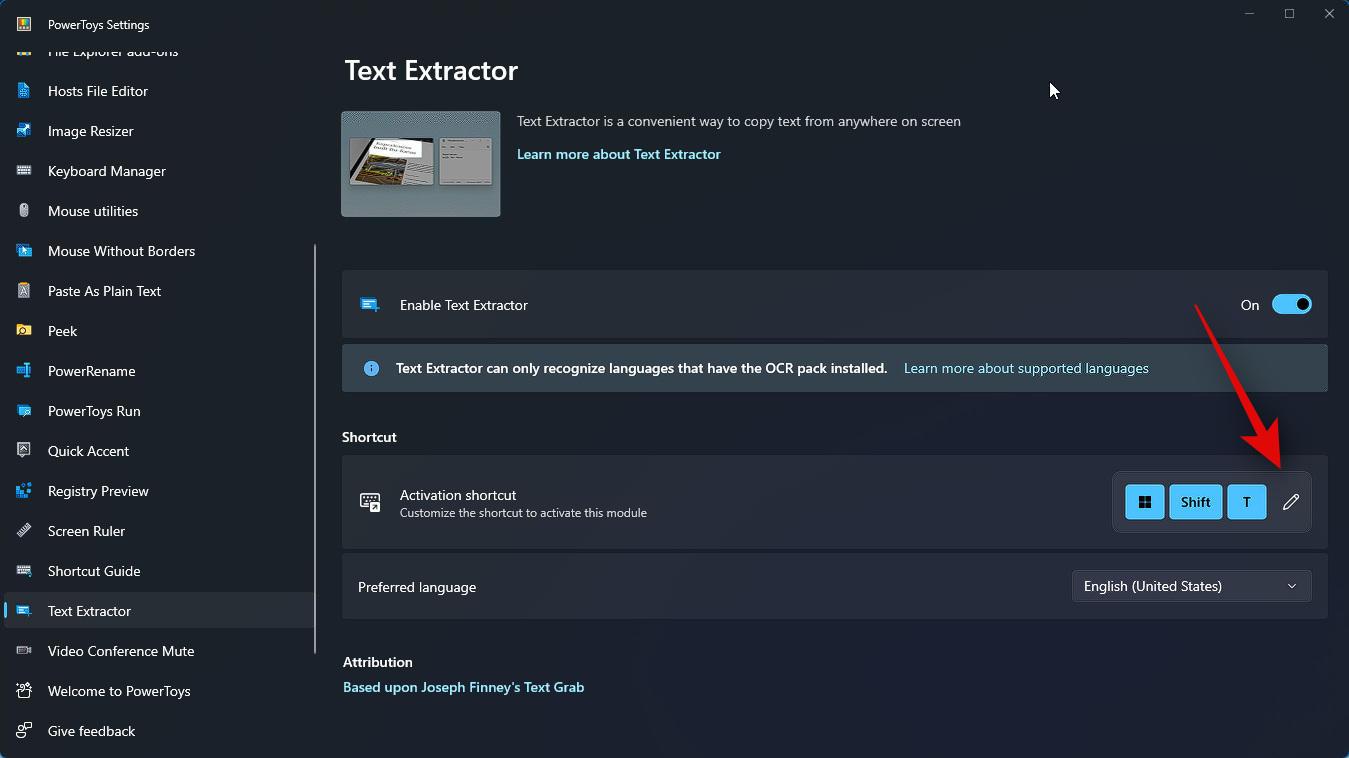
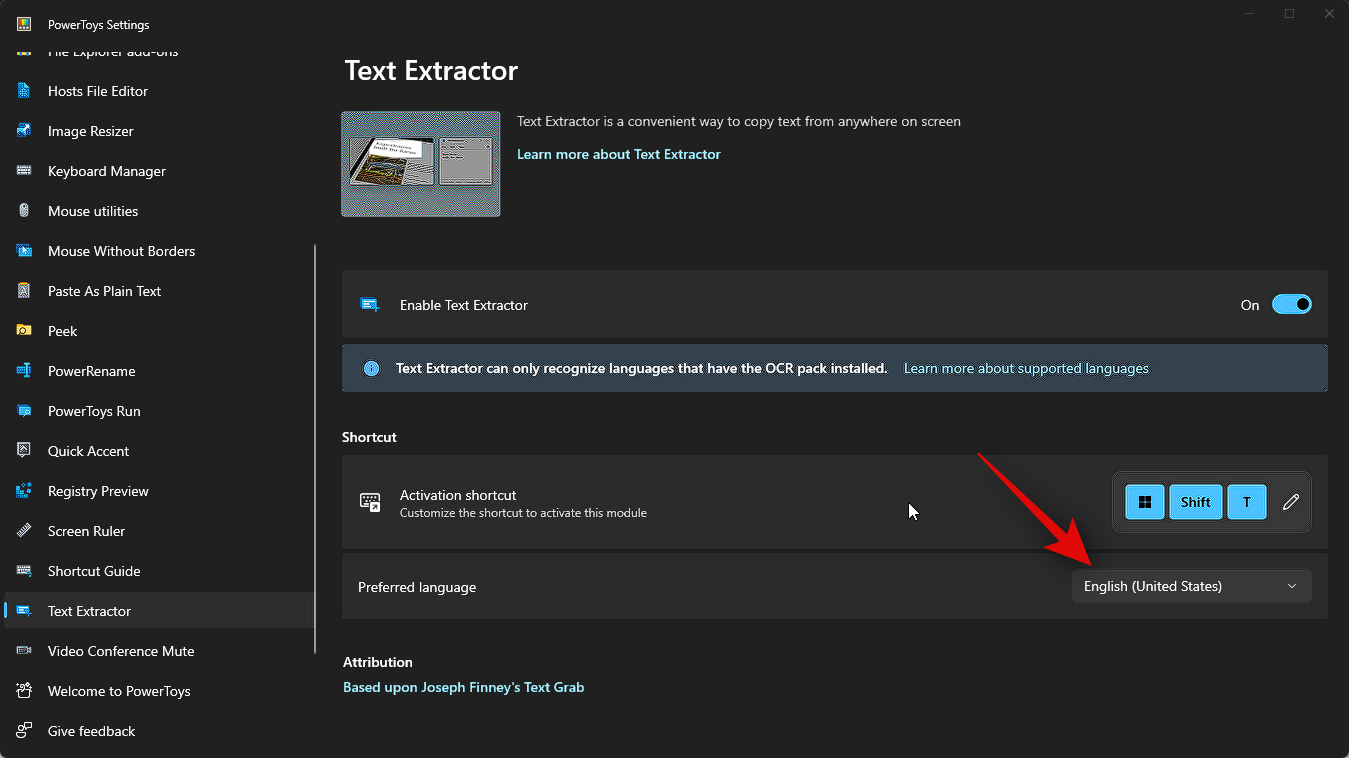
Now click and enable the toggle for Enable Text Extractor at the top.
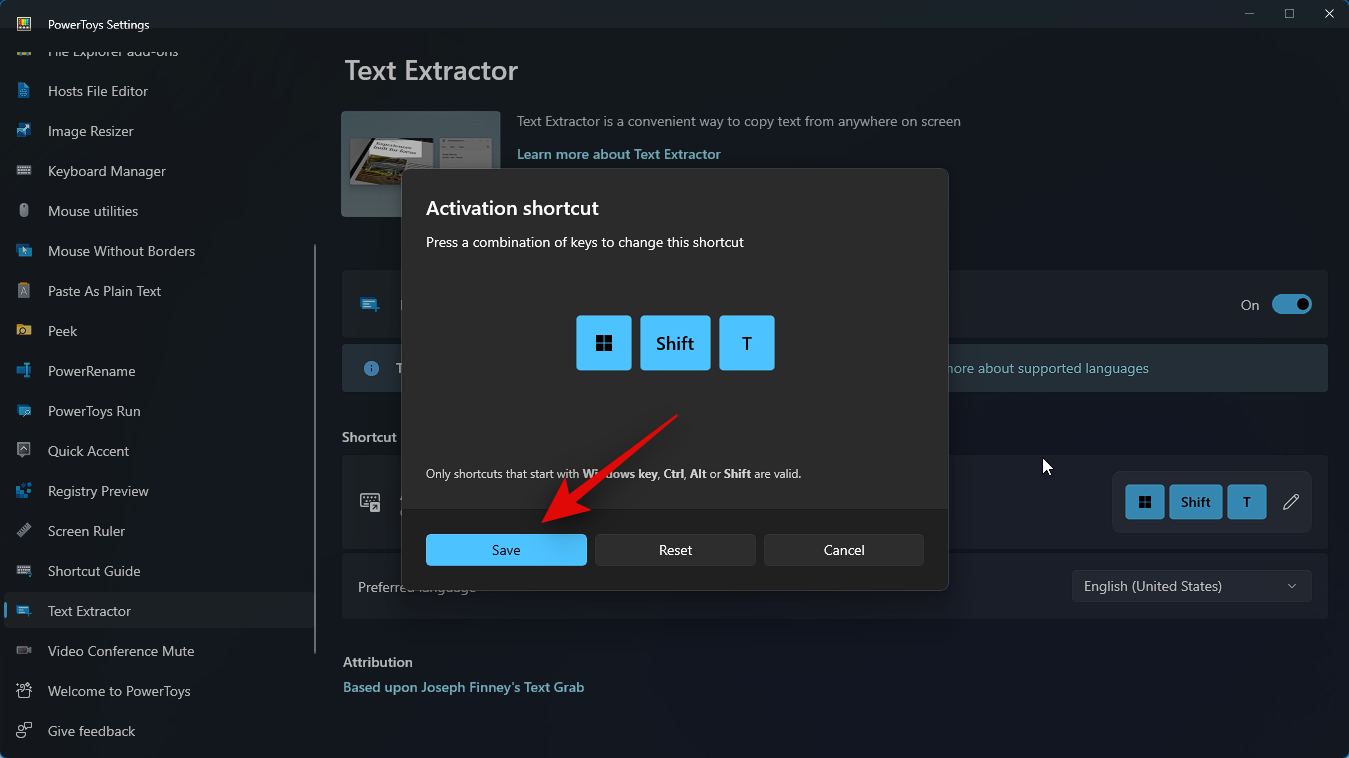
Click the Edit icon beside Activation shortcut.
Now press the preferred key combination you wish to use to activate Text Extractor on your PC.

Click Save to save the combination.
Click Reset instead if you wish to revert to the default key combination.
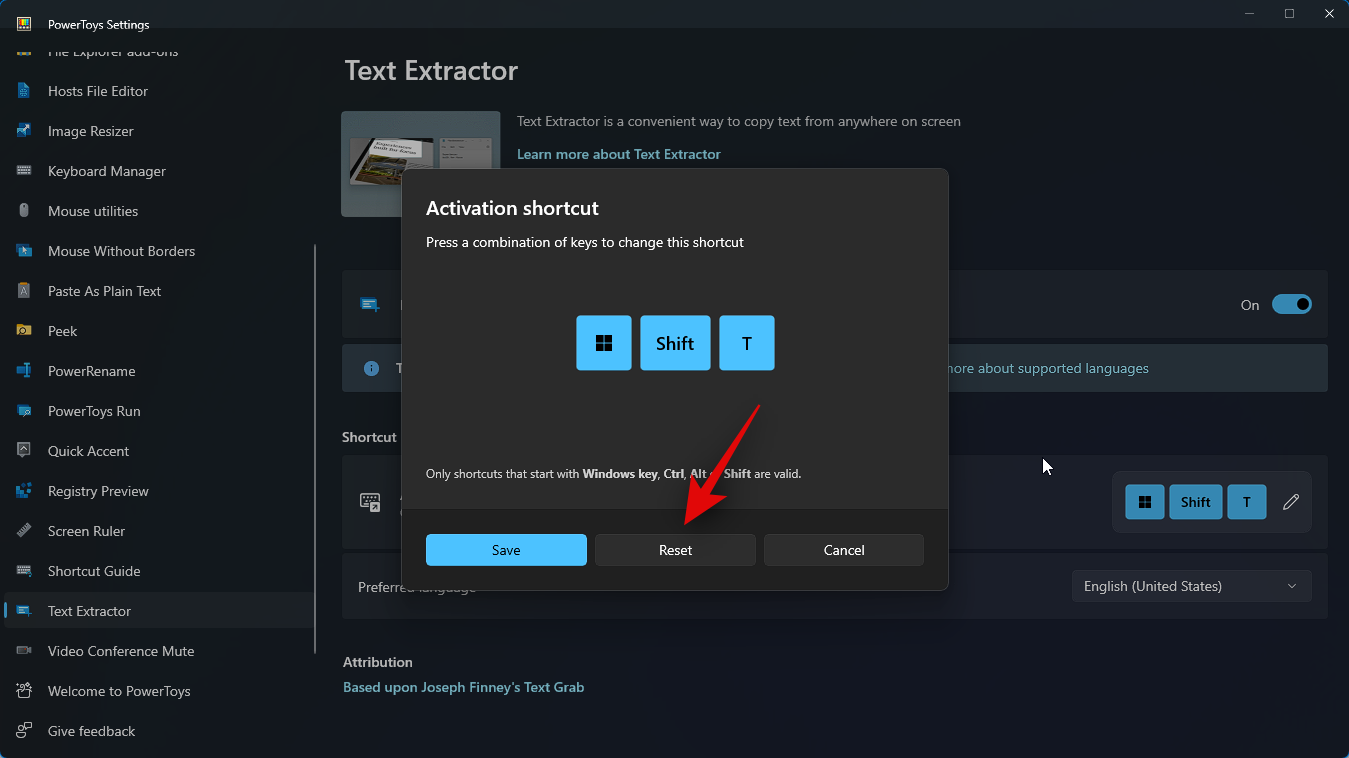
You can also click Cancel to abort creating a key combination.

Now click the drop-down menu for Preferred language and select the language you wish to use with Text Extractor.
We can now use Text Extractor where we like. Let’s take a look at how you can extract text from a webpage for this example. Visit a preferred webpage from where you wish to capture text.

Scroll to the text you wish to copy and press the key combination you set for Text Extractor in the guide above. If you did not change the key combination, you can press Windows + Shift + T on your keyboard to activate the Text Extractor.
Now click and drag to select the text you wish to extract.

The text from the selected area will be automatically extracted and copied to your clipboard. You can now paste it wherever you like by pressing Ctrl + V.

Similarly, you can also extract text from images, applications, and more. Let’s try to extract text from the Settings app for this example. Press Windows + i to open the Settings app.
Now press the key combination to activate Text Extractor. If you did not set a custom combination, press Windows + Shift + T. As we did before, click and drag on your screen to select the text you wish to extract.
The text will now be extracted and copied to your clipboard. You can now press Ctrl + V to paste the text wherever you like.

And that’s how you can use Text Extractor on your PC.
How to remove the OCR language pack when removing PowerToys
There might be times when you wish to remove installed OCR language packs from your PC. Here’s how you can do that. Follow the steps below to help you along with the process.
Open Run by pressing Windows + R.
Type the following and press Ctrl + Shift + Enter.
powershell
Now use the following command to check for installed OCR language packs.
Get-WindowsCapability -Online | Where-Object { $_.Name -Like 'Language.OCR*' }
You should now get a list like the one shown below. Check State under listed language packs. If any language pack reads Installed, then the pack is installed on your PC. Note down its language code which will be after ~~~.
Once noted down, use the following command to remove the language pack from your PC. Replace [Language code] with the code you noted down earlier.
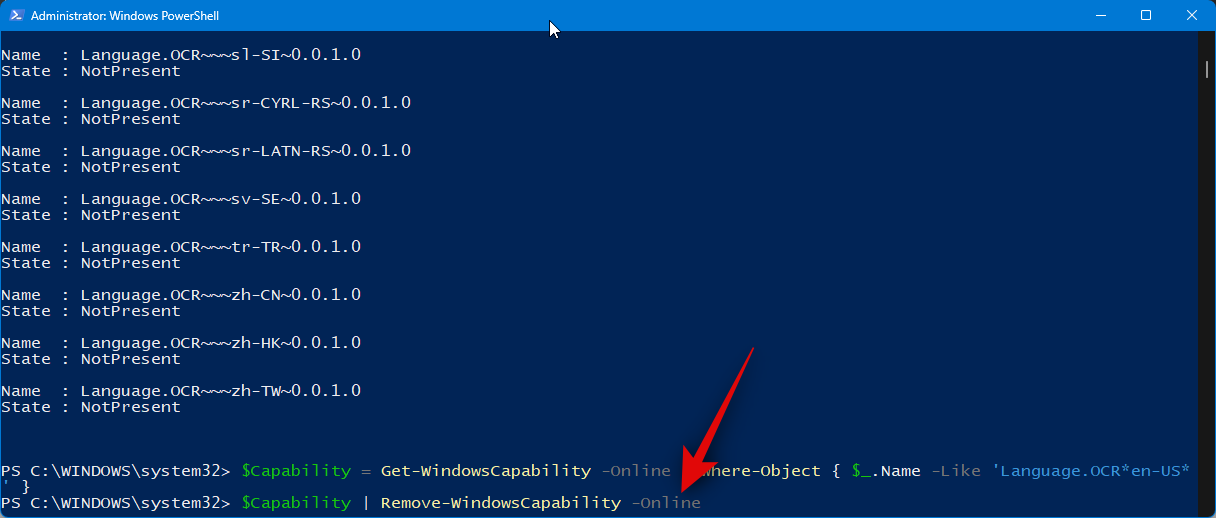
$Capability = Get-WindowsCapability -Online | Where-Object { $_.Name -Like 'Language.OCR*[Language code]*' }
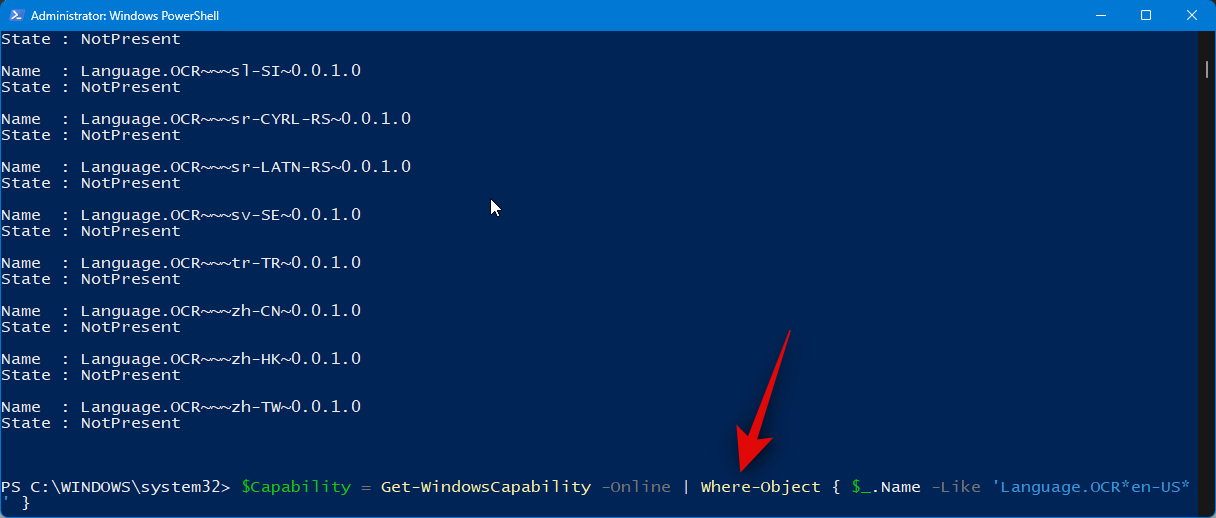
Next, use the following command to apply the changes.
$Capability | Remove-WindowsCapability -Online
Type in the following and press Enter to close PowerShell.
exit
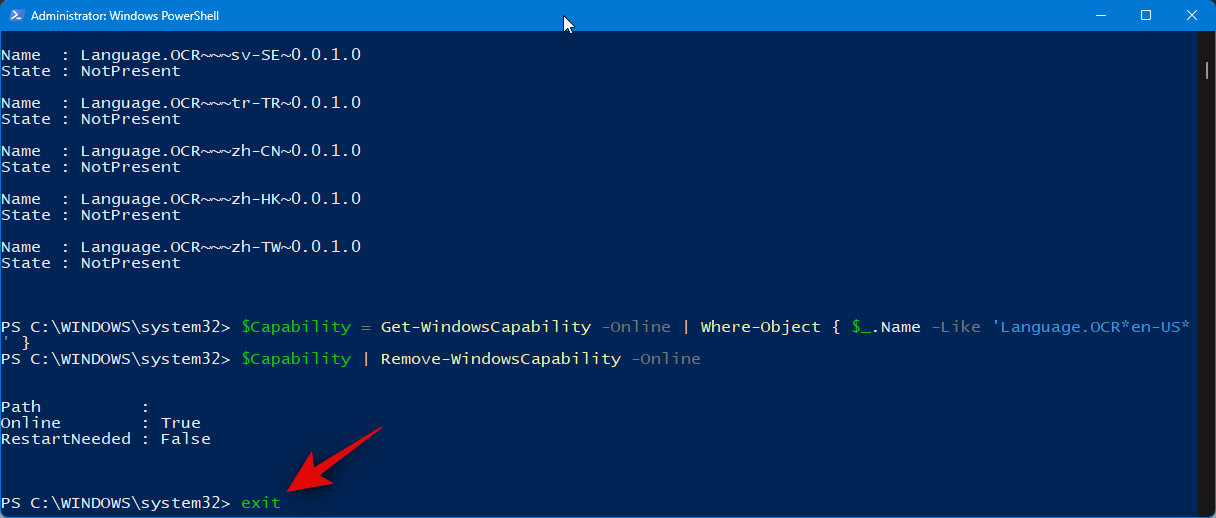
And that’s it! You will now have removed the selected OCR language pack from your PC.
We hope this post helped you easily use Text Extractor on your PC. If you face any issues or have any questions, feel free to reach out using the comments section below.


One response to “How to Extract Text From Images, PDF or Anything on Your Screen Using PowerToys From Microsoft”
Thanks for sharing the content, it is useful and helpful