

To get the Bellringer Badge in PEAK, ring five separate Belltowers in the GLOOM during one expedition, using the white pointing statues and crow-covered tower silhouettes to find them under the mist.
Bellringer is a five-tower farm inside the GLOOM. Each tower gives you both badge progress and breathing room, so ring it, use the cleared pocket to reset, then push back into the mist before the biome wears the run down.
Bellringer Badge requirement and Frog Hat reward
| Point | Answer |
|---|---|
| Badge requirement | Ring 5 Belltowers. |
| Biome | All five must be in the GLOOM. |
| Run condition | Do it in one expedition. |
| Reward | Frog Hat. |
| Unlock timing | The badge triggers when the fifth valid Belltower is rung. |
Make the attempt in a normal badge-eligible run. Bellringer counts separate towers, so seeing a tower, passing one, or returning to the same activated tower gives you no extra progress.
How Belltowers behave in the GLOOM
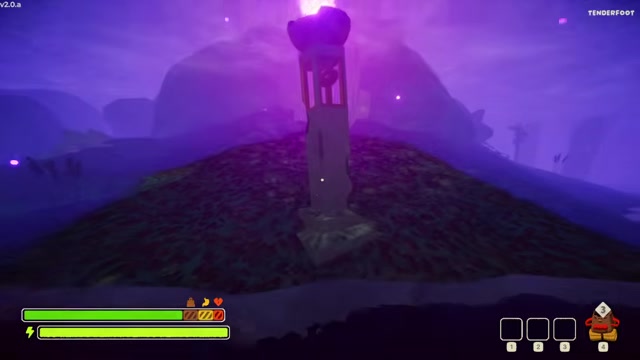
Belltowers sit under the GLOOM mist and are easiest to identify by their BELLTOWER object prompt and RING interaction prompt when you get close. Do not rely on material or texture; look for the bell structure, tower silhouette, crows around it, and the interaction text instead.
Key Once rung, a Belltower lights with a purple flame and clears a local patch of GLOOM around it. That cleared area is your safe pocket: use it to stop the sleep pressure, reset your bearings, and recover just enough control before leaving again.

The flame also helps with nearby Ghost threats when the tower interaction allows it, which makes every tower useful beyond the Bellringer count. Do not turn the badge run into a Ghost hunt, though; the priority is still finding and ringing five towers before the expedition ends.

Route for finding five Belltowers
Enter prepared

Go into the GLOOM ready for a full five-tower search, not a quick detour.
Scan for crows

Look across and under the mist for crow clusters, since Belltowers have crows on them.
Check white statues

When you find a small white statue, follow the direction it points as a route clue toward a Belltower.
Move along the statue direction

Push through the mist in the direction the statue faces and keep watching for the bell silhouette or BELLTOWER prompt.
Ring every new tower

When the RING prompt appears, interact with the Belltower and count it only after it activates.
Use the cleared area briefly

Pause in the GLOOM-free zone only long enough to steady the run, manage sleep pressure, and choose your next direction.
Continue outward
Leave the safe zone, spread out in co-op if you have teammates, and repeat the statue-and-crow search until five separate towers are rung.
GLOOM survival tools that help the search
| Clue or tool | Use |
|---|---|
| White statues | Follow the pointing direction as a route toward a hidden tower. |
| Crows | Use crow-covered spots as high-value search targets. |
| Belltower safe zones | Clear local GLOOM, hold off sleep pressure, and recover before moving on. |
| Candlestick | Bring or use it if available to help deal with sleep pressure and Ghost danger. |
| Co-op spreading | Split the search pattern so the group covers more mist without stacking on one path. |
The biggest danger in Bellringer is wasting time while the fog breaks your sense of direction. Pick a heading before you drop into thick mist, use visible rocks, trees, fences, or activated flames as reference points, and avoid circling the same cleared tower unless you are deliberately regrouping.
Stamina matters because the GLOOM is wide and low visibility makes panic movement expensive. Move with purpose between clue checks, save enough stamina to escape Frogs and Ghosts, and use any Belltower safe zone you create as a short reset point instead of a place to linger.
Because the GLOOM is not a climbing-focused biome, climbing-speed items are a poor use of attention for this badge. Favor tools and habits that keep the search moving, keep sleep under control, and stop threats from forcing a wipe.
After every Belltower, turn the cleared flame area into a checkpoint: reset direction, pick the next statue or crow cluster, then leave before you lose time.
Mistakes that ruin a Bellringer attempt

The most obvious failure is leaving the attempt unfinished: if the expedition ends, the five-tower chain is gone. Commit to Bellringer once you enter the GLOOM, and do not treat one or two towers as banked progress for another run.
Random wandering is the next big time sink. If you ignore statues, crows, and already-lit towers as landmarks, the mist can make you loop through the same patch while the sleep effect keeps building pressure.
Also, count only towers you have actually rung. A tower you saw from above, a tower a teammate mentioned but nobody activated, or the same tower revisited after its purple flame is already lit does not count again for Bellringer.
Finally, keep expectations grounded around movement speed. A single showcase run can use modded speed for demonstration, so do not plan your normal badge route around sprinting across the entire biome at that pace.
GLOOM badges to pair with Bellringer
Bellringer naturally overlaps with other GLOOM objectives because the same biome contains Belltowers, Ghosts, and the sleep pressure that affects long searches. If a Ghost is close enough to a tower or you have a Candlestick, work toward Exorcist while staying focused on the five-ring route.
Well Rested also benefits from the same habits. Searching the GLOOM for that objective keeps you exposed for a while, so ringing Belltowers along the way gives you safer pauses and makes the biome more manageable.
Video help




Leave a Reply