- What to know
- What is Style Tuner in Midjourney?
- How to create your custom Style Tuner
- How to generate images using a Style Tuner code
- What happens when you use one style code across different prompts?
- How to save your style code for future generations
- How to combine two or style codes on Midjourney
- How to adjust the influence of your style code using –stylize parameter
- I cannot access the Style Tuner page link. What should I do?
What to know
- Midjourney offers a Style Tuner tool that lets you create a custom visual style to influence the colors and character details of images you generate.
- You can access the Style Tuner by entering the
/tuneparameter along with a base prompt to create different image styles and then choosing how many visual styles you want to generate inside it. - When Midjourney processes your prompt with different styles, you’ll be shared a link to the Style Tuner page from where you can choose the images you strongly like.
- Check out the guides below to create your style tuner, customize it, copy the style code, and then finally use it to generate images using it with original and new prompts.
Midjourney has a Style parameter that you can use to fine-tune the aesthetic of images so that they look more photo-realistic, cinematic, or expressive than usual generations. This parameter, however, had limited presets, meaning you only had a handful of choices to apply for certain models. To help you give more control over what colors, style, characters, and details are added to the images, Midjourney now offers a Style Tuner tool that lets you create your custom style and control the personality of the model you use.
What is Style Tuner in Midjourney?

Style Tuner is a new feature on Midjourney that lets you create your custom style to generate images. With this tool, you can influence colors, style, characters, and their details and control the personality of the model you use to create images inside Midjourney.
You can create a custom style by entering a base prompt that you want Midjourney to use for setting a style standard and follow that up by choosing (style direction) how many styles you want the platform to generate based on this prompt. You can direct Midjourney to create a preset number of base styles ranging from 32 images (16 directions) to 256 images (128 directions).
Upon choosing a prompt and style direction, Midjourney will create a link from where you can view different styles of images and select the ones you strongly like. Once you’ve chosen a desired set of images, Midjourney will generate a code for your custom style which you can later use to generate either the same original prompt or combine it with a different prompt.
Style codes you create can be set as the default style for all future generations using the Sticky Style option and you can store a bunch of codes on your account for each access. To help others discover new styles, you can also share style codes with friends or use their codes for your generations.
Also: How to Regenerate Specific Parts of an Image Using Vary Region on Midjourney
How to create your custom Style Tuner
If you wish to create a style code using the Style Tuner tool on Midjourney, follow the instructions below to get started.
Step 1: Choose your prompt and style directions
To access the Style Tuner tool inside Midjourney, you’ll have to use the / tune command followed by the input prompt that you want to use to create different image styles. For this, open any of Midjourney’s servers or the Midjourney Bot on your server or Discord DM. Regardless of where you access Midjourney, click on the text box at the bottom.

Here, type / tune and select the /tune option from the menu.

Now, enter your desired prompt inside the “prompt” box to request Midjourney to create visual styles for your description, and then press the Enter key on your keyboard.

The Midjourney Bot will now respond to you with a new “Create Style Tuner?” message. Here, you’ll have to choose your preferred Style Direction and Mode for generating the visual styles based on the input prompt.

Style Direction: It’s the number of image pairs you want to choose from within the Style Tuner. The default value set here is 32, but you can choose from any of these values – 16, 32, 64, and 128. These values denote the number of pairs of image grids that you can choose from and the GPU time that’s consumed will differ for each of them.
- 16 Style Directions will generate a total of 32 image grids, consuming 0.15 fast hours from your GPU credit.
- 32 Style Directions will generate a total of 64 image grids, consuming 0.3 fast hours from your GPU credit.
- 64 Style Directions will generate a total of 128 image grids, consuming 0.6 fast hours from your GPU credit.
- 128 Style Directions will generate a total of 256 image grids, consuming 1.2 fast hours from your GPU credit.
Mode: It’s a style mode you wish to use for generating different visual styles. You can choose the Default mode or Raw mode.
You can choose your preferred Style Direction value by clicking on the Style Direction dropdown menu and selecting one of the desired options.

Similarly, you can set the mode to Default or Raw by clicking on the Mode dropdown menu and selecting your preferred option from the menu.

When you’re done configuring these options, click on Submit at the bottom.

Midjourney will now ask you to confirm your submission and highlight the GPU credits that may be consumed during the process. To confirm, click on the Are you sure? button at the bottom.

The Midjourney Bot will now process your request and it will take around 2 minutes for the tuner to be generated.

When it’s done, you’ll receive a direct message from the Midjourney Bot with a link to the Style Tuner.

Related: How to Get Prompt Ideas for Generating Images on Midjourney
Step 2: Customize your Style Tuner with preferred images
Once Midjourney shares a link to the Style Tuner, click on this link inside the “Style Tuner Ready!” message that you received.

You may see a prompt on the screen to confirm your action. To open this link, click on Visit Site on this prompt.

A new tab will open on your web browser that loads the Midjourney Style Tuner page. This page will show the input prompt that you used for generating the visual styles and two ways to fine-tune the aesthetic.

You can choose Compare two styles at a time to select a preferred image grid from a pair of them for every style direction that you generate.

Or, you can choose Pick your favorites from a grid to select individual images from a larger grid to tune your style.

If you choose the first option, you can tune the aesthetic by selecting the image grid you strongly like on either side of the empty box. You can choose the one on the left to pick as your preferred style for one style direction and choose the one on the right for the next direction. If you don’t feel strongly about either image grid in one of the directions, you can leave the empty box in the middle selected.
In this instance, we selected the left image grid, so the first grid is highlighted.

In this instance, we prefer the visual style on the right one, so that one is highlighted.

Here, since both the grids don’t match our preferred style, we leave the empty middle box selected.

You can do this for all the remaining style directions generated on this page. Midjourney says Answering only a few rows will result in a bold style. If you want your custom style to be more nuanced, Midjourney suggests skipping as few as possible.
If you choose the “Pick your favorites from a grid” option instead, you can select the images you like from a larger grid. When you choose the image you strongly like, it will be highlighted as shown in the screenshot below.

You can switch between these methods at any time inside the Style Tuner page using the respective options at the top. You can also switch between them using the graduation cap icon and grid icon from the toolbar at the bottom. The graduation cap icon will select the “Compare two styles at a time” method while the grid icon will select the “Pick your favorites from a grid” method.

Related: How to Create Identical Images and Modify Them Using Seed on Midjourney
Step 3: Copy your Style code
Once you’ve answered all of the style direction questions or selected your preferred images from the generated options, you can access the style code for this aesthetic inside the “Your code is:” section at the bottom of the page. To copy only the style code, click on the Copy icon adjacent to the generated code.

If you wish to copy the code along with your original prompt, click on the Copy icon on the bottom toolbar. This toolbar will always show the original prompt and the style code inside the Style Tuner page.

Related: How to Make Videos of Your Image Creations on Midjourney
How to generate images using a Style Tuner code
With the style code generated inside the Style Tuner page, you can go back to the Midjourney Discord tab on your web browser to create images based on the fine-tuned aesthetic.
Case 1: Generate using the original prompt
To generate the original prompt with the generated style code, make sure you copy it from the bottom toolbar inside the Style Tuner page. When the complete prompt with the code is copied onto your clipboard, open any of Midjourney’s servers or the Midjourney Bot on your server or Discord DM.
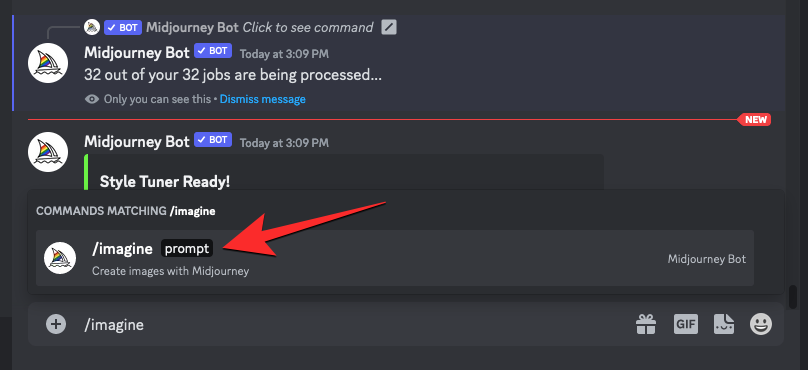
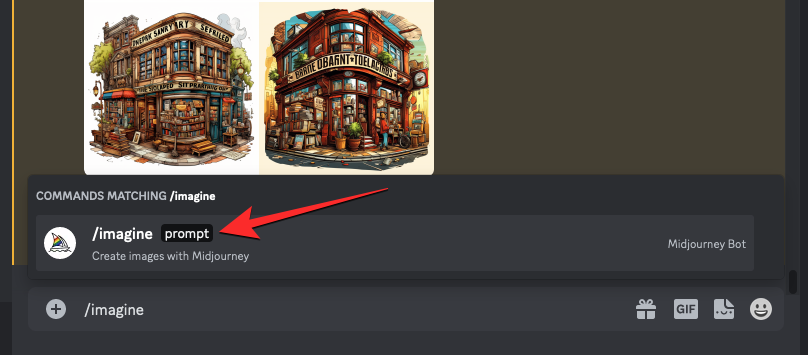
Regardless of where you access Midjourney, click on the text box at the bottom. Here, type /imagine and select the /imagine option from the menu.

Now, paste the copied prompt from the Style Tuner page inside the “prompt” box to request Midjourney to create the original images using the new style code and press the Enter key on your keyboard.

Midjourney will now process your input prompt and create a set of 4 images based on your prompt. These images will follow the aesthetic that you chose inside the Styler Tuner page.

Related: How to Use Seed in Midjourney to Recreate Previously Generated Images
Case 2: Using the style tuner code with a new prompt
To generate a new prompt with the generated style code, make sure you copied only the Style code from the Style Tuner page. Once that’s copied, open any of Midjourney’s servers or the Midjourney Bot on your server or Discord DM.
Regardless of where you access Midjourney, click on the text box at the bottom. Here, type /imagine and select the /imagine option from the menu.

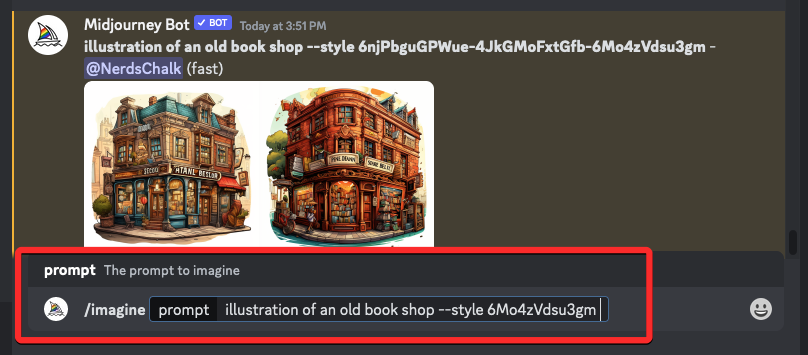
Now, enter your desired prompt inside the “prompt” box and then add the --style <code> parameter at the end of the prompt. Here, replace <code> with the generated style code you copied. When the prompt is ready, press the Enter key on your keyboard.

Midjourney will now process your new prompt and create a set of 4 images based on it. These images will follow the aesthetic that you chose inside the Styler Tuner page.

Related: How to Use Chaos Parameter on Midjourney
What happens when you use one style code across different prompts?
When you enter a prompt to get to the Style Tuner page, Midjourney offers a variety of visual styles that you can choose to impact the style that you want to create. You can then use the generated code with the original prompt to create images based on your chosen visual styles so that the image grids don’t show other unwanted styles during generation.
To achieve similar styles with the same color combination and character details on another prompt, you can use the same style code you generated from the Style Tuner page. While a style code may be able to generate similarly styled images for different prompts, its influence may differ from one prompt to the other.
You can combine one style code with various prompts and the images will generated in unexpected and creative ways. This code may influence one prompt strongly while other prompts may result in only subtle changes. To generate a desired output, you can use the /tune command to choose your preferred visual style for a particular prompt if previously generated style codes do not create the images you want.
How to save your style code for future generations
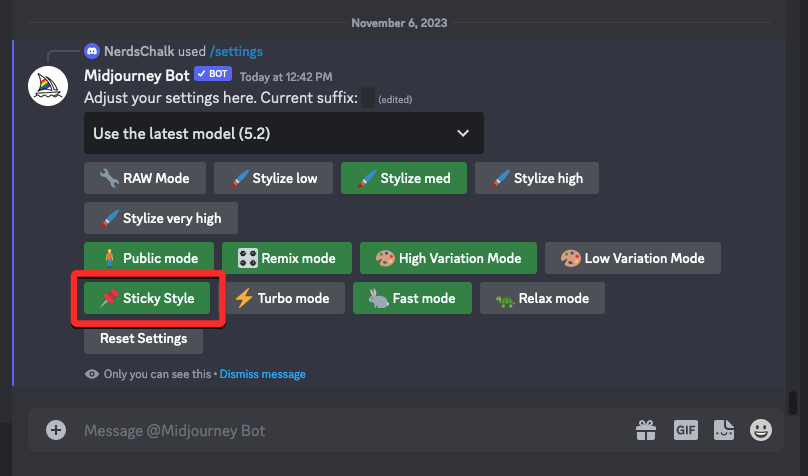
If you prefer using a style code that you recently used, you can save it for all future generations using the Sticky Style option inside Midjourney settings. To save the last-used style code, open any of Midjourney’s servers or the Midjourney Bot on your server or Discord DM.
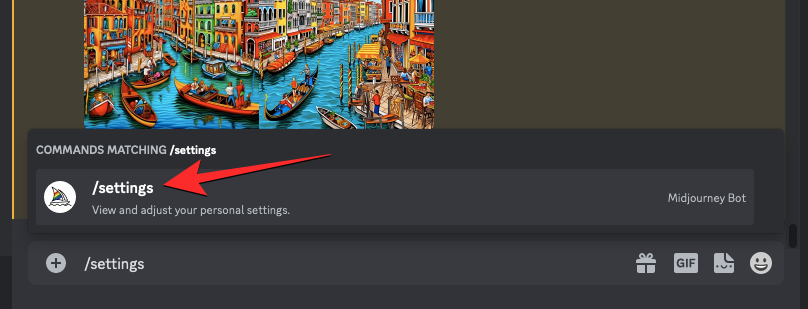
Regardless of where you access Midjourney, click on the text box at the bottom. Here, type /settings, select /settings from the menu, and then press the Enter key on your keyboard.
In the Midjourney response that appears, click on Sticky Style.
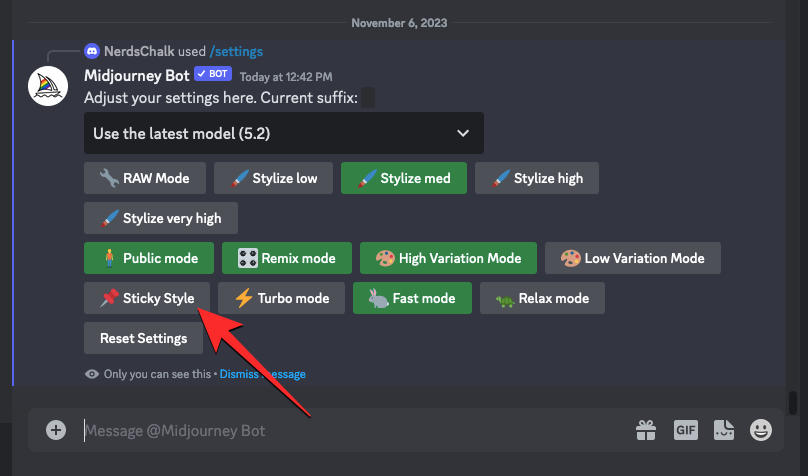
The Sticky Style option will now be highlighted with a green background to indicate that your last used style code is now applied to your future prompts.
You can now create a new set of images with a different prompt and your earlier style code will be automatically applied during image generation.
How to combine two or style codes on Midjourney
In addition to letting you combine a style code with different sets of prompts, Midjourney also allows you to combine two or more style codes inside a prompt. When you use two or more style codes, Midjourney will consider all the embedded styles present in the inserted codes while generating images from a prompt.
You can use the following syntax to combine two or more style codes in Default mode: /imagine <prompt> --style code1-code2-code3
To combine multiple style codes in Raw mode, you can use this syntax: /imagine <prompt> --style raw-code1-code2-code3
Let’s try combining multiple style codes in an actual prompt. To start, open any of Midjourney’s servers or the Midjourney Bot on your server or Discord DM. Regardless of where you access Midjourney, click on the text box at the bottom. Here, type /imagine and select the /imagine option from the menu.
Now, enter your desired prompt inside the “prompt” box and then add the --style code1-code2-code3 parameter at the end of the prompt.
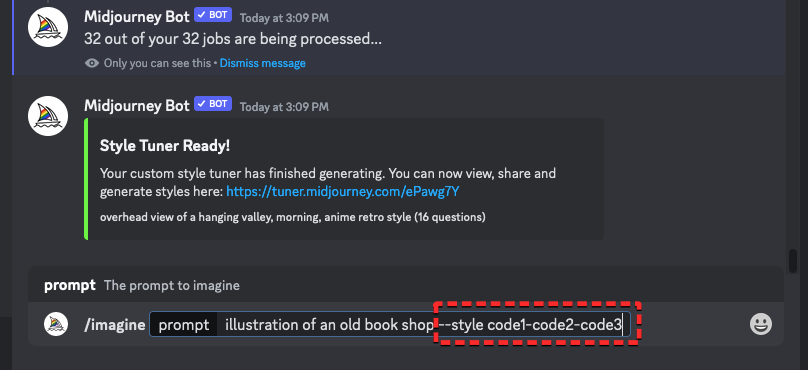
Here, replace code1-code2-code3 with the actual codes that you copied from the Style Tuner page. When the prompt is ready, press the Enter key on your keyboard.
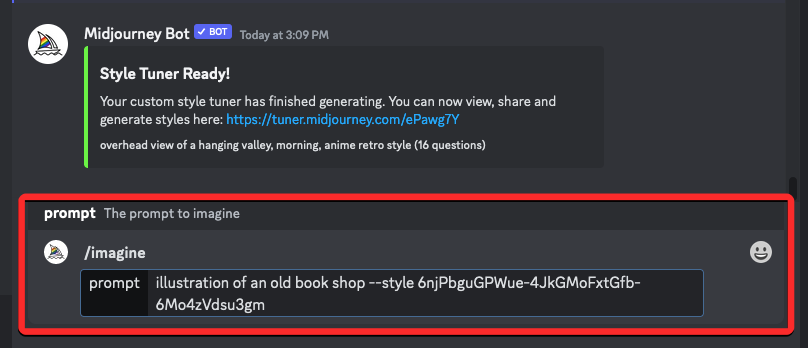
Midjourney will now process your prompt and create a set of 4 images based on it. These images will follow the aesthetics from multiple style codes you added to your prompt.

How to adjust the influence of your style code using –stylize parameter
As explained above, a style code that you previously generated may have a strong effect on one prompt but have a subtle effect on another prompt. If a code you applied doesn’t produce the desired effect for a prompt, you can use the --stylize parameter to adjust the influence of the --style <code> parameter.
For the uninitiated, the Stylize parameter lets you control how much of the “default styling” Midjourney applies when creating images. When you combine the Stylize parameter with the Style parameter, you essentially control the influence of the chosen style code instead of Midjourney’s “default styling”.
▶︎ What Is Stylize Parameter on Midjourney and How to Use It
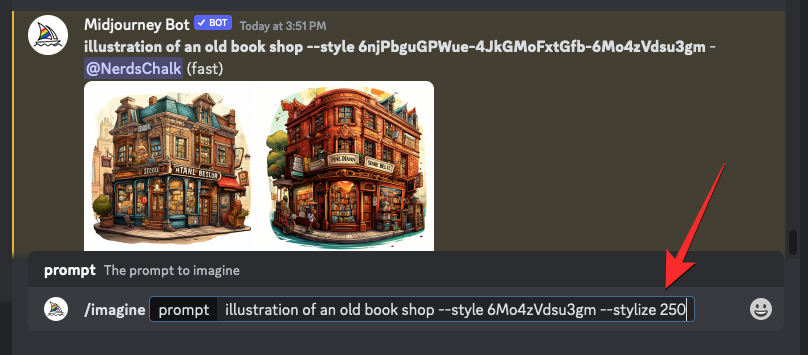
To increase the effect of a style code for a prompt, you can use higher stylize values to adjust its influence. You can follow the syntax below to apply the stylize parameter for a desired style code: /imagine <prompt> --style <code> --stylize <value> – where you replace <prompt> with the words you want to describe for creating your desired image, <code> with the style code you generated from the Style Tuner page, and <value> with a number between 0-1000 based on the strength of stylization you want to apply to your images.
Let’s start by typing /imagine inside the text box at the bottom and selecting the /imagine option from the menu.
Now, enter your desired prompt inside the “prompt” box and then add the --style <code> parameter. Here, replace <code> with the style code you copied from the Style Tuner page.
If you wish to increase the influence of this code for the selected prompt, add the --stylize <value> parameter at the end of the prompt. You can replace <value> with 250 or 500 to increase the effect of the style code. You can also choose any number between 0 and 1000 to increase this influence subtly. When the prompt is ready, press the Enter key on your keyboard.
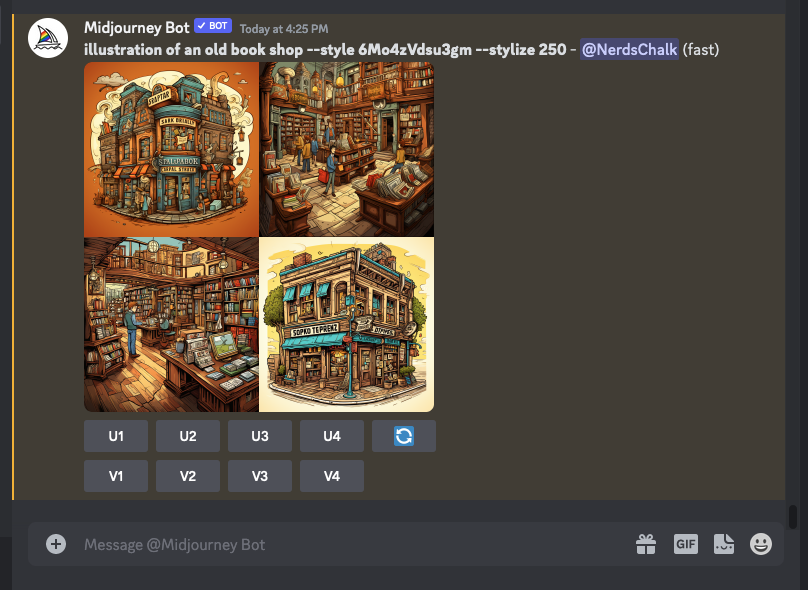
Midjourney will now process your prompt and create a set of 4 images based on it. These images will have a visual style that matches the style code you generated using Style Tuner.
I cannot access the Style Tuner page link. What should I do?
When you use the /tune command to create visual styles for a prompt, Midjourney shares a Style Tuner link inside your Discord account’s direct messages. If this response doesn’t show a clickable link, it’s probably because links aren’t enabled on your Discord settings. To solve this issue, click the cogwheel icon at the bottom of the Discord page.

When Discord settings open, scroll downwards on the left pane and go to App Settings > Text & Images. Here, turn on the Show embeds and preview website links pasted into chat toggle under “Embeds and Link Previews”.
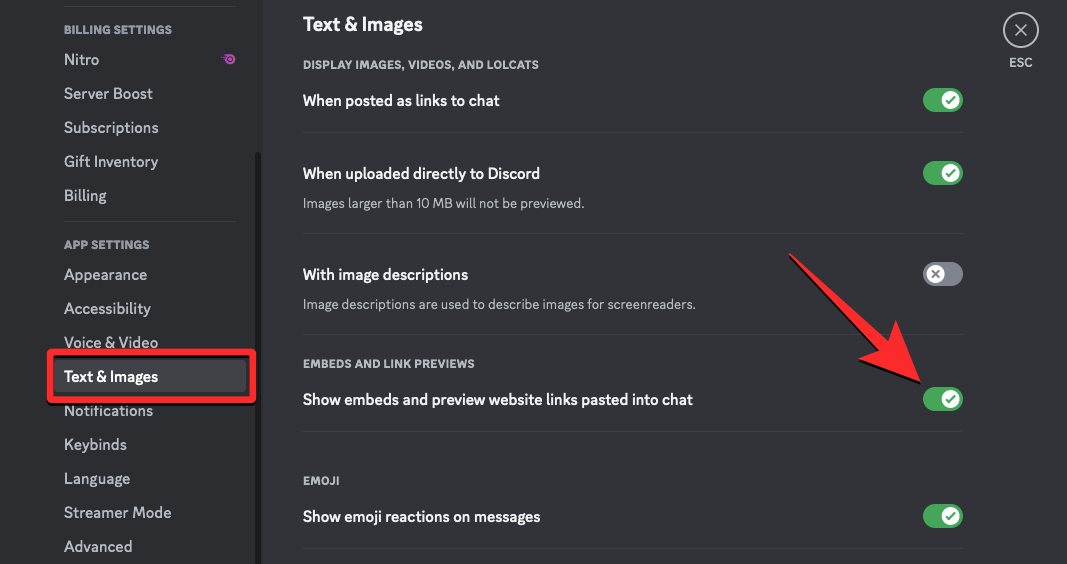
You’ll now be able to access the Style Tuner page link inside your Discord DMs.
That’s all you need to know about using the Style Tuner tool to create your own custom style and personality on Midjourney.