
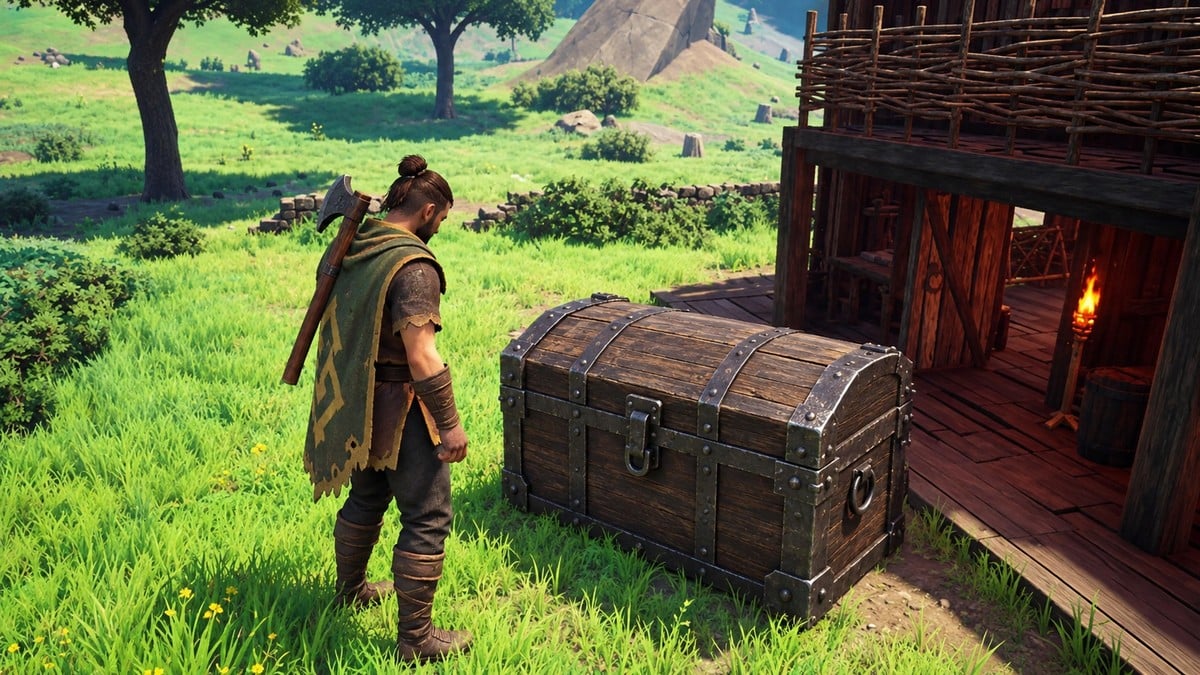
Reach Construction level 40 to unlock Personal Chest, a spell that opens storage anywhere and keeps stored items from adding to your carried weight.
Need more room for your items? Personal Chest gives you extra storage. You can also level Agility to unlock perks that raise your carrying limit, then use the dedicated item slots in place of primary-inventory space.
- Prepare the Weapon Rack materials and unlock
- Build and recycle Weapon Racks for Construction XP
- Cast Personal Chest and store heavy loot remotely
- How to unlock and use Personal Chest through Weapon Racks
- Increase carry weight with Agility, equipment and Rest
- Preserve inventory space with compartments and base storage
- Frequently Asked Questions
Prepare the Weapon Rack materials and unlock
The Weapon Rack method requires crafting materials as well as combat progress. Using melee weapons or fists in combat increases Attack, unlocking the rack blueprint through your construction build menu.
An optional Sweet Veg Ball gives you Knowledgeable Nourishment, a 10% XP boost lasting 300 seconds that also applies to Construction. Have the food ready when you begin building to put that duration toward your training.
For the food’s raw ingredients, Bramblemead has plentiful red berries, cabbage and potatoes around the dilapidated building containing the Wise Old Man. Gathering those plants can also yield seeds for growing your own supply.
Build and recycle Weapon Racks for Construction XP
Placing structures awards Construction XP. A wooden barrel placement yielded 20 XP in a single showcase run, while the rack-building sequence uses dismantling and material reuse to support repeated construction.
Construction potions can also accelerate training if you have them. They’re sometimes found in chests, making them another option alongside the food bonus.
Cast Personal Chest and store heavy loot remotely
Personal Chest can be available relatively early if your combat and Construction progress meet the requirements for this route. Once it unlocks, accessing the storage requires a spell cast, so keep its rune cost in mind before heading out.
Keep the required runes available for later casts. Personal Chest has a five-second cooldown, so repeated summons also require a short wait.
How to unlock and use Personal Chest through Weapon Racks
Prepare the crafting materials, train Construction with repeated rack builds, and summon your storage once the spell unlocks.
STEP 1/14
7%
Prepare Weapon Rack materials with Flax
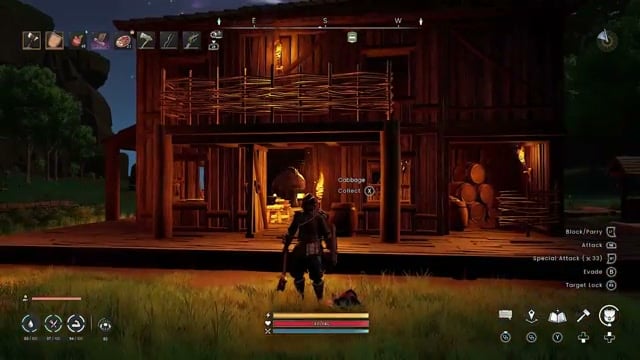
Collect the blue Flax flowers found in early areas to unlock the Spinning Wheel.
STEP 2/14
14%
Spin Coarse Thread
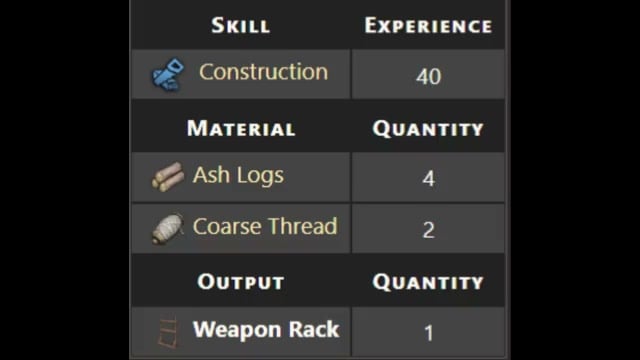
Place the Spinning Wheel and process your gathered Flax into Coarse Thread for construction.
STEP 3/14
21%
Build Weapon Racks for Construction XP
Each build uses 4 Ash Logs and 2 Coarse Thread, produces one Weapon Rack, and awards 40 base Construction XP.
STEP 4/14
29%
Dismantle the placed racks
Break down your Weapon Racks to recover their materials; dismantling returned the full material cost in the showcase session.
STEP 5/14
36%
Rebuild with the recovered supplies
Use the refunded materials for another round of Weapon Rack placements.
STEP 6/14
43%
Prepare the optional XP food

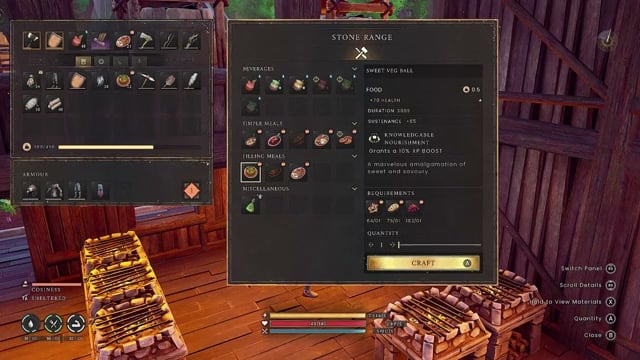
Craft a Sweet Veg Ball at the basic Stone Range using 1 Fried Cabbage, 1 Baked Potato and 1 Dried Redberries.
STEP 7/14
50%
Eat before continuing construction
Consume the Sweet Veg Ball and resume building racks while its buff is active; each placement awards 44 XP, an additional 4 XP per build.
STEP 8/14
57%
Reach the Personal Chest unlock
Continue until Construction level 40. Look for the Construction level-up banner followed by the Personal Chest perk notification on the right side of the screen.
STEP 9/14
64%
Open the spellbook to cast Personal Chest
On the Xbox controls described, press Y to open your spells.
STEP 10/14
71%
Turn to Spell Book 2
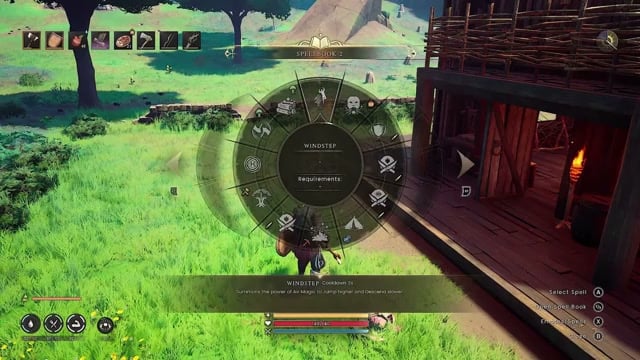
Press Right Trigger to move to the next spell screen.
STEP 11/14
79%
Select Personal Chest
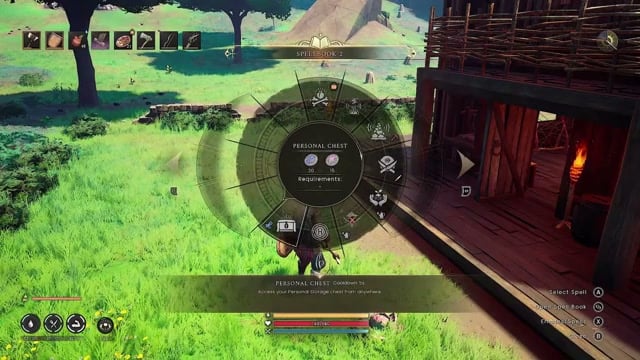
Choose Personal Chest from the spellbook.
STEP 12/14
86%
Summon the chest
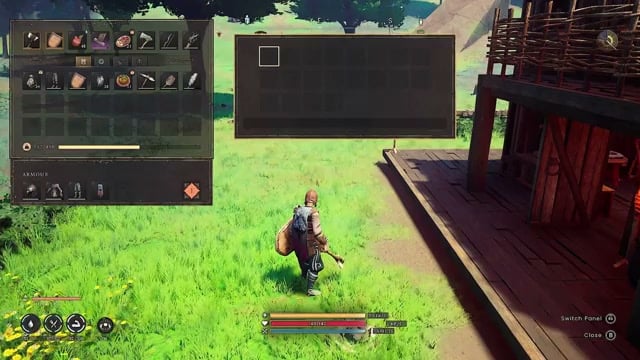
Cast the selected spell to create a chest in front of you.
STEP 13/14
93%
Open the summoned storage
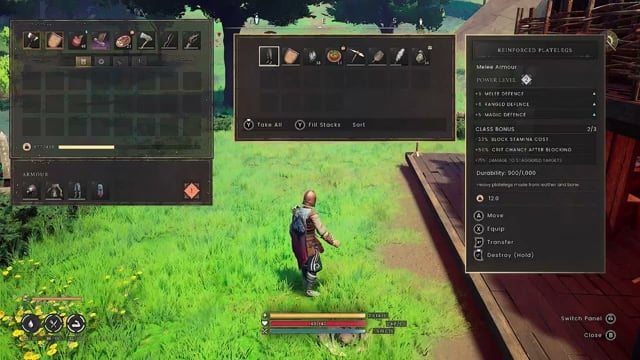
Interact with the chest to display its contents alongside your inventory.
STEP 14/14
100%
Transfer spare equipment
Move spare shields or armour into the chest to free space in your carried inventory.
Dungeon loot gives the chest an immediate use. Vault Cores weigh about 50 each, so moving them into remote storage takes a substantial item out of your load while you continue gathering. You can also keep a core stored during a journey to place a teleporter, then retrieve it when you need it.
Increase carry weight with Agility, equipment and Rest
Your carrying allowance is based on weight rather than inventory slots or remote storage space. It defaults to 400, with items occupying armour slots, the hot-bar and your primary inventory all counting toward that allowance.
Upgrades that increase carrying allowance
| Upgrade | Requirement and carry-weight effect |
|---|---|
| Agility | Backpacker unlocks at level 50 and Explorer at level 75. Each passive adds 75 capacity, taking the allowance to a maximum of 550. |
| Leggings of Lightness | Add 50 capacity when worn, giving a 450–600 allowance. Currently identified as the only armour piece that increases capacity. |
Rest is a survival meter that affects both maximum stamina and carrying allowance. Keep it high: low Rest can slow your travel even before you reach the numeric weight limit.
When you’re Encumbered, automatic pickup of nearby items stops. Manual pickups can still add weight, and encumbrance itself has no upper limit. A heavier carried load also increases the Law Rune cost of lodestone teleportation.
Preserve inventory space with compartments and base storage
Put runes in the rune pouch, ammunition in the quiver and quest items in their dedicated compartment. That leaves primary-inventory space available for the materials and loot you’re collecting.
Inventory slots by compartment
| Inventory compartment | Slots |
|---|---|
| Hot-bar | 8 |
| Armour | 5 |
| Primary inventory | 24 |
| Rune pouch | 24 |
| Quiver | 24 |
| Quest items | 24 |
Before another gathering trip, leave accumulated gear and crafting materials in base storage. Keep unfamiliar items there until you know their uses, and pack clean water and cooked food for the journey. Planning storage around these returns reduces travel loads and leaves fewer carried valuables exposed to death.
New materials need a crafting-station visit before you put them away. Bring them back to base and use the corresponding crafting station while they’re still in your inventory to reveal associated recipes. Before collecting resources for an upgrade, identify the bench that makes it.
Complete relic sets introduce another space tradeoff: they occupy inventory slots while providing combat and gathering bonuses. Account for that occupied space when packing for your next outing.
Frequently Asked Questions
Which carried items do you lose when you die?
On death, all primary-inventory contents to a gravestone are transferred. You retain your runes and key items, equipped armour and shield, so these categories require no recovery from the gravestone.



Leave a Reply