
A screen saver offers a layer of privacy when you walk away from your screen without locking it. Many people also use images as scene savers to add a personal element to their workspace. However, screensavers can be an irritant when you need to inactively stare at the screen and the screen saver pops out of nowhere. With modern LCD screens, users have a lesser chance of facing screen burn-in than they did with CRT screens. So, the point of having a screen saver has become moot.
Screen savers may interfere with software and programs that you have running. Having the screen on even after not needing the device to be active is a waste of electricity as well. Thus, more and more people are phasing out the use of screen savers on their devices. If you are a Windows 10 users then there are a few ways in which you can easily disable screen savers.
Related: 3 Ways to Force Remove or Disable Microsoft Edge on Windows 10 [It works!]
Method #1: Disable screen saver through windows settings
The simplest way to disable your screen saver is by going through the settings. You can choose to turn off the screen saver as well as change the screen out time.
There are two ways in which you can find the settings options from where you can make the relevant changes.
Option 1 in Windows Settings
Go to the start button at the bottom left of the screen.

You will see the settings symbol on the left column once you click on start.

Clicking on settings will take you to the settings home page. You can also press the Windows key+i to open the settings home page.
Select Personalization in settings.
From the left sidebar, select the lock screen option. Scroll down and click on screen saver settings.

Now click on the drop-down menu for ‘Screensaver’ and select ‘None‘.

Click on ‘Apply‘ and the screensaver should now be disabled on your system.
Related: How To Set A Dynamic Wallpaper For Windows 10
Option 2 in Windows Settings
Right-click your mouse on any empty space of the desktop and select Personalize. 
This will directly take you to the Personalization settings. From here you again have to select the lock screen option in the left sidebar.

As mentioned above you can scroll down to find the screen saver settings.

When you click on screen saver settings you will see the screen saver dialog box.

Here you can select the kind of screen saver you want as well as disable the screen saver that you no longer want. From the drop-down menu under screen saver, you need to select none if you want to disable the screen saver. 
You simply have to now press apply for the change. You do not need to restart your device. With this, your screen saver is disabled.
Related: How to Get and Customize the New Windows 10 Start Menu Redesign
Method #2: Disable Slideshow in Power Options
If you are a laptop user looking to save power by disabling screensaver in Windows then you might want to disable slideshow on battery as well. This will prevent Windows from displaying a photo slideshow on battery even if you have a screensaver enabled on your system. Let’s take a look at the procedure.
Right-click on the ‘Battery Icon‘ in your taskbar and select ‘Power Options‘.

Now click on ‘Change plan settings‘ beside your current power plan.

Click and select ‘Change advanced power settings‘.

A new dialog box will now open up. Click on the ‘+‘ beside ‘Desktop Background Settings‘ to see all available settings.

Similarly, click on the ‘+‘ beside ‘Slide show‘.

Now click on ‘Available‘ beside ‘On battery‘.

A drop-down menu should now appear. Click on it and select ‘Paused‘.

Finally, click on ‘Apply‘ in the bottom right corner.

And that’s it! Slideshow will now be disabled for your laptop whenever the charger is disconnected. You can use the same method to disable slideshow when your laptop is powered externally as well.
Related: 4 ways to uninstall Windows 10 update and 3 tips to prepare for it
Method #3: Disable screen saver through Registry Editor
If you want to prevent anyone from enabling the screen saver again you can simply disable it from the Registry Editor.
To open the registry editor you need to press the Windows key+R.
A dialog box will open where you can either type regedt32 or regedit.exe. You can also use the ‘Start‘ menu to search for the same.


UAC will now ask for administrative access in order to help you access the Registry editor. Click on ‘Yes‘ to proceed.
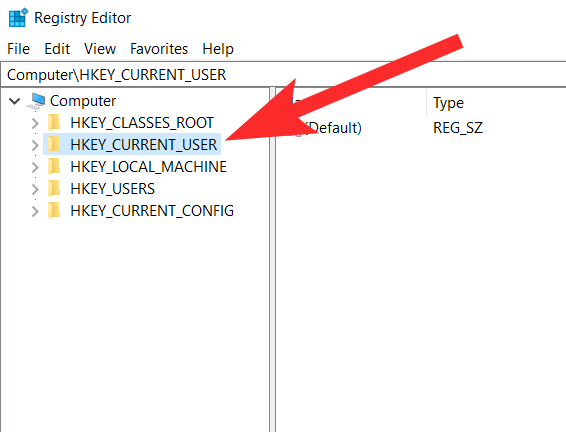
On the left side of the screen, you will see multiple folders under. Start by expanding the HKEY_CURRENT_USER folder.
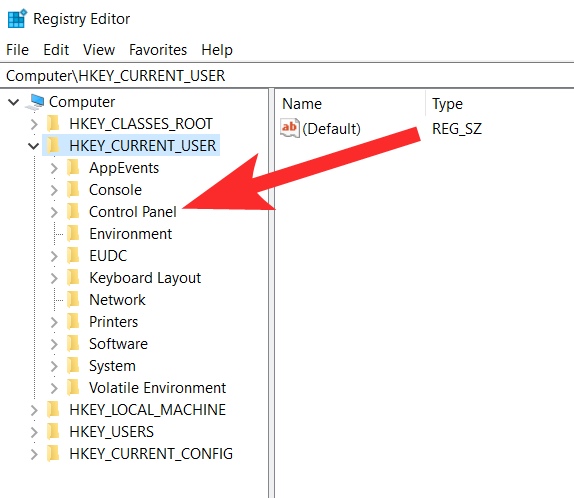
Now expand the Control Panel to get more keys.
Under the control panel click on Desktop.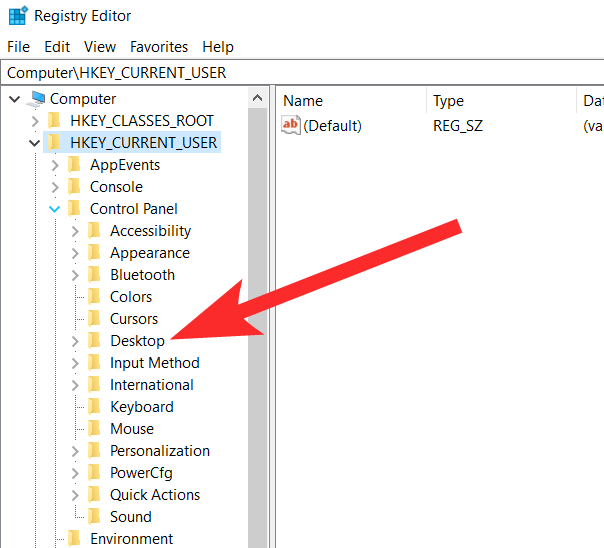
Note: Make sure you select the Desktop key instead of expanding it like earlier.
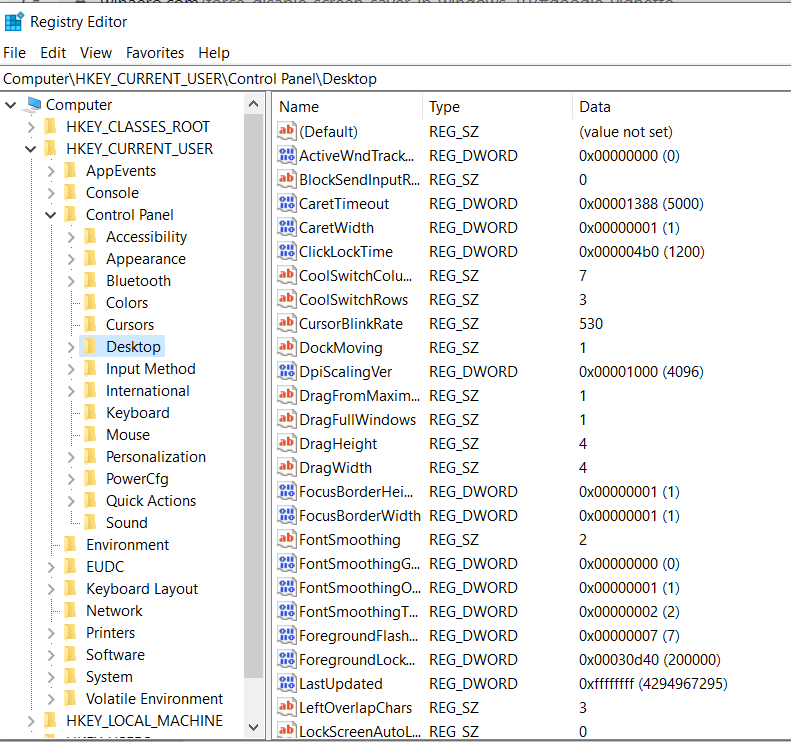
Once you click on the desktop key, on the right side of the screen you will see multiple string values. Scroll and find ScreenSaverActive.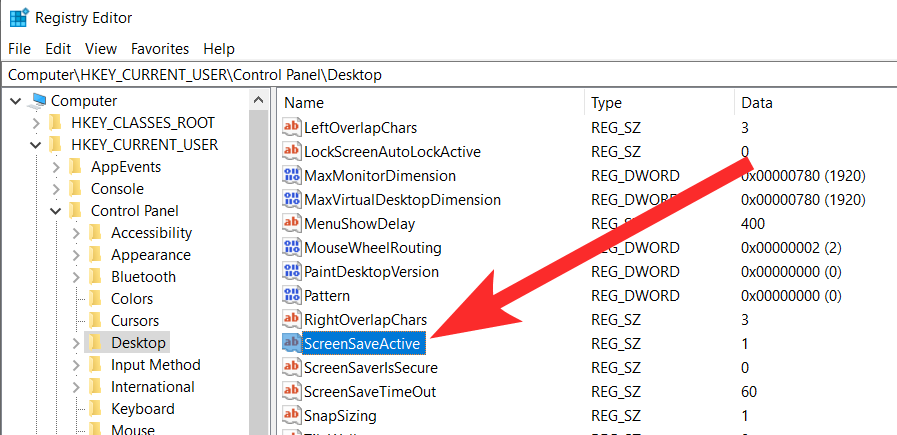
Double-click on this string and under Value Data you will see ‘1‘ if the screen saver is enabled. 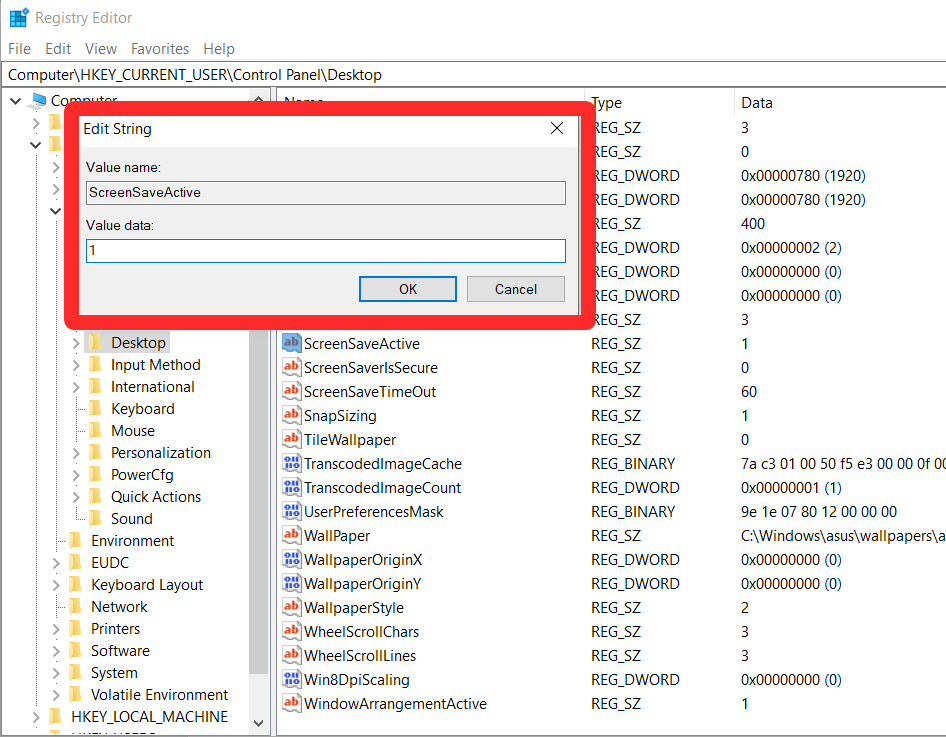
Now change the value to ‘0‘ and press OK.
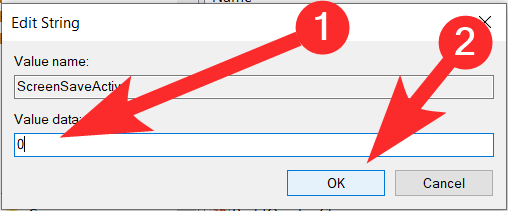
Finally, restart your device and the screensaver should be disabled for you.
Method #4: Disable screen saver using Group Policy
Those who have Enterprise, Education, or Windows 10 Pro versions can disable the screen saver for all users on the same device by editing the Group Policy.
Press Windows key+R to open the Run dialog box. Enter gpedit.msc and then press the Enter key.

This will open the Local Group Policy Editor. Go to User Configuration > Administrative Template > Control Panel > Personalization. Now, click on the ‘Screen saver timeout’ option in the right side.

When you click on the setting a dialog box will open. Here you will find three options:
- Not Configured
- Enabled
- Disabled

For both not configured and enabled, the screen saver will remain on. So, you have to click on Disabled. Once you have disabled the screen saver apply the change.
Group policy editor not available?
Note: If this option is unavailable on your device you will get a prompt that the file name is incorrect. This is likely the case if you are using the Home edition of Microsoft Windows.

Using these methods, you can disable the screen saver on your Windows 10 device no matter the issue. If you have any more questions, use the comments section below to reach out to us.


2 responses to “How to Turn Off Screen Saver on Windows 10”
you are a legend!
***** 5 star for you Legend….. this is what unconditional sharing is… live long