TikTok stands as an unmatched arena to engage in instant collaborations with creators. And the developers strive to keep things alive in the platform by introducing new effects and assistive tools to encourage and promote content creation and creator interactions.
The “Stitch” tool on TikTok is one of the relatively new additions to its set of interactive tools to bridge the gap between content and creators and bring them together under a creative pursuit. In this article, let’s make a closer examination of the Stitch tool on TikTok and the ways to use it.
What is the “Stitch” tool for on TikTok?
Stitch on TikTok is a shortcut tool that allows you to snip a selected part from a video to use it as the opening clip for your content. It is TikTok’s invitation to the users to interact with different creators and content with little hassle.
There are a few characteristics unique to Stitch, the most important being the 5 seconds cap on maximum length you can extract from the original video. The portion thus snipped off of the original becomes the opening of your video to which you can a new video recording to create a stitched video.
@__queensie__
Stitch is predominantly used as a device to react to videos, where users take the key content of a video to create a response video imbued with wit, humor, or sarcasm. Of course, it is all meant to be fun, at least to an extent.
Related: How to use TikTok filters: Everything you need to know
How to “Stitch” on TikTok
Choose the video that you want to Stitch with on TikTok and tap the arrow titled Share.
![]()
From the options, tap Stitch.

It leads to the trimming page, where you can select a maximum of 5 seconds from the selected video to stitch a new video with. Drag the red blocks on the slider bar to adjust the duration; pay attention to the selected portion to make sure that you get the relevant context.

Now hit the Next button located at the top right.

It opens to the regular recording page of your TikTok. The opening clip is already inserted into the video (marked red in the video circular progress bar that outlines the red record button).

Note: You can add effects, adjust the original audio, add voice-over, image, filter, or text overlays to the recording; however, Stitch tool doesn’t grant the provision to use prerecorded videos; this even knocks out green screen video effect from your options.
Once you complete filming a new video, TikTok takes you to the editing page, where you can make use of the filters and other tools to curate your content. Tap Next.

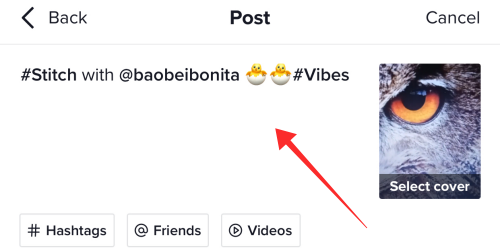
Add relevant hashtags and captions to your video. The text that reads “#stitch with <TikTok username>” is a non-editable prefix added by default to the video by TikTok. It cannot be deleted from the caption, as it is a measure taken to offer proper courtesy to the creator of the original video. You can add text and hashtags as you see fit in the text box following the courtesy tag.

You can also adjust the privacy settings or even toggle on or off Allow Stitch for the current video before uploading to allow or reject other users from stitching with your content. Hit Post to upload the video.

If you toggle off Allow Stitch, the Stitch tool gets befogged from the options to interact with your video.

The screenshot below shows how the options appear under a video that doesn’t allow Stitch.

Related: How to Turn Off Restricted Mode on TikTok Without Password
How to “Stitch” on TikTok with or without sound
Choose the video that you want to Stitch with on TikTok and tap Share.

Tap Stitch to start video extraction.

Adjust the length or point of reference on the seek bar and tap Next.

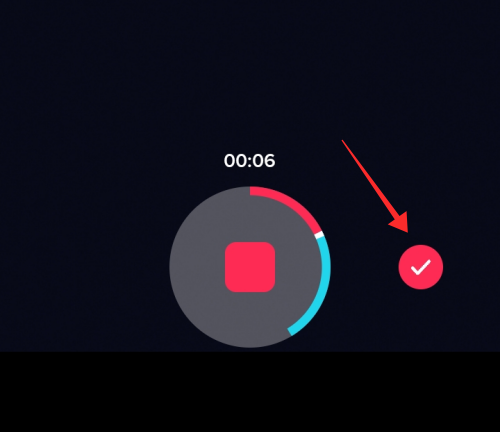
It opens the record page on the app. Record a fresh video using the app cam. Tap the red tick if you wish to end the recording before the preset time. The video should be at least 5 seconds long, excluding the clip imported from the other video.
Once you are on the editing page, tap Volume.

Use the slider to adjust the volume of the audio in the video. To adjust the volume of the clip you have stitched your video with, use the seek bar assigned for the Added sound. Set it to 0 if you wish to completely mute the sound in the original clip. To increase or decrease the volume of the video that you recorded, use the slider bar for Your audio.

Tap Done after adjusting the volume of the sounds.

There is no option to Add Sound as you would in the regular create mode when the Stitch feature is in use. However, you can add a voice-over by playing an original or copyright-free soundtrack in real-time to record it as the audio feed. The quality of the track would, of course, pale in comparison to the Add Sound function unless you take extra care to record the sound in a noise and echo-proof environment.
To add voice-over, tap Voiceover from the tools panel.

How to stitch a video on TikTok from camera roll
Can you really stitch a video from your camera roll? The straightforward answer is “no” as the Stitch feature on TikTok does not allow you to stitch a video with one available in the device library.
Although there are no direct means to stitch a video with a prerecorded or saved video from the gallery, there exists a workaround, albeit it takes a few more taps to execute when compared with the “Stitch” function on the app.
To stitch a video found on the app with one we already have on your device, you can seek the assistance of simple editing tools or even the trim tool on TikTok itself. Let’s see how it is done within the app.
Tap the arrow titled Share on the video you wish to stitch a prerecorded video with.

Now, tap Save video to download it to your camera roll.

Hit the Create + button to go to the recording page.

Tap Upload.
 .
.
Select the original video that you just saved to the gallery along with the prerecorded video you wish to stitch it with. The advantage of taking the Upload route is that you can add as many videos as you want from the gallery and stitch them together. Tap Next once you have selected all the videos.

The next page is all about trimming. In the default mode, you can adjust the clips as a unified piece on the seek bar by dragging the sliders at the beginning or tail end of the video.

However, this is a bit too stifling if you want to nip and tweak the content with more precision. But, worry not, you can trim each component clip separately. To do that, tap on any of the tiles representing the clip you want to trim.

If you wish to follow the Stitch formula as seen on the app, self-impose the 5-second restriction and clip the original video to extract the context to which you wish to integrate your prerecorded video with. Trim all or any of the clips and hit the tick symbol to save the edit made to the clip.

Once you are happy with the edits, tap Save to go to the main editing page. Keep in mind that you cannot edit the clips further on the editing page that follows. Hence, trim the content with precision in this phase before you move to the next page. You can even reorder the clips at this phase of editing.

One of the limitations of merging clips through uploads on TikTok is the lack of control over the audio/sound in the video. It is either all or nothing, in a way, on the editing page. Of course, you can add a new sound to the video. Tap Add Sound.

Search up the sound of choice and hit the red check to apply the selection.

The effect is more widescale than you might like because any sound thus added is applied to the video as a whole. You can manage the intensity, though. To do that, tap Volume.

Adjust the slider against Original sound to increase or decrease (or mute) the sounds available in the original clips. Use the slider assigned for Added Music to adjust the volume of the sound you just added to the video from the TikTok library.

Hit Done once you have adjusted the volume of the original and added sounds.

If you wish to add a voiceover, hit Voiceover.

Voice-over can be added with or without the original sound in the background by selecting or de-selecting Keep original sound.

Hit Save to go back to the main page.

Add filters and other decorations or overlays to the video as you like. Tap Next to enter the final phase of uploading.

Now, to closely emulate the Stitch feature, we need to implement proper tags and give credit to the creator of the original content. Hence, it is recommended that you add an appropriate caption like “#Stitch with @<TikTok user> followed by your thoughts and other hashtags.
Review and adjust the privacy settings. If your video duration allows it, you can even turn on Stitch for the video. Hit Post to complete.

It is technically stitching if we manage to blend two videos like we just did, right? Of course, for more optimized editing, you may use apps like YouCut or Inshot to trim, mute, or split the clips in many ways. But, if you are not one to nitpick over the details, the TikTok editing tools might just be enough to complete the stitch.
Who can “Stitch” with your TikTok videos?
Stitching videos can be a two-way street, but only if you so desire. You get absolute control over who can view the “stitched” content that you posted, or who can stitch with your videos. We already discussed in the section the method to toggle off the Stitch feature before uploading a video. There are two other ways to manage who can stitch videos with your content.
How to turn off or on “Stitch” for all videos in Privacy
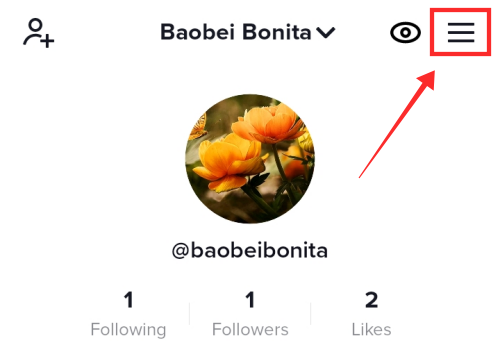
Launch the TikTok app and tap the profile icon to go to your profile.
![]()
Tap the burger button to view the options.
Select Settings and privacy.

Under ACCOUNT, select Privacy.

Under SAFETY, tap Stitch.

Set the privacy settings to any of the three options Everyone, Friends, or Only Me to control who can stitch with your videos.

If you wish to take Stitch off the list of available collaborative devices for all your videos, select Only Me. If you select Friends, all your mutual followers gain access to the Stitch tool under your videos.
How to turn off or on “Stitch” for a particular TikTok video
You don’t necessarily have to banish yourself from the dynamic realm of TikTok collaborations by imposing a fixed rule for Stitch for all your videos. This is all thanks to the option to tweak privacy settings for a video even after uploading.
Tap the profile icon to go to your profile.
![]()
From the grid for public video, tap the video of which you wish to alter the privacy settings.

Tap the ellipsis button.

Drag the options tray to the left side to find and select Privacy settings.

Toggle off Allow Stitch to turn off the feature only for that video. The privacy settings for other videos will not be affected if you turn it off under a specific video.

Thankfully, thus, you don’t have to restrict your video to a limited audience or delete it just to manage the permissions to collab via Stitch.
TikTok Stitch v/s Duet
Duet feature is a tried and tested device that allows you to virtually transmigrate into a video’s context and content and interact directly with it to enter into a “collaboration” in the traditional sense of the word. Both the new content (that you add to it) and the original exist side by side on split-screen, contributing equal worth to the new content.
@txt.bighitent #duet with @maerryfairy Thank you MOA!!
TikTok Stitch on the other hand is more about adding to the original than sharing the screen as typically seen in Duet videos. When you use the Stitch tool on videos that allow it, you can extract up to 5 seconds of the content from the selected video and bring it over to your own recording page and use it as the opening clip.
So, when we think about it, Stitch is more of a fancy trimming tool for other videos that saves you the trouble of downloading and editing them separately before you can add them to your video. At the same time, the Stitch tool is bereft of the option to rearrange clips, because, at the end of the day, the intended use of the tool is to collaborate with another creator or react to an existent video by integrating a part of it with yours.
FAQs
Can you stitch with a video using a pre-recorded video from the camera roll?
Sadly, TikTok doesn’t allow stitching with pre-recorded videos, at present. This restriction is rather strict too, for even the 3D Green Screen video importing effect is hidden when the Stitch tool is in use. The only solution at present is to take the long, traditional route of downloading the video and trimming it separately if you wish to integrate the content of the said video with a prerecorded video from the camera roll.
Stitch not showing on TikTok?
TikTok Stitch has a two-tier eligibility system. Firstly, the feature should be enabled by the creator for others to Stitch it. Stitch could be limited to a certain audience or selectively turned off for certain videos individually. The second condition is that, if the account you registered with on TikTok belongs to the underage group, then Stitch is disabled for you. If you belong to the 13-15 age group, the default and unchangeable condition is that no one Stitch your videos; however, you can stitch with other people’s content. A bit more leniency is allowed for users of the 16-17 age group, where permission may be given by the user to mutual friends on the app to stitch videos. The privacy settings can be adjusted anytime, as well, to revoke the permission.
What are the restrictions applied to the Stitch tool on TikTok?
The Stitch tool only allows you to scoop up a total of 5 continuous seconds from a video, which can then be used as the opening bite for yours. At the same time, the feature itself is only available if the creator of the original video has opened the function to outsiders. Hence, Stitch on TikTok is a device best suited to make reaction videos similar to the content created by popular influencers like Khaby Lame or to join in on the fun of trends like “Tell Me Without Telling Me”.
How to know if someone “stitch”-ed your content?
Even though the stitched content only appears on the page of the one who used the original video, TikTok adds an immutable courtesy tag on every stitched video as a reference to the original. As a result, you get system notifications that read “<TikTok user> mentioned you in a video” every time someone stitches with your video. Got to hand it to TikTok, for it ensures that credit is given where it is due by tagging the creator of the original content in the caption of the new video. This helps maintain transparency, and deter plagiarism or dispute over intellectual property ownership.
What happens if you turn off the “Stitch” feature for a video that allowed it previously?
When you turn off Stitch for a video that previously permitted the feature, you block any future endeavors from other users to stitch with your video; however, the videos stitched with yours prior to the change in privacy settings remain unaffected.
RELATED