Whether you are looking to create a meme or want to change the background of the photo, removing background is the first step. Sure, there are countless other reasons to do so, too. So, let’s check out how to remove the background from a photo to crop out what you want from it using the PicsArt app, which is one of the best photo editors on Android.
How to remove background from your photo and then change it
2Grant it the necessary permissions to access your local storage. You will be greeted by the home screen of the app.
3Tap on the ‘+’ icon at the bottom of your screen. Now select the photo that you want to edit from your local storage.

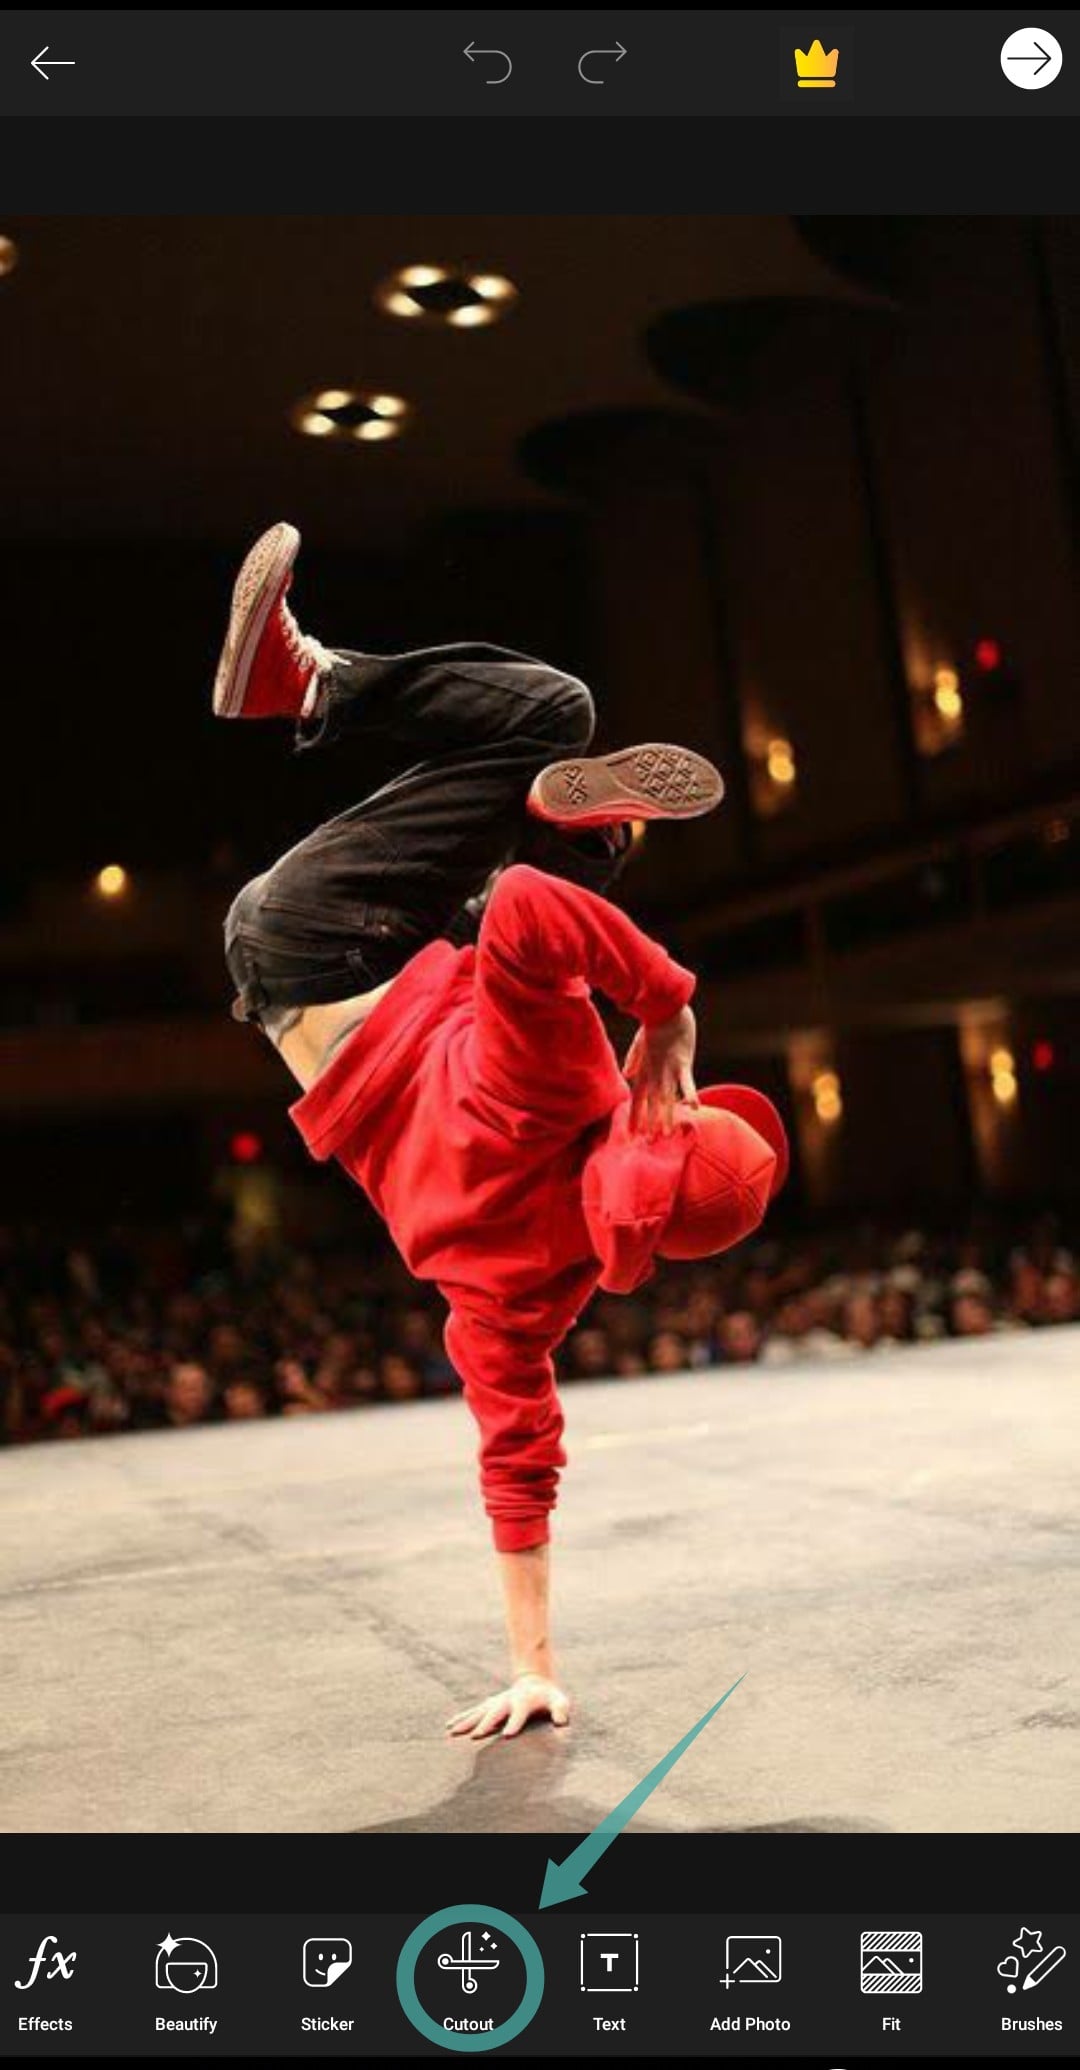
4Follow Steps 1 to 3 from the above-stated guide. Now scroll the bottom pane of your screen and find the option titled ‘cutout’.
5Select the ‘freeform’ design as shown in the screenshot below.

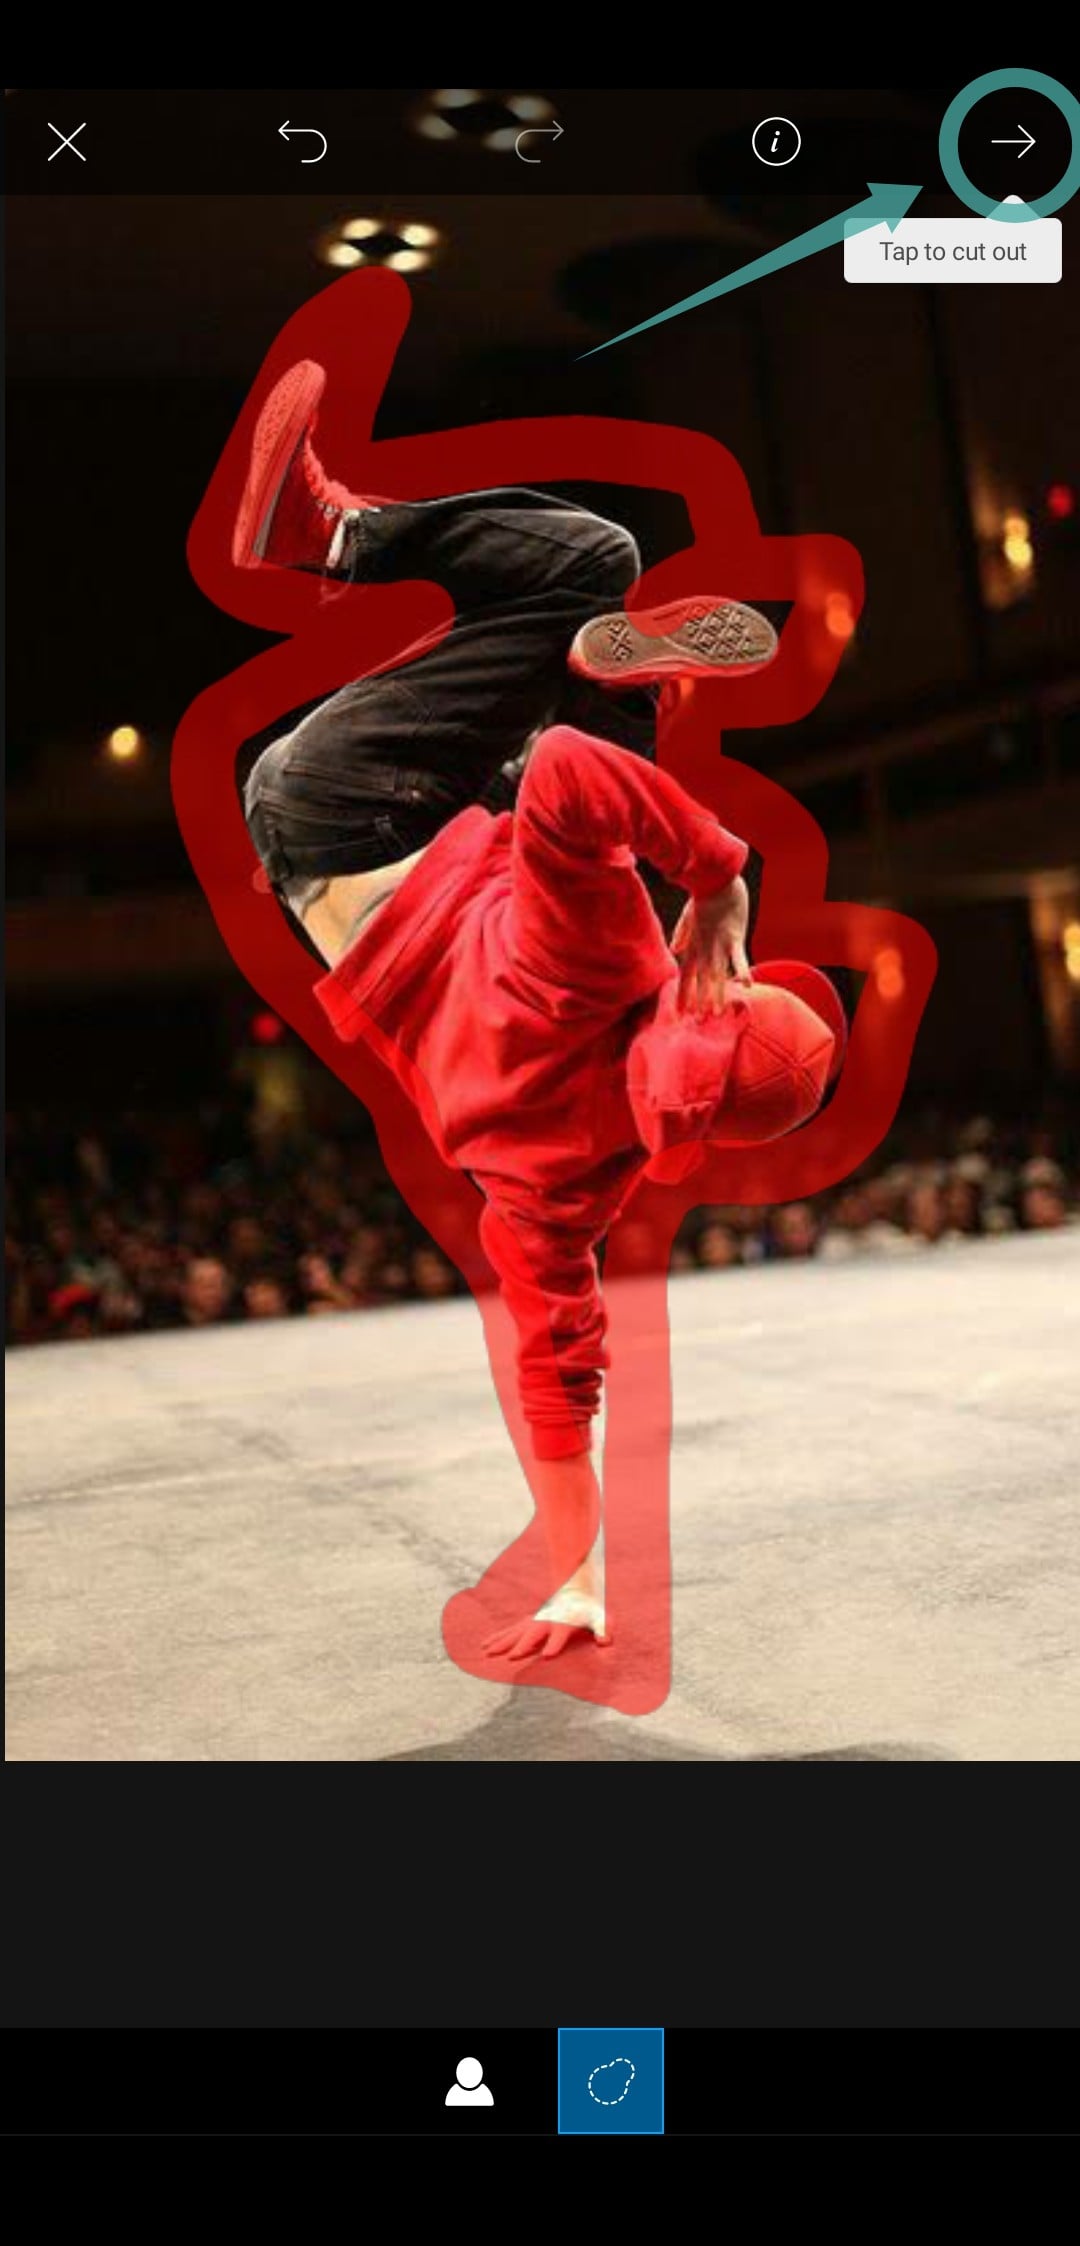
6Now start drawing on all the elements of your photo that you want to keep in the image. Once you are done, tap on the ‘right arrow’ in the top right corner of your screen.
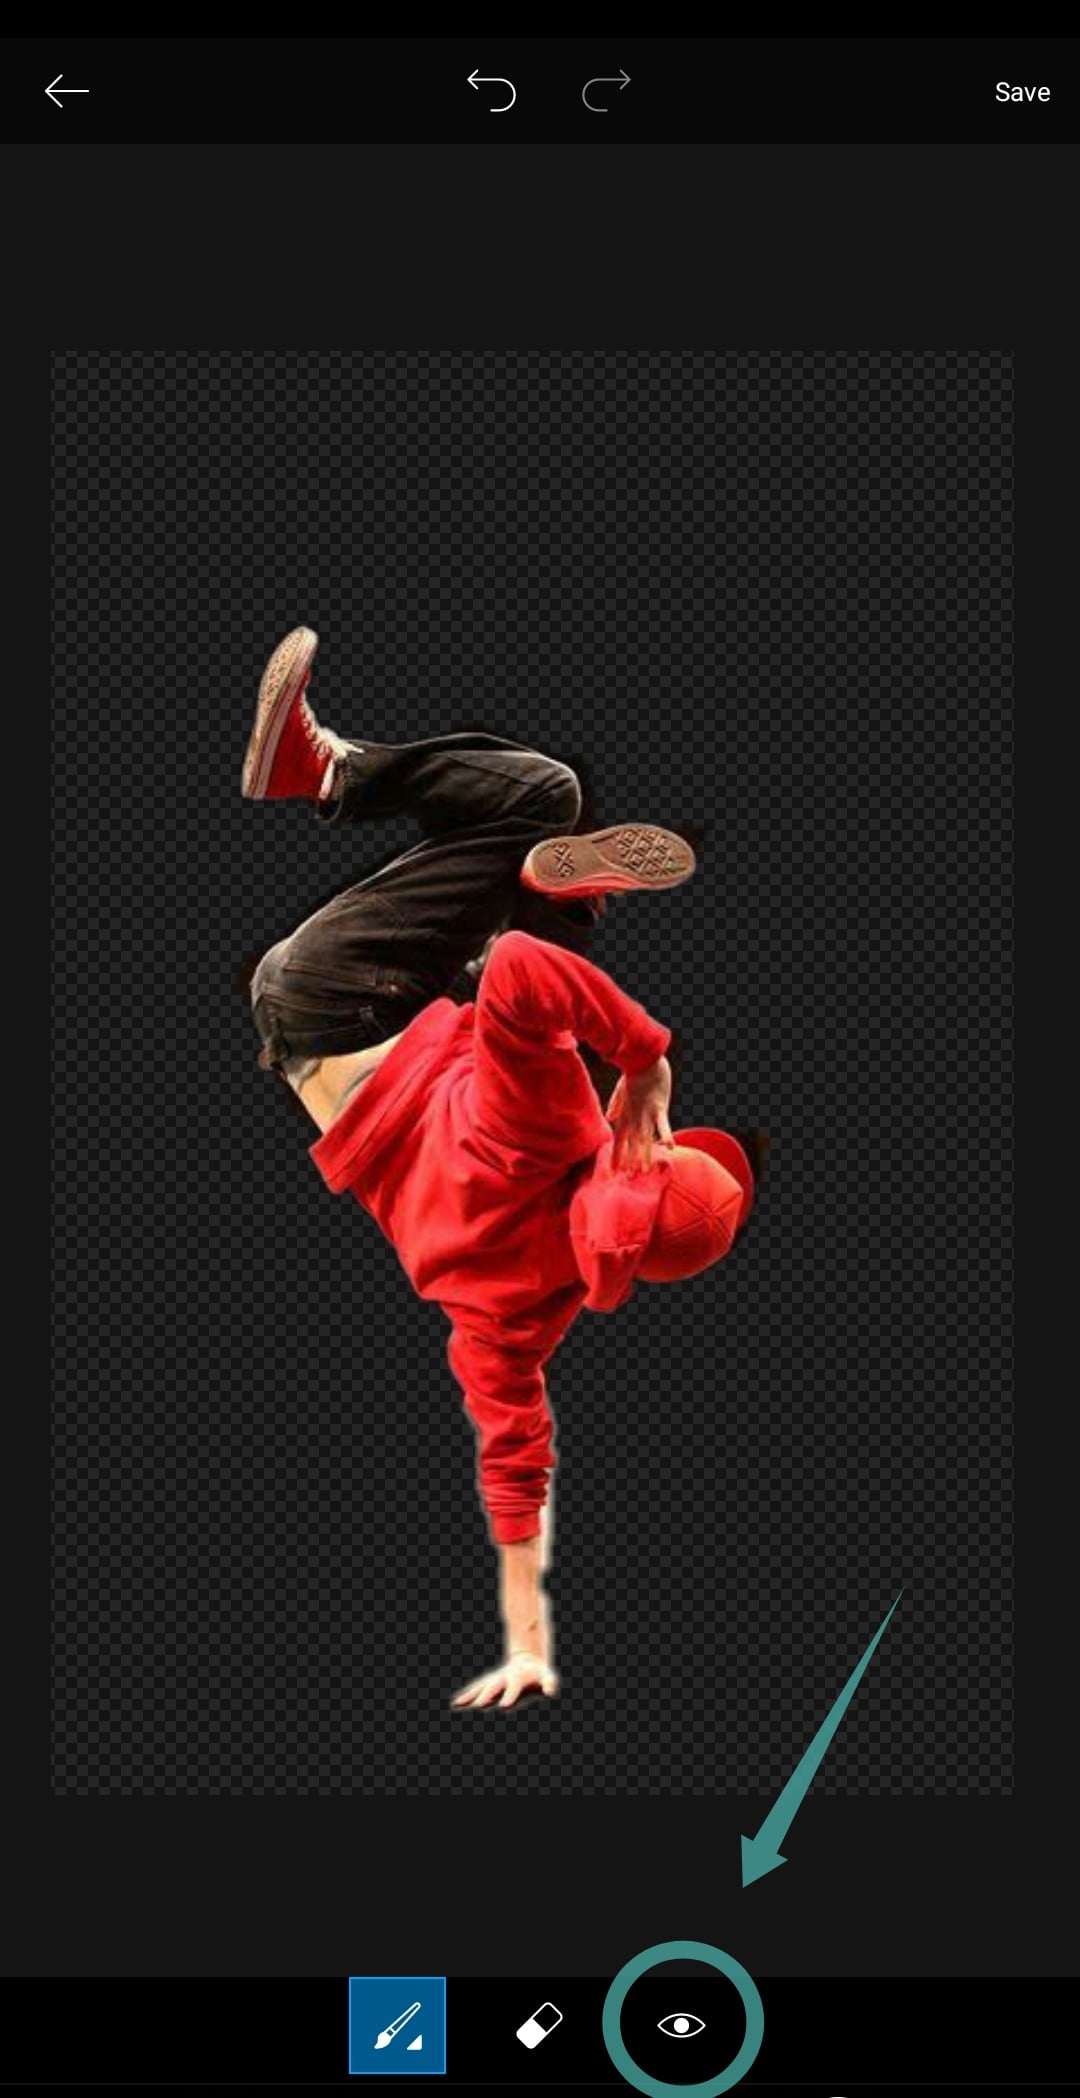
7Picsart will automatically use its algorithms to determine the subject in question and separate it from the background. Tap on the eye icon as shown below, in order to get a preview of the final image. You can edit this preview using the eraser and draw tool to get a more refined selection.
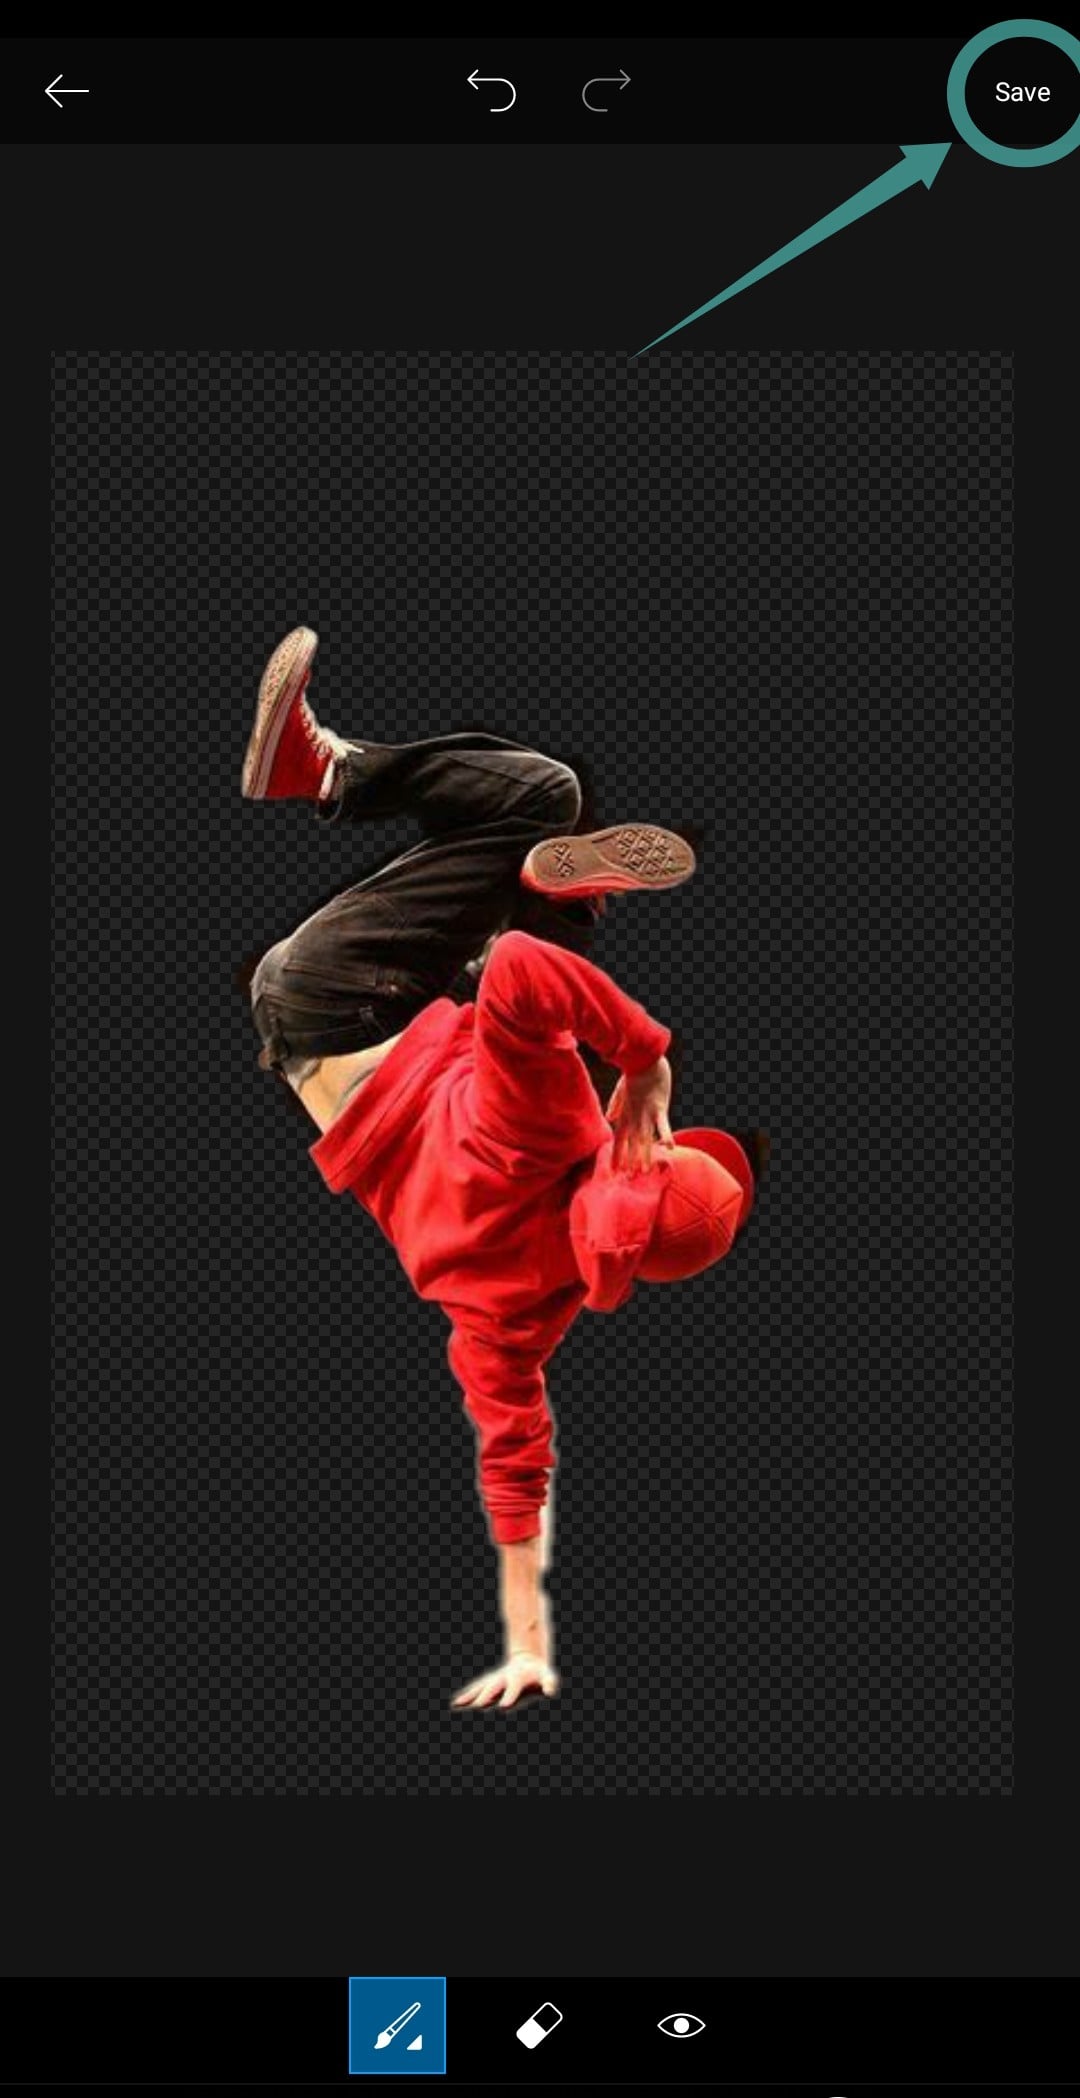
8Once you are happy with your selection, tap on the ‘save’ option in the top right-hand corner of your screen.
9Now simply tap on the back arrow in the top left-hand corner of your screen.
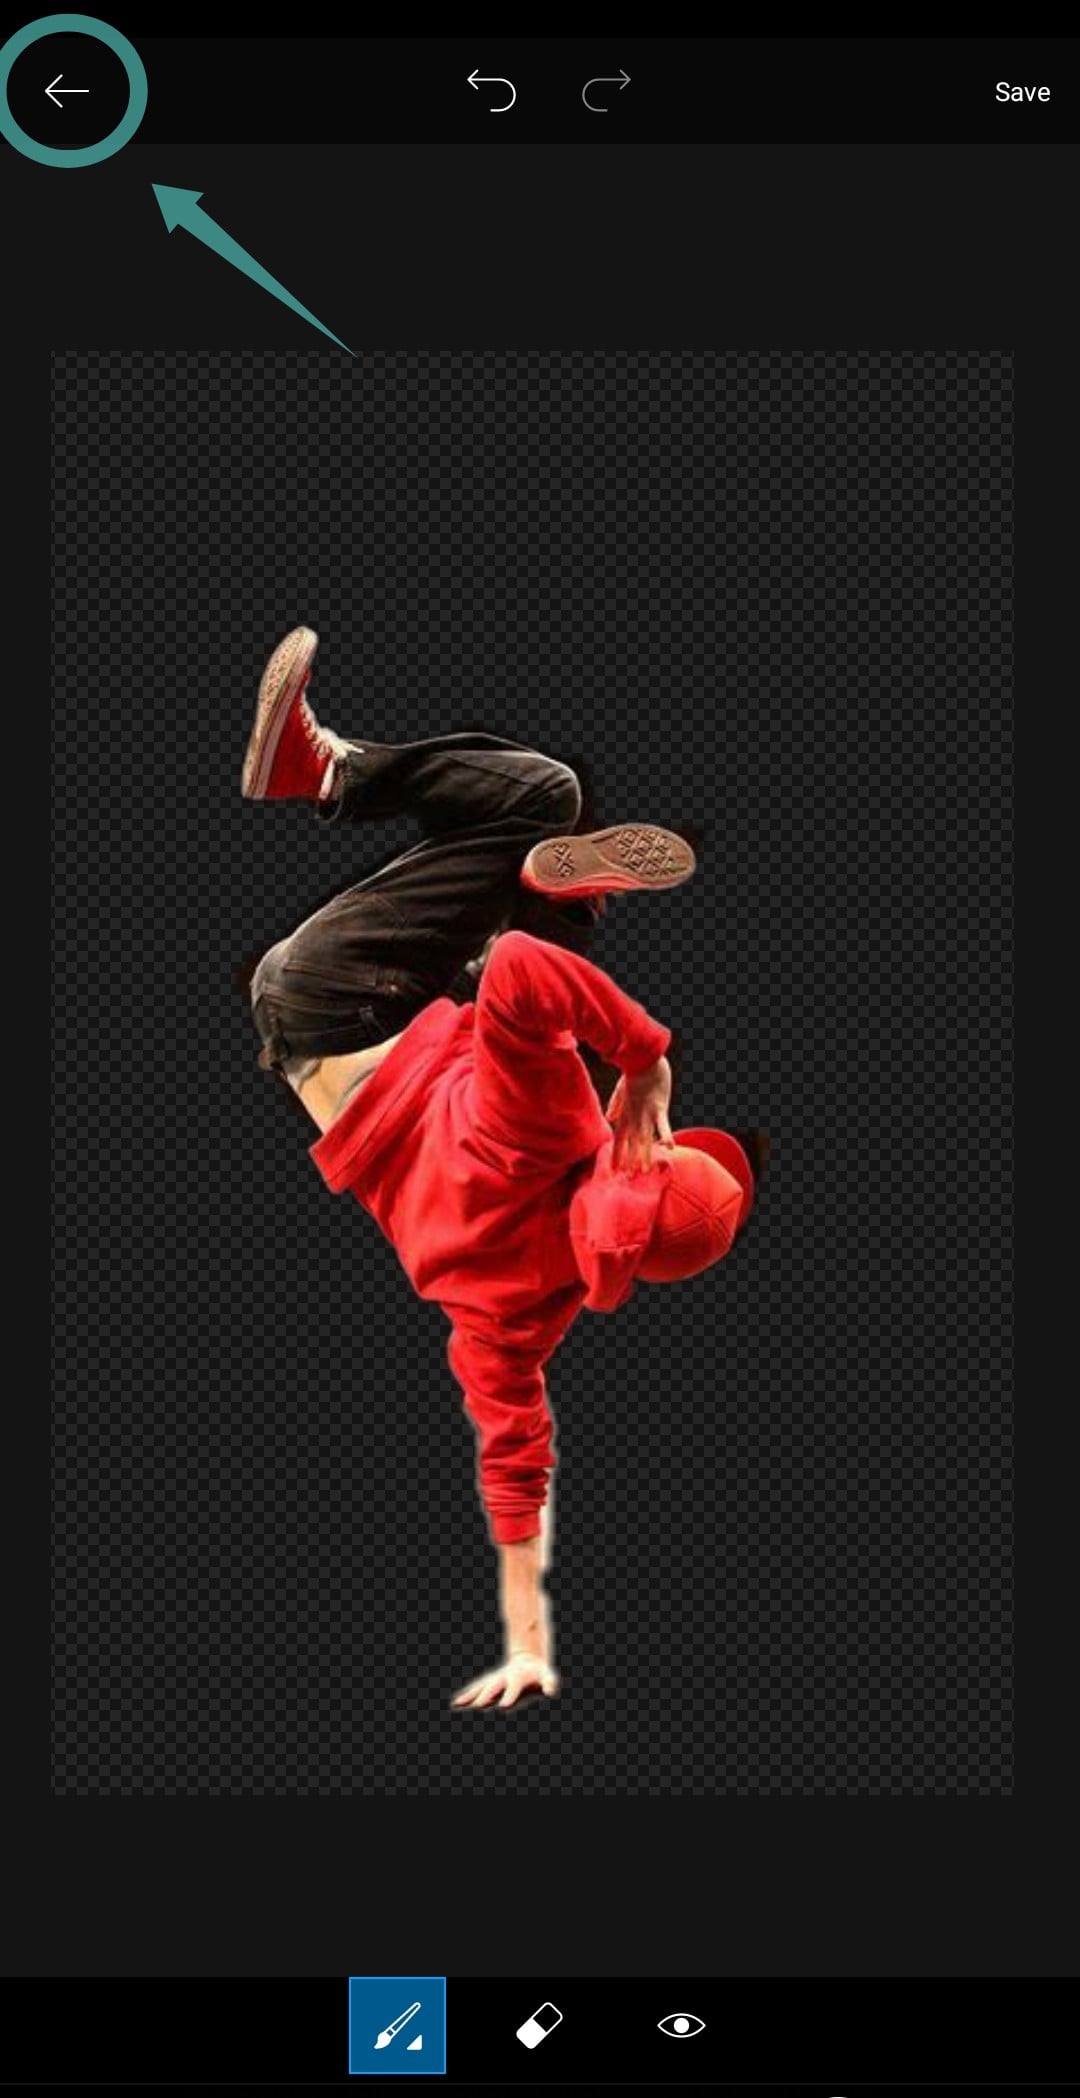
Note: You can select ‘discard’ if you do not want to save the cutout image as a JPEG to your device. Your cutout is already saved in the stickers library of Picsart.
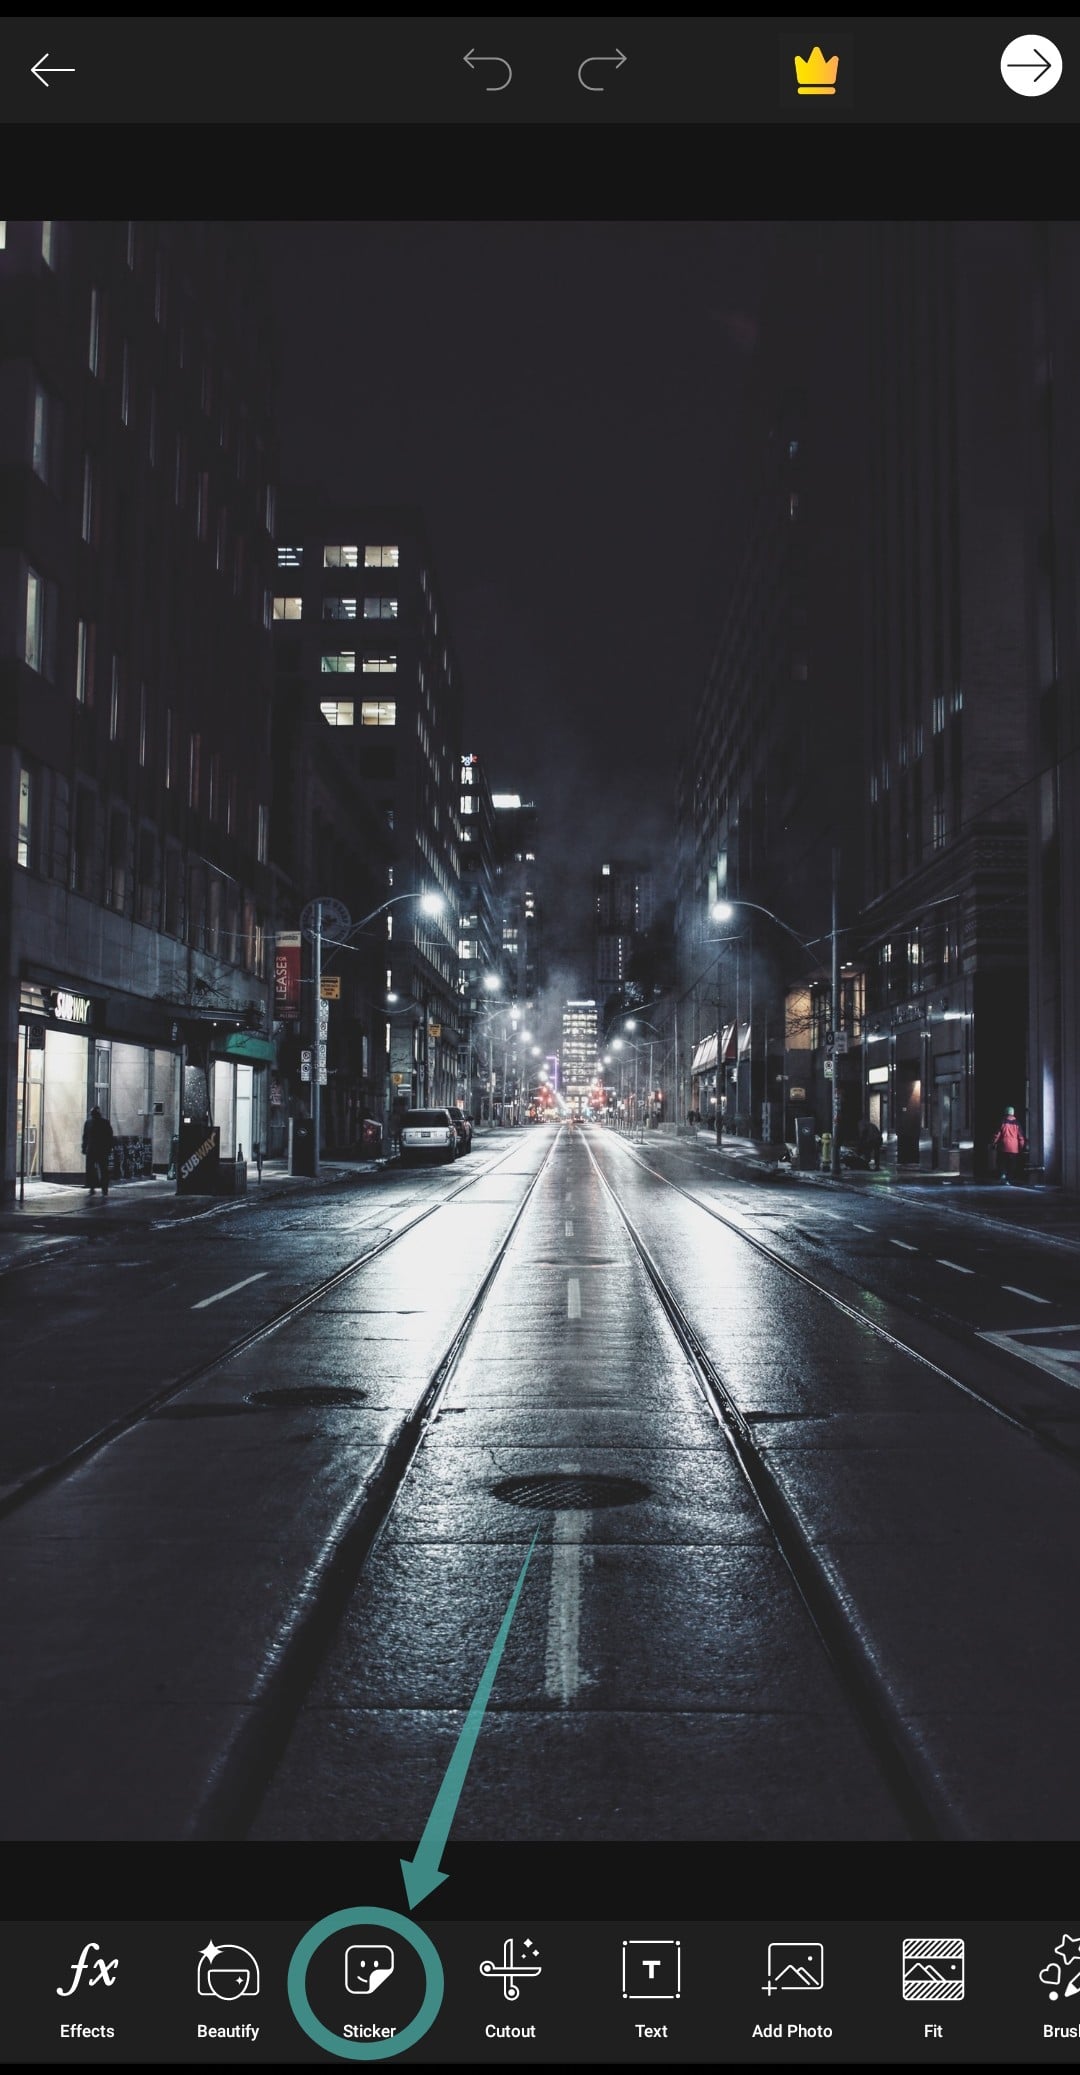
10You will now be taken to the image selection page, select a new image that you want to be the background image of your final image.
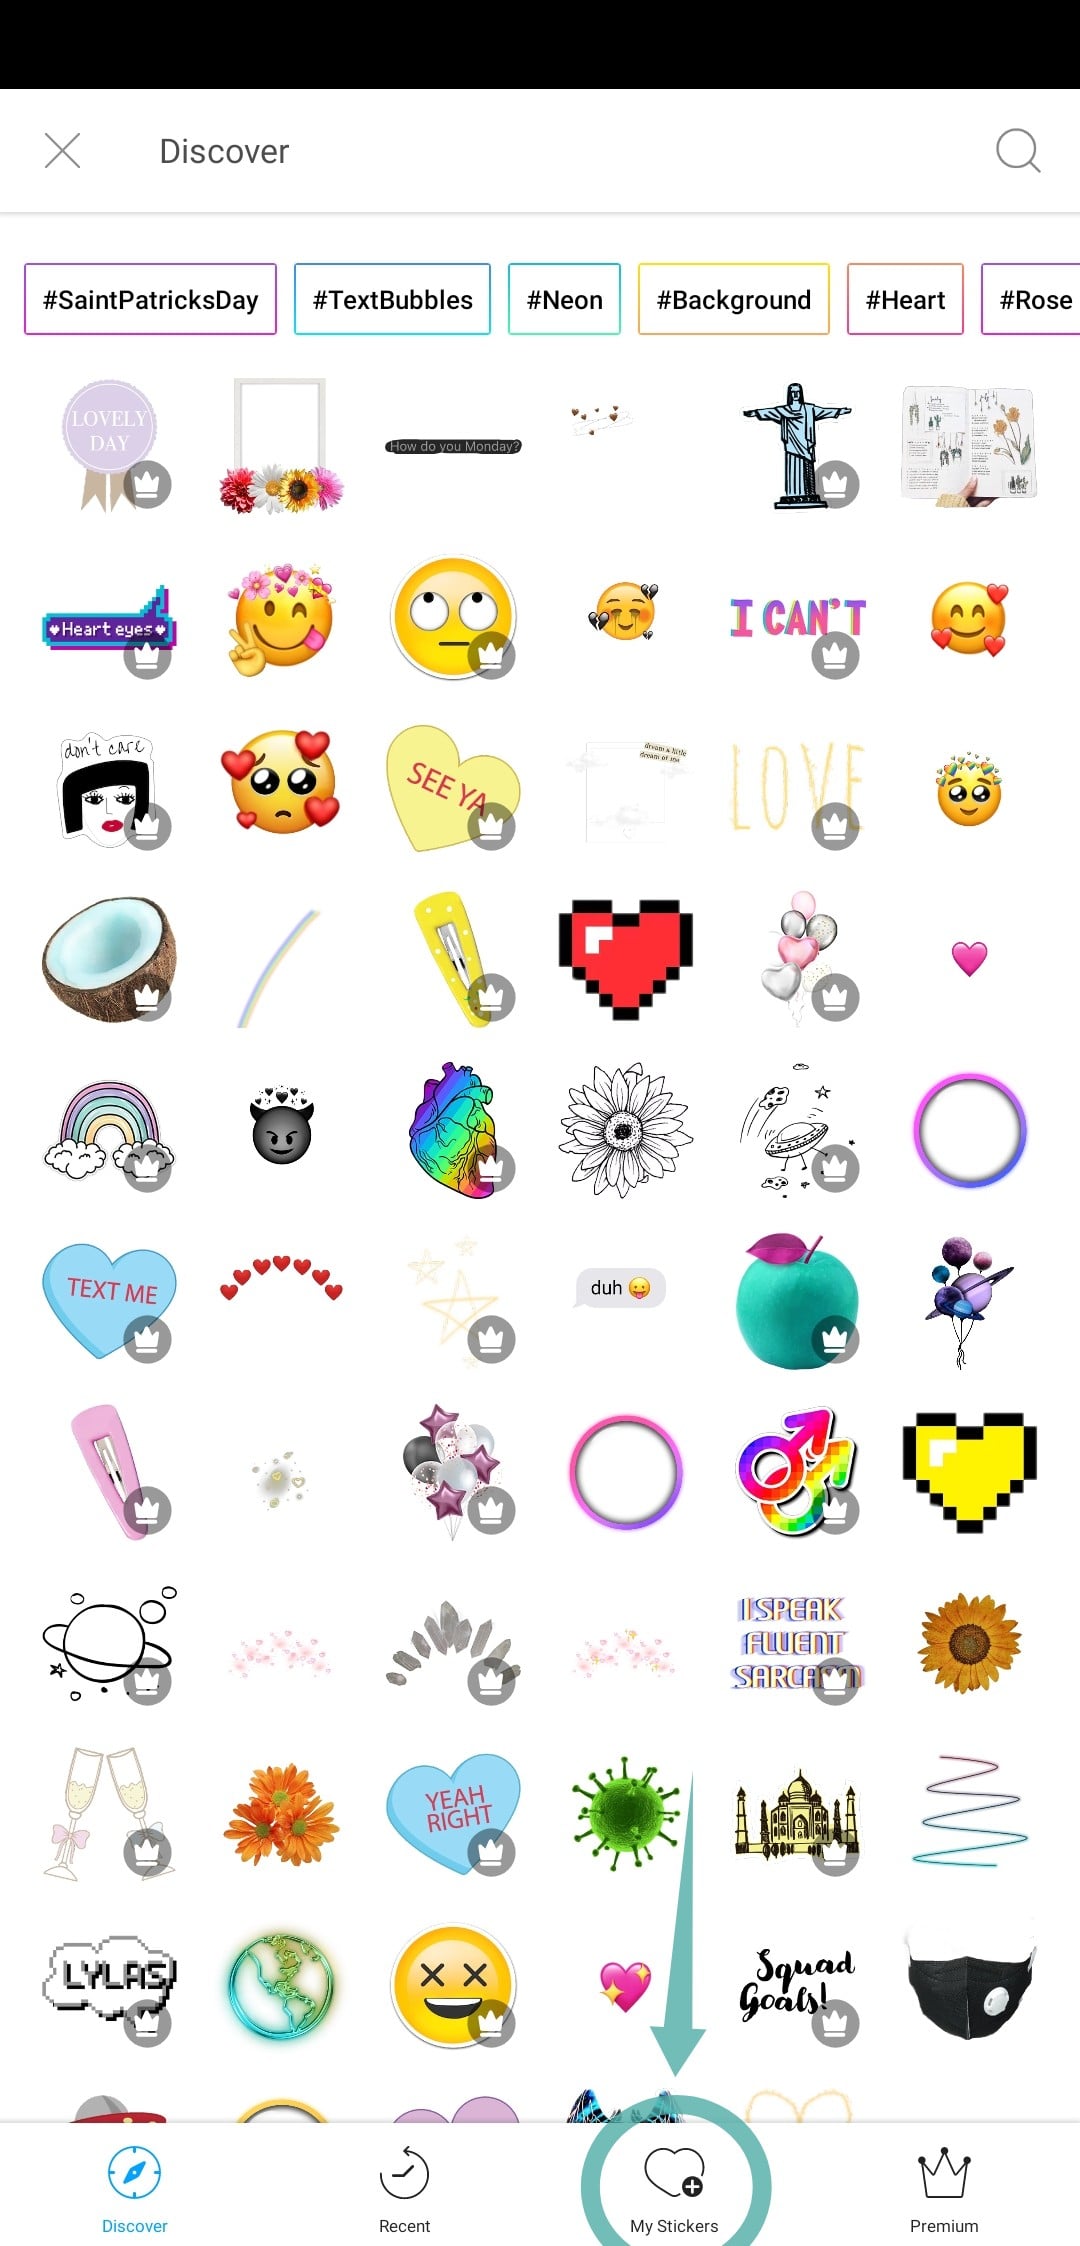
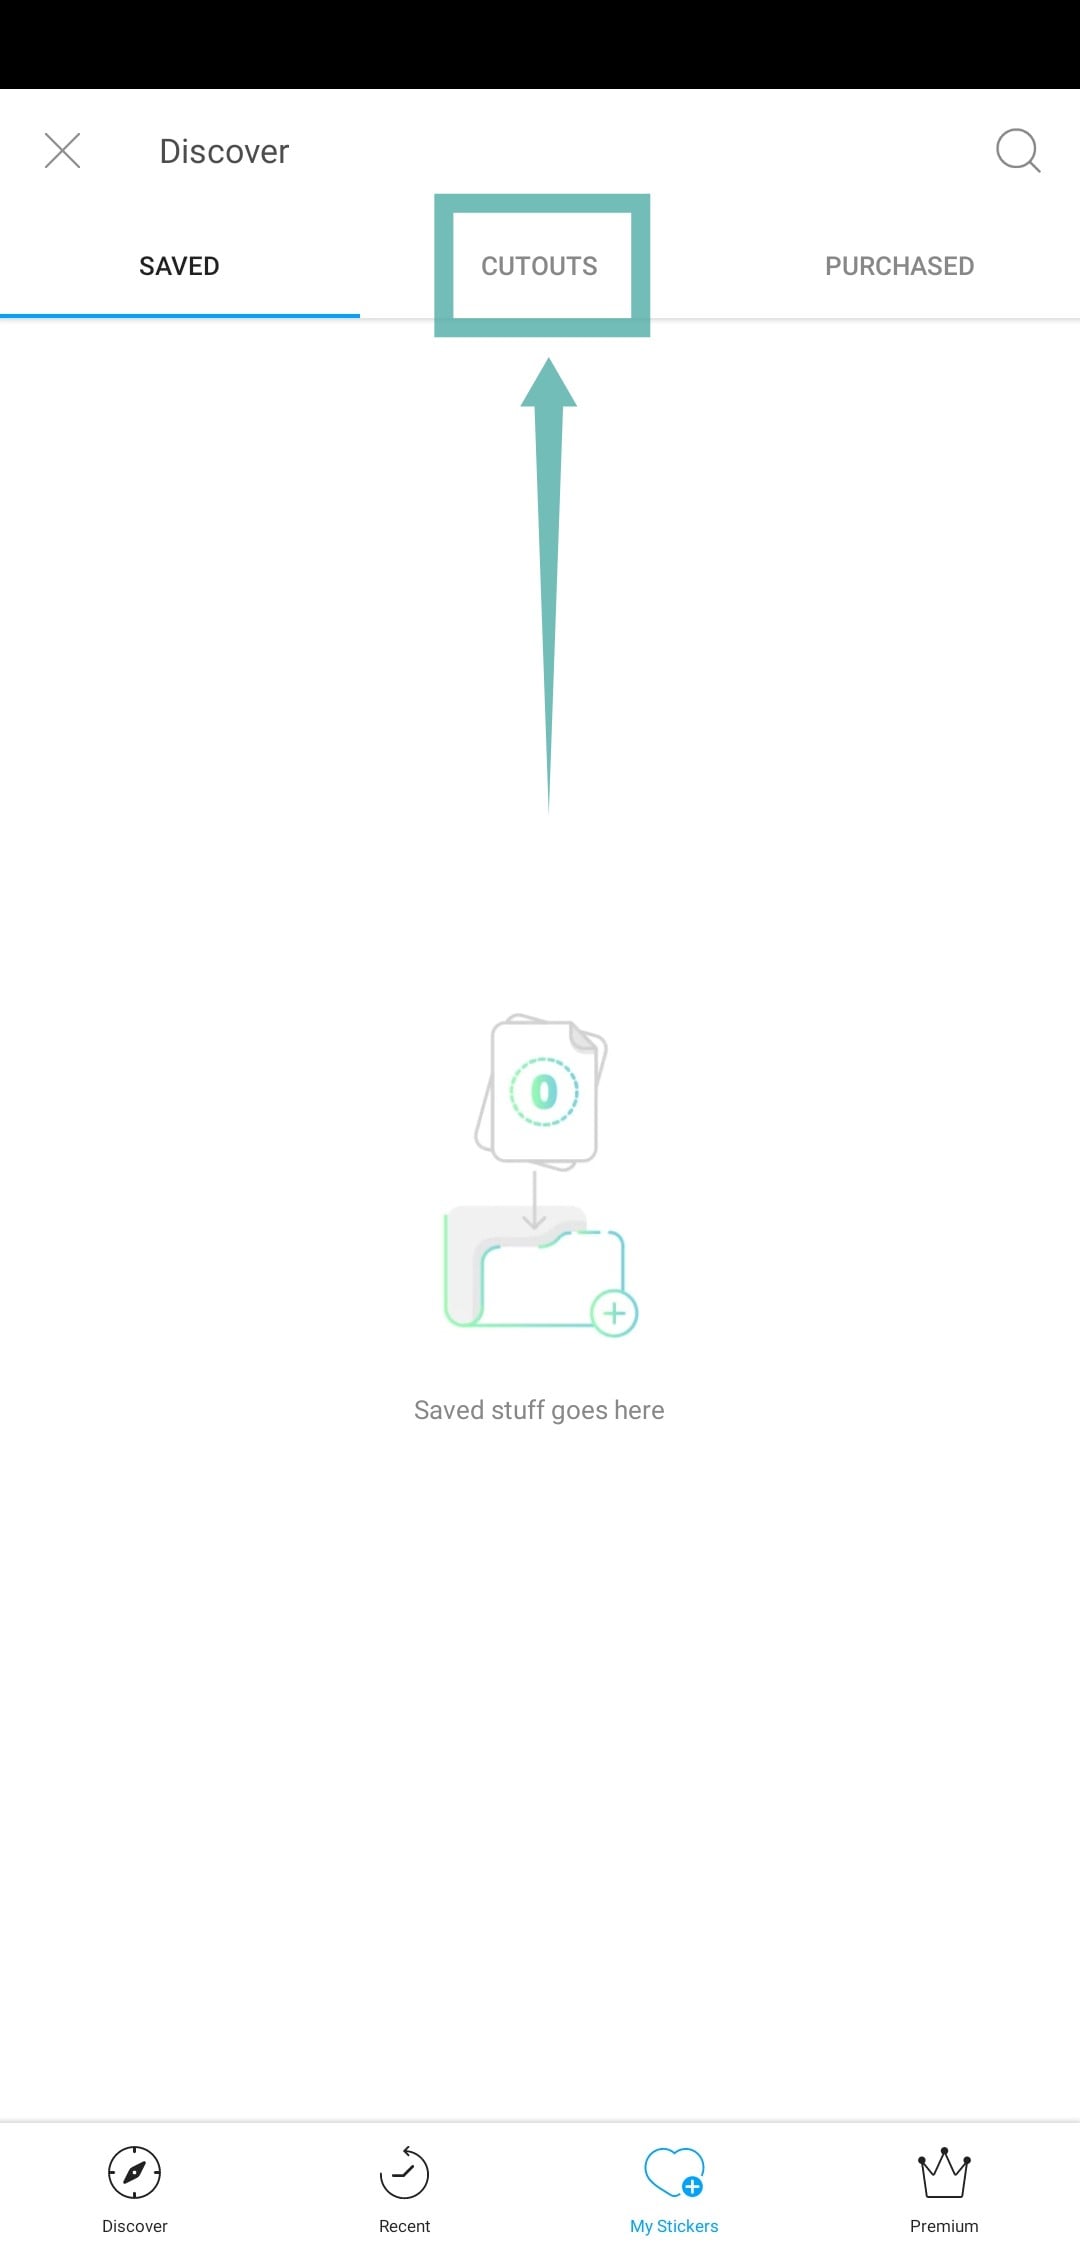
11Now scroll the bottom pane until you find an option titled ‘stickers’. Tap on it, and select ‘my stickers’. You will now see three tabs on the top of your screen, tap on the one that says ‘cutouts’. You can now select the cutout that we created earlier.
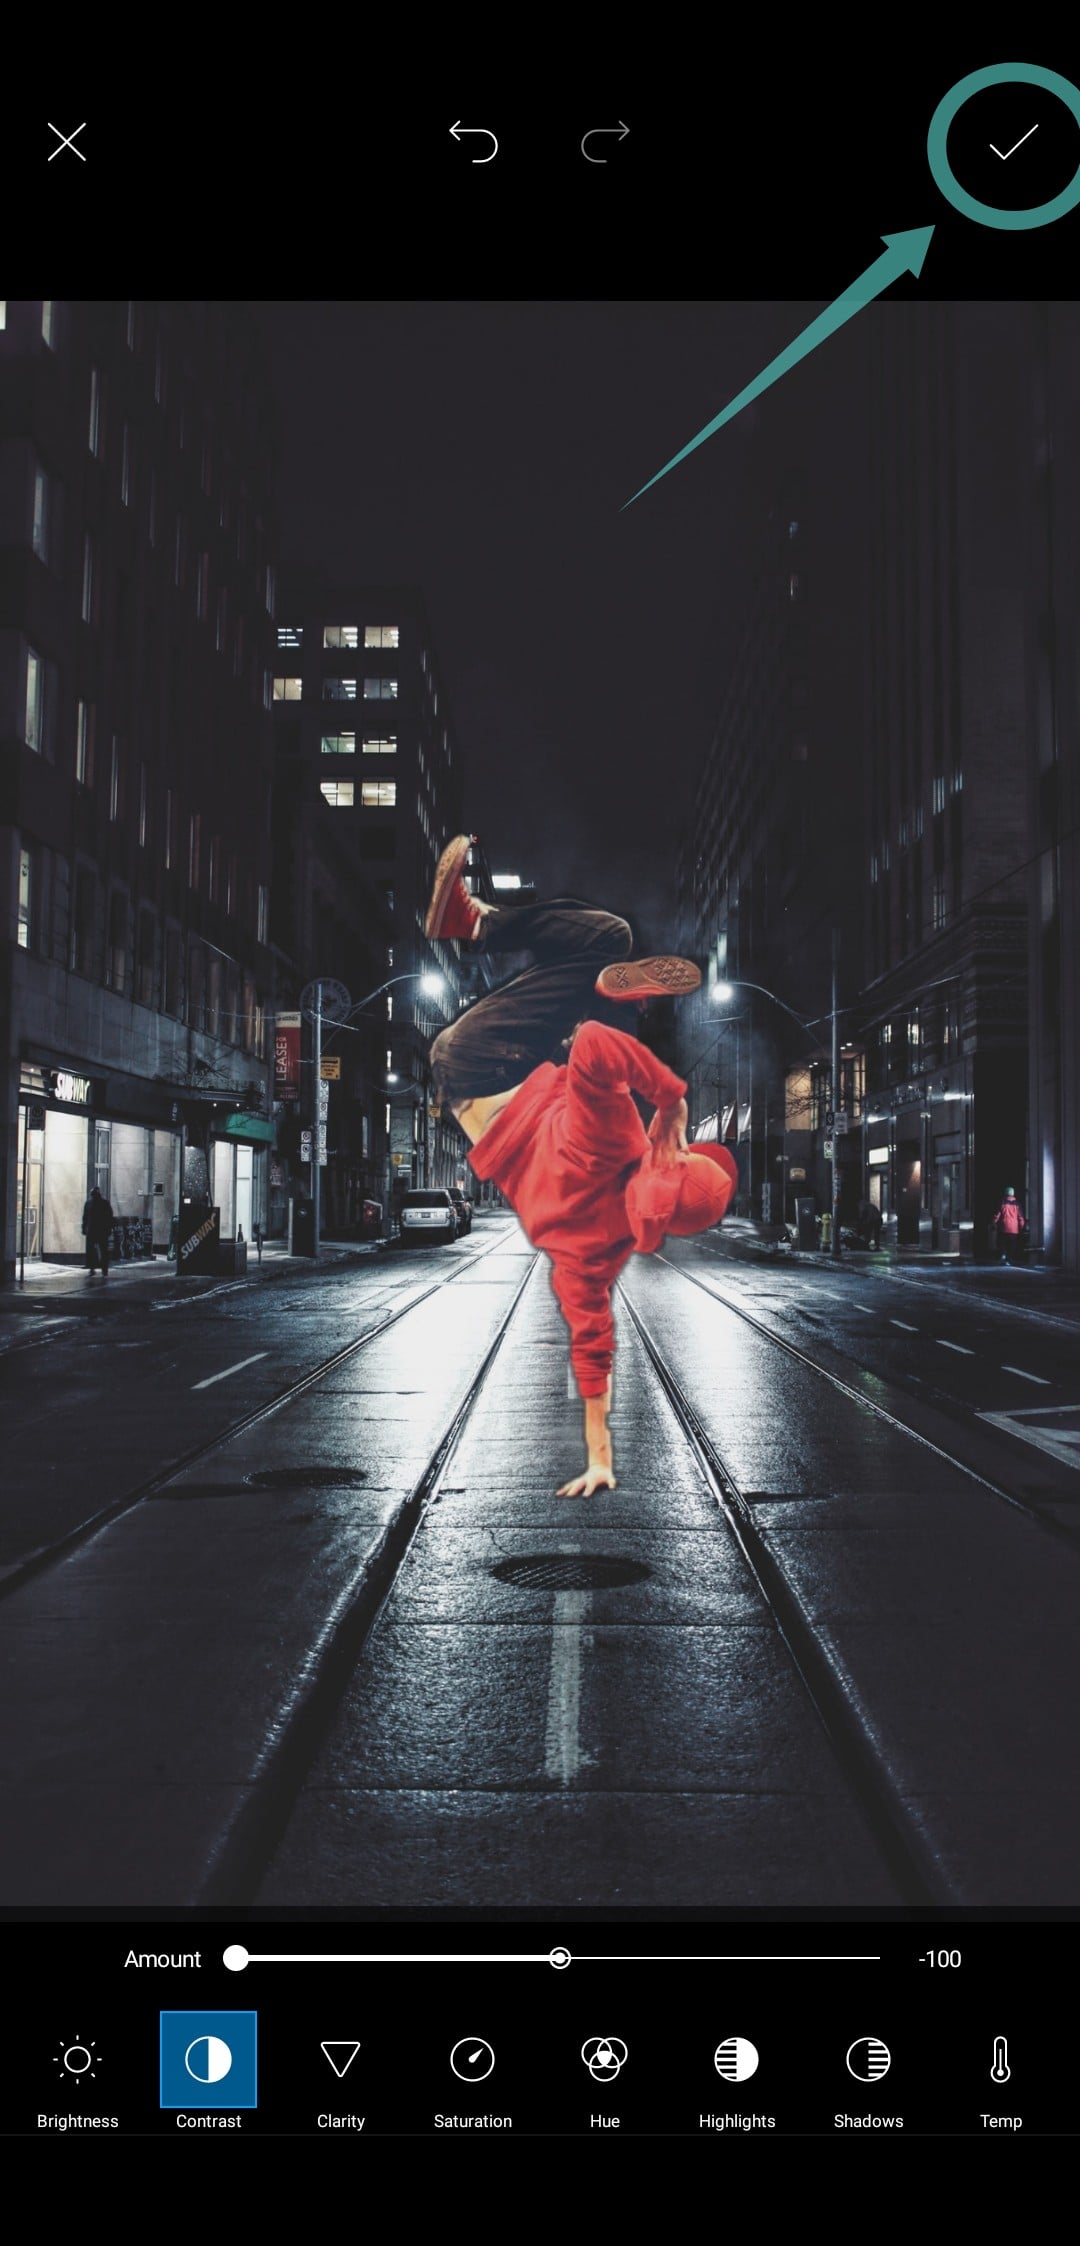
12Your cutout will now be superimposed onto your background image. You can rotate, resize and reposition it according to your liking. Once you are happy with your placement, simply tap on the ‘tick’ in the top right-hand corner of your screen.
13Scroll the bottom pane to find the section for ‘brushes’. Select the third brush from the left as shown below.

14Now draw the desired shape or outline on your image for a neon sketch effect. You can even change the color and brush size for a more customized look. If you want to zoom in or out simply use the pinch gesture. You can move around your image using two fingers on the screen.
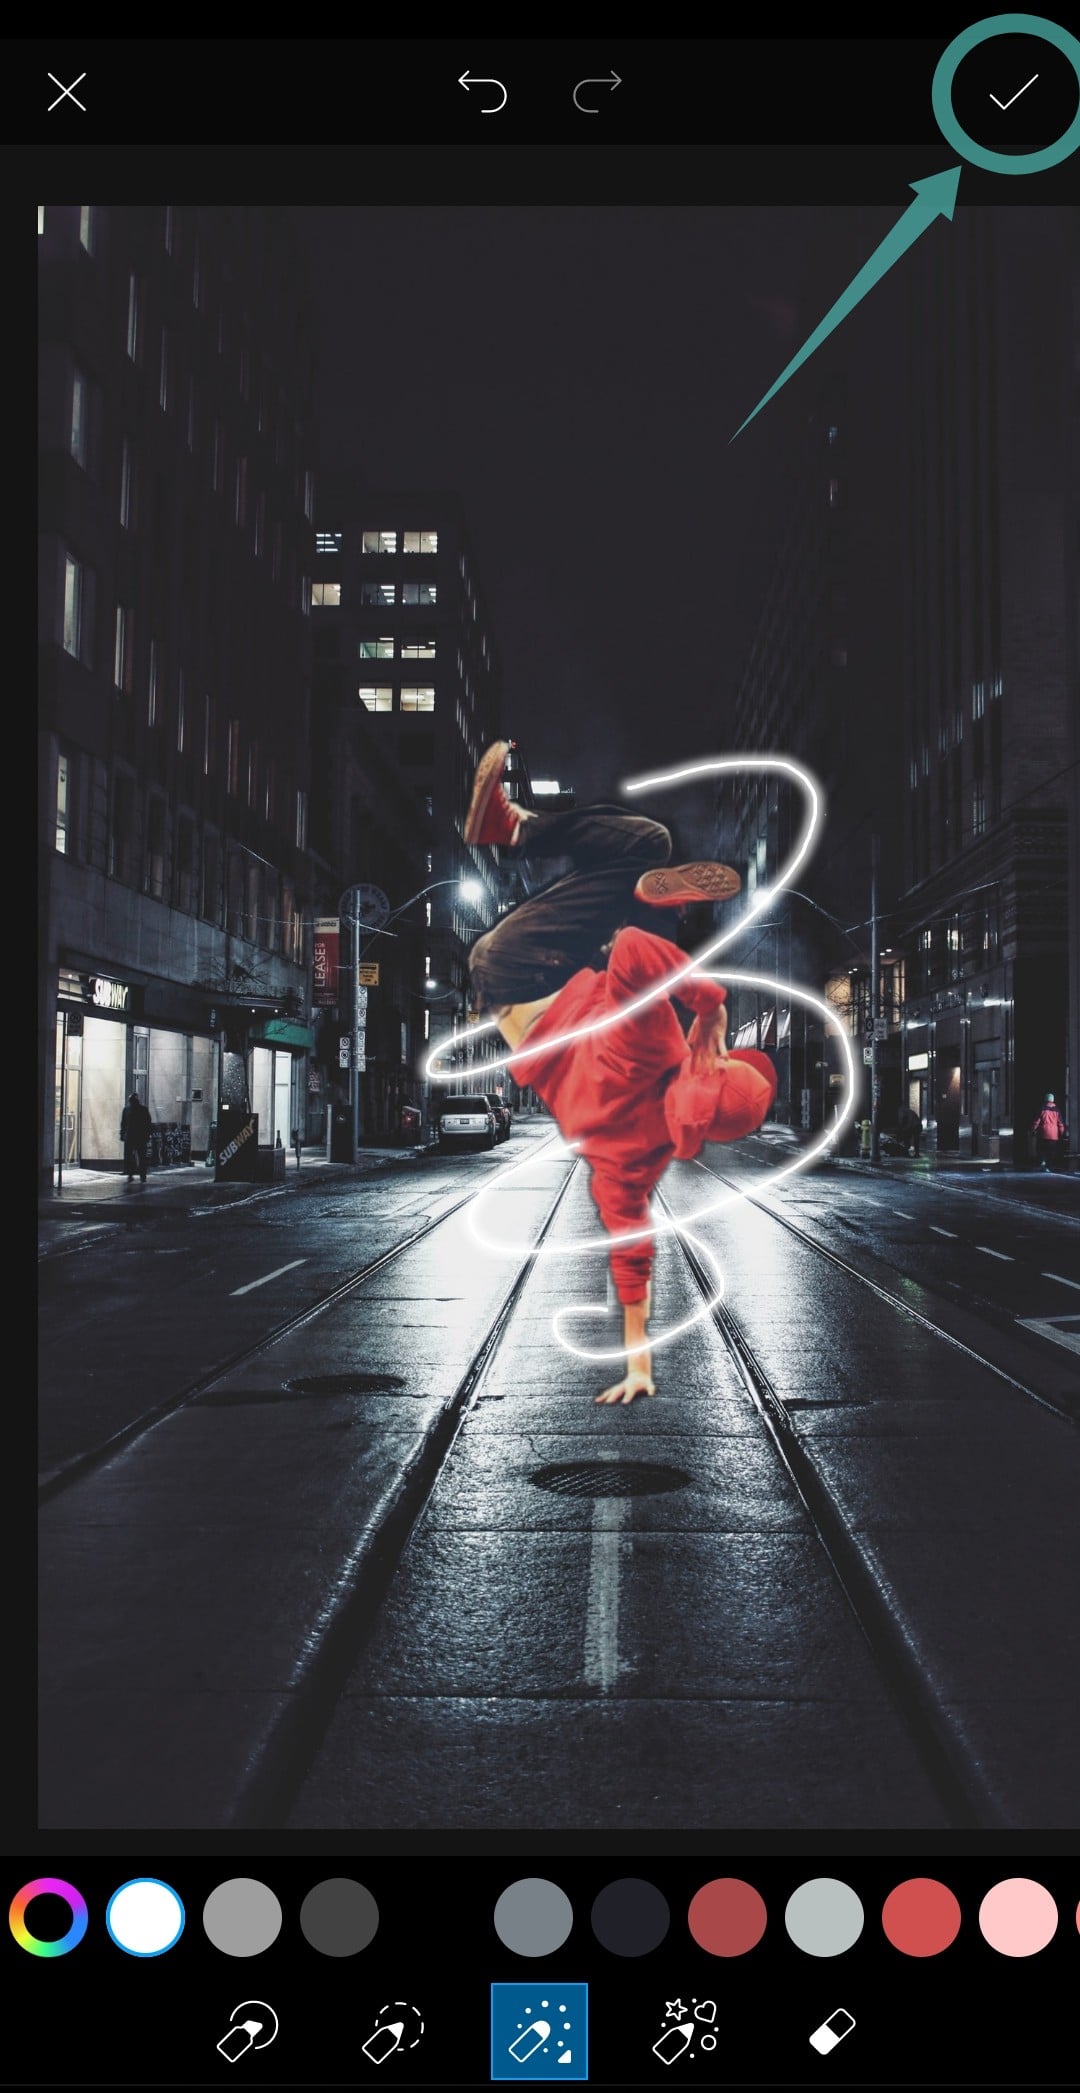
15Once you are happy with your sketch effect, tap on the ‘tick’ in the top right-hand corner of your screen.
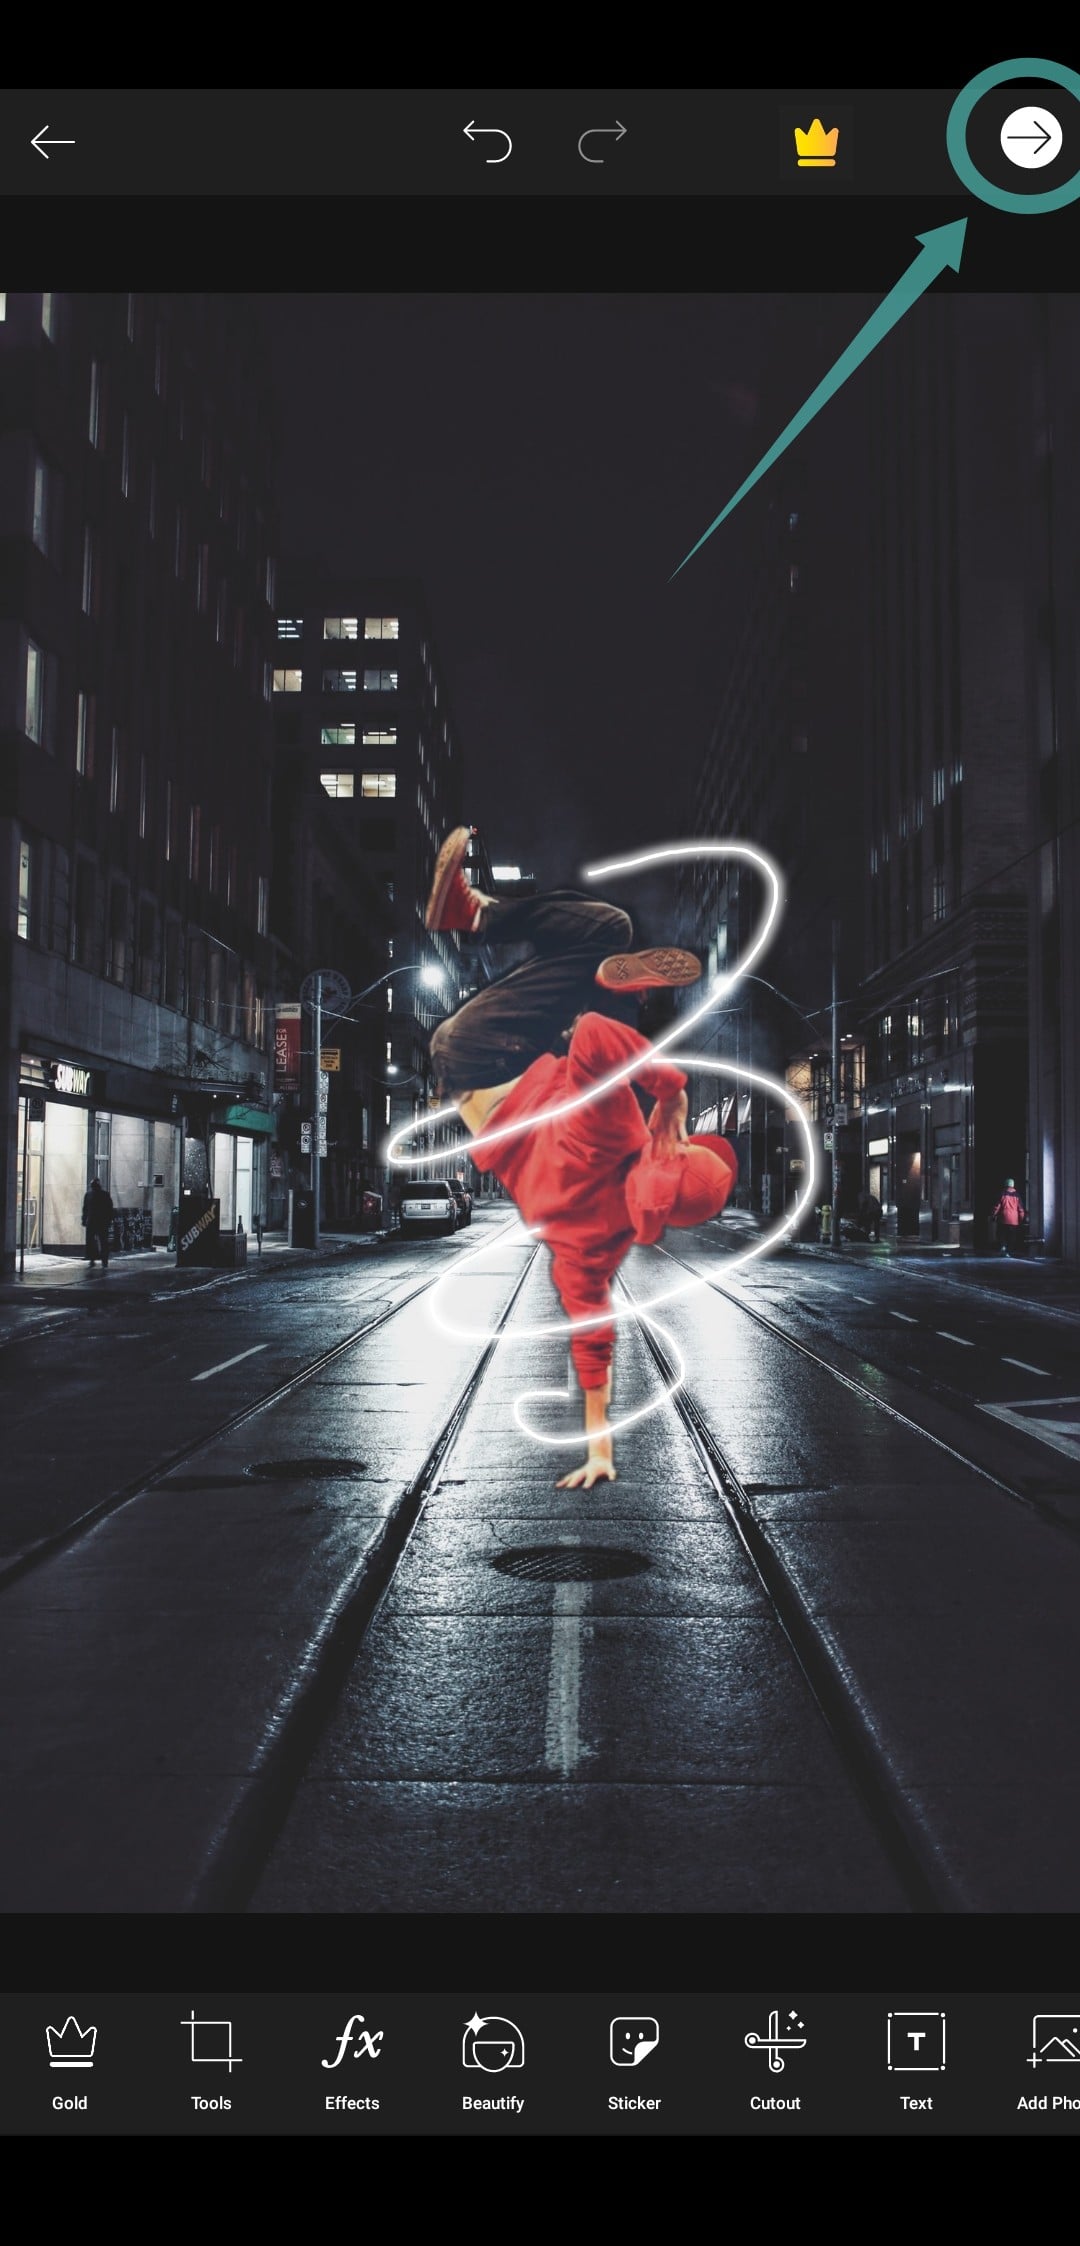
16Tap on the ‘right arrow’ in the top right-hand corner of your screen to share/save your image.
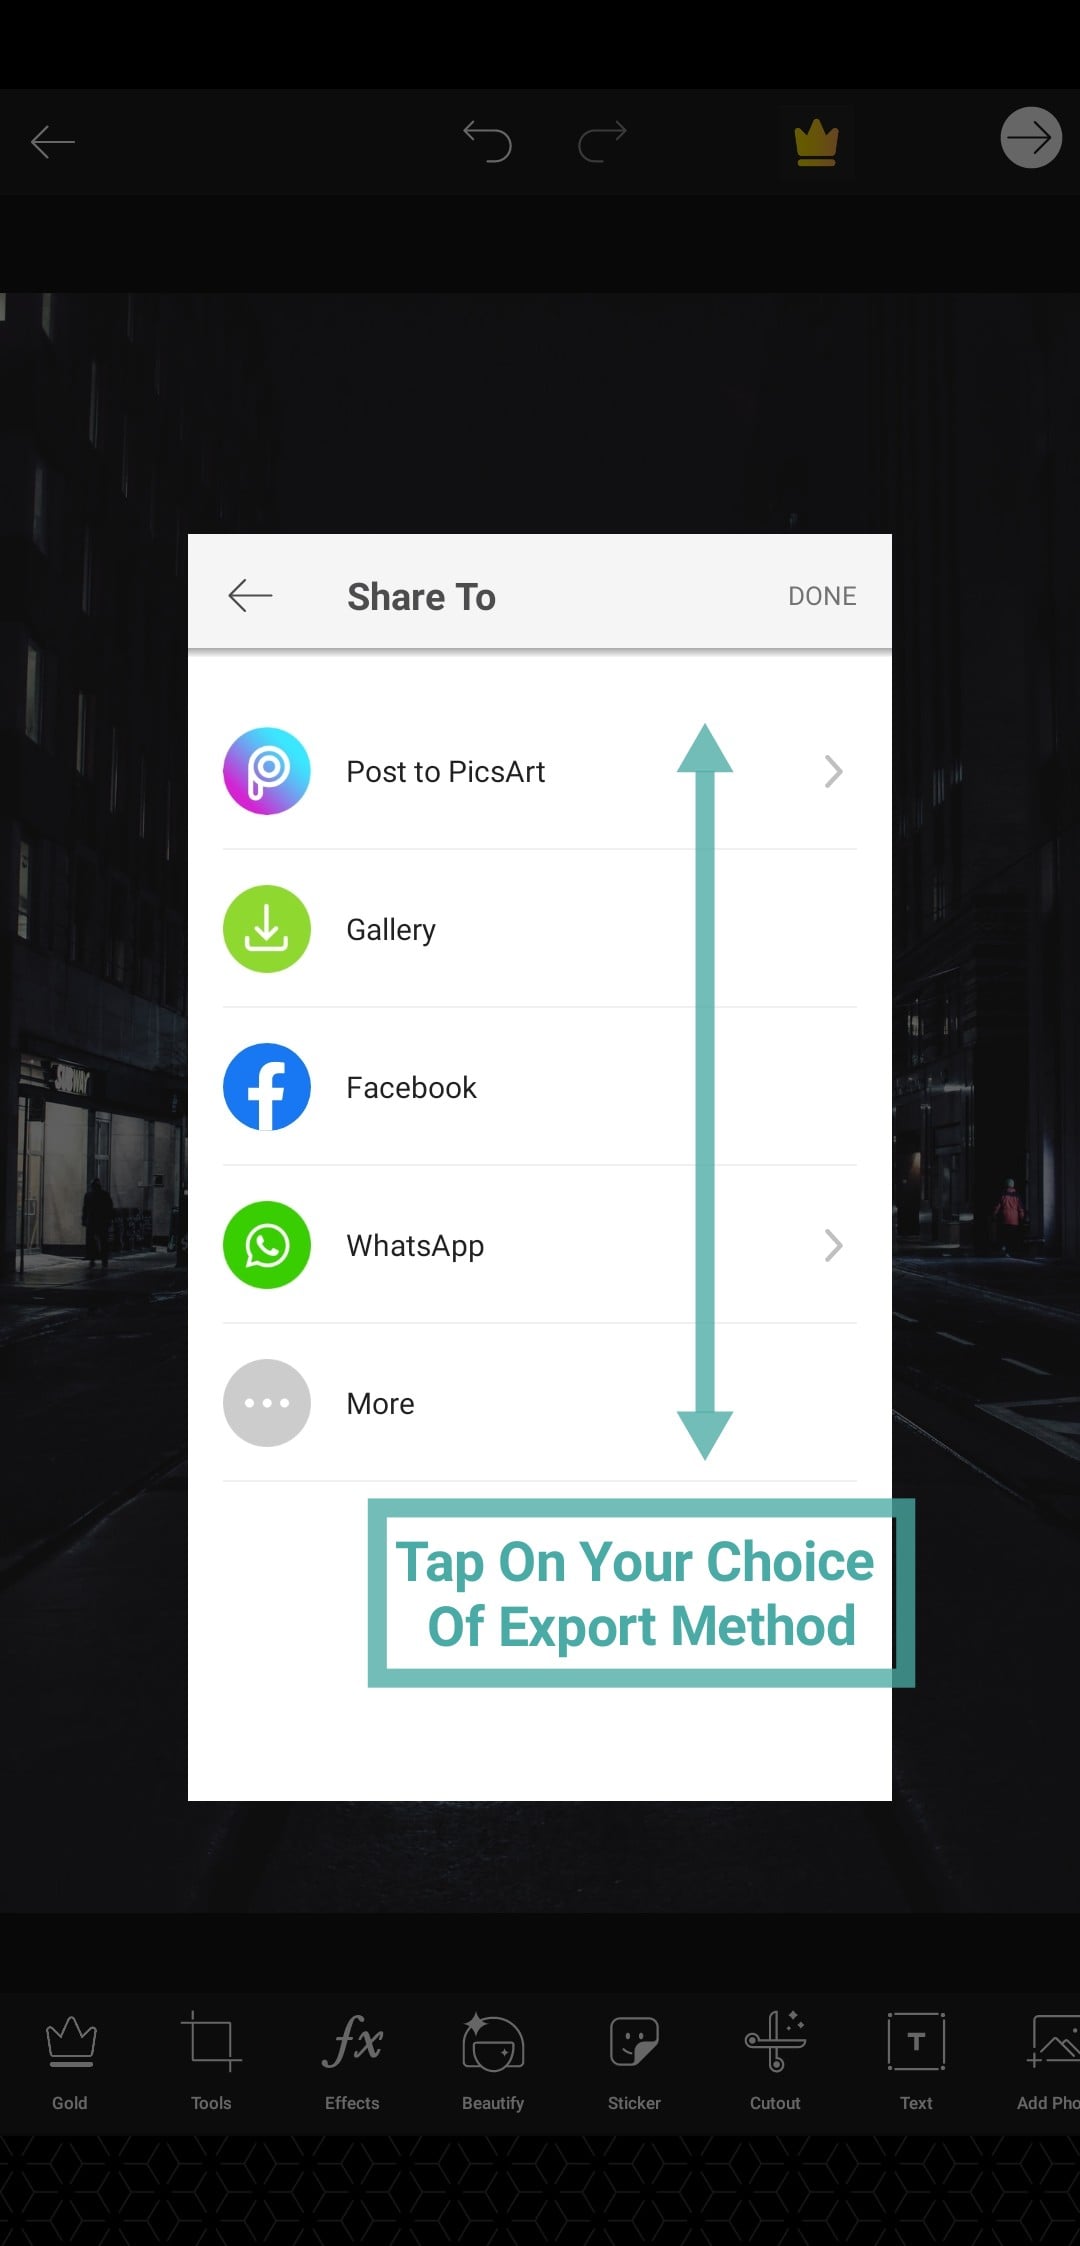
17You will now be shown a share sheet which will have the option to publish your artwork to Picsart, save it in the gallery and share it to various social media platforms that are available on your phone. Select the option that fits your needs the best.
Your image with a sketch line effect and a custom background will now be shared/saved to your desired location. You can continue editing your image further in order to achieve the desired look on your image.
RELATED: