Irrespective of whether you’re a novice or a battle-hardened veteran on Windows 10, you are likely to find yourself using the copy-paste combination at least once a day. Windows 10, like its predecessors, allows you to copy and paste texts, links, and more between different applications. And it achieves that with the help of a feature called ‘Clipboard.’ Today, we’ll take a brief look at what it is and how you could erase your clipboard, completely, in Windows 1o.
Related: How to clear clipboard on Mac
What does ‘Clipboard’ mean in Windows 10?
When you copy a text snippet, number, or link, Windows calls on clipboard to keep track of your edits. The built-in application simply stores the data you copied and unleashes it when you hit ‘Paste’ or ‘Ctrl + V.’ Unlike macOS, which only allows you to recall your latest entry, Windows 10 grants you the option to fetch from previous copies as well. And while we can’t help but marvel at this neat feature, we must also be prepared for potential privacy breaches.
So, if you’re one of the millions of users who share their PC with other people, it’s important to keep a close eye on your clipboard history and erase the records every once in a while.
How to find clipboard on Windows 10
Well, each of the methods given below will help you empty your clipboard quite easily. But if you wish to find the clipboard first and see its content, then choose the methods below that show you the full list. Avoid using the one-click-empty methods below if you want to see your clipboard content first.
How to clear clipboard on Windows 10: 7 Methods
The clipboard is an exceptionally useful tool. However, it can quickly become a liability if you don’t take out some time to clean it up, occasionally. Below are the top seven ways of cleaning your Windows 10 clipboard.
Method #1: Using keyboard shortcut
To view, use, and delete your previous copies, you’ll need to open the clipboard and take it from there. Hit ‘Windows + V’ to bring up the clipboard menu. Once you get the little window with all your copies, click on the ellipsis button on the right of a copied item to access the overflow menu. At the top, there’s the option to delete that particular entry. Click on ‘Delete’ to do so.
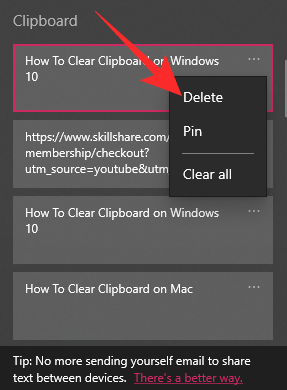
Repeat this step for all the entries you want to delete.
Note: Hitting the regular paste shortcut — ‘Ctrl + V’ — only gives you access to the most recent entry. But Windows + V shows you all of your recently copied items.
To empty the clipboard at once, click on ‘Clear all’ on any of the item.
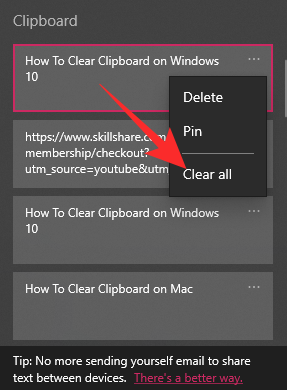
Your entire Windows 10 clipboard would be deleted.
Method #2: Using settings
Windows 10 has simplified the overall user experience with intuitive menus. And the ‘Settings’ menu is one of our favorites. You can get to the back end of the system and make as many changes as you need, without making a mess. Like millions of little options under the ‘Settings’ umbrella, you can clear and alter the behavior of the native Windows 10 clipboard.
First, click on the Windows button at the bottom left corner and hit the gear icon.

Now, go to ‘System.’
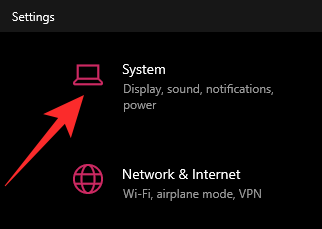
After you land on the system settings page, scroll through the list of options until you see the ‘Clipboard’ option.

After you click on it, you’ll find the available customization options related to the clipboard application. Scroll down to the bottom of the page, and you’ll find the ‘Clear clipboard data’ banner. Click on the ‘Clear’ button to clear everything on your clipboard.

If you want to stop Windows 10 from keeping track of your previous copies, you could simply ask it to stop remembering your stuff. To do so, simply hit the toggle under ‘Clipboard history’ and be done with it.

Method #3: Using command prompt
Command Prompt is an integral part of Windows systems and regularly allows you to carry out a bunch of tasks with the help of easy-to-memorize commands. Clearing the clipboard is one of the many neat tasks that the command prompt can achieve, and below, we’ll check out how.
First, locate the search bar at the bottom left corner of your screen — on the right of the Windows button — and type “CMD.”
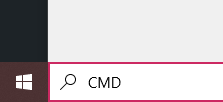
Now, after the command prompt launches, type:
cmd /c "echo off | clip"
Hit enter.
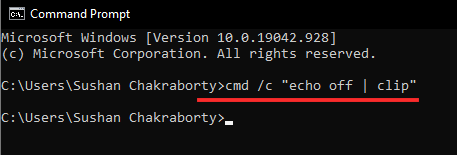
The next line would be blank, denoting that the clipboard has been erased.
Method #4: Using a shortcut
In the previous sub-section, we checked out how we could use Command Prompt to erase the clipboard. Here, we’ll make use of the same working formula to create a desktop shortcut and clear the board in an instant.
First, go to your desktop and right-click anywhere on the screen. Now, expand the ‘New’ section and click on ‘Shortcut.’

Windows will ask you to add the source of the shortcut. Put down “cmd /c echo.|clip” and hit ‘Next.’
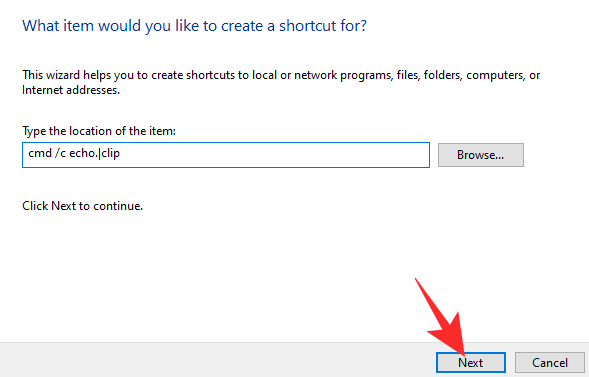
On the next page, Windows will recognize it as a Command Prompt script. Pick a name for the shortcut and hit ‘Finish.’
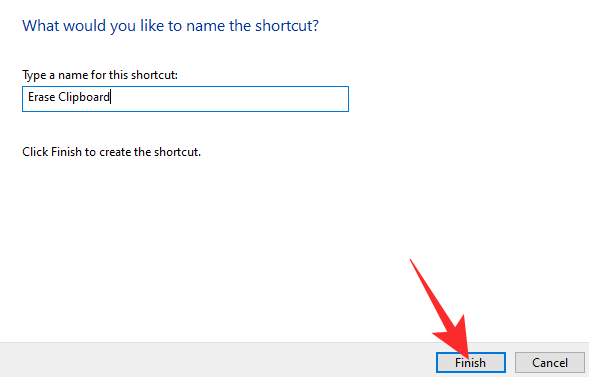
We’re using “Erase clipboard” here.
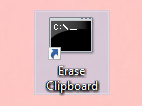
Now, whenever we click on the shortcut, the script would be executed and clear the clipboard.
Method #5: Using context menu
Adding the clear clipboard shortcut to the context menu can come in handy, as you won’t need to jump through hoops when you want to erase the clipboard the next time. You’ll need to play around with the registry editor to add the option to the context menu.
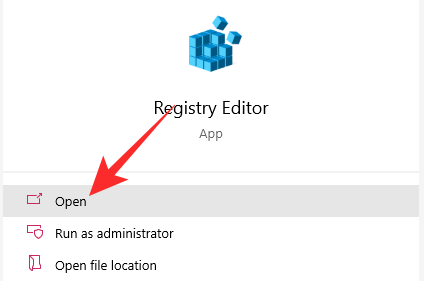
First, look for “Regedit” by clicking on the search bar at the bottom left corner and click on ‘Open.’
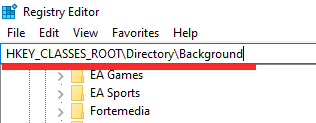
When it opens, look for “HKEY_CLASSES_ROOT\Directory\Background.”
Next, right-click on the ‘Shell’ folder and create a new Key.

Give it an appropriate name — “Erase Clipboard,” for example. Right-click on ‘Erase Clipboard’ and add a new Key. Name it “CMD.”

Now, selecting the ‘CMD’ key on the left, double-click on the value on the right-hand side. Put the following command as its value:
cmd.exe /c echo off | clip
Press ‘Ok’ and exit the area.
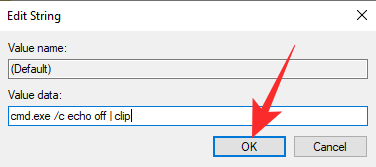
Go to your desktop and right-click anywhere on the screen. You’ll find the ‘Erase Clipboard’ option waiting for you.
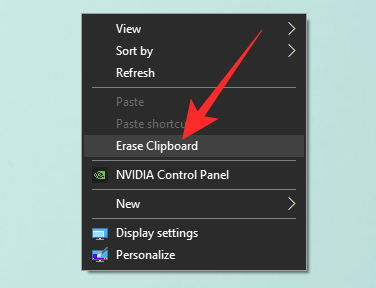
Click on it to clear your Windows 10 clipboard.
Method #6: Using Powershell
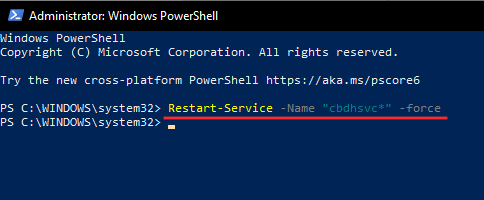
Go to the search bar right next to the Windows button and type ‘Powershell.’ Now, run the application as an administrator.

When Powershell comes alive, type the following command:
Restart-Service -Name "cbdhsvc*" -force
Hit enter and watch the clipboard service restart.
Method #7: Restart your computer
Whenever we run into trouble, the thought of restarting the computer often pops up as the only logical solution. And this stands true for the clipboard as well. If for some reason, you cannot manage to erase your clipboard using one of the six methods we discussed above, you can always go back to basics and restart your Windows 10 PC.
To restart, click on the start button at the bottom left corner of your screen and hit the power button.
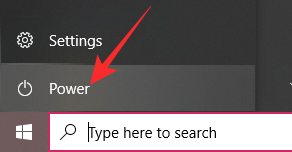
Now, click on ‘Restart.’
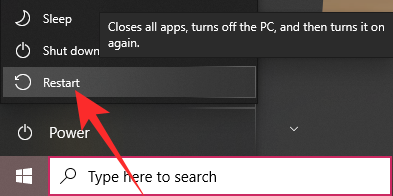
If applications are stopping your PC from restarting, close them and proceed. When your computer boots back up, your clipboard would be cleaned
How to delete Word clipboard in Windows 10
Microsoft Word has its own little clipboard, which allows you to cut/copy text and animation from anywhere and paste it into any Word file. Since you can copy multiple files, the Word clipboard can become a bit messy, which is why you should get rid of unwanted files on your clipboard. However, before deleting the stored items, you’ll need to view them.
First, launch the Microsoft Word application and go to the ‘Home’ tab.

In the top-left portion of your screen, you’ll find the ‘Clipboard’ section. Click on the launcher — diagonal arrow — in its bottom-right corner.

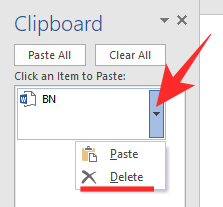
Now, right-click on the items you want to delete and hit ‘Delete.’
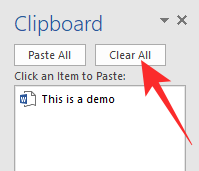
And to clear them all at once, hit ‘Clear All.’
How to delete Excel clipboard in Windows 10
Similar to Word, Microsoft Excel also comes with its dedicated clipboard. Everything you copy while working in Excel goes straight to the clipboard, and you can call upon it anytime you like. It’s an ingenious little addition, of course, but the clipboard can get a little crowded if you do not erase it every once in a while. Thankfully, getting rid of old copies is easier done than said.
Launch the Microsoft Excel application and go to the ‘Home’ tab at the top of the screen.

On the left-most section, you’ll get the options to format your sheet. Right underneath, you’ll find the clipboard banner, with the launcher icon in the bottom-right corner.
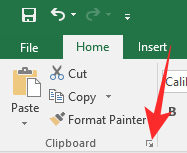
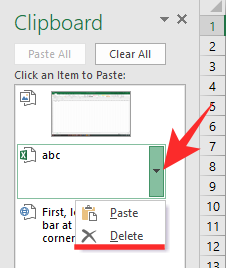
Click on it to expand the clipboard. Now, click on the down arrow right next to a copied content to expand its options. Click on ‘Delete’ to remove the item from your list.
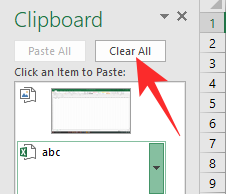
If you wish to clear your entire clipboard at once, click on the ‘Clear all’ button at the top.
How to stop the Office clipboard from collecting
Microsoft Office applications — Microsoft Word, Microsoft Excel, for example — use a universal clipboard called ‘Office Clipboard.’ It comes into play only when you’re running an Office application and shares its data with the native Windows clipboard. Even if you minimize the Office application and jump to a different window, the Office Clipboard keeps recording your copies, making them available for use on your favorite Office-suite app.
The Office clipboard can only store 24 copies, which is why you might want to stop it from collecting your data when you don’t intend to use it inside an Office application. Stopping it from collecting data is pretty standard. First, click on the up arrow at the bottom-right corner of your taskbar to see the Office clipboard icon.
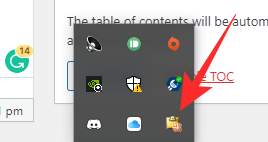
Right-click on it and select the ‘Stop collecting’ option.

That’s it! The Office clipboard will not collect data when you switch to a non-Office application.
RELATED
- How To Change Administrator Windows 10
- How To Get the Linux GUI App Support on Windows Subsystem for Linux (WSL)
- How To Cast Phone to PC: 5 Ways Explained
- How To Turn On Bluetooth Windows 10
- Screenshots on Windows 10 not working? 8 Fixes
- How to Create a Shortcut to VPN Connection on Windows 10
- How To Set 7zip as Default Windows 10

