Frozen or unresponsive programs are easy enough to kill from the Task Manager. But Microsoft has recently given users the convenience of killing these tasks straight from the taskbar. Though the option is not rolled out to everyone, it is fairly easy to get if you have a Windows Insider build. Here’s everything you need to know to enable the ‘End Task’ button and close tasks from the taskbar.
How to get the “End task” button to kill apps from the taskbar
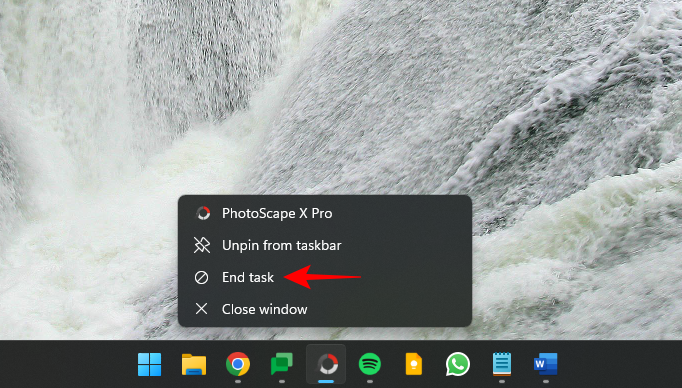
The ‘End Task’ button is available for all Windows 11 users. However, to enable it, one will have to dig through the Settings app a bit. Nevertheless, once enabled, you’ll be able to force close any app right from the taskbar. If you don’t find the setting as given in Method 1, you can still use ViVeTool (methods 3 and 4) as shown below to enable the End Task option in the taskbar, regardless of your Insider build.
Related: Where is ‘My Computer’ on Windows 11? How to Find ‘This PC’ Easily!
Method 1: Using the Settings app
The ‘End Task’ option is available under the “For developers” page in Windows Settings. Here’s how to reach it:
- Press
Win+Ito open the Settings app. Then, with ‘System’ selected in the left pane, scroll down on the right and select For developers.
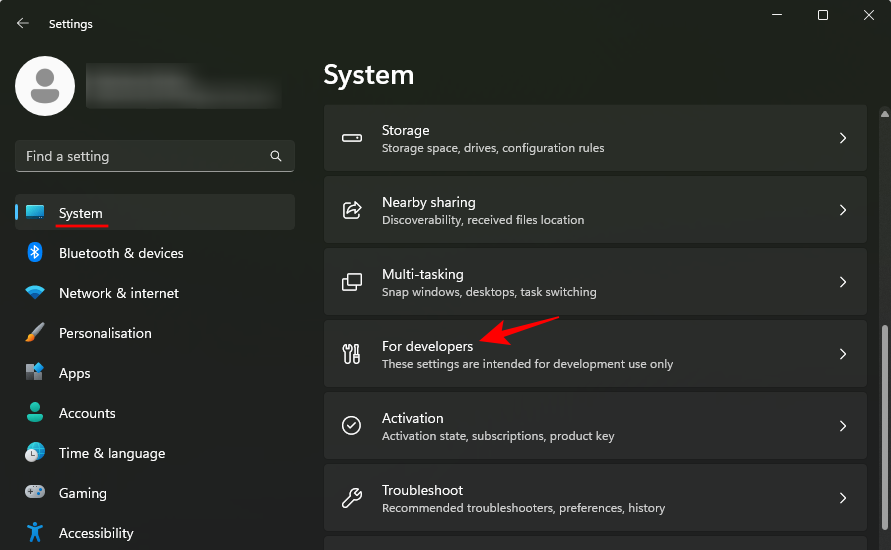
- Here, find End Task and toggle it On.
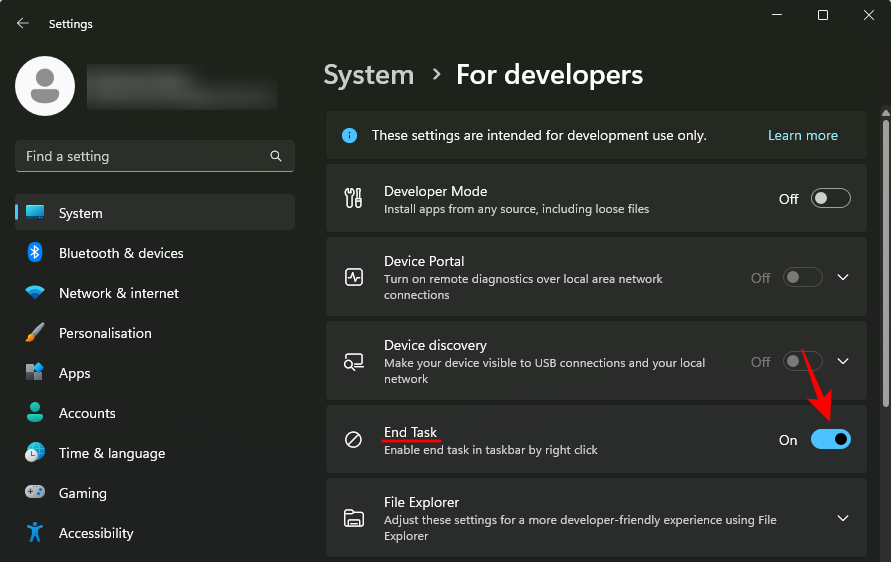
- Now right-click on an open app in the taskbar. You will see the ‘End Task’ option appear here.

Use it to quickly close all instances and processes of non-responsive apps and programs.
Related: How to Repair Windows 11 Without CD: 12 Methods Explained!
Method 2: Using the Registry Editor
A roundabout way of enabling the ‘End Task’ option is to make a registry tweak using the Registry Editor. Here’s how:
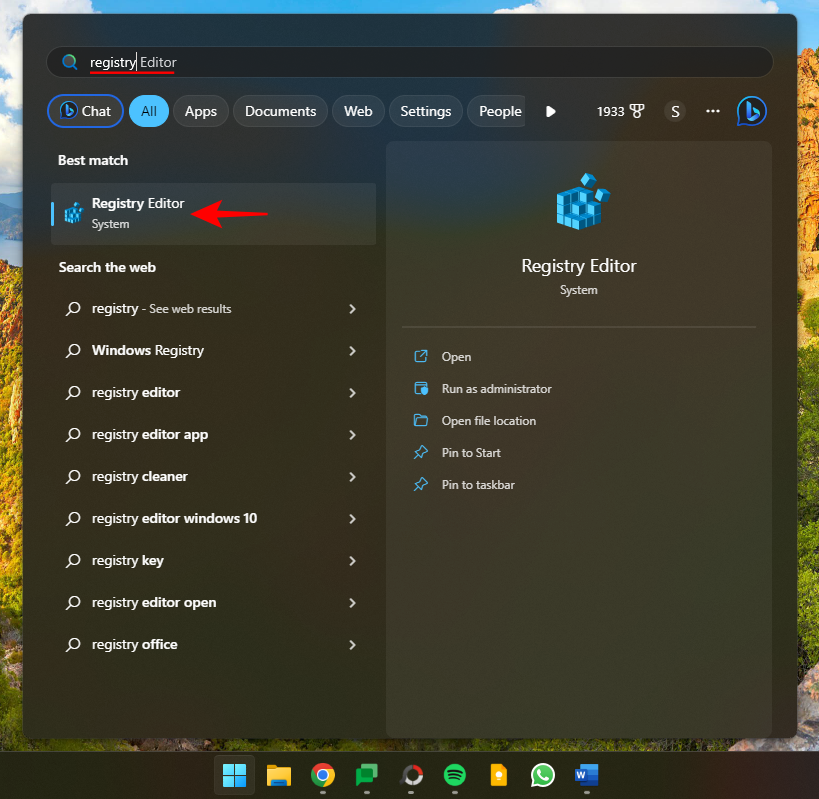
- Press Start, type “registry” and select the Registry Editor.
- Now, navigate to the following:
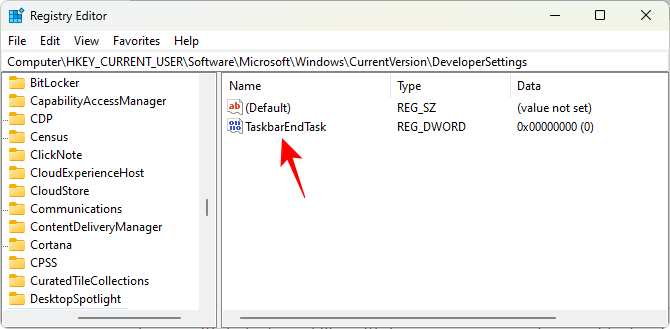
HKEY_CURRENT_USER\Software\Microsoft\Windows\CurrentVersion\DeveloperSettings
Alternatively, copy the above and paste it into the Registry Editor’s address bar.

- And hit Enter. On the right, double-click on TaskbarEndTask.
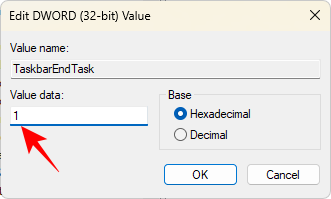
- Change its value to 1.
- Click OK.
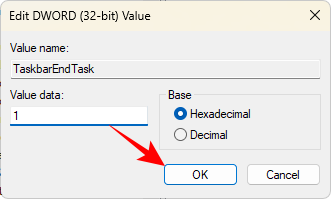
And just like that, you will have enabled the End Task button in the taskbar.
Related: How to turn on Windows Defender in Windows 11
Method 3: Using ViVeTool in the command prompt
If you’re unable to access the End Task option from the Settings app, fret not. With ViVeTool, you can unearth and enable the features that are hidden from view. Here’s how:
Firstly, download ViVeTool from the link below.
- ViVeTool | GitHub link
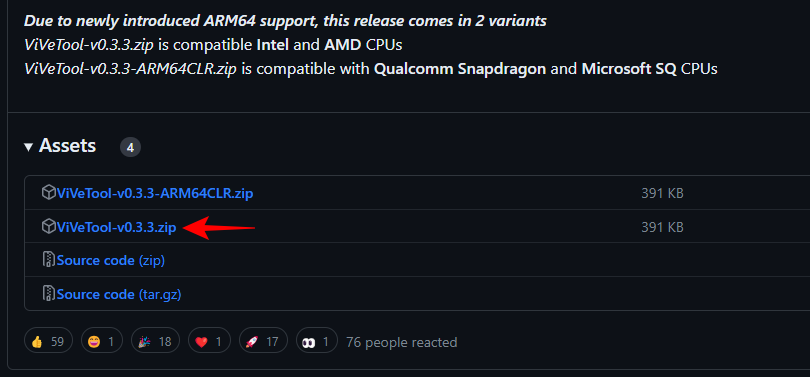
- On the GitHub page, download ViVeTool-v0.3.3.zip.
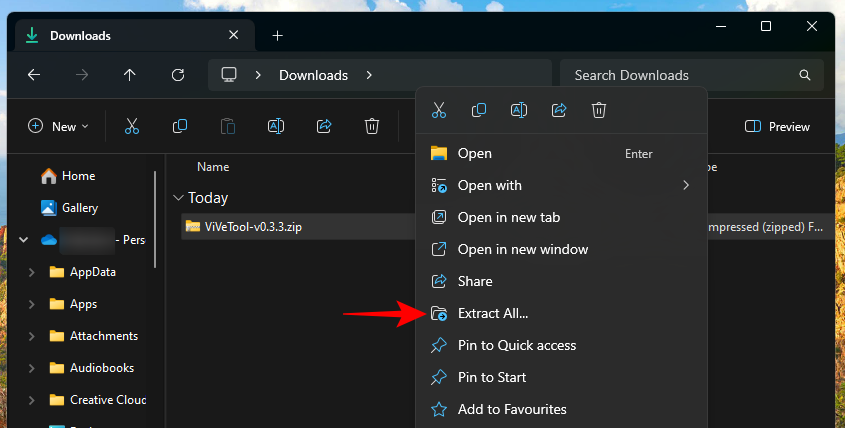
- Extract the download zip file by right-clicking on it and selecting Extract All.
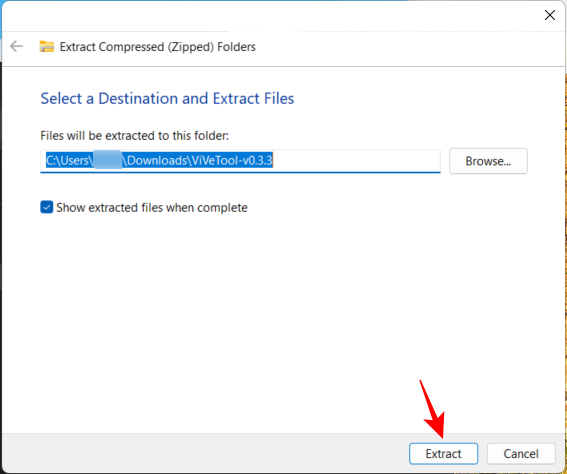
- Click on Extract.
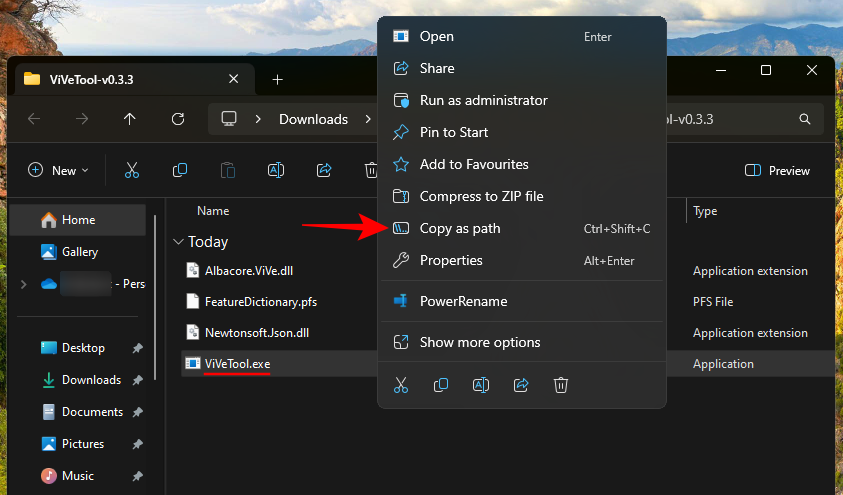
- Now, right-click the extracted ViVeTool.exe file and select Copy as path.
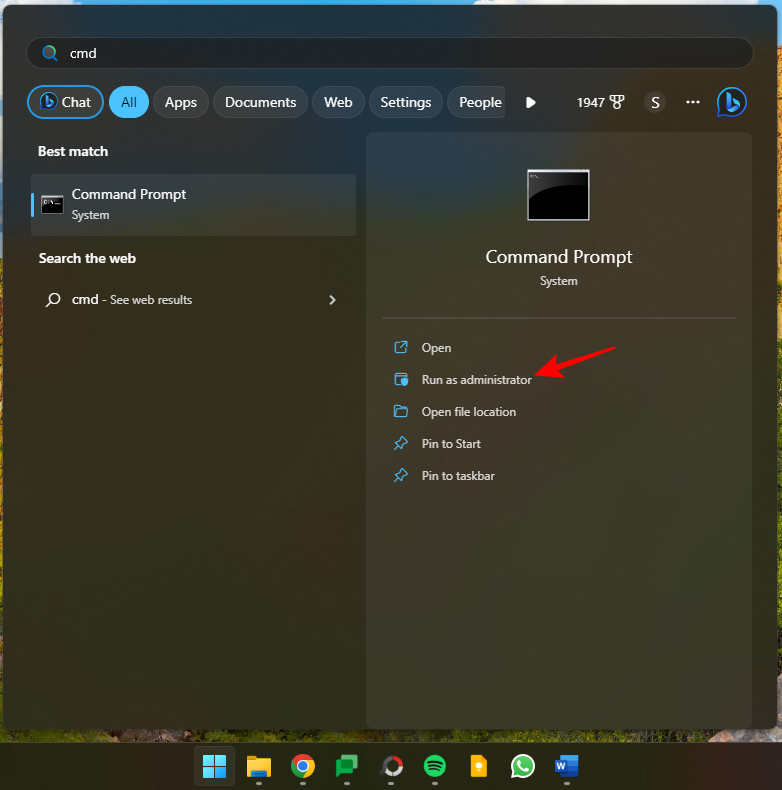
- Next, press Start, type cmd, and run the Command Prompt with administrator privileges.
- Paste the copied path here. Then continue the command by entering the following:
/enable /id:42592269
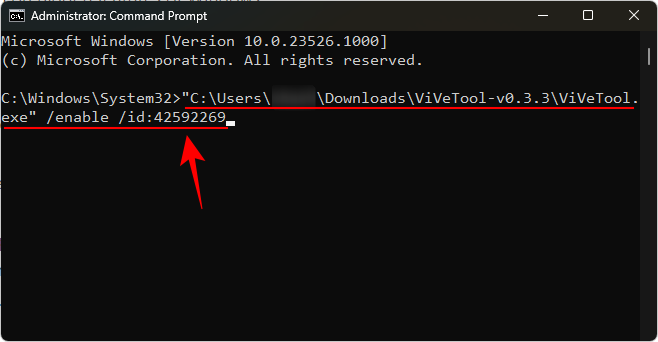
- Here, ‘42592269’ is the ID of the End Task feature. Hit Enter to enable the feature. Once the feature is successfully enabled, you’ll get a confirmation for the same.
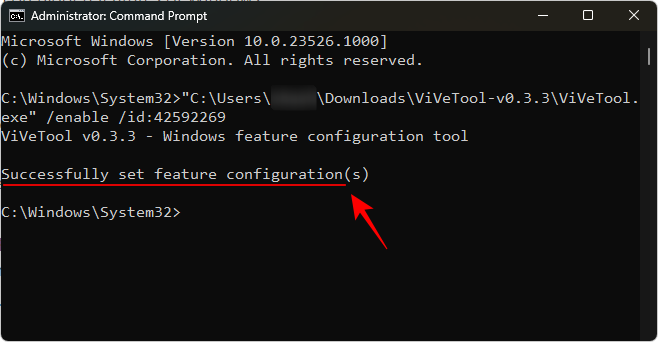
Restart your computer for the changes to take effect. Then enable ‘End Task’ in the For Developers page of the Settings app, as shown in Method 1.
Related: How to stop Windows 11 update [7 methods explained]
Method 4: Using the ViVeTool GUI
ViVeTool also has a GUI app that lets you enable various Windows features that are hidden or turned off by default in particular builds. Download it from the link given below:
- ViVeTool GUI | GitHub link
- Download the Pre_Release_Hotfix.zip file.

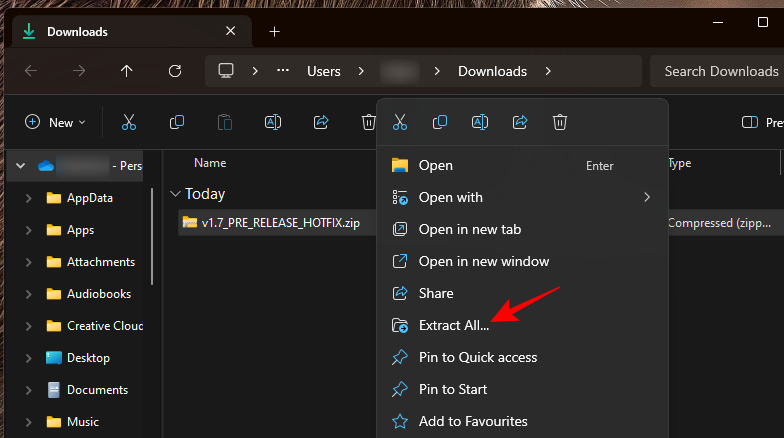
- Once downloaded, right-click the downloaded zip file and select Extract all.
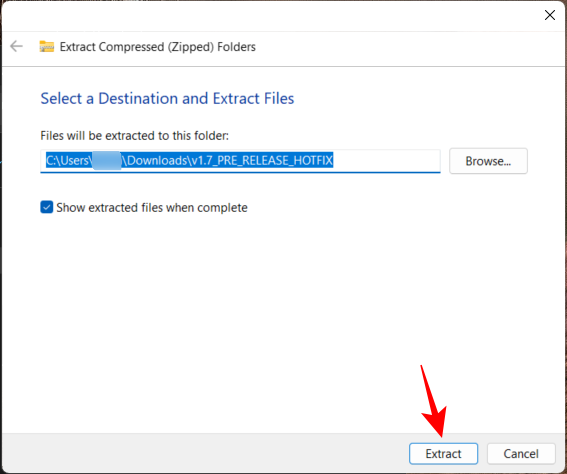
- Click Extract.
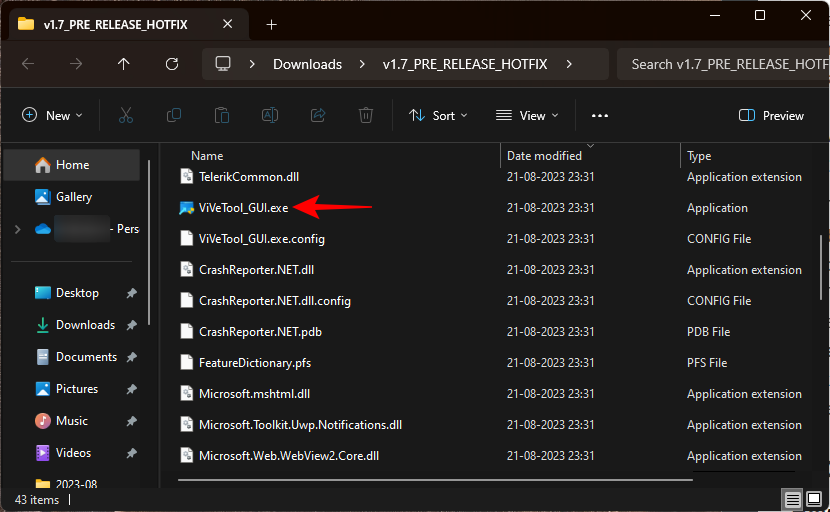
- In the extracted folder, launch ViVeTool_GUI.exe.
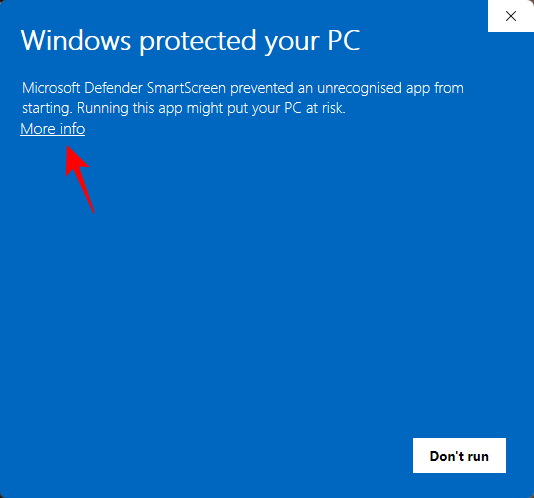
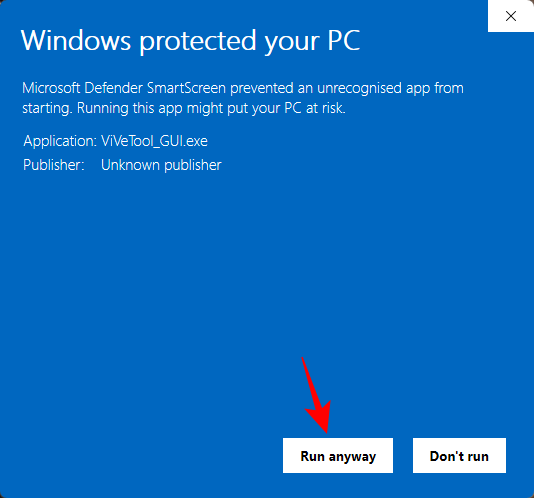
- On the Microsoft Defender SmartScreen, click on More info.
- Then select Run anyway.
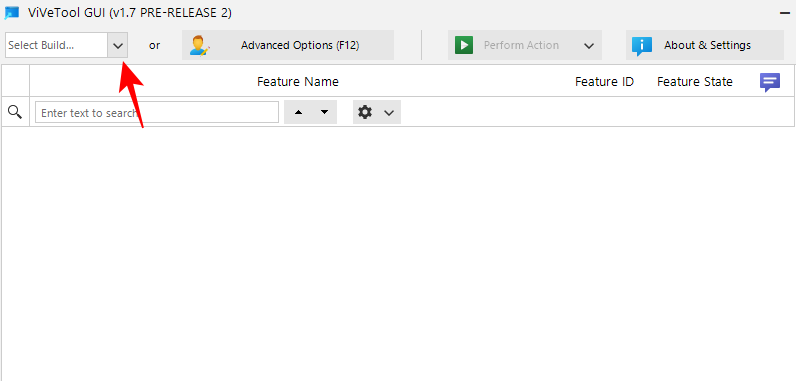
- Once the ViVeTool GUI opens, click on the ‘Search Build’ drop-down menu at the top left corner.
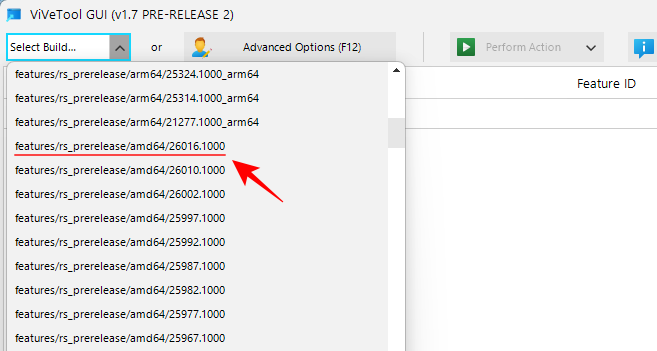
- Then select one of the latest Windows builds.
- Wait for the features to populate. Once done, click in the search field.
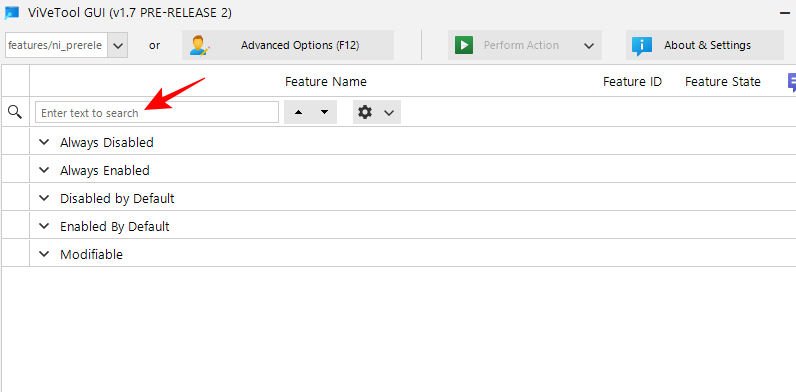
- Then type EndTask. You should see the ‘EndTask’ feature appear in the results.
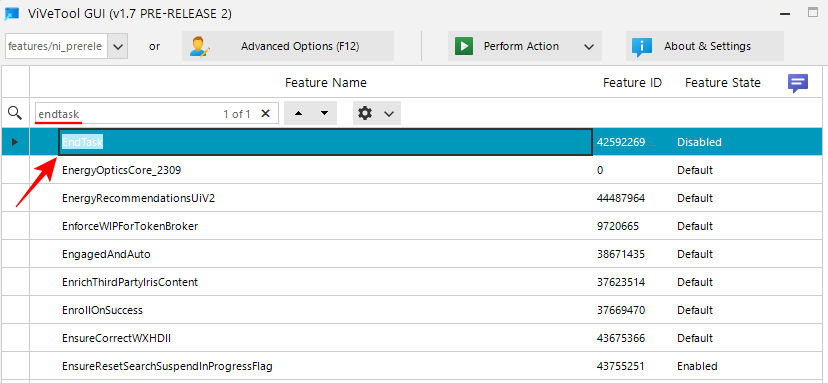
- Select it and then click on Perform Action at the top.
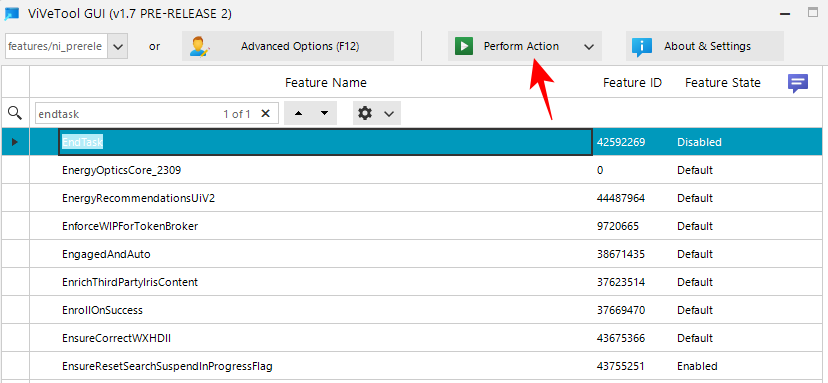
- And select Activate feature.

- Once enabled, you will get a message confirming the same.
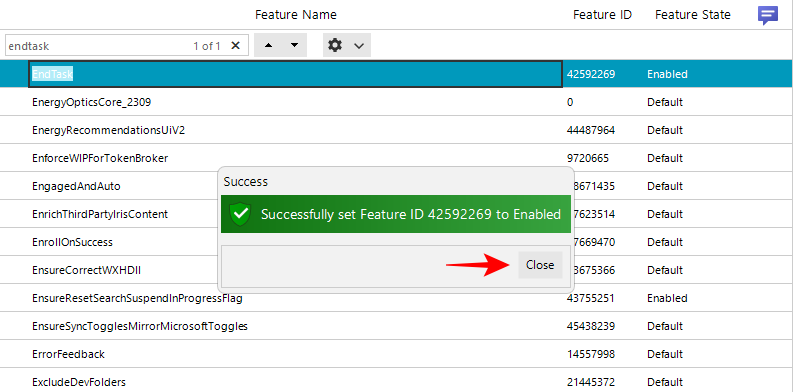
- Restart your computer for good effect. Then go to the ‘For Developers’ page in the Settings app as shown before and enable ‘End Task’ from there.
- You will now be able to right-click on any open task and select End Task to quit all its instances and processes.
Related: How to Install Windows 11 Canary Build
FAQ
Let’s consider a few commonly asked questions about the new ‘End Task’ button in the taskbar.
What’s the feature ID of the ‘End Task’ button in the taskbar?
The feature ID of the ‘End Taskbar’ button is 42592269. You can use this ID to enable the End Taskbar feature with the help of ViVeTool. Refer to methods 3 and 4 in the guide given above.
How do I end all tasks using the ‘End task’ button on the taskbar?
The ‘End task’ option that you get on the taskbar can only end tasks associated with the selected app. It isn’t meant to end all open tasks. You will have to individually right-click all tasks in the taskbar and end them separately.
The new End Task feature in the taskbar makes it much more convenient to kill unresponsive apps and tasks. The fact that the option is within the ‘For developers’ Settings page and is disabled by default seems to suggest that it will remain so even when it makes it to a stable build.
But given how instrumental it can be on a daily basis, it is something that you should definitely consider enabling and save yourself the trouble of opening the Task Manager every time an app or a program freezes up on you. We hope this guide helped you with the same. Until next time!
RELATED
- How to Copy Text From Anywhere on Screen With Microsoft PowerToys
- How to Disable a Keyboard Key on Windows 11 Using PowerToys from Microsoft
- How to Resize Images in Bulk with PowerToys on Windows
- How to Change the Background of An Image for Free on Web
- How to Install Google Play Games Beta on Your Windows PC to Play Android Games


