What to know
- Device Usage options allow you to tell Microsoft and Windows 11 how you wish to use your PC. Suggestions, recommendations, and tips are then curated to your use case scenarios accordingly. In some cases, you might also be offered free trials for certain Micorosft services.
- The easiest way to edit and change your Device Usage options is by using the Settings app. To do so, head to Settings > Personalization > Device Usage. You can then turn on the toggles for your preferred use cases.
Microsoft has been improving Windows 11 and testing out new features with each feature update since its release. Designed to be a more user-focused experience, the company has slowly shaped Windows 11 to be an intuitive and easy-to-use OS. Most settings have now been moved from the Control Panel to the Settings app, and the UI has been streamlined to reflect the overall Windows 11 design. Microsoft offers even more ways of personalizing your experience when using Windows 11 using the Device Usage options.
These options are first presented during the OOBE of Windows 11 but can be customized later on as well. They personalize your overall Windows 11 experience by curating the OS to your needs and workflows. Let’s find out more about Device Usage options and how you can customize them to your advantage.
Related: How to stop Windows 11 update [7 methods explained]
What are Device Usage options in Windows 11 and why you should customize them?
Device Usage options help tell Windows 11 and Microsoft, how you plan to use your device. Once you select the appropriate options, ads in Windows 11 are personalized based on your interests. Additionally, Windows 11 will share tips and suggestions based on your Device Usage settings.
Recommendations will also be curated to your workflow depending on how you plan to use your device. Windows 11 has the following Device usage options that you can choose from. These will help tell Windows 11 and Microsoft how you plan to use your device. This data is kept anonymous and isn’t shared with third-party apps or services.
- Gaming: This option will allow Windows 11 to show you ads based on what other gamers are interested in. You might also be offered an XBOX Game Pass trial and app suggestions will be centered around gaming. OS tips and recommendations will also focus on gaming to help you make the most of your system’s resources.
- Family: This option will lead to family-friendly apps. You might also be suggested features developed with families in mind including privacy and security recommendations. Additionally, you might also be prompted to set up a Microsoft Family Group so you can make the most out of your system.
- Creativity: Selecting Creativity will lead to ads focused on content creators. Your app suggestions and OS recommendations will also be tailored with creative workflows in mind.
- School: Selecting school will serve you ads centered around education. Your app suggestions will also focus on the same and OS recommendations might include suggestions to set up and use OneDrive.
- Entertainment: When you select Entertainment, ads will focus on the latest happenings in the world of entertainment. Additionally, pinned app suggestions will also be for entertainment apps and websites.
- Business: Selecting this option will lead to ads centered around growing your business. You will also be offered app suggestions centered around productivity and similar services. Additionally, you might also be offered a trial for Microsoft 365 Business.
Related: How to check NAT type on Windows 11
How to use Device Usage options to customize your PC to your needs and use
Now that you’re familiar with Device Usage options here’s how you can customize them on your PC. Follow either section below depending on your preferred method.
Which method to use?
Of course, the first method that uses the Settings app is simply the easiest and greatest, so choose any other method over this only if you really need to. Let’s get started.
Method 1: Customize Device Options using the Settings app
Here’s how you can use the Settings app to customize Device Usage options on your PC. Follow the steps below to help you along with the process.
Open the Settings app by pressing Windows + i on your keyboard. Now click Personalization on your left.

Click Device Usage at the bottom on your right.

Now click and turn on the toggle for one of the following options depending on how you wish to use your device.
- Gaming
- Family
- Creativity
- School
- Entertainment
- Business

And that’s it! You will now have customized your Device Usage options based on your preferences.
Related: Top 6 ways to crop a video on Windows 11
Method 2: Customize Device Options using the Registry Editor
You can also customize Device Usage options using the Registry Editor. Follow the steps below to help you along with the process.
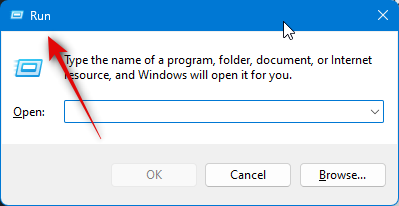
Open Run by pressing Windows + R.
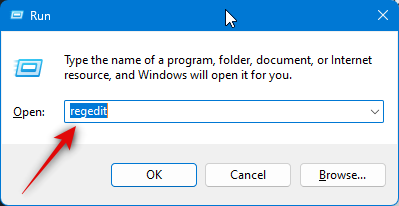
Type the following and press Enter on your keyboard.
regedit
Now navigate to the following path by either using the left sidebar or by using the address bar at the top.
HKEY_CURRENT_USER\Software\Microsoft\Windows\CurrentVersion\CloudExperienceHost\Intent
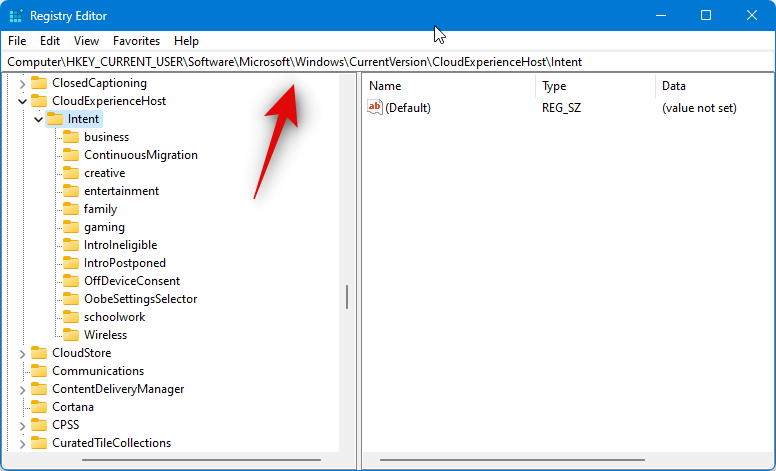
Next, click and select the Device Usage option you wish to customize from the left sidebar.

Double-click Intent on your right.

Set the Value data: to 1 to enable the option or 0 if you wish to disable it.

Click OK once you’re done.

Next double click the Priority DWORD value.

Set its Value data: to 0.

Click OK once you’re done.

Now click and select the OffDeviceConsent key from the left sidebar.

Double-click the accepted DWORD value on your right.
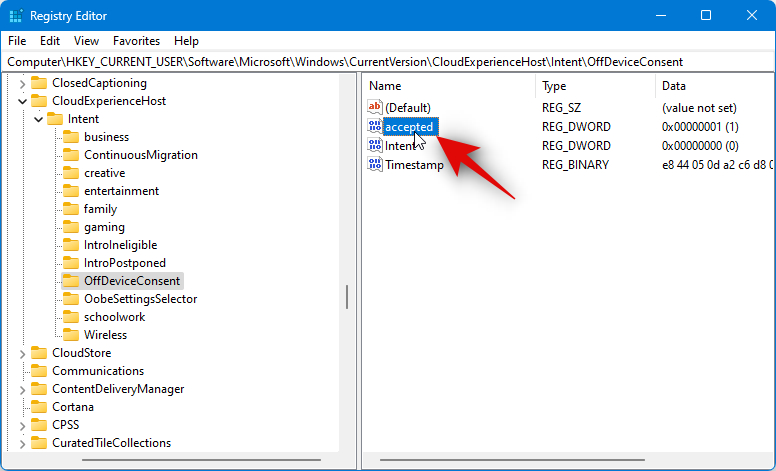
Set its Value data: to 1.
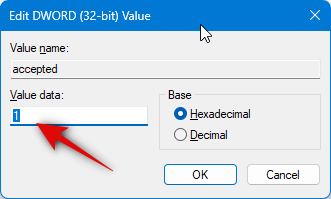
Click OK.
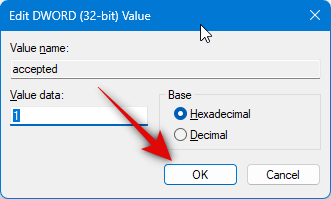
Now close the Registry Editor and restart your PC to apply the changes.
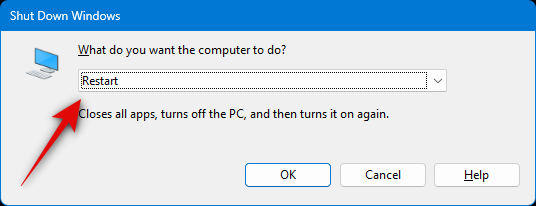
And that’s how you can customize your Device Usage options using the Registry Editor. You can repeat the steps above to customize other Device Usage options as well.
Method 3: Customize Device Options using PowerShell
You can also customize your Device Usage options using PowerShell. Follow the steps below to help you along with the process.
Open Run by pressing Windows + R.

Now type the following and press Ctrl + Shift + Enter.
powershell

PowerShell will now launch as an administrator. Use one of the commands below to enable or disable the relevant device usage option based on your preferences.
For Gaming
Use the commands below to enable the Gaming device usage option. Replace 1 with 0 and vice versa depending on the command to disable this option based on your preferences.
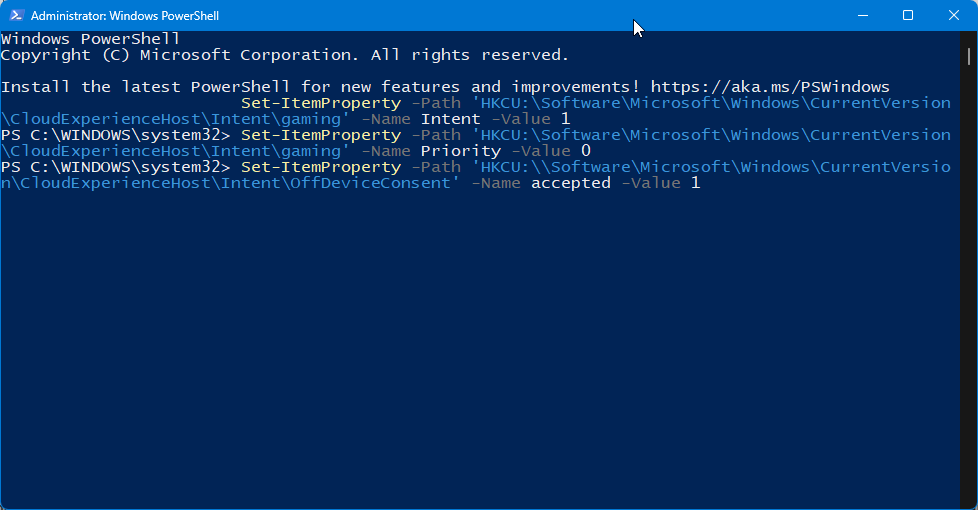
Set-ItemProperty -Path 'HKCU:\Software\Microsoft\Windows\CurrentVersion\CloudExperienceHost\Intent\gaming' -Name Intent -Value 1Set-ItemProperty -Path 'HKCU:\Software\Microsoft\Windows\CurrentVersion\CloudExperienceHost\Intent\gaming' -Name Priority -Value 0Set-ItemProperty -Path 'HKCU:\\Software\Microsoft\Windows\CurrentVersion\CloudExperienceHost\Intent\OffDeviceConsent' -Name accepted -Value 1
For Family
These commands will help you enable or disable the Family Device Usage option. As we did earlier, execute the commands individually and replace 1 with 0 and vice versa to disable this Device Usage option.

Set-ItemProperty -Path 'HKCU:\Software\Microsoft\Windows\CurrentVersion\CloudExperienceHost\Intent\family' -Name Intent -Value 1Set-ItemProperty -Path 'HKCU:\Software\Microsoft\Windows\CurrentVersion\CloudExperienceHost\Intent\family' -Name Priority -Value 0Set-ItemProperty -Path 'HKCU:\\Software\Microsoft\Windows\CurrentVersion\CloudExperienceHost\Intent\OffDeviceConsent' -Name accepted -Value 1
For Creativity
The following commands will help you enable the Creativity Device Usage option. Execute these commands individually and replace 1 with 0 and vice versa to disable the option instead.

Set-ItemProperty -Path 'HKCU:\Software\Microsoft\Windows\CurrentVersion\CloudExperienceHost\Intent\creative' -Name Intent -Value 1Set-ItemProperty -Path 'HKCU:\Software\Microsoft\Windows\CurrentVersion\CloudExperienceHost\Intent\creative' -Name Priority -Value 0Set-ItemProperty -Path 'HKCU:\\Software\Microsoft\Windows\CurrentVersion\CloudExperienceHost\Intent\OffDeviceConsent' -Name accepted -Value 1
For School
Use these commands to enable School Device Usage option. Replace 1 with 0 and vice versa to disable the School Device Usage option instead.

Set-ItemProperty -Path 'HKCU:\Software\Microsoft\Windows\CurrentVersion\CloudExperienceHost\Intent\schoolwork' -Name Intent -Value 1Set-ItemProperty -Path 'HKCU:\Software\Microsoft\Windows\CurrentVersion\CloudExperienceHost\Intent\schoolwork' -Name Priority -Value 0Set-ItemProperty -Path 'HKCU:\\Software\Microsoft\Windows\CurrentVersion\CloudExperienceHost\Intent\OffDeviceConsent' -Name accepted -Value 1
For Entertainment
These commands will help you enable the Entertainment Device Usage option. As before, replace 1 with 0 and vice versa to disable this option instead.

Set-ItemProperty -Path 'HKCU:\Software\Microsoft\Windows\CurrentVersion\CloudExperienceHost\Intent\entertainment' -Name Intent -Value 1Set-ItemProperty -Path 'HKCU:\Software\Microsoft\Windows\CurrentVersion\CloudExperienceHost\Intent\entertainment' -Name Priority -Value 0Set-ItemProperty -Path 'HKCU:\\Software\Microsoft\Windows\CurrentVersion\CloudExperienceHost\Intent\OffDeviceConsent' -Name accepted -Value 1
For Business
Use the commands below to enable the Business Device Usage option. You can replace 1 with 0 and vice versa to disable this option instead.

Set-ItemProperty -Path 'HKCU:\Software\Microsoft\Windows\CurrentVersion\CloudExperienceHost\Intent\business' -Name Intent -Value 1Set-ItemProperty -Path 'HKCU:\Software\Microsoft\Windows\CurrentVersion\CloudExperienceHost\Intent\business' -Name Priority -Value 0Set-ItemProperty -Path 'HKCU:\\Software\Microsoft\Windows\CurrentVersion\CloudExperienceHost\Intent\OffDeviceConsent' -Name accepted -Value 1
Once you’re done simply close PowerShell and changes should be applied to your PC.
Method 4: Customize Device Options using the Command Prompt (CMD)
You can also use the command prompt to modify and change your Device Usage options according to your preferences. Follow the steps below to help you along with the process.
Open Run by pressing Windows + R on your keyboard.

Now type the following and press Ctrl + Shift + Enter.
cmd

Once Command Prompt is open, use one of the commands below depending on the Device Usage options you wish to enable. If you wish to disable any option, replace 1 with 0 in the relevant commands below and vice versa.
For Gaming
These commands will help you toggle the Gaming Device Usage option.
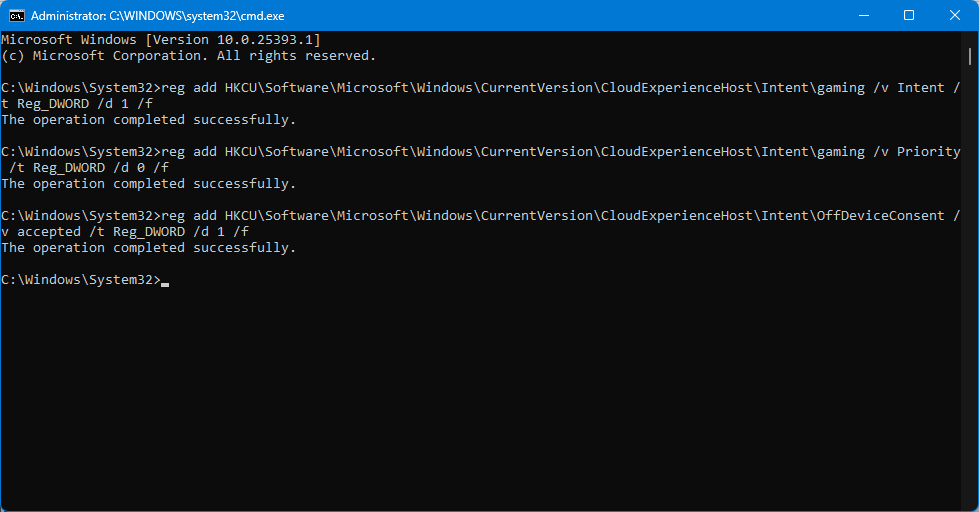
reg add HKCU\Software\Microsoft\Windows\CurrentVersion\CloudExperienceHost\Intent\gaming /v Intent /t Reg_DWORD /d 1 /freg add HKCU\Software\Microsoft\Windows\CurrentVersion\CloudExperienceHost\Intent\gaming /v Priority /t Reg_DWORD /d 0 /freg add HKCU\Software\Microsoft\Windows\CurrentVersion\CloudExperienceHost\Intent\OffDeviceConsent /v accepted /t Reg_DWORD /d 1 /f
For Family
The commands below will help you toggle the Family Device Usage option on your PC.

reg add HKCU\Software\Microsoft\Windows\CurrentVersion\CloudExperienceHost\Intent\family /v Intent /t Reg_DWORD /d 1 /freg add HKCU\Software\Microsoft\Windows\CurrentVersion\CloudExperienceHost\Intent\family /v Priority /t Reg_DWORD /d 0 /freg add HKCU\Software\Microsoft\Windows\CurrentVersion\CloudExperienceHost\Intent\OffDeviceConsent /v accepted /t Reg_DWORD /d 1 /f
For Creativity
Use the commands below to toggle the Creativity Device Usage option on your PC.

reg add HKCU\Software\Microsoft\Windows\CurrentVersion\CloudExperienceHost\Intent\creative /v Intent /t Reg_DWORD /d 1 /freg add HKCU\Software\Microsoft\Windows\CurrentVersion\CloudExperienceHost\Intent\creative /v Priority /t Reg_DWORD /d 0 /freg add HKCU\Software\Microsoft\Windows\CurrentVersion\CloudExperienceHost\Intent\OffDeviceConsent /v accepted /t Reg_DWORD /d 1 /f
For School
The following commands will help you toggle the School Device Usage option on your PC.

reg add HKCU\Software\Microsoft\Windows\CurrentVersion\CloudExperienceHost\Intent\schoolwork /v Intent /t Reg_DWORD /d 1 /freg add HKCU\Software\Microsoft\Windows\CurrentVersion\CloudExperienceHost\Intent\schoolwork /v Priority /t Reg_DWORD /d 0 /freg add HKCU\Software\Microsoft\Windows\CurrentVersion\CloudExperienceHost\Intent\OffDeviceConsent /v accepted /t Reg_DWORD /d 1 /f
For Entertainment
Use these commands to toggle the Entertainment Device Usage option.
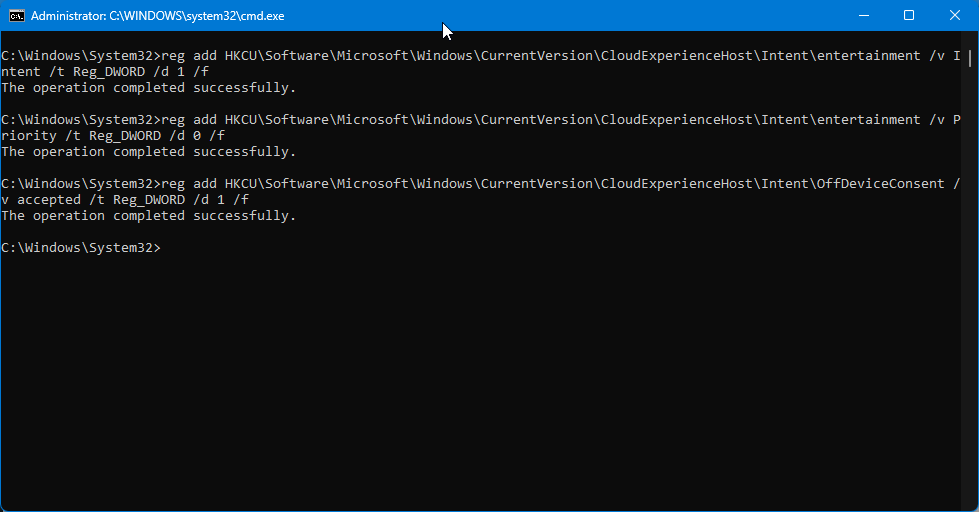
reg add HKCU\Software\Microsoft\Windows\CurrentVersion\CloudExperienceHost\Intent\entertainment /v Intent /t Reg_DWORD /d 1 /freg add HKCU\Software\Microsoft\Windows\CurrentVersion\CloudExperienceHost\Intent\entertainment /v Priority /t Reg_DWORD /d 0 /freg add HKCU\Software\Microsoft\Windows\CurrentVersion\CloudExperienceHost\Intent\OffDeviceConsent /v accepted /t Reg_DWORD /d 1 /f
For Business
These commands will help you toggle the Business Device Usage option.

reg add HKCU\Software\Microsoft\Windows\CurrentVersion\CloudExperienceHost\Intent\business /v Intent /t Reg_DWORD /d 1 /freg add HKCU\Software\Microsoft\Windows\CurrentVersion\CloudExperienceHost\Intent\business /v Priority /t Reg_DWORD /d 0 /freg add HKCU\Software\Microsoft\Windows\CurrentVersion\CloudExperienceHost\Intent\OffDeviceConsent /v accepted /t Reg_DWORD /d 1 /f
We hope the post above helped you easily customize and manage Device Usage options on your Windows 11 PC. If you face any issues or have any more questions, feel free to reach out to us using the comments section below.


