

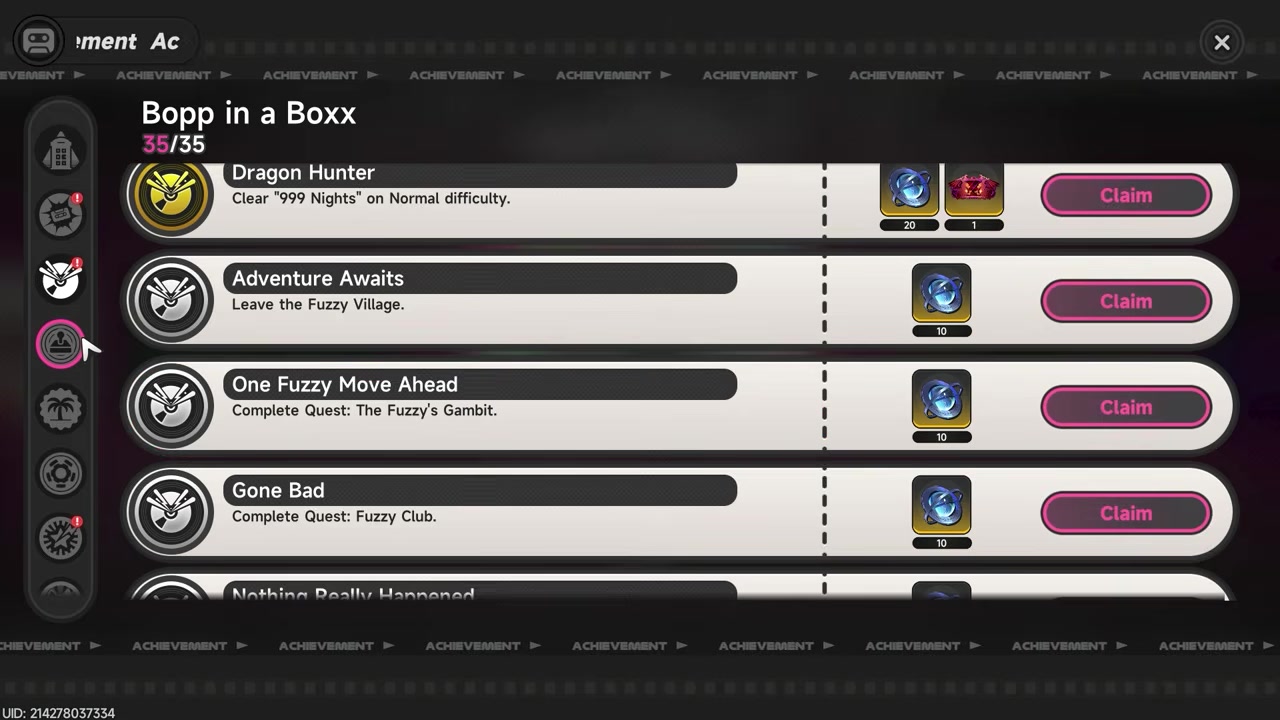
The available 1.2 route covers 20 new achievements: 8 Bob in the Box quest/story clears, 5 Single Frame objectives, and 7 Gravity Type objectives tied to dice rolls, damage ticks, chests, difficulty clears, hired-ally combat, challenge clears, Bastille, and gambling.
The 1.2 achievement route runs through 999 Nights, Fuzzy Village, and the Warren Continent board areas. A few entries are labeled by their objective instead of an achievement title because the route exposes the unlock condition more clearly than the UI name. Check your achievement tabs after each clear, chest run, and challenge so you do not miss an Annulith claim sitting in another category.
- NTE 1.2 achievement checklist
- Access requirements for 999 Nights
- Bob in the Box quest clears
- I’ll Be Back bonfire reset method
- It’s 100 dice-roll method
- Mold damage from Crimson Castle fake chests
- Burn damage in Chocolate Volcano lava
- Watch Your Step enemy kills in lava
- Now I Chose You hired-ally fight
- Weapon identification dice-roll objective
- Chest Master and difficulty clears
- Bastille challenge checklist
- Bastille Fuzzy Rolling Things waves
- Lucky Guy loss farm and backup 100 roll
- Efficient cleanup order and bug fixes
- Frequently Asked Questions
NTE 1.2 achievement checklist
| Achievement | Unlock method |
|---|---|
| Bob in the Box – 8 achievements | |
| Bob in the Box normal difficulty clear | Clear the Bob in the Box route on normal difficulty. |
| Adventure Awaits | Finish the Bob in the Box objective tied to Adventure Awaits. |
| Bob in the Box side-quest clear 1 of 6 | Complete the matching Bob in the Box side quest. |
| Bob in the Box side-quest clear 2 of 6 | Complete the matching Bob in the Box side quest. |
| Bob in the Box side-quest clear 3 of 6 | Complete the matching Bob in the Box side quest. |
| Bob in the Box side-quest clear 4 of 6 | Complete the matching Bob in the Box side quest. |
| Bob in the Box side-quest clear 5 of 6 | Complete the matching Bob in the Box side quest. |
| Bob in the Box side-quest clear 6 of 6 | Finish the remaining Bob in the Box side-quest chain. |
| Single Frame – 5 achievements | |
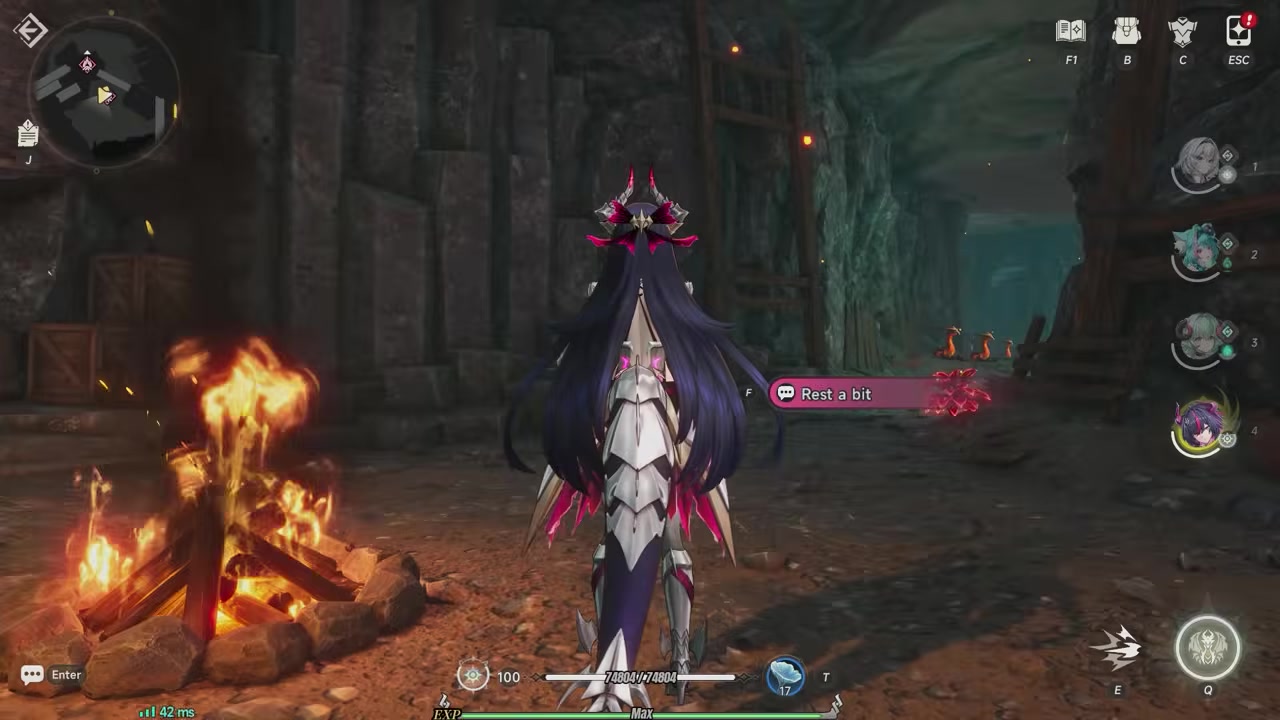
| I’ll Be Back | Sit at a bonfire, reset, and repeat until you reach 10 resets. |
| It’s 100 | Roll exactly 100 from a chest, equipment identification, or Lucky Guy gamble. |
| Crimson Castle mold-damage objective | Open fake golden chests and take 33 mold-damage hits. |
| Chocolate Volcano burn-damage objective | Stand in lava until you take 33 burn-damage hits. |
| Lucky Guy loss objective | Lose the Lucky Guy gamble 33 times by rolling below 50. |
| Gravity Type – 7 objectives | |
| Watch Your Step | Kill 3 enemies while you and the enemies are touching lava. |
| Now I Chose You | Hire an ally NPC, keep them in your party, and land hits in a boss fight. |
| Weapon-identification dice-roll objective | Identify weapons or equipment until the dice-roll requirement is met. |
| Chest Master | Open 100 chests across the 1.2 route. |
| Difficulty-clear objective | Clear the 999 Nights difficulty sweep. |
| Challenge-clear prerequisite objective | Clear the required challenges before Bastille. |
| Bastille timed-wave objective | Turn in Fuzzy Rolling Things and clear the enemy waves in time. |
KEY!The cleanest way to handle the list is to avoid farming isolated achievements too early. Let story clears, chests, dice rolls, and difficulty clears stack naturally, then clean up the lava, Bastille, and gambling objectives at the end.
Save Lucky Guy for cleanup: the same gambling loop gives repeat dice rolls for It’s 100 while you work toward 33 losses.
Access requirements for 999 Nights
| Requirement | Where to start |
|---|---|
| Version 1.2 update | Launch after updating to the 999 Nights patch. |
| Dreamwalk Corridor | Clear this story requirement before Fighting with a Dragon. |
| Hunter Lvl 26 | Reach the level gate for the 1.2 main episode. |
| Fighting with a Dragon | Start the episode to access 999 Nights and Warren Continent. |
| Fuzzy Village portal | Use the village portal to enter the Warren Continent board area. |
Version 1.2 achievement hunting starts after the update and after your account can enter the Fighting with a Dragon episode. That means you need Dreamwalk Corridor cleared and Hunter Lvl 26 reached before the Warren Continent route opens.
The episode begins from Eibon, then sends you through Nanally, Mint’s apartment, Iroi, and Shinku before the board-world content opens. Your core hub is Fuzzy Village, with the portal at the back leading into Warren Continent and areas such as Chocolate Volcano, Milk Ice Mountain, Amber Sugar Lake, and Crimson Castle.
On PC, press F1 inside 999 Nights to check the task menu between clears. It is also worth checking the broader achievement tabs, since rewards can sit under categories like Exploration, Battle, Quests, Interest, Bond, Develop, Gameplay, and City.
Bob in the Box quest clears
| Route item | What |
|---|---|
| Normal difficulty | Clear Bob in the Box on normal difficulty. |
| Adventure Awaits | Complete the Bob in the Box objective with this title. |
| Side-quest clears | Finish the Bob in the Box side quests until the set reaches 8 total claims. |
The Bob in the Box portion is mostly a story, side-quest, and difficulty-clear set. The route accounts for 8 achievements here, including the normal difficulty clear, Adventure Awaits, and the remaining side-quest clears.
Do this section before heavy cleanup. The Bob in the Box clears overlap naturally with early 1.2 progression, and you will collect chests, equipment, and dice-roll chances while moving through the same content.
I’ll Be Back bonfire reset method
STEP 1/3
Sit at a bonfire
Use a bonfire in the 1.2 route and let your character sit.
STEP 2/3
Reset at the bonfire
Trigger the bonfire reset after sitting down.
STEP 3/3
Repeat 10 total resets
Keep sitting and resetting until I’ll Be Back pops after the tenth reset.
It’s 100 dice-roll method
It’s 100 is pure dice RNG: you need a roll to land exactly on 100. You can get that roll from precious chests, from weapon or equipment identification, or from the Lucky Guy gambling loop near the arena.
STEP 1/3
Open precious chests
Keep opening valuable chests while exploring Warren Continent for natural dice-roll chances.
STEP 2/3
Identify weapons or equipment
Use identification rolls from gear drops to chase the same 100 result.
STEP 3/3
Use Lucky Guy for repeats
If chests and gear do not hit 100, use the Lucky Guy gamble later for repeat rolls.
Mold damage from Crimson Castle fake chests
The mold-damage achievement comes from fake golden chests in Crimson Castle. The target is 33 mold-damage hits, and three fake chests near the boss can be enough if you stay in the damage long enough.
STEP 1/5
Teleport near the Crimson Castle boss
Use the Crimson Castle teleport point closest to the boss area.
STEP 2/5
Open the fake golden chests
Trigger the fake chests near the boss and stay close enough to take mold damage.
STEP 3/5
Reach 33 mold hits
Let the mold ticks build until the achievement triggers.
STEP 4/5
Use the farming-spot chest if needed
If one chest was already used, teleport near the farming spot and open the golden chest behind you near the mobs.
STEP 5/5
Check the bridge for extras
Crimson Castle has more fake golden chests near the bridge if you still need more mold ticks.
Burn damage in Chocolate Volcano lava
STEP 1/3
Teleport to Chocolate Volcano
Use the middle-area teleport point in the volcano.
STEP 2/3
Drop into the lava
Jump down into the lava pool from the nearby ledge.
STEP 3/3
Take 33 burn hits
Stay in the lava until the burn-damage achievement triggers.
Watch Your Step enemy kills in lava
You can do Watch Your Step in the same Chocolate Volcano lava trip as the burn-damage achievement. The important part is timing: the kill only counts when both you and the enemy are touching lava.
STEP 1/5
Stay in the lava area
Remain in the Chocolate Volcano lava zone after starting the burn-damage objective.
STEP 2/5
Aggro nearby enemies
Pull enemies toward the lava and avoid bursting them while they are still on dry ground.
STEP 3/5
Wait for lava contact
Let the enemy reach the lava before attacking.
STEP 4/5
Kill 3 enemies in lava
Defeat three enemies while both sides are touching lava to unlock Watch Your Step.
STEP 5/5
Reset the pack if needed
If enemies die too early, teleport out and back in to reset the attempt.
Now I Chose You hired-ally fight
STEP 1/3
Hire an ally NPC
Hire any available ally NPC near the boss route.
STEP 2/3
Keep the ally in your party
Start the nearby boss fight while the hired ally is active.
STEP 3/3
Land a few boss hits
Hit the boss a couple of times with the ally present; a full boss kill may not be necessary.
Weapon identification dice-roll objective
The weapon-identification achievement is another dice-roll objective, so it pairs well with It’s 100. Every identification gives progress toward the roll count, and a lucky 100 roll can finish both goals at once.
STEP 1/4
Collect unidentified gear
Keep weapons or equipment from your Warren Continent run.
STEP 2/4
Identify the gear
Use identification to generate dice rolls toward the 33-roll objective.
STEP 3/4
Watch for a 100
If any identification roll lands on 100, claim It’s 100 too.
STEP 4/4
Clear backpack space
If your backpack fills up, make room before continuing the identification loop.
Chest Master and difficulty clears
| Objective | Unlock method |
|---|---|
| Chest Master | Open 100 chests across the 1.2 route. |
| Normal difficulty clear | Finish the normal 999 Nights route. |
| Challenge difficulty clear | Clear the replay challenge difficulty. |
| Nightmare difficulty clear | Clear the nightmare difficulty route. |
Chest Master requires 100 chests, so it should progress while you clear story, side quests, Crimson Castle fake chests, and normal exploration. Do not leave it for the end unless you are already close, because chest hunting also gives more dice-roll chances.
After each difficulty clear, check the achievement tabs before moving on. The route expects the full difficulty sweep, and the Bob in the Box normal clear can overlap with that cleanup.
Bastille challenge checklist
| Challenge | Requirement |
|---|---|
| Fuzzy Club | Clear it before attempting Bastille. |
| Bubble Defense | Clear it before attempting Bastille. |
| Double Jumping King | Clear it before attempting Bastille. |
| Wipeout | Clear it before attempting Bastille. |
| Zombie King | Clear it before attempting Bastille. |
| Fuzzy Gambit | If Red Haze does not spawn, enter the domain, leave the game, and re-enter until it appears. |
| Dragon Shinku | Use Fuzzy Curse on a character you do not rely on, then stay close and let the curse handle the fight. |
Before you go to Bastille, clear the required challenge list. This is where most route delays happen, especially if Red Haze fails to appear for Fuzzy Gambit or if Dragon Shinku feels overtuned.
For Dragon Shinku, put Fuzzy Curse on an unused character rather than your main damage setup. If you use Mint only as a buffer, she is a good candidate for carrying the curse while the fight plays out.
Bastille Fuzzy Rolling Things waves
Bastille warning: this objective can behave badly. Enemy waves may fail to appear, movement can lock, random kickouts can happen, and failed attempts can consume your Fuzzy Rolling Things. Since those come from boss drops with a low drop rate, bring spares or wait until you are ready to risk the attempt.
STEP 1/5
Farm Fuzzy Rolling Things
Get Fuzzy Rolling Things from boss drops before entering Bastille.
STEP 2/5
Enter Bastille
Turn in Fuzzy Rolling Things to start the timed enemy-wave challenge.
STEP 3/5
Clear the enemy waves
Kill each wave within the time limit when enemies appear correctly.
STEP 4/5
Stop if the instance breaks
If waves do not spawn, movement locks, or you get kicked out, leave and return later with spare tokens.
STEP 5/5
Claim the Bastille objective
Once a timed-wave clear registers, claim the Bastille-related achievement.
Lucky Guy loss farm and backup 100 roll
Lucky Guy is the final cleanup stop for the Single Frame set. He is near the arena upstairs in Fuzzy Village, and you should bring gold coins before starting the gambling loop.
STEP 1/6
Return to Fuzzy Village
Go back to the village after finishing Bastille or your other cleanup tasks.
STEP 2/6
Find Lucky Guy near the arena
Head toward the arena side and go upstairs to reach Lucky Guy.
STEP 3/6
Bring gold coins
Have about 30K gold coins available before gambling.
STEP 4/6
Gamble for losses
Rolls below 50 count as losses, while rolls above 50 count as wins.
STEP 5/6
Reach 33 losses
Keep gambling until the loss achievement triggers at 33 losses.
STEP 6/6
<
p class=”vg-step-title” id=”keep-rolling-for-it-s-100″ style=”margin:16px 0 6px”>Keep rolling for It’s 100
If It’s 100 is still missing, continue the same loop until a roll lands on 100.
Video help
Efficient cleanup order and bug fixes
| Problem | Fix |
|---|---|
| Missed fake Crimson Castle chests | Use the extra golden chest near the farming spot or the fake chests near the bridge. |
| It’s 100 will not roll | Finish chests and gear identification first, then use Lucky Guy for repeat dice attempts. |
| Bastille waves or movement break | Stop spending Fuzzy Rolling Things casually and return with spare boss-drop tokens. |
| Red Haze does not spawn | Re-enter the Fuzzy Gambit domain, leave the game, and repeat until Red Haze appears. |
| Enemies die before touching lava | Lower your damage, hold attacks, wait for lava contact, or teleport out and back in to reset. |
Start with story, Bob in the Box, side quests, and the difficulty sweep, because those feed chest count, gear drops, and dice-roll chances. After that, clean up I’ll Be Back, the Crimson Castle mold ticks, and the Chocolate Volcano burn and lava-kill objectives. Save Bastille for late cleanup because of its unstable behavior, then use Lucky Guy for any remaining gambling losses or the missing It’s 100 roll.
Frequently Asked Questions
How many new 1.2 achievements does this route cover?
It covers 20 achievements: 8 from Bob in the Box, 5 from Single Frame, and 7 from Gravity Type objectives.
Do I need Dreamwalk Corridor and Hunter Lvl 26 first?
Yes. You need Dreamwalk Corridor completed and Hunter Lvl 26 reached before starting Fighting with a Dragon, which opens 999 Nights and Warren Continent.
How do I get It’s 100 if chests and weapons did not roll 100?
Use Lucky Guy near the arena upstairs in Fuzzy Village. The gambling loop gives repeat dice rolls, so it can finish It’s 100 while you also chase the 33-loss achievement.
Where can I get more mold damage after opening Crimson Castle chests?
Teleport near the Crimson Castle farming spot and check behind you near the mobs for another golden chest. If you still need mold ticks, check the bridge area for more fake golden chests.
How do I stop enemies from dying before the lava for Watch Your Step?
Pull enemies toward the Chocolate Volcano lava and stop attacking until they touch it. If your damage is too high, use a weaker setup or reset the area by teleporting out and back in.
More questions⤵
Is the Bastille achievement bugged?
Bastille can break during the timed-wave objective. Waves may not appear, movement can lock, kickouts can happen, and Fuzzy Rolling Things can be lost, so save it for late cleanup and bring spare boss-drop tokens.
Do I need Shinku to finish these achievements?
You need to clear the Dragon Shinku challenge before Bastille, but the route does not require owning Shinku. Use Fuzzy Curse on a character you do not rely on and stay close until the fight ends.




Leave a Reply