It’s safe to say that Widgets are easily one of the best features Microsoft packed in Windows 11. We know, some of you may want to disable widgets at first sight, but we can agree most people do find it pretty cool. That’s why it can hurt when widgets are not working for you on Windows 11. Here are some ways to fix it when Windows 11 widgets are not working alright for you.
-
How to fix Windows 11 widgets not working in 15 ways
- Method 1: Turn off and on the Widget
- Method 2: Kill the Widget’s task manually
- Method 3: Restart the File Explorer app (explorer.exe)
- Method 4: Repair Microsoft Edge
- Method 5: Sign in again with your Microsoft account
- Method 6: Check and enable Widgets in the Registry Editor
- Method 7: Check and enable Widgets in the Group Policy Editor
- Method 8: Try setting Microsoft Edge as your default browser
- Method 9: Re-install Windows web experience pack
- Method 10: Repair Microsoft Edge Webview2 Runtime
- Method 11: Downgrade Web Experience pack to v421.20050.505
- Method 12: Run an SFC scan
- Method 13: Run DISM and Chkdsk scans
- Method 14: Wait for an update for Microsoft Edge
- Method 15: Contact Microsoft Support
How to fix Windows 11 widgets not working in 15 ways
Widgets can become buggy or broken due to issues with Microsoft Edge and its companion components, or, you may face issues with Widgets because of an OS-level bug or maybe a missing system file. All these issues can be fixed with the methods listed below. We recommend you start with the first fix and make your way through the list until you manage to fix your issue.
Method 1: Turn off and on the Widget
We first recommend you try toggling Widgets from the Settings app again. You could be facing a small bug, and toggling Widgets again will help restart the background service. Follow the steps below to help you along with the process.
Open the Settings app using the Windows + i keyboard shortcut. Now click Personalization.
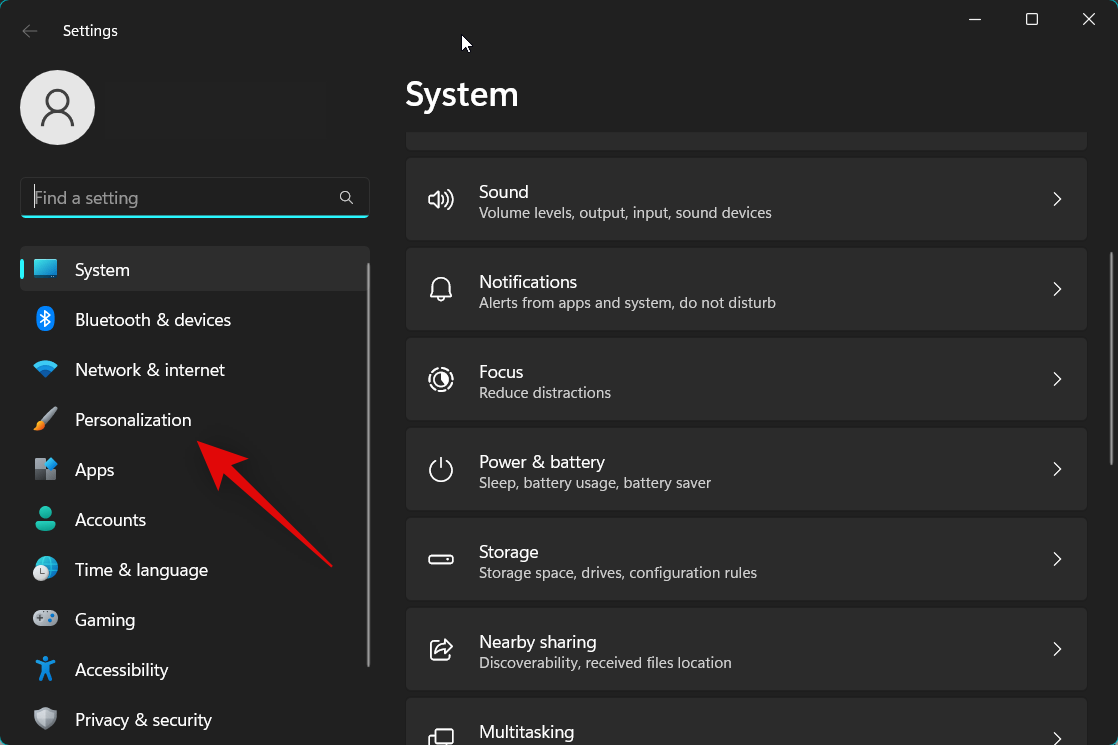
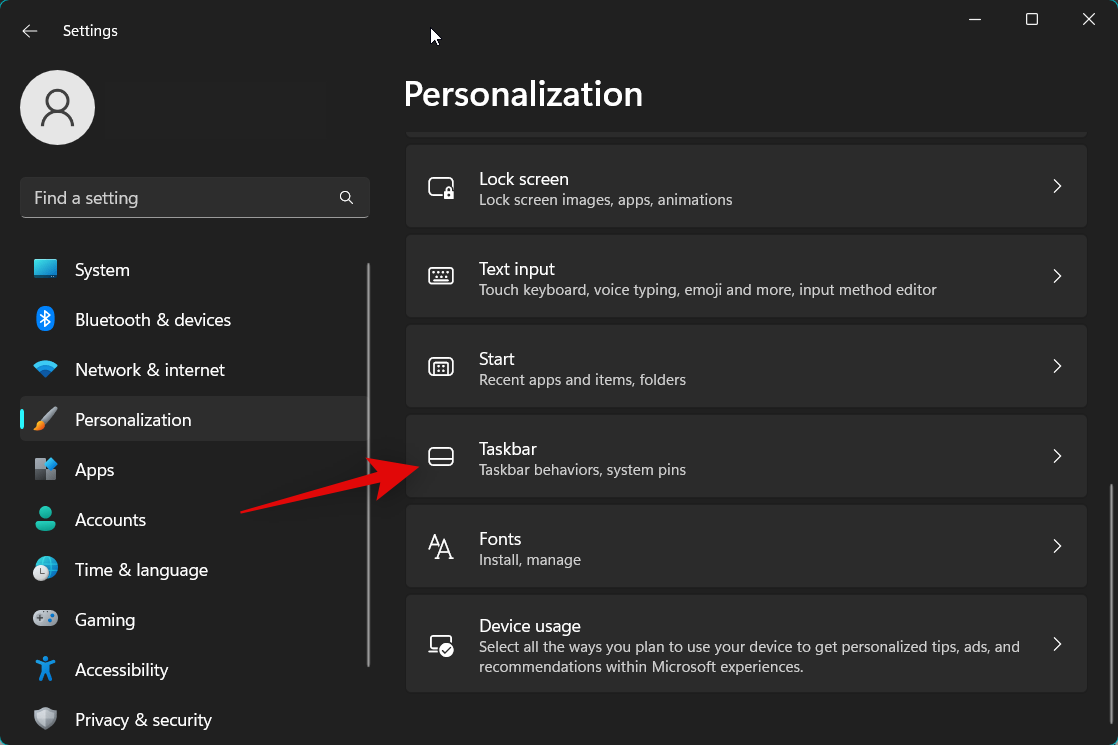
Select Taskbar.
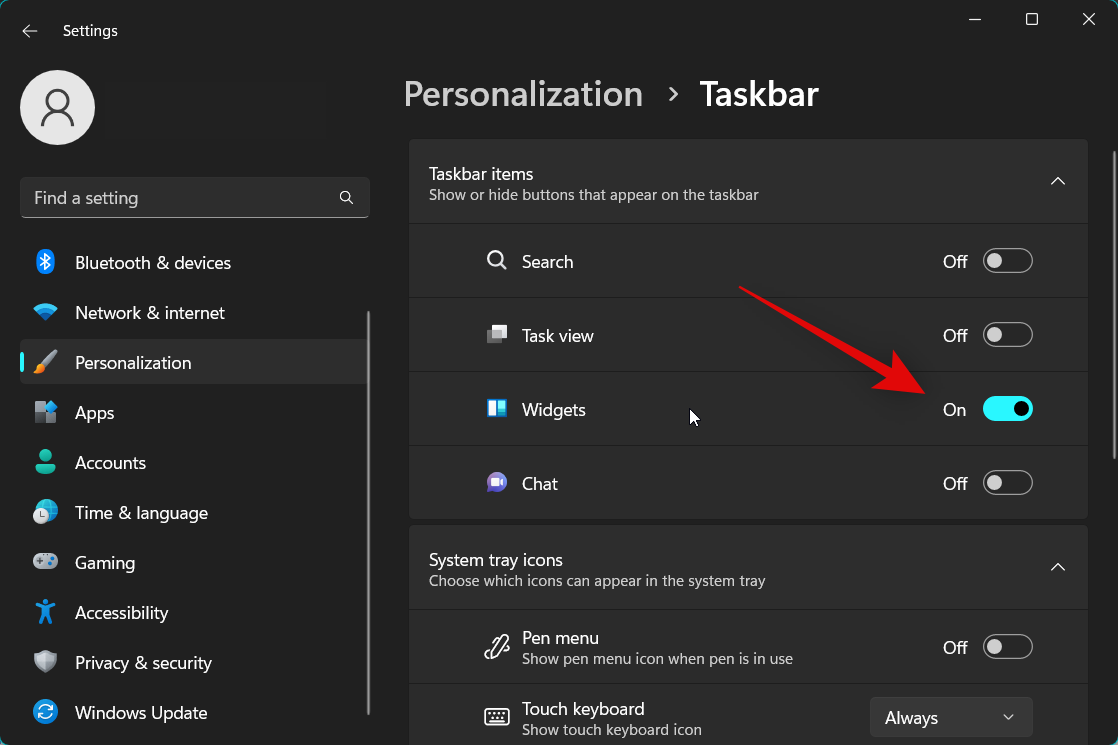
Now turn off the toggle for Widgets under Taskbar items.
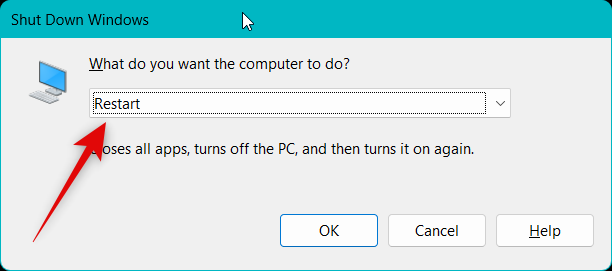
We now recommend you restart your PC to apply the changes and clear any cache files.
Once your PC restarts, head to Settings > Personalization > Taskbar like we did above and turn on the toggle for Widgets.
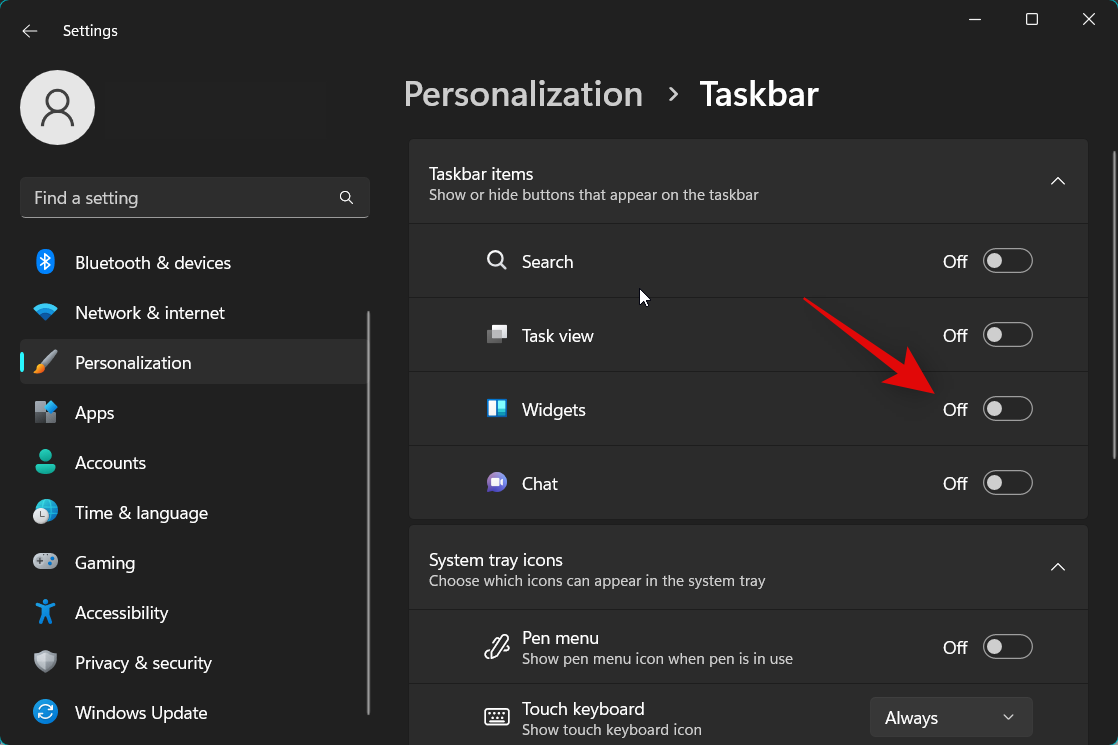
Now use the Windows + W keyboard shortcut to access the widgets panel. You can also click the weather icon in the bottom left corner of your taskbar or click the Widgets icon beside your Start menu icon.

Widgets should now be fixed on your PC if you were facing a temporary bug.
Method 2: Kill the Widget’s task manually
You can now try killing the Widget’s task/process manually. Accessing the Widgets panel after killing the task will help restart it. Follow these steps to manually kill the Widgets task on your PC.
Open the Task Manager by pressing the Ctrl + Shift + Esc on your keyboard. Click and select Windows Widgets from the app list on your screen.
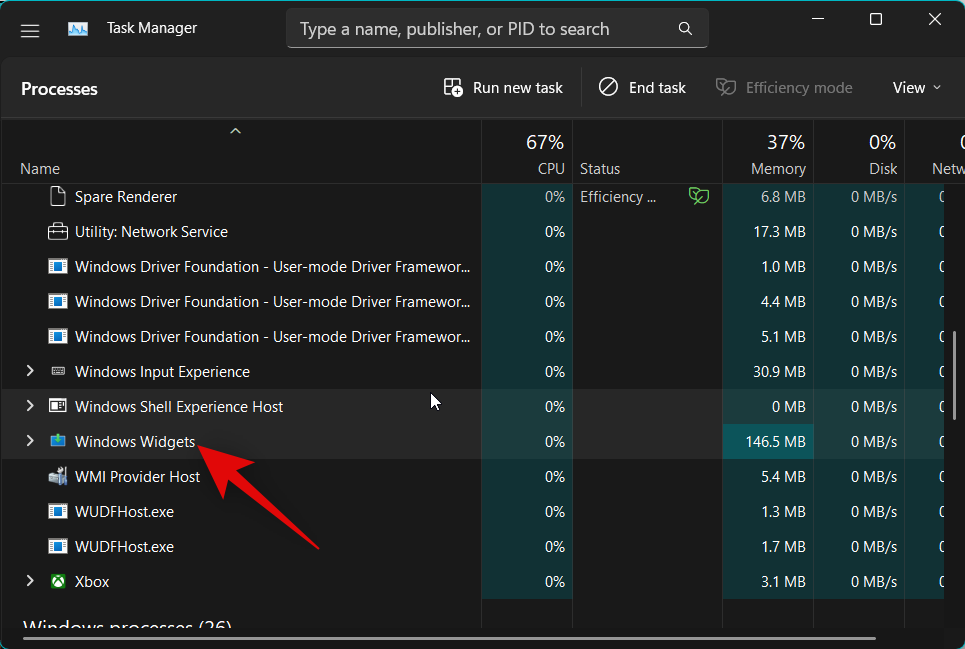
Click End task.
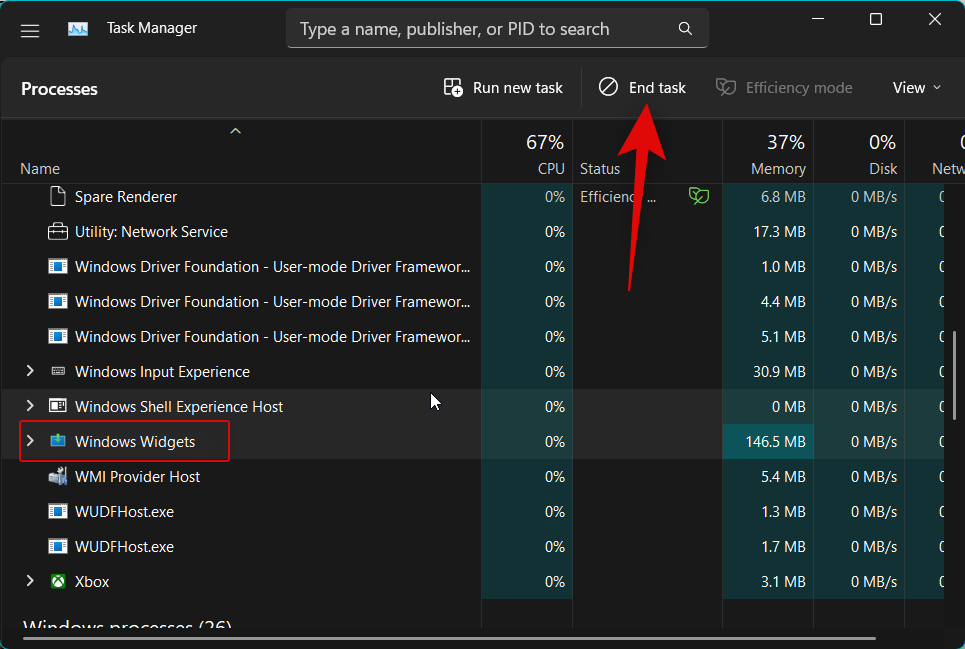
Widgets task will now be killed manually. You can now try accessing the Widgets panel again, which will restart the Widgets process.
And that’s it! Widgets should now be fixed for you if you were facing issues with the Widgets process in the background.
Method 3: Restart the File Explorer app (explorer.exe)
You can now try restarting the File Explorer app. the File Explorer app is responsible for most UI elements in Windows, including Widgets. Restarting the same might help fix Widgets on your PC. Follow the steps below to help you along with the process.
Open the Task Manager using the Ctrl + Shift + Esc keyboard shortcut. Now click and select explorer.exe from the list on your screen.
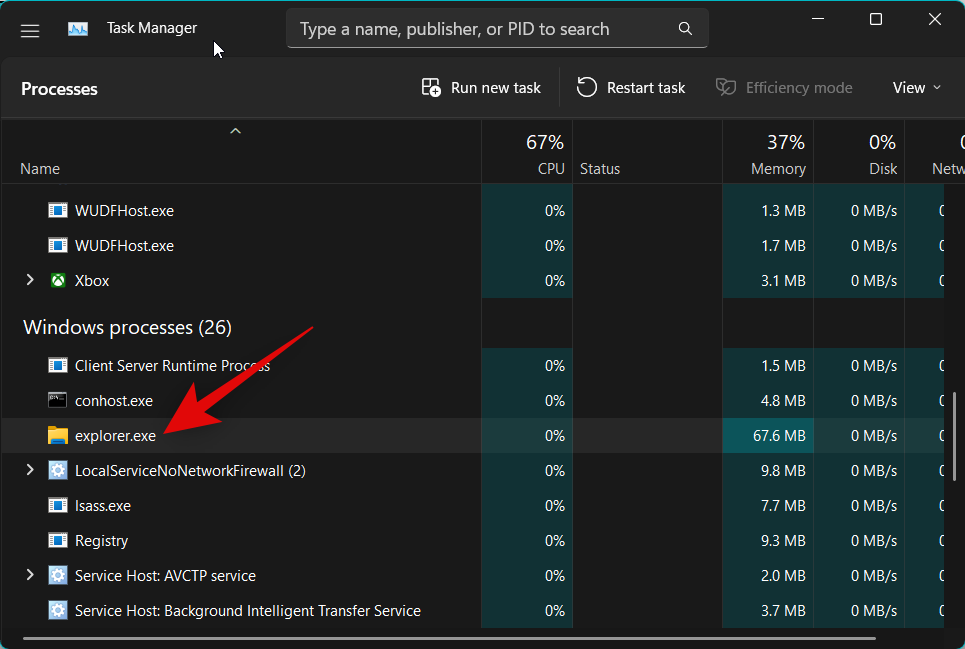
Click Restart task in the top right corner of your screen.
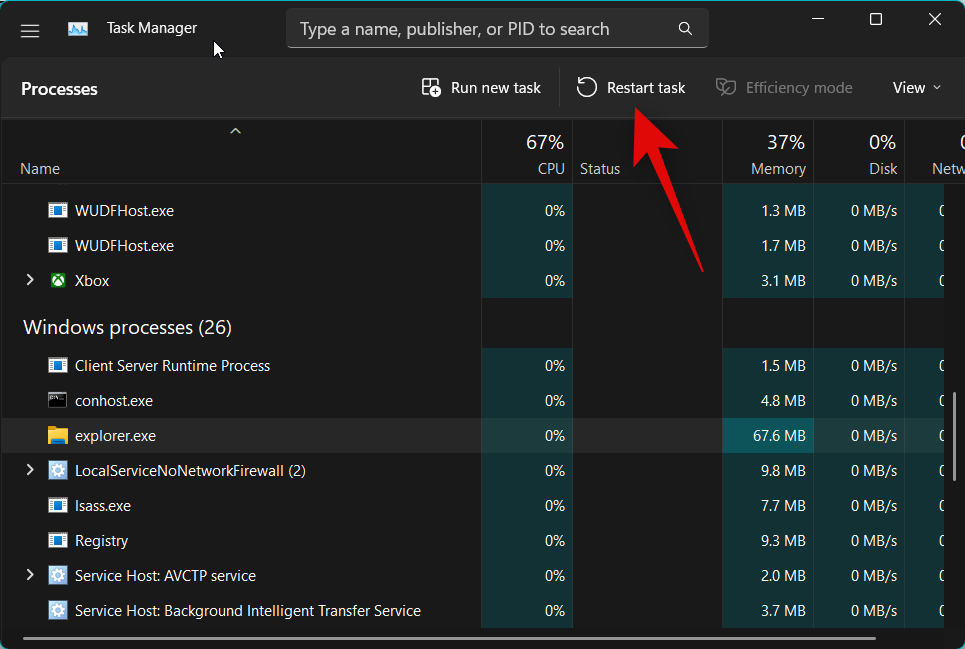
Windows Explorer will now be restarted on your PC. If Widgets were facing issues due to bugs with Windows Explorer, then the issue should now have been fixed for you.
Method 4: Repair Microsoft Edge
You can now try repairing Microsoft Edge. Widgets use Edge to source and display the latest information for all widgets added to your widgets console. You could be facing issues with Microsoft Edge and its other components. Here’s how you can repair Microsoft Edge on your PC.
Open the Settings app using Windows + i keyboard shortcut. Now click Apps on your left.
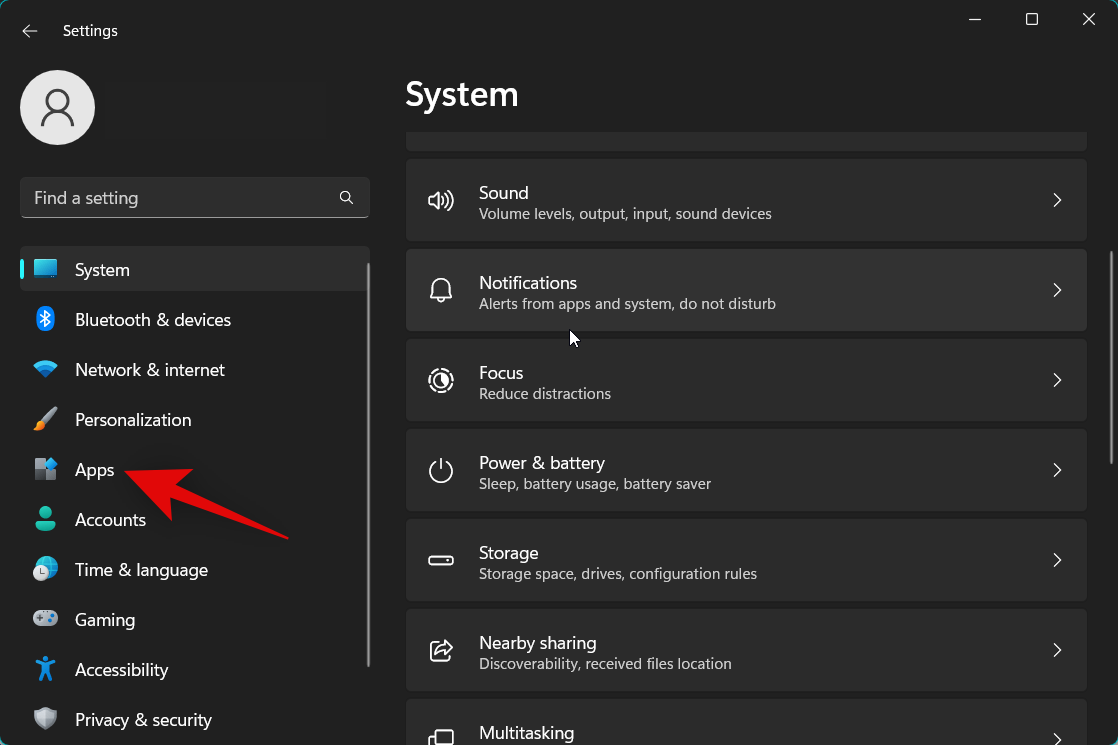
Select Installed apps.
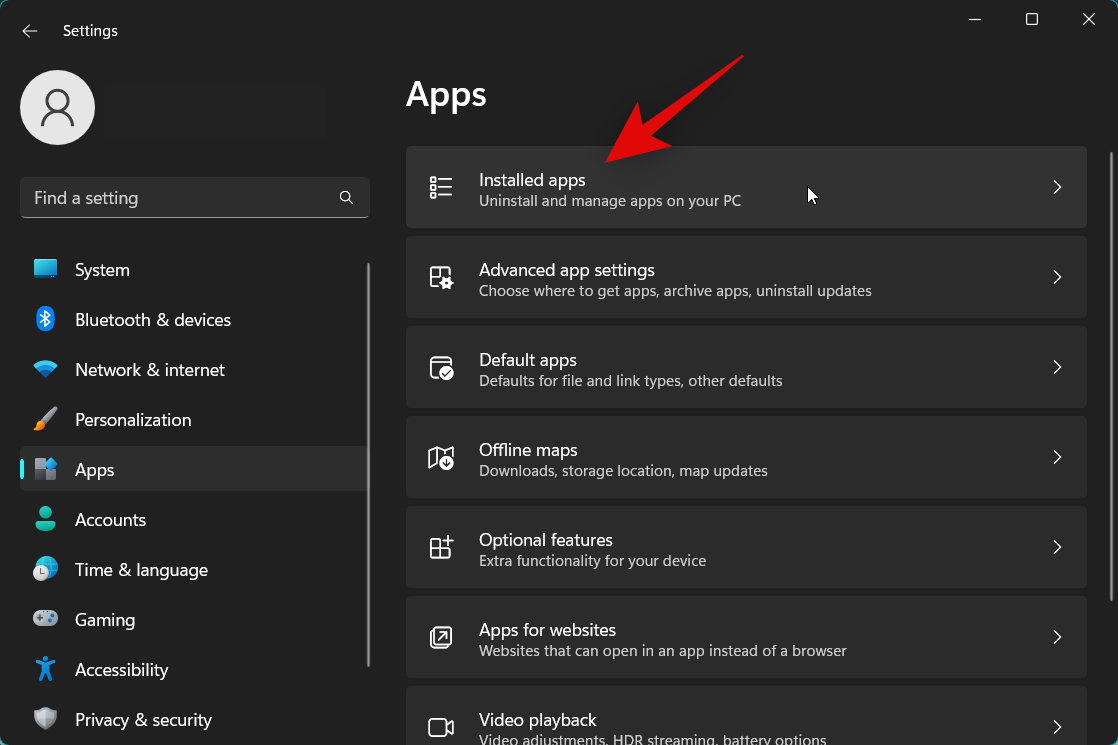
Now click the 3-dot () menu icon beside Microsoft Edge.
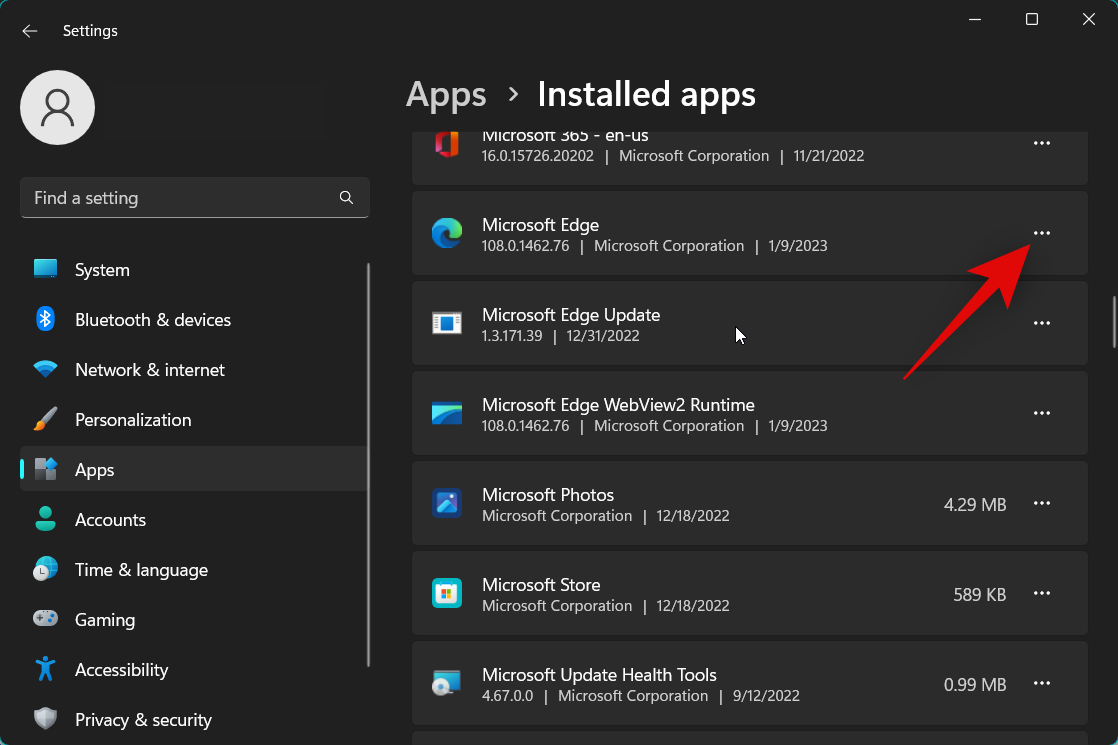
Click Modify.

Now click Repair.
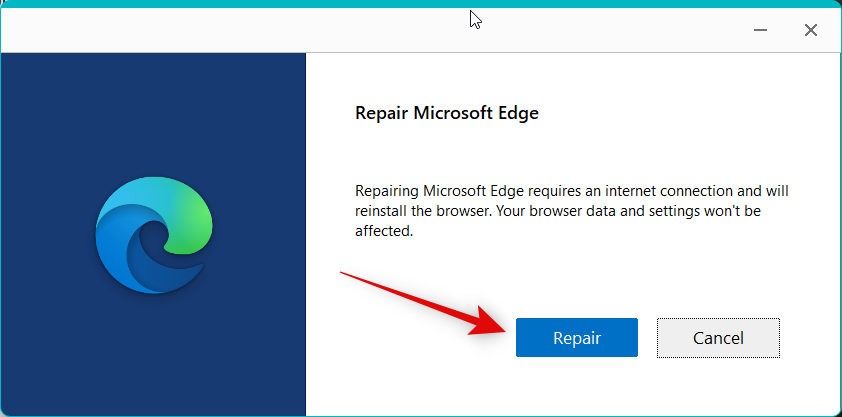
Microsoft Edge will now download a fresh copy and use it to restore the current installation. Once the process has been completed, click Close.
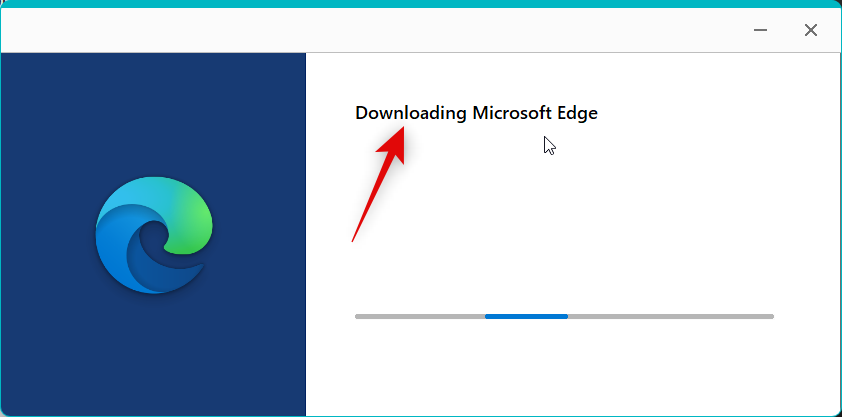
And that’s it! If Microsoft Edge was causing issues with Widgets, then it should now have been fixed on your PC.
Method 5: Sign in again with your Microsoft account
According to some user reports, it seems that a Microsoft Account is needed so that the widget panel can source accurate information and display it properly. Users with local accounts have managed to fix Widgets by signing in with a Mircosoft Account instead. We thus recommend you try signing in with a Microsoft account or sign out and sign back into your account if you’re already signed in using a Microsoft account. Use the first section to sign out of your Microsoft account if you’re already signed in. If you’re using a local account, you can skip this step and directly jump to the next section instead.
Step 5.1 – Sign out of your Microsoft account
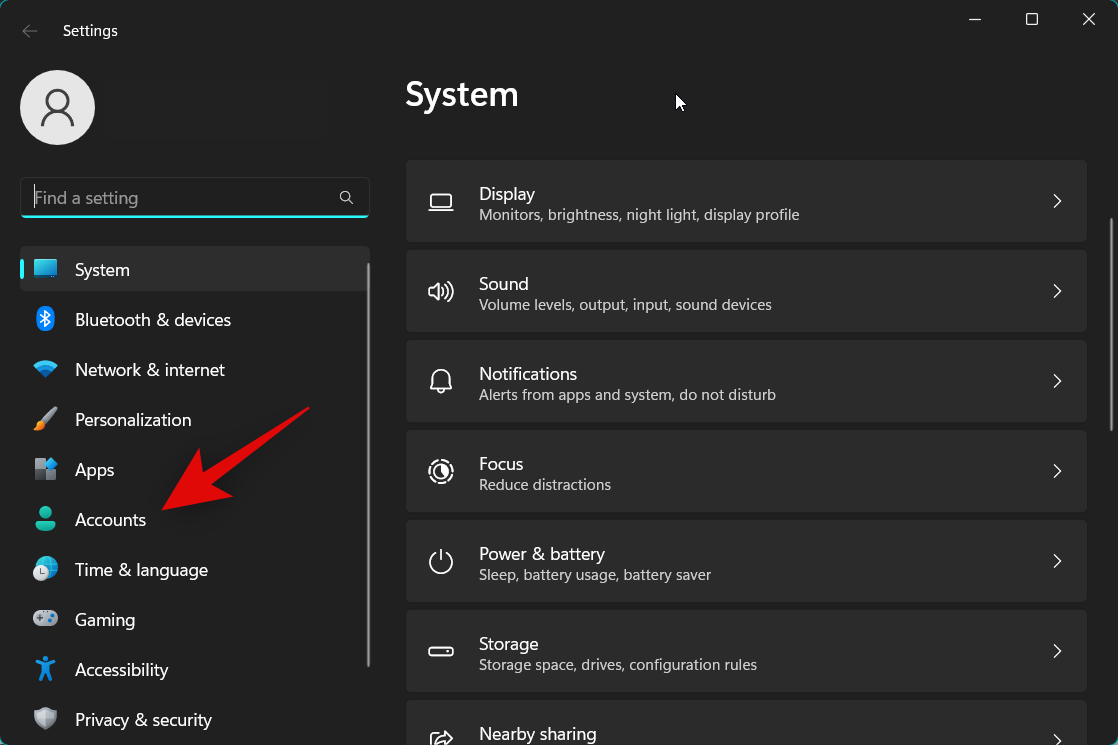
Open the Settings app using the Windows + i keyboard shortcut. Now click Accounts on your left.
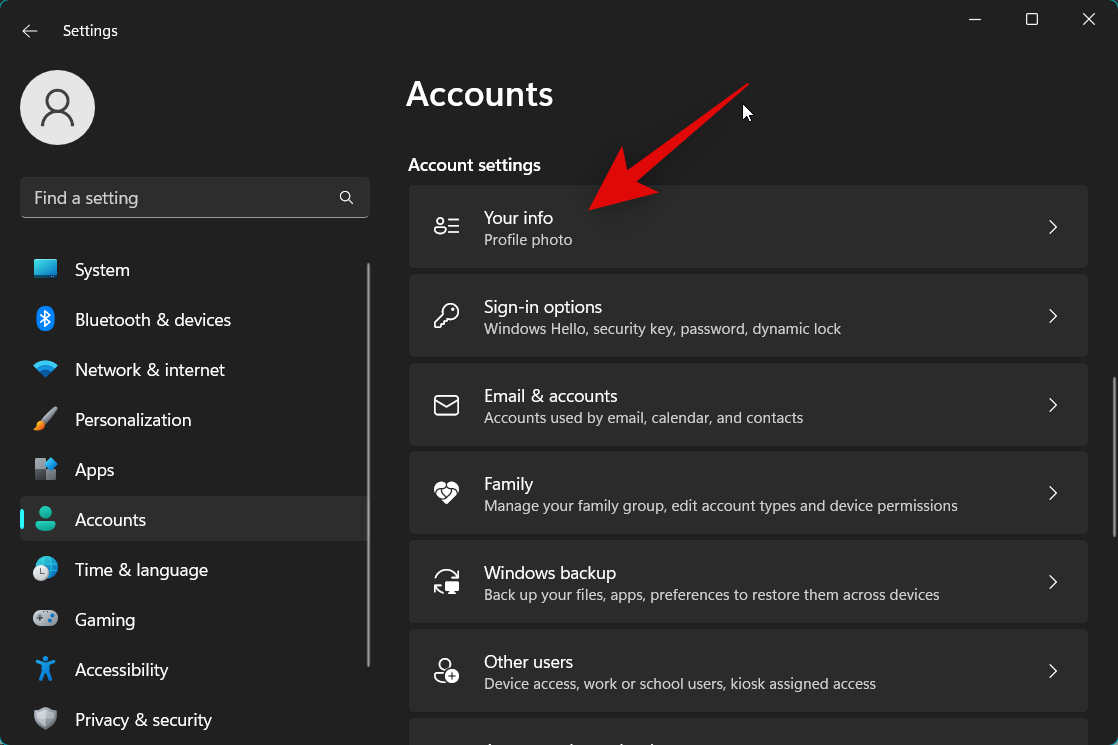
Click Your info.
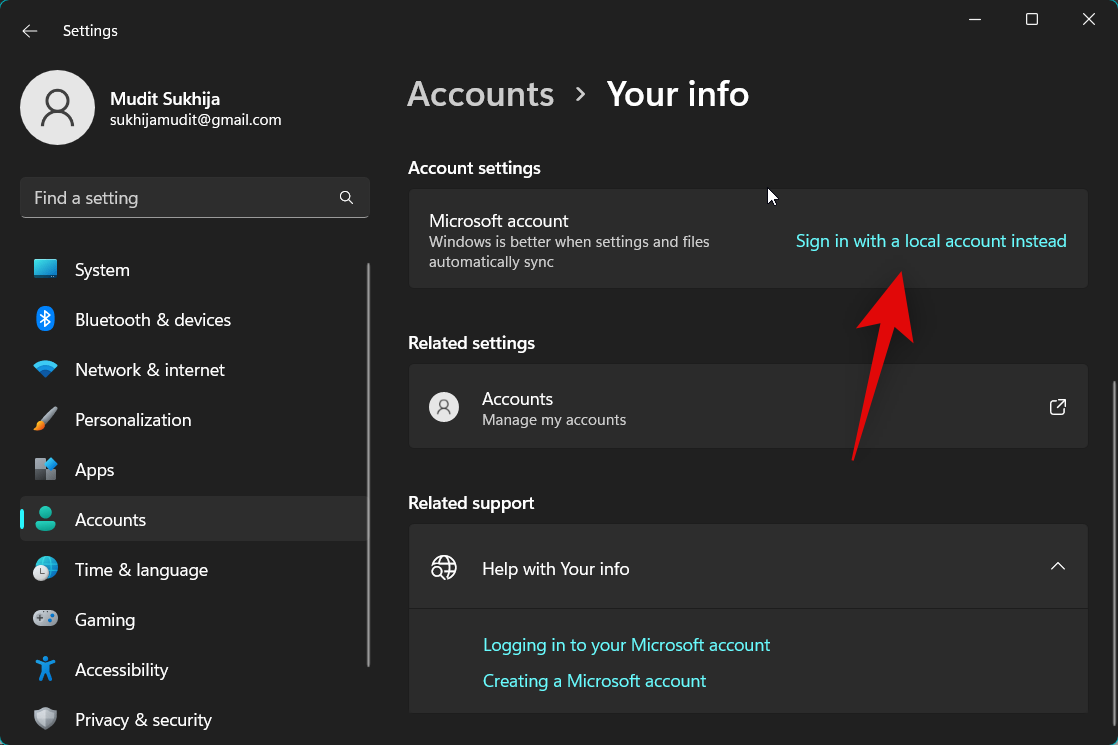
Click Sign in with a local account instead.
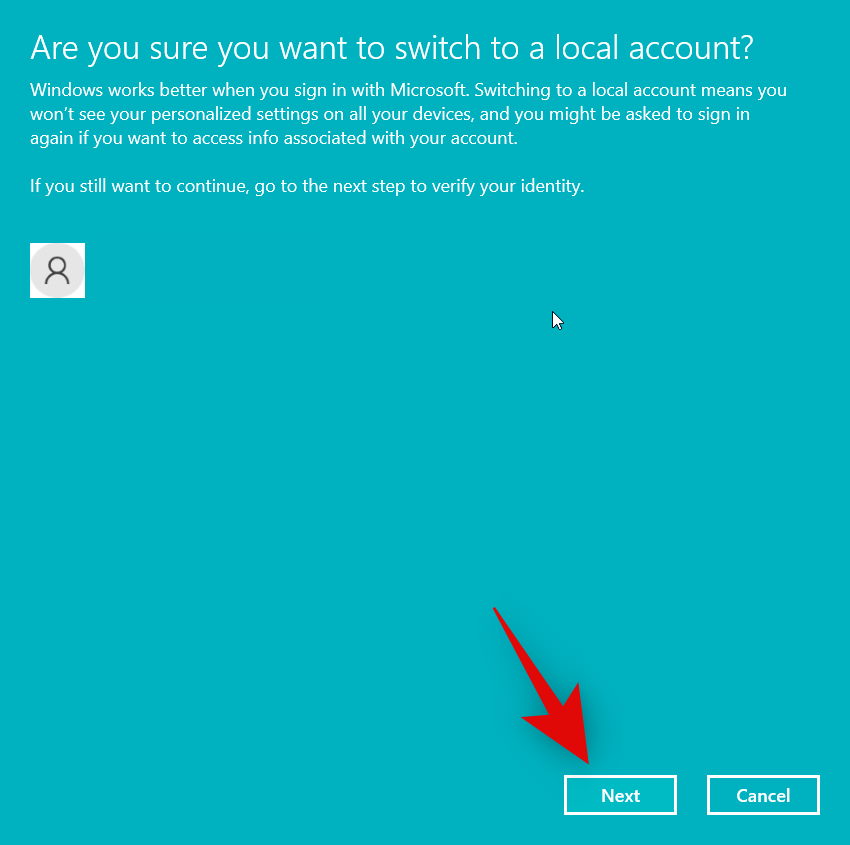
Click Next in the pop-up on your screen.
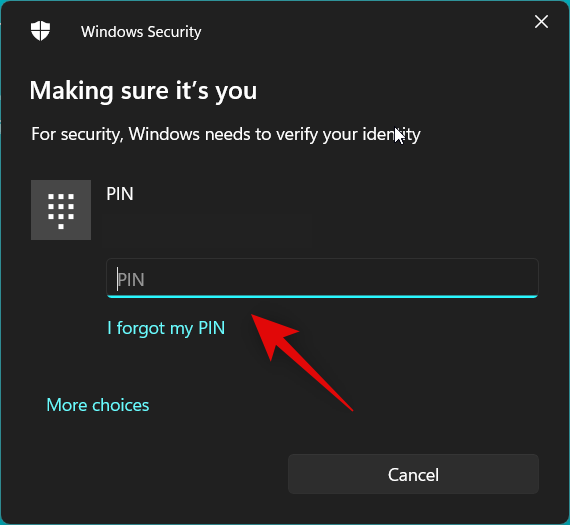
Use your PIN or Windows Hello to verify your identity.
Now choose your username and password in their respective fields.
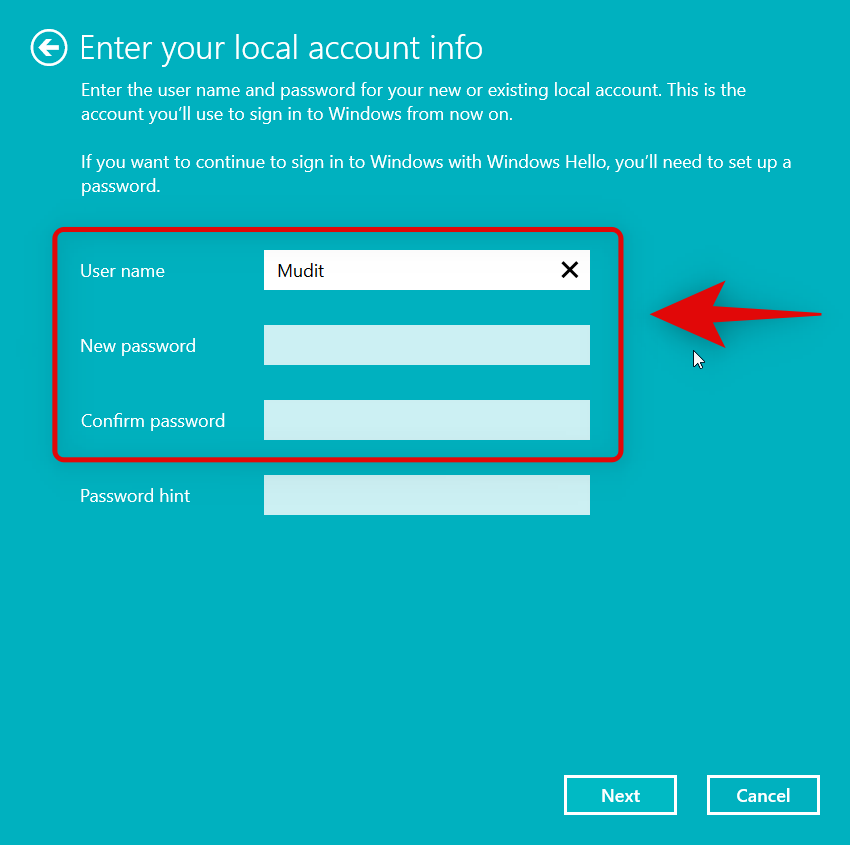
Click Next once you’re done.
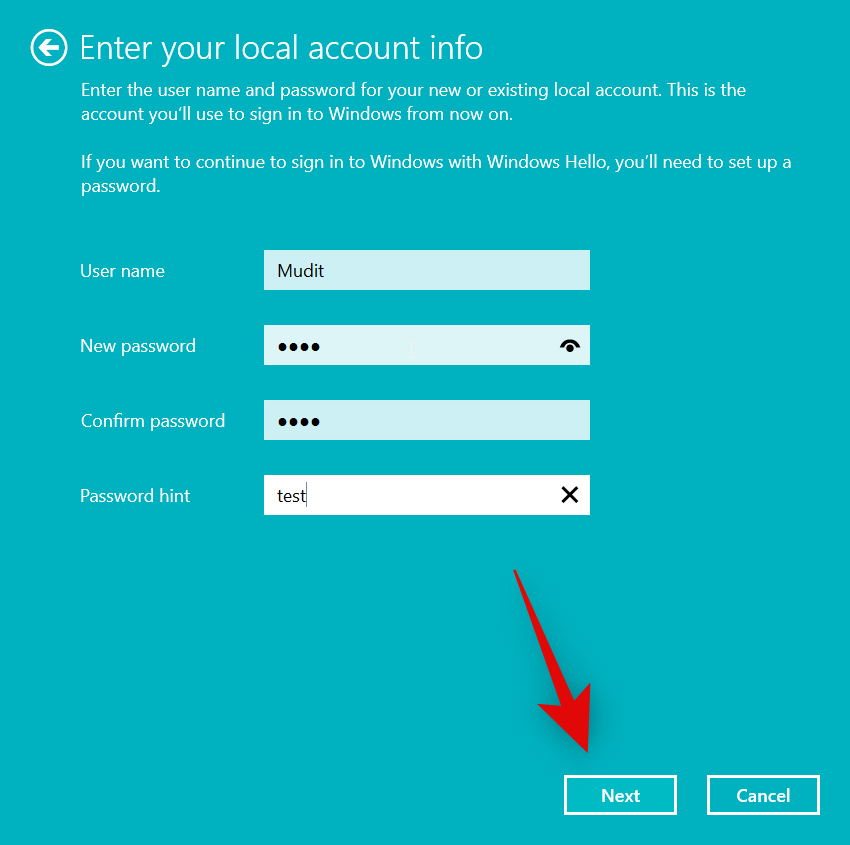
Click Sign out and finish.
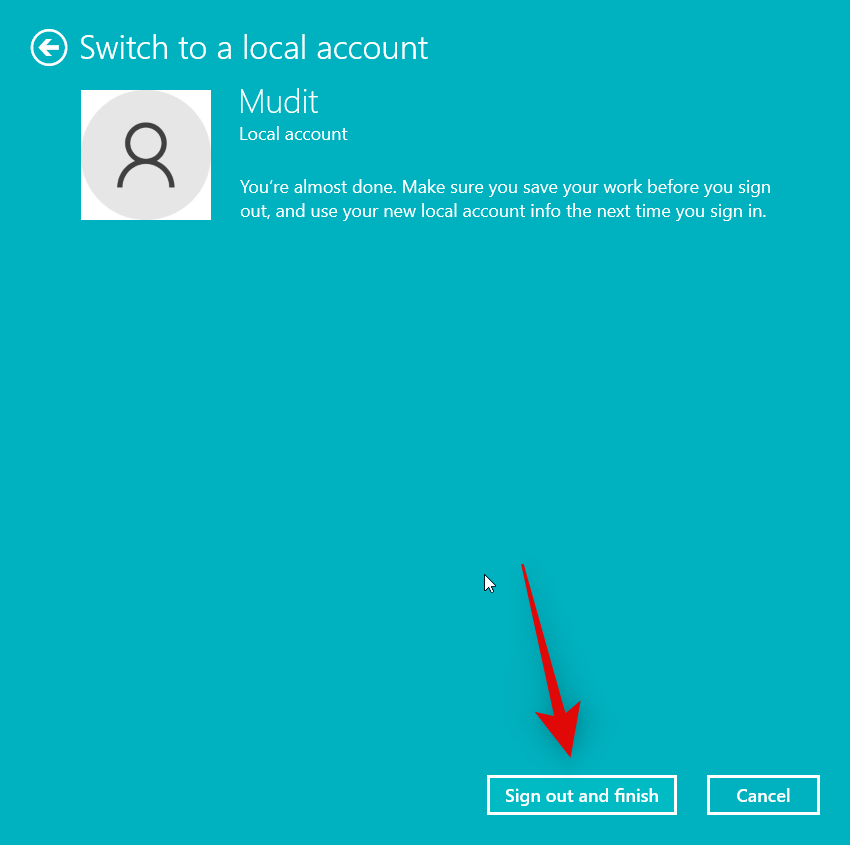
You will now be signed out. We now recommend you restart your PC and sign back into your local account. You can now use the section below to sign back in with a Microsoft account.
Step 5.2 – Sign in with your Microsoft account
Open the Settings app by pressing Windows + i. Click Accounts.

Scroll down and click Your info.

Click Sign in with a Microsoft account instead.
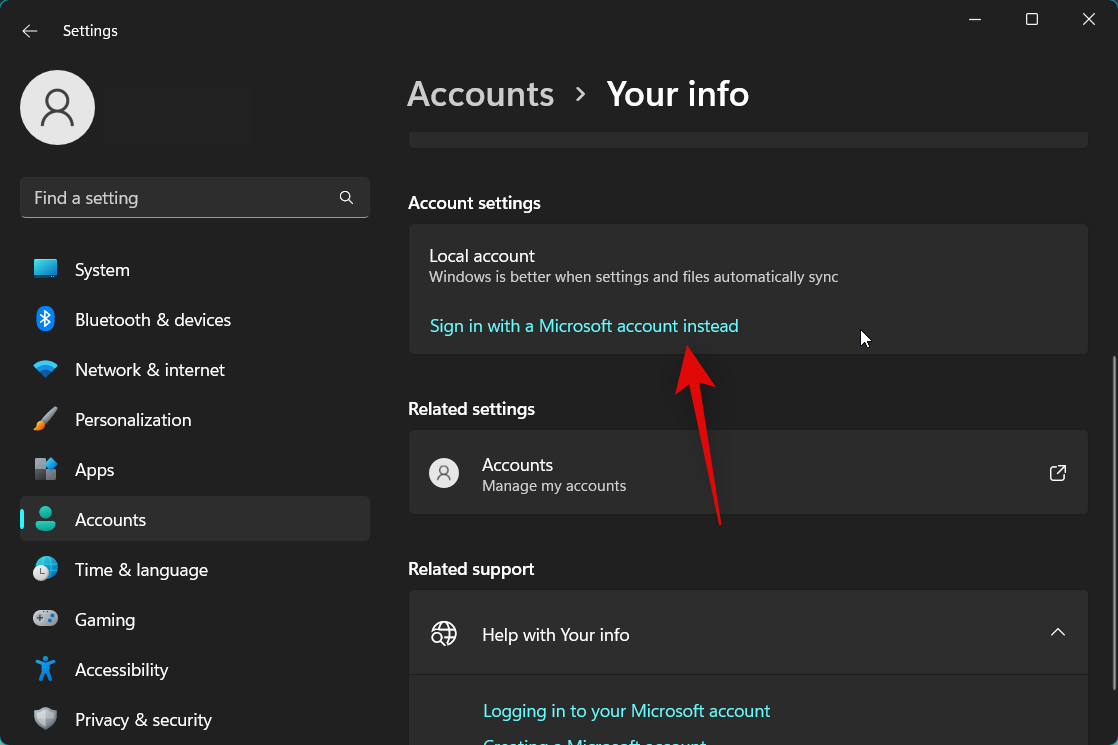
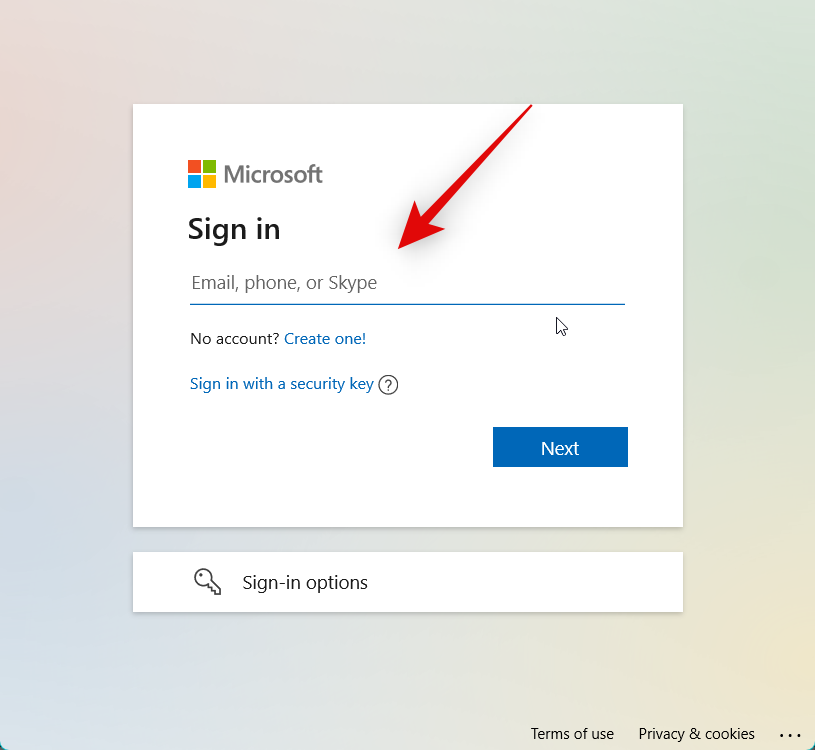
Sign in with your Microsoft account credentials in the pop-up on your screen.
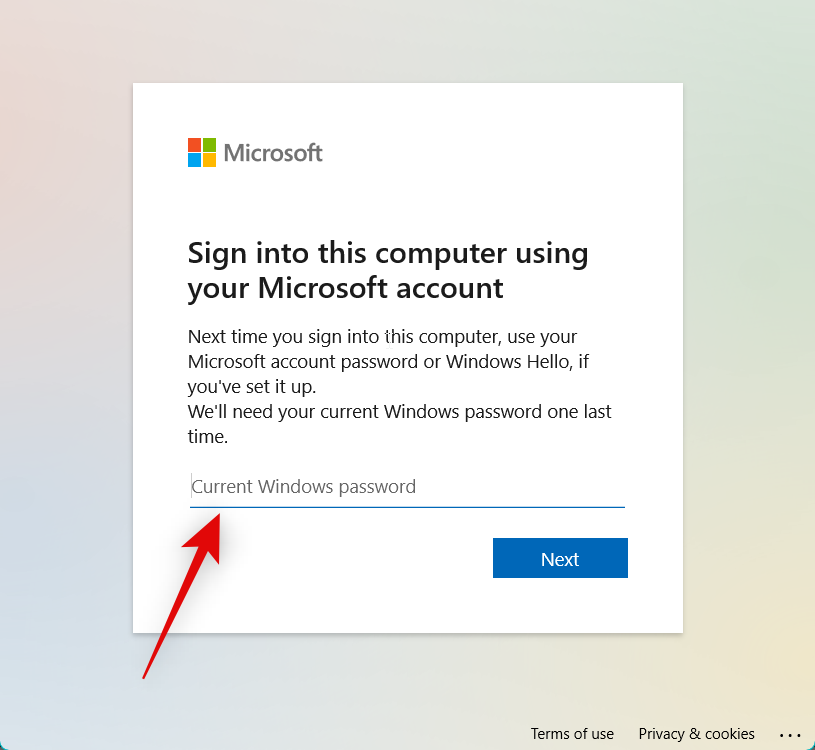
Once you’re signed in, enter your PC’s password to confirm your identity.
You will now be asked to set up Windows Hello. Click Next.
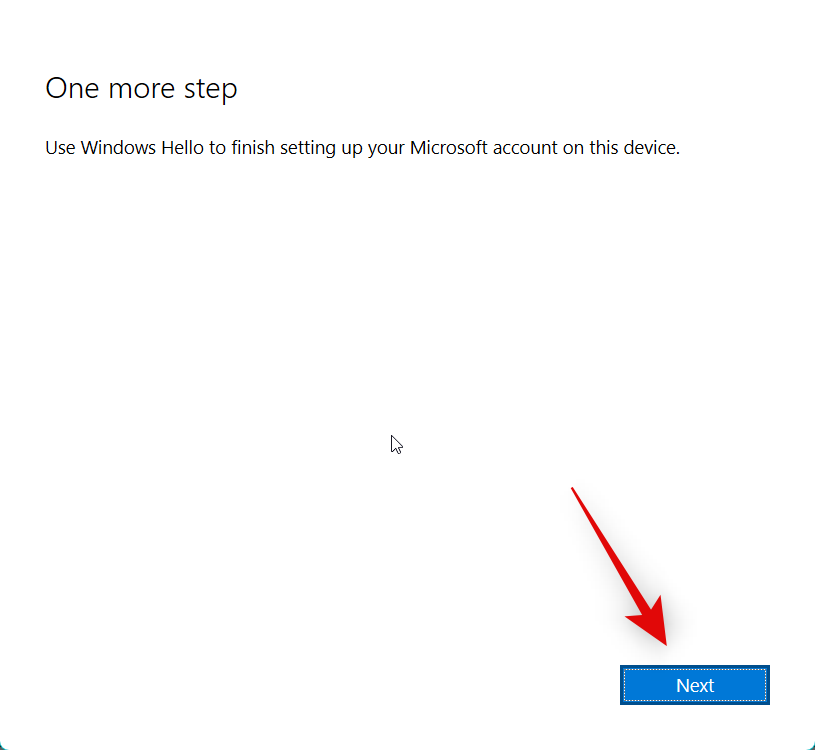
And that’s it! You will now be signed in with your Microsoft account. You can now try using Widgets again. If you were facing bugs with your Microsoft account, the issue should now have been fixed.
Method 6: Check and enable Widgets in the Registry Editor
It could also be that Widgets have been disabled in the Registry Editor. We recommend you check and enable the same if disabled on your PC. Follow the steps below to help you along with the process.
Open Run by pressing Windows + R.
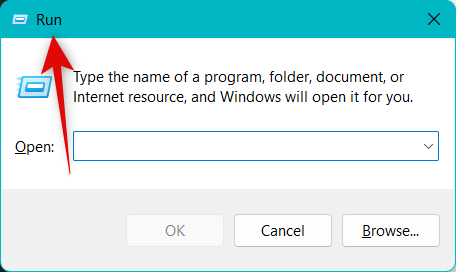
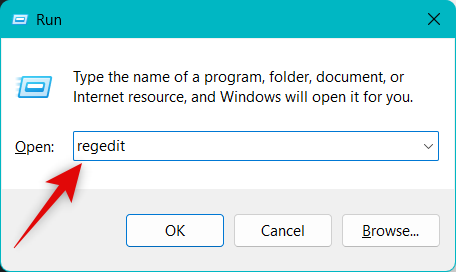
Now type in the following and press Enter.
regedit
Navigate to the following path in the Registry Editor using the left sidebar. You can also copy and paste the path below into the address bar at the top.
HKEY_LOCAL_MACHINE\SOFTWARE\Policies\Microsoft
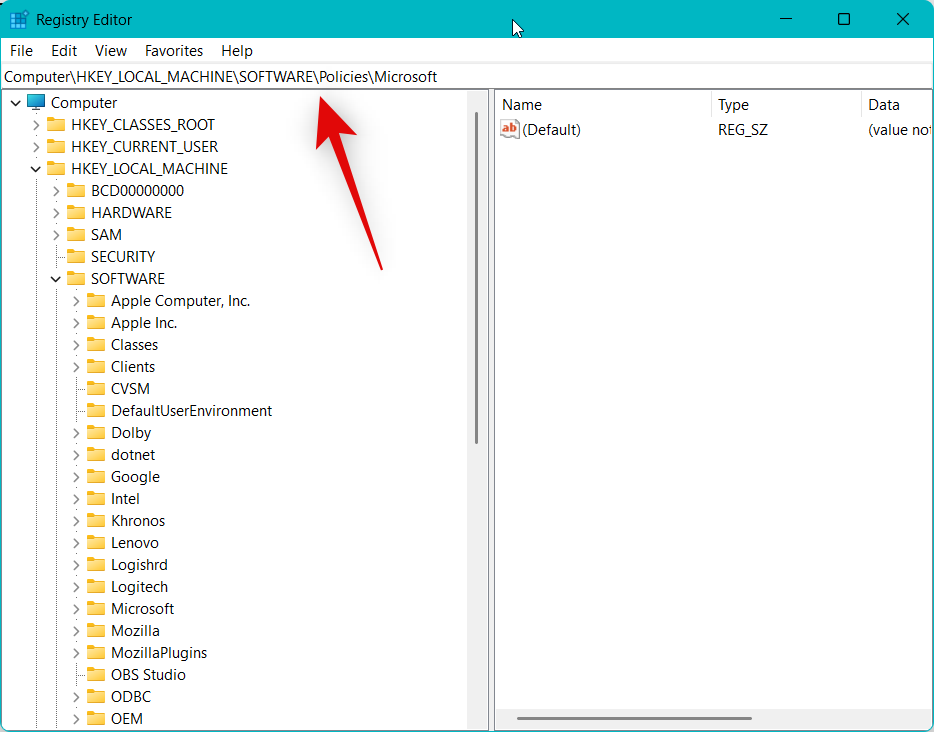
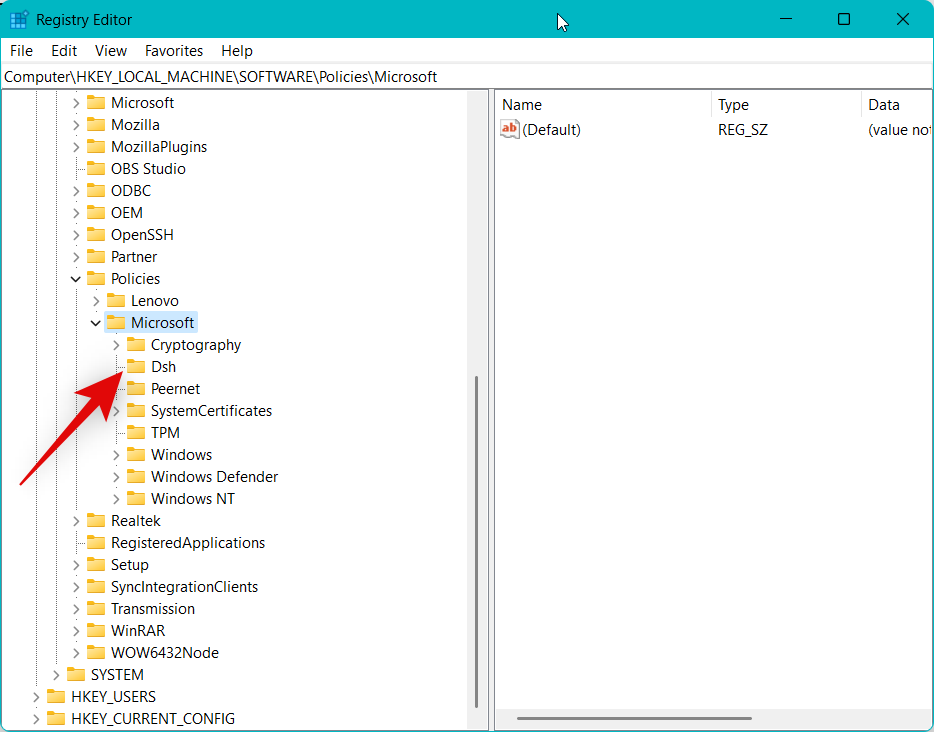
Now look for a key named Dsh under Microsoft. If it exists, then click and select the same. If it doesn’t exist, then Widgets aren’t disabled on your PC using the Registry Editor. In such cases, you can skip this fix and move on to the next one.
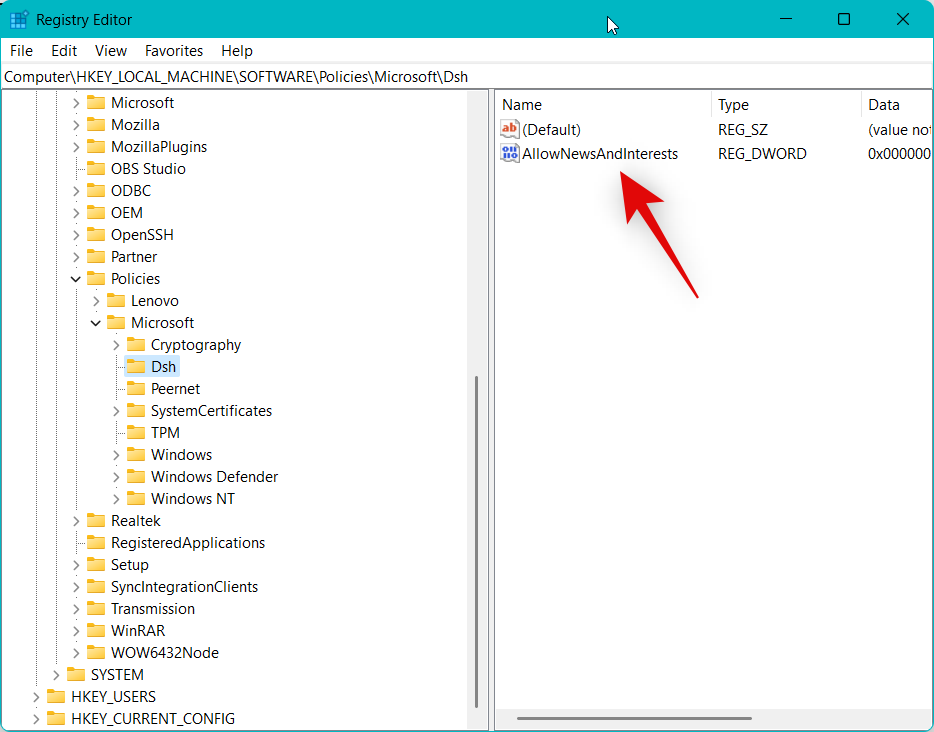
Double-click AllowNewsAndInterests on your right.
If the Value data is set to 0 then Widgets are currently disabled. Replace 0 with 1 instead.
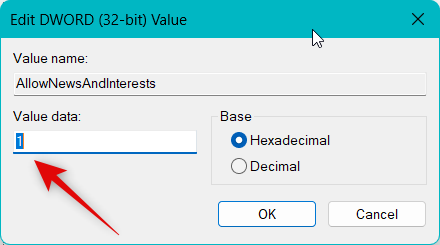
Now click OK.
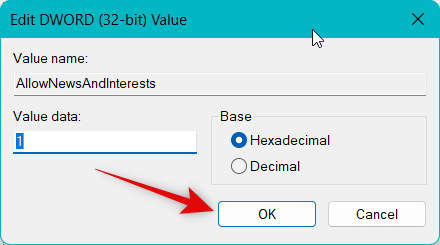
Restart your PC to apply the changes. Once your PC restarts, open the Settings app by pressing Windows + i. Now click Personalization on your left.

Select Taskbar.

Now enable the toggle for Widgets.

And that’s it! Once enabled, Widgets should now be working on your PC as intended.
Method 7: Check and enable Widgets in the Group Policy Editor
It could also be that widgets have been disabled on your PC using the Group Policy Editor. If you’re using a work-issued PC, then this is a setting likely managed by your IT admin, and you might need to get in touch with them to access the Group Policy Editor and fix this issue. Use the steps below to help you along with the process.
Open Run by using the Windows + R keyboard shortcut.

Now type in the following and press Enter.
gpedit.msc
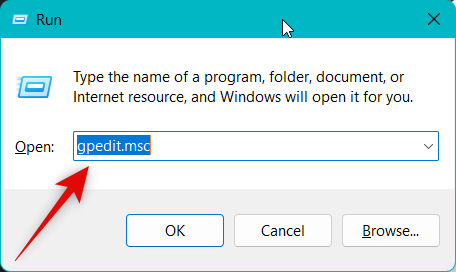
Navigate to the following path using the left sidebar.
Computer Configuration > Administrative Templates > Windows Components > Widgets
Now double click Allow widgets on your right.
If Disabled is selected at the top, then click and select Not Configured.
Click OK.
The changes will now be applied, and we now recommend you restart your PC. Once your PC restarts, use the steps in Method 1 above to enable Widgets on your PC.
And that’s it! If widgets were disabled using the Group Policy Editor on your PC, then the issue should now have been fixed for you.
Method 8: Try setting Microsoft Edge as your default browser
Widgets use your default browser to source and display information from the internet in the Widgets panel. It could be that you’re using a third-party browser as your default browser, which is unable to work as intended with widgets. If this happens to be the case, we recommend you set Microsoft Edge as your default browser and try accessing widgets again. Use the steps below to help you along with the process.
Open the Settings app using the Windows + i keyboard shortcut. Now click Apps on your left.

Click and select Default apps.
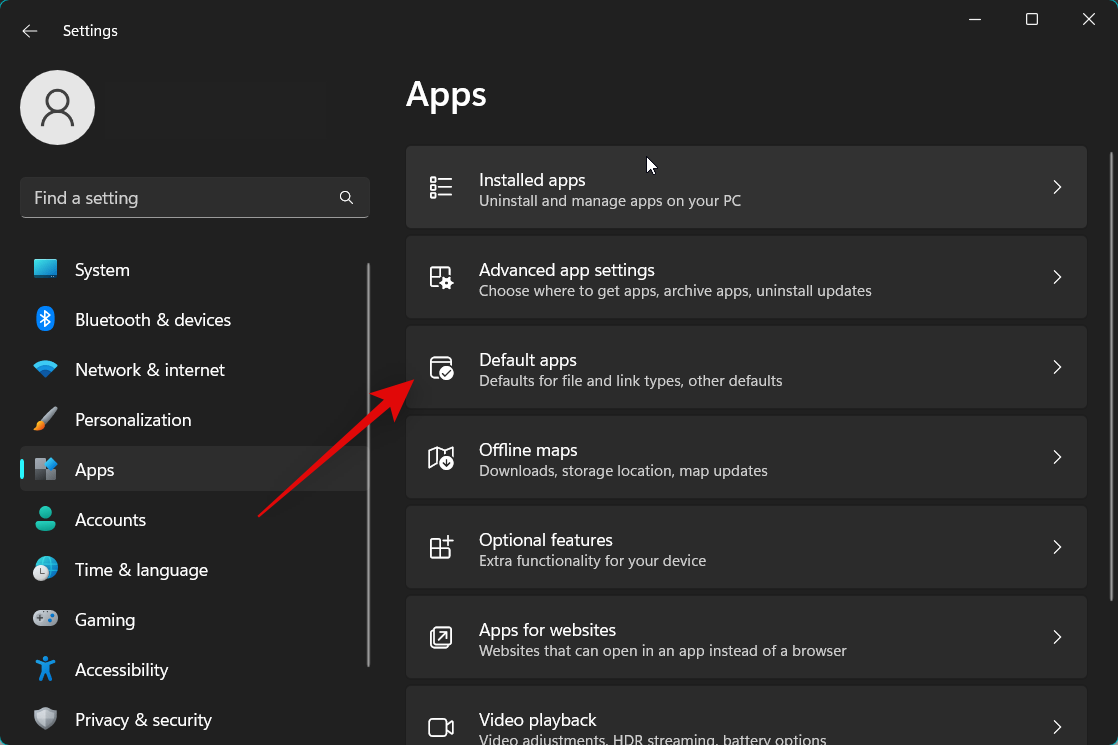
Scroll down and click Microsoft Edge from the app list.
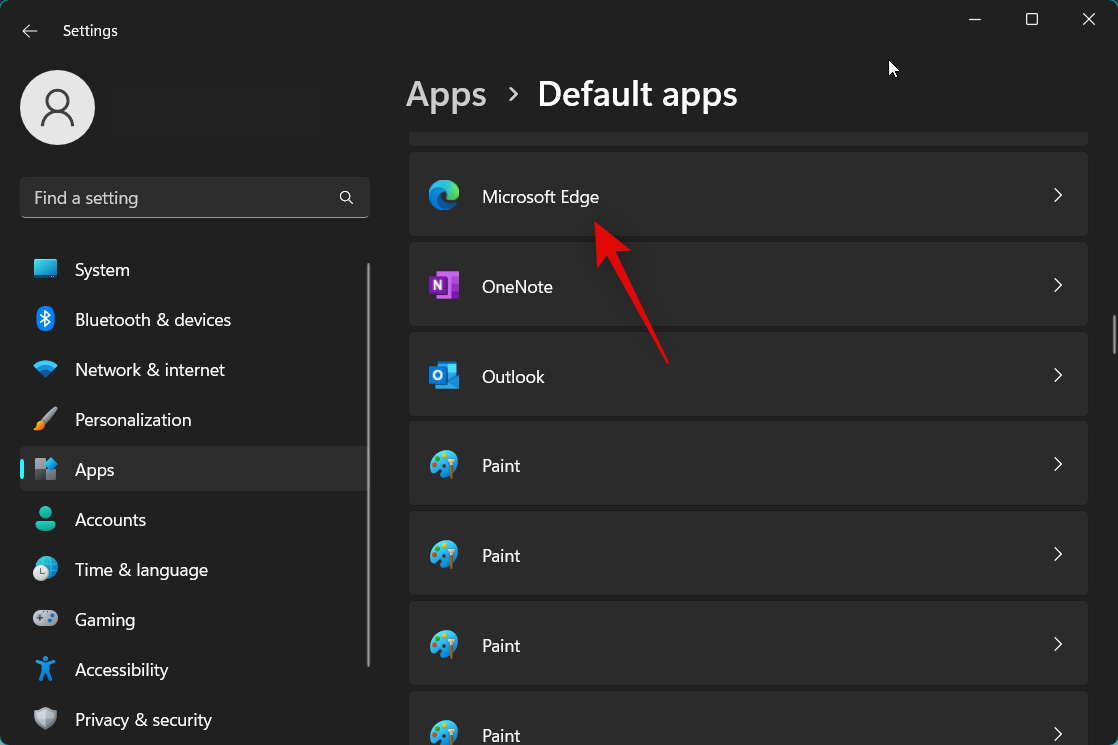
Click Set deafult at the top.
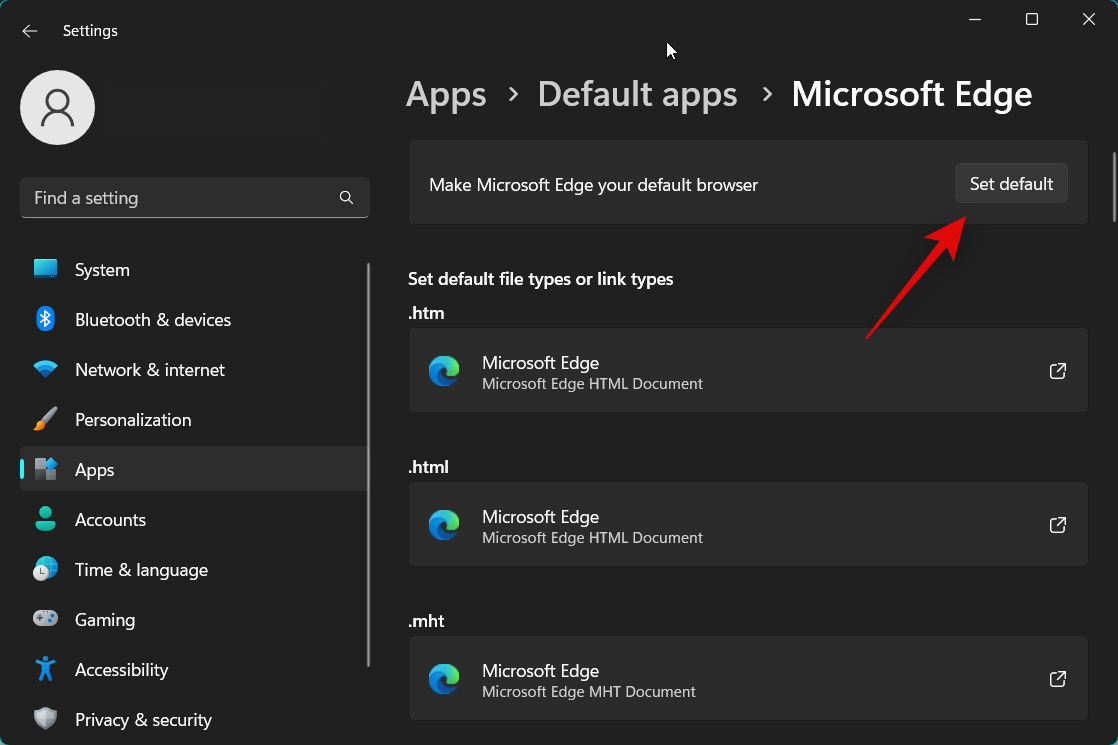
We now recommend you restart your PC for good measure.

And that’s it! You can now try accessing widgets again. If you were facing issues due to a third-party default browser, then the issue should now have been fixed for you.
Method 9: Re-install Windows web experience pack
We now recommend you try re-installing the Windows web experience pack. This is a vital component used by widgets to source information from the internet. Issues with the Windows web experience pack can also cause issues with widgets, and re-installing the same should help get rid of any bugs. Follow the steps below to help you along with the process.
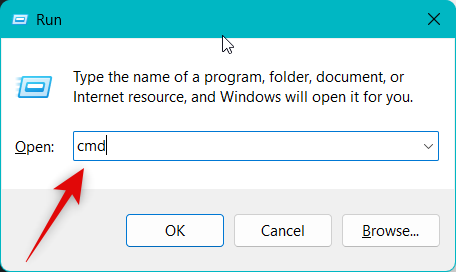
Open Run by pressing Windows + R on your keyboard.

Now type in the following and press Ctrl + Shift + Enter on your keyboard.
cmd
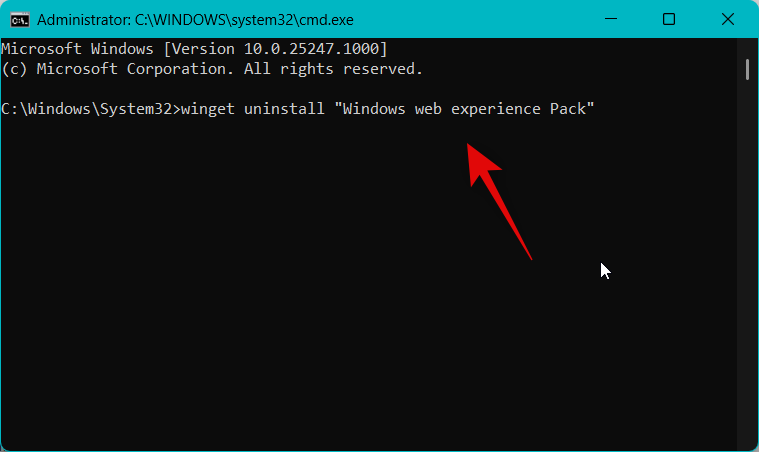
Type in the command below to uninstall Windows Web Experience Pack from your PC.
winget uninstall "Windows web experience Pack"
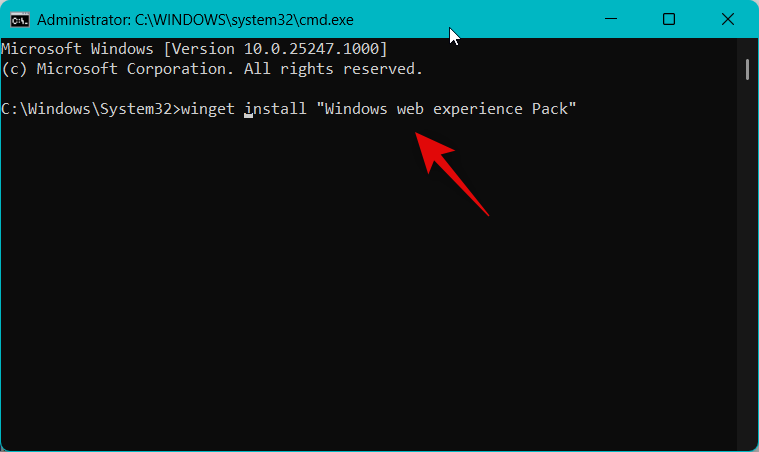
We now recommend you restart your PC. Once your PC boots up, use the steps above to launch Command Prompt as an administrator again. Then use the command below to re-install Windows Web Experience Pack on your PC.
winget install "Windows web experience Pack"
Once the process finishes, use the command below to close the Command Prompt.
exit
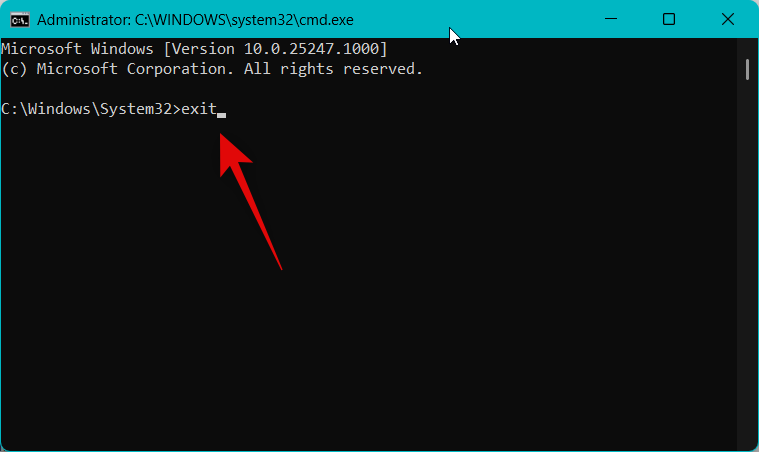
Now restart your PC for good measure. You can now try accessing widgets again. If you were facing issues with the Windows Web Experience Pack, then it should now have been fixed for you.
Method 10: Repair Microsoft Edge Webview2 Runtime
Microsoft Edge webview2 Runtime is another vital component needed by widgets to work properly. You could also be facing issues with this component, and repairing it should help fix the same. Follow the steps below to help you along with the process.
Open the Settings app using the Windows + i keyboard shortcut. Now click Apps on your left.

Click and select Installed apps.

Now scroll down on your right and click the 3-dot() menu icon beside Microsoft Edge Webview2 Runtime.
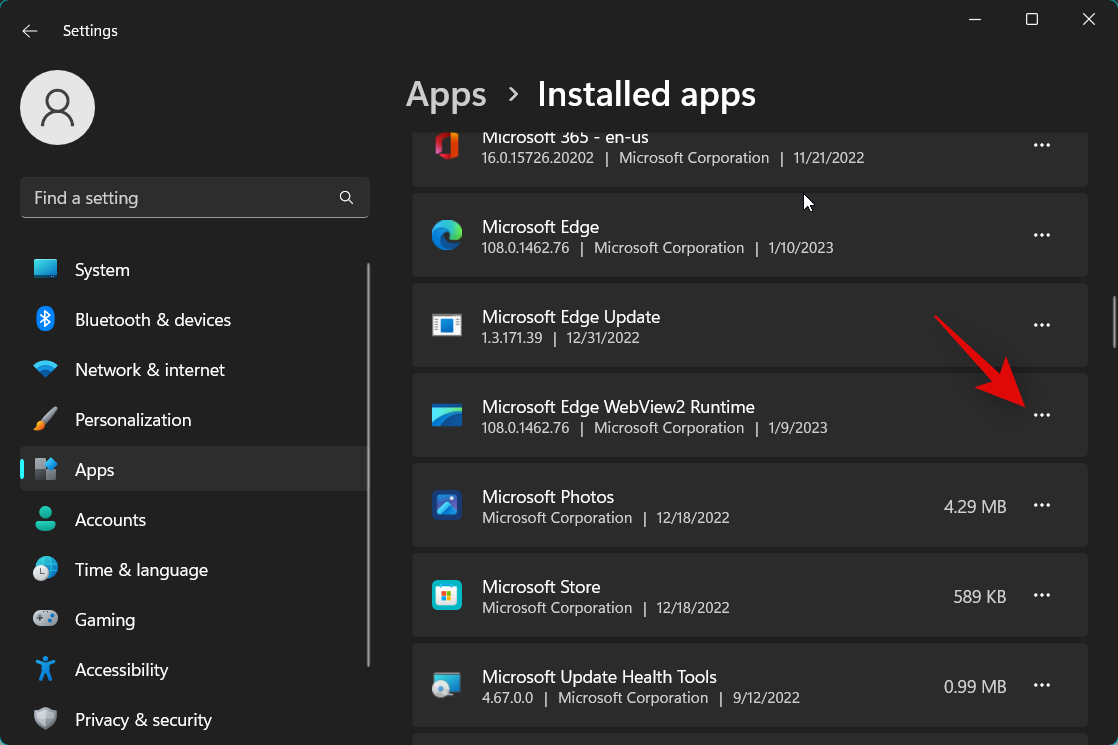
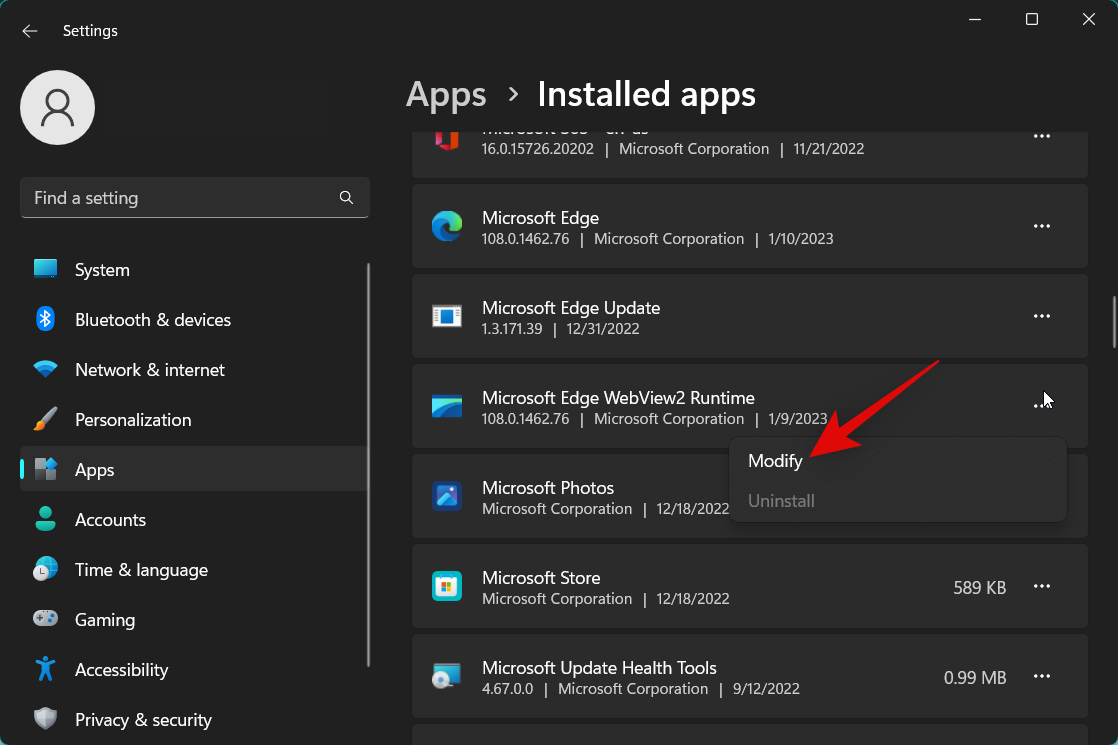
Select Modify.
Click Repair.
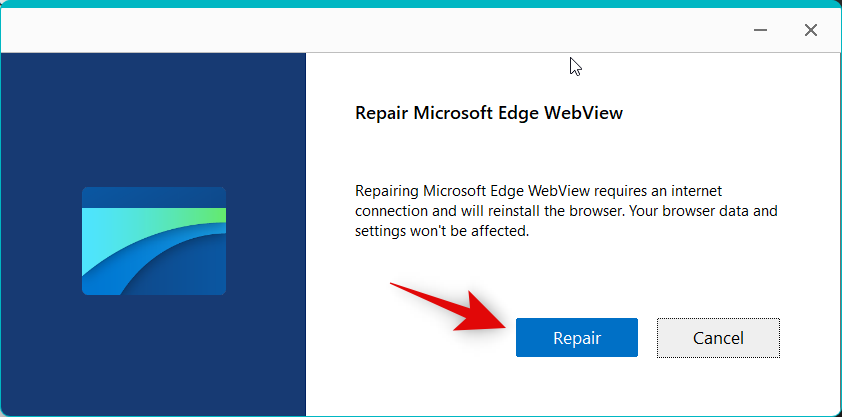
Microsoft Edge Webview2 Runtime will now repair itself. Once done, click Close.
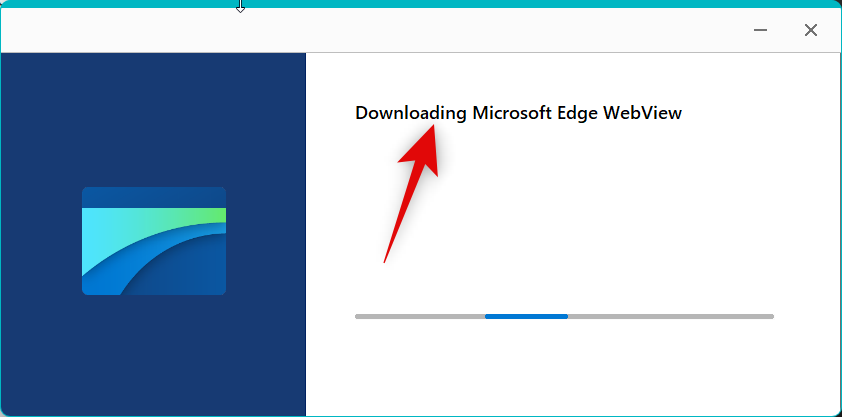
We now recommend you restart your PC for good measure.

And that’s it! If widgets were facing issues due to bugs with Microsoft Edge Webview2 Runtime, then the issue should now have been fixed for you.
Method 11: Downgrade Web Experience pack to v421.20050.505
A recent update to the Web Experience Pack seems to break widgets from many users around the world. Downgrading the Web Experience Pack to v421.20050.505 seems to be fixing issues for many users. We recommend you try downgrading the web experience pack on your PC to see if that fixes widgets for you. Follow the steps below to help you along with the process.
Open Run by using the Windows + R keyboard shortcut.

Now type in the following and press Ctrl + Shift + Enter on your keyboard.
cmd

Use the command below to uninstall the current Web Experience Pack installed on your PC.
winget uninstall "Windows web experience Pack"

Once done, use the command below to close the Command Prompt.
exit

We can now download the older version of the Web Experience Pack. Start by copying the link below for the Microsoft Store listing for the Web Experience Pack.
- Microsoft Store Link | Web Experience Pack
Now visit the link below for Store adguard and paste the copied link in the dedicated text box at the top.
- Store Adguard | Link
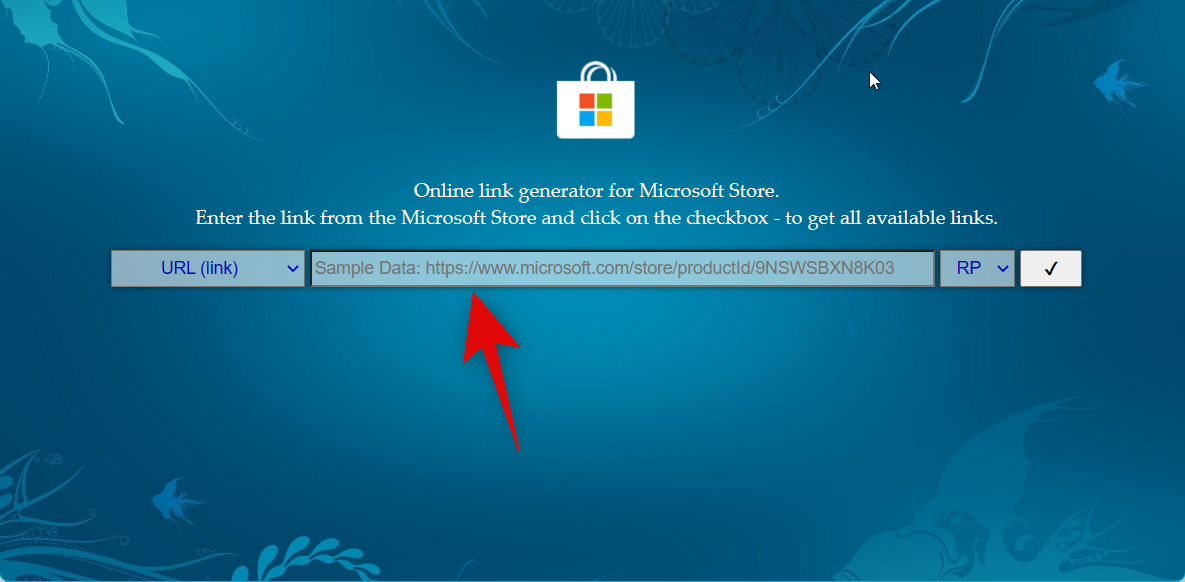
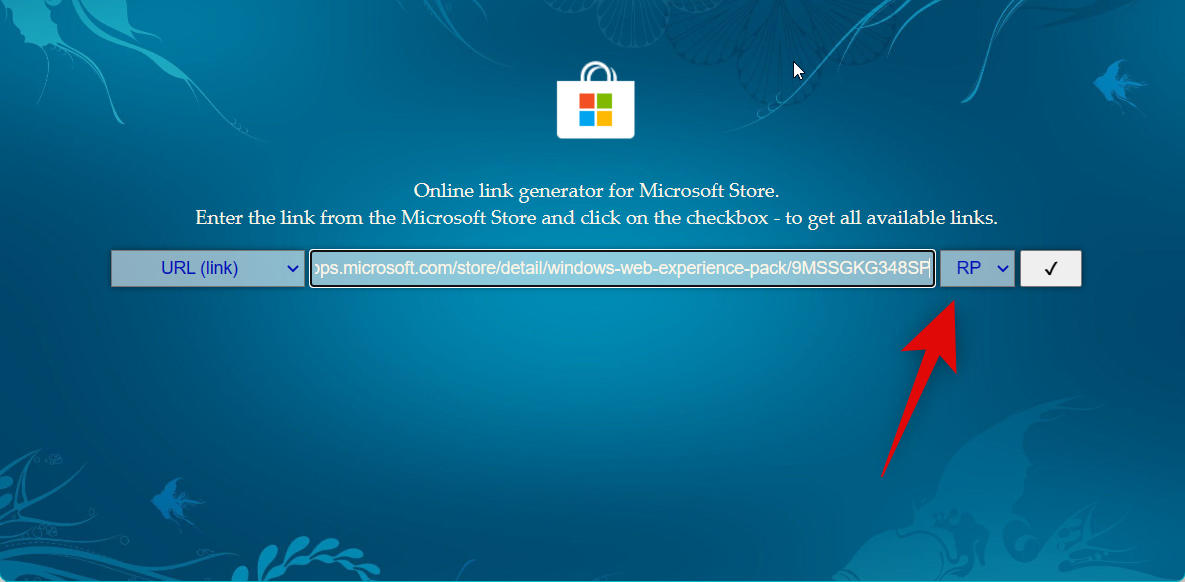
Click the drop-down menu to the right of the text box and select RP.
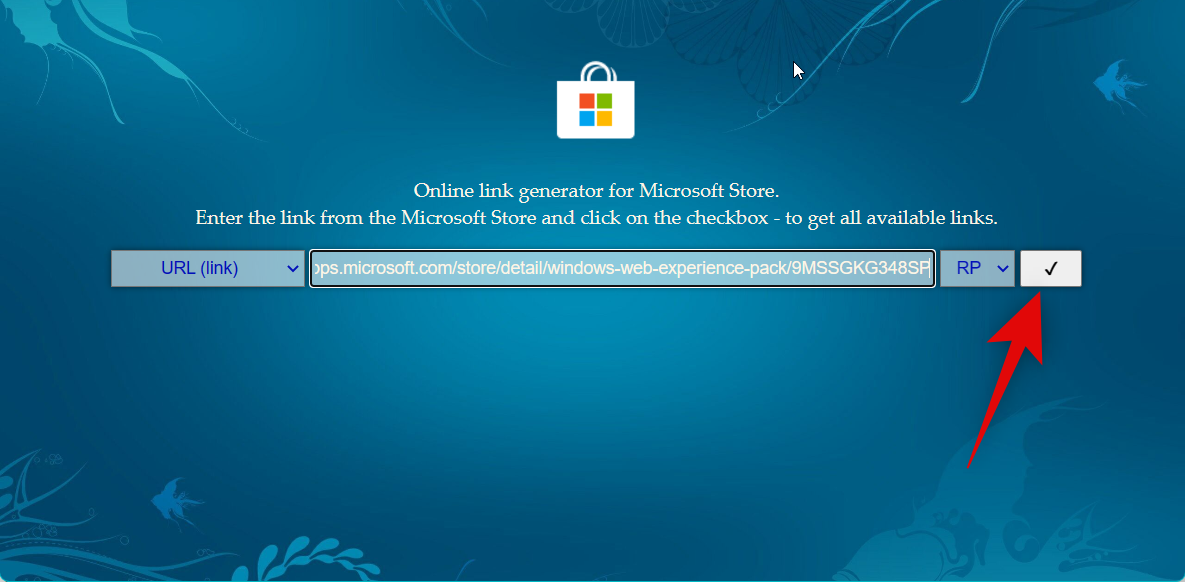
Click the Check icon once done.
Scroll down and click the link for Web Experience Pack v421.20050.505. It should be the first package on the list.
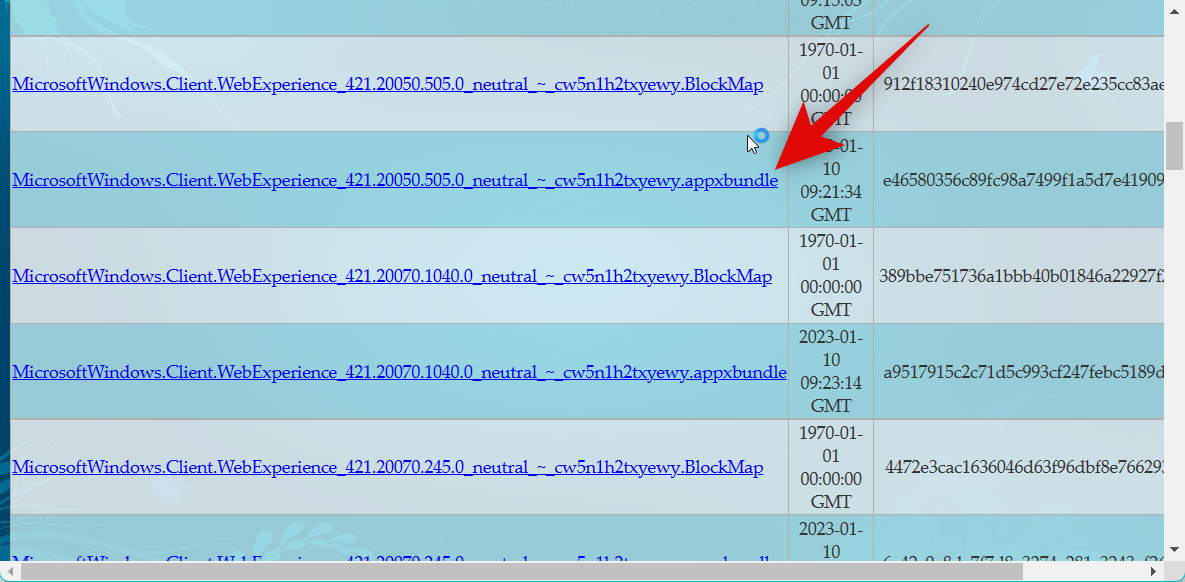
Note: Ensure you click and download the .appxbundle and not the .BlockMap file.
A download will be initiated for the package. Save it to a convenient location on your PC.
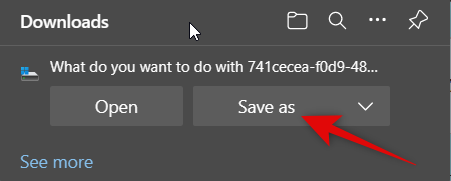
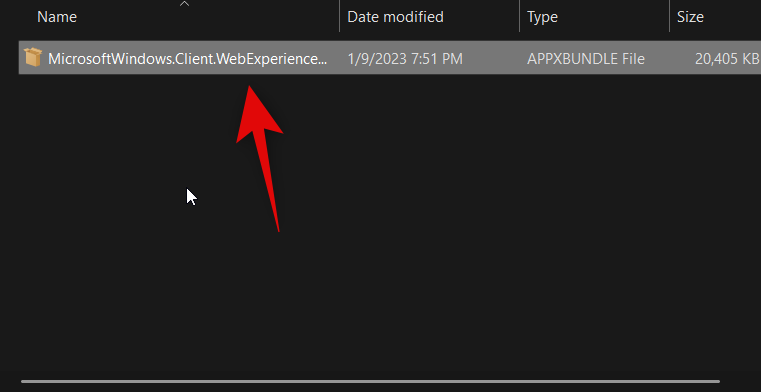
Once downloaded, double-click the package to install it on your PC.
Click Install in the bottom right corner.
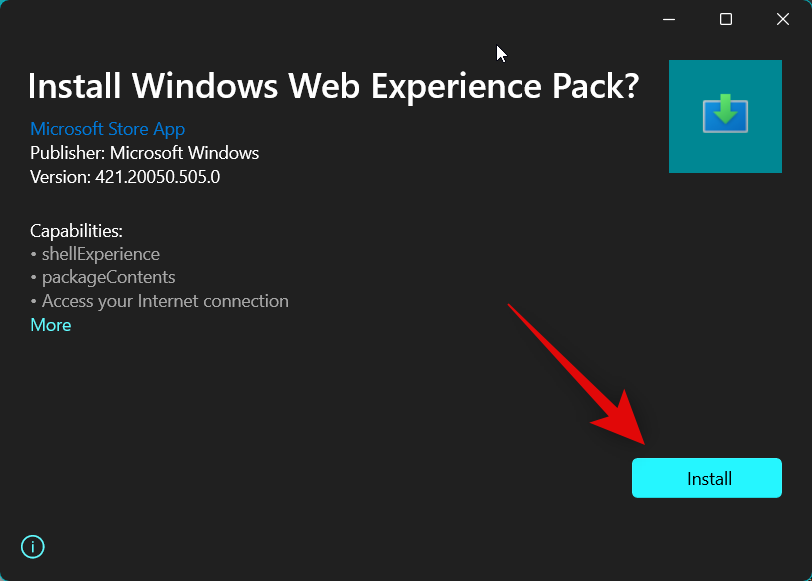
The package will now be installed on your PC. Once done, we recommend you restart your PC for good measure.

And that’s it! The older Web Experience Pack should now help get widgets back up and running again on your PC.
Method 12: Run an SFC scan
We now recommend you run an SFC scan. You could be facing issues with corrupted or missing system files, and an SFC scan can help identify and fix the same on your PC. Follow the steps below to help you along with the process.
Open Run by pressing Windows + R on your keyboard.

Type in the following and press Ctrl + Shift + Enter on your keyboard.
cmd

Now use the command below to run an SFC scan on your PC.
sfc /scannow
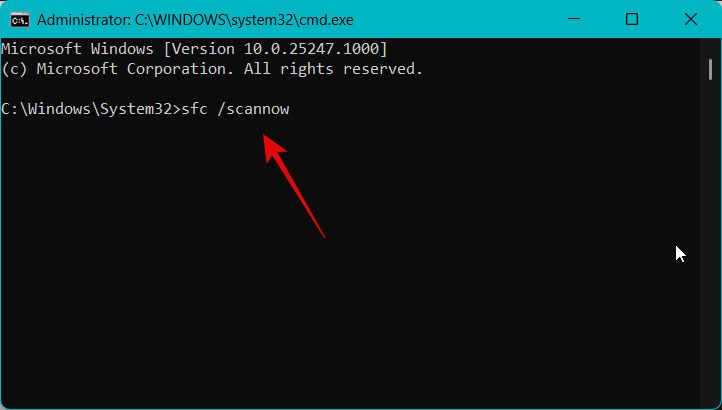
Once the process finishes, use the command below to close the Command Prompt.
exit
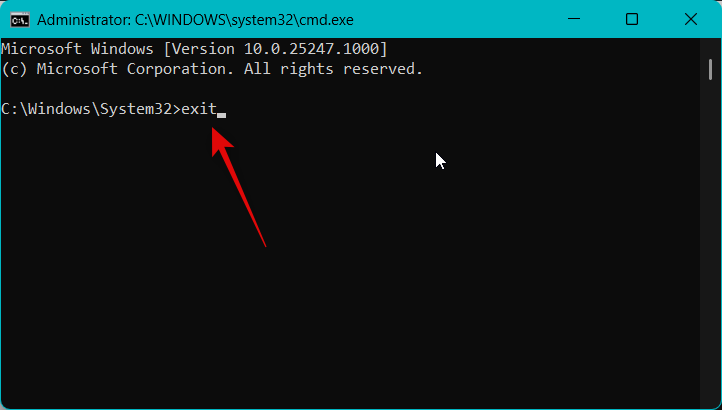
We now recommend you restart your PC to apply the changes and clear any temporary files.

And that’s it! You should now be able to use Widgets without any issues if missing or corrupted system files were the cause of your issue.
Method 13: Run DISM and Chkdsk scans
We now recommend you run Chkdsk and DISM scans. These can help fix bugs and corrupted files with your current Windows installation, as well as file system errors pertaining to your boot disk. Follow the steps below to help you along with the process.
Open Run using the Windows + R keyboard shortcut.

Now type in the following command and press Ctrl + Shift + Enter.
cmd

Use this command to run a DISM scan.
DISM /Online /Cleanup-Image /restorehealth
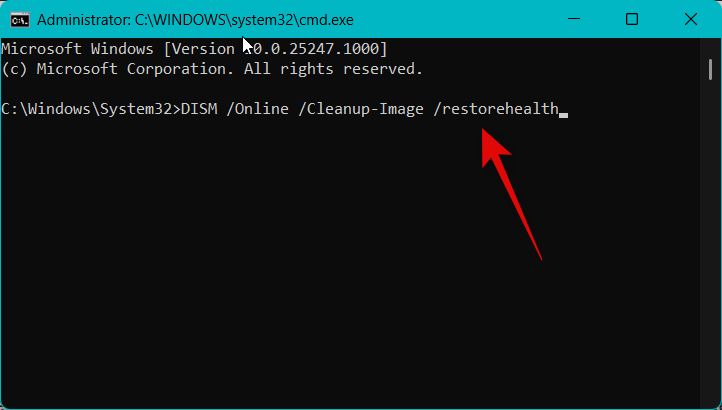
Once the scan is complete, use the command below to run a Chkdsk scan. Replace [LETTER] with the currently assigned letter to your boot drive.
chkdsk [LETTER]: /r /scan /pref
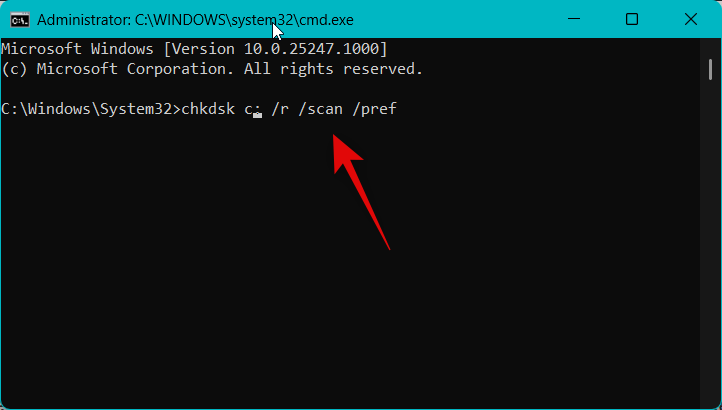
When the scan is completed, use the command below to close the Command Prompt.
exit

We now recommend you restart your PC for good measure.

And that’s it! Widgets should now be working again if they were facing issues due to corrupted Windows files or file system errors on your PC.
Method 14: Wait for an update for Microsoft Edge
As discussed above, Widgets not working is a known issue after the recent Windows Web Experience Pack update. We now recommend you simply wait for a future update which will more than likely fix this issue at your end. Microsoft is aware of this issue and is more than likely working on a fix. We also recommend you regularly check for updates to Microsoft Edge. You can use the steps below to check and update Edge on your PC easily.
Open Microsoft Edge on your PC and visit the address below.
edge://settings/help
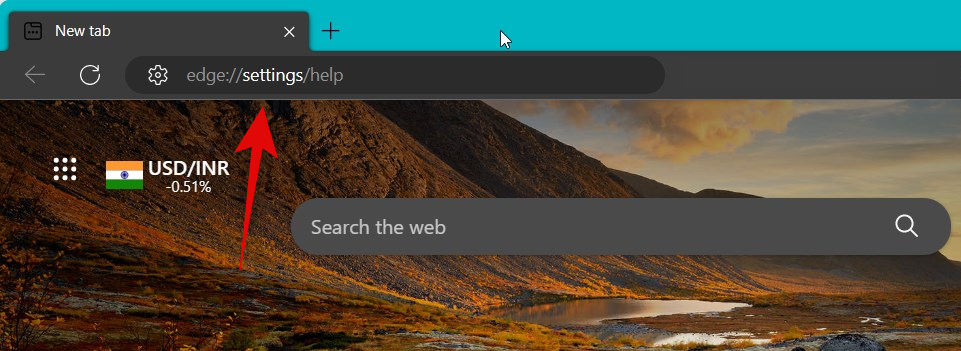
You will now be at the About page for Edge, and the browser will automatically check and display available updates for your PC. We recommend you install any pending updates, which will also update the web experience and webview2 runtime packages.
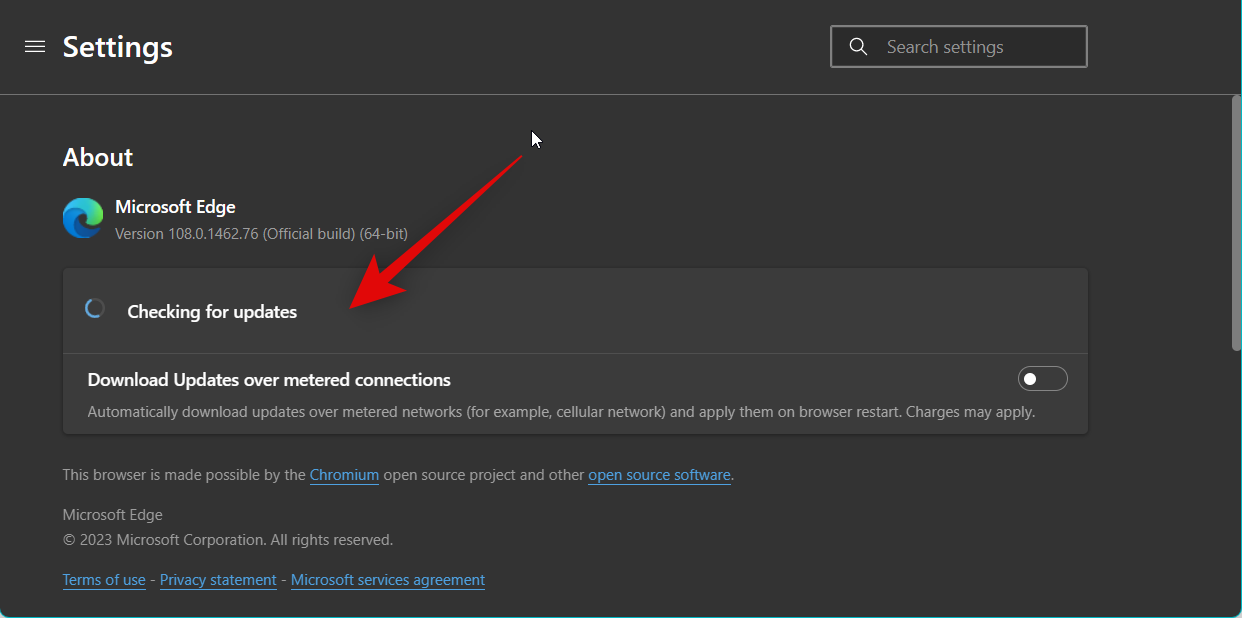
This should help get rid of the known bug and fix Widgets at your end.
Method 15: Contact Microsoft Support
You should now get in touch with Microsoft Support if you’re still facing issues with Widgets at your end. You could be facing an issue or bug that is specific to your setup, and a support executive will be able to better diagnose your issue. You can use the link below to get in touch with Microsoft Support in your region easily.
We hope this post helped you easily fix Widgets on Windows 11. If you have any more questions, feel free to reach out to us using the comments section below.




Method 11 worked. I’ve been trying for hours and it only worked because I managed to download the file. I would never find that out because neither the official MS website has such information. It helped a lot. Thank you very much!