
So you’ve installed Kdenlive on Windows and want to start using it to edit your videos. But learning how to navigate a new app is easier said than done, especially when it comes to video editing apps that tend to have a steep learning curve.
Kdenlive is one of the best open-source (free!) video editing tools available out there. If you don’t want to dole out a subscription fee that goes along with many of the premier video editing apps such as Adobe Premiere Pro and Sony Vegas, learning how to use Kdenlive can help solve all your video editing woes for a long time to come.
With that in mind, let’s take a look at how you can start using Kdenlive and its features with a basic Kdenlive tutorial.
How to use Kdenlive: Basic tutorial
Firstly, open Kdenlive from the Start menu.

1. Create a new project
As soon as you open Kdenlive, you’ll automatically be on a new project with default project settings. To view and change your project settings, click on Project in the top toolbar.

Then select Project settings.

On the other hand, if you want to create a new project from scratch, click on File.

Then select New.

And then select your project settings.

You can choose from the available project settings with the default project location or have a custom setting. In our example, we’re selecting the Vertical HD 30 fps under “Custom” as our video is shot with vertical framing.
Click on OK once you’ve selected the project settings.

2. Import files
Now, let’s import some media files to your project. This can be achieved in a couple of different ways.
Click on Project in the toolbar.

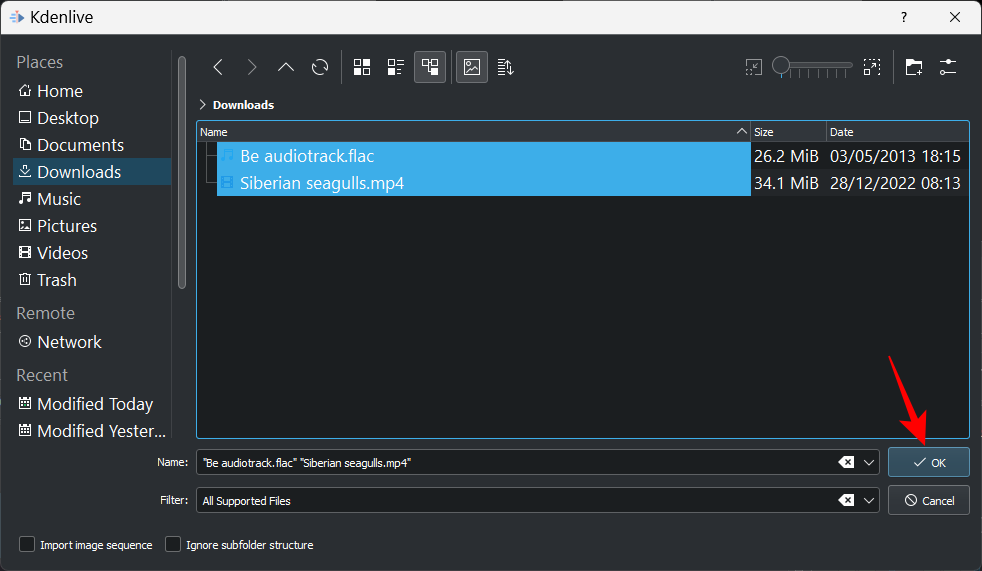
Then select Add Clip or Folder…

Navigate to your files, select them, and click on OK.
If there are any files that need to be converted for easy editing, you’ll get a prompt for the same. Click on Transcode, if applicable.

Once done, you will see your files in the “Project bin”.

Another way to import files is to simply drag and drop them into the project bin.

Adding tracks to timeline
Next, we are going to add our imported files to the timeline. This is as easy as dragging the media file from the project bin to the timeline, like so:

Your video file will be added to a video channel and, if it has accompanying audio, that will be added to an audio channel.

With default settings, Kdenlive will show you two preview screens. The first one is called Clip Monitor – a preview screen for your media in the project bin. The second preview screen is called the Project Monitor and that previews your media in the timeline.

If you have additional audio and video files, they can also be added separately in the same manner – videos in the video channel, and audio in the audio channel.
Quick tip: If you need to zoom in or zoom out the video in the timeline, use the slider in the bottom right corner.

3. Trim files
Now, let’s trim the files and make sure that only relevant material makes it to the final output. To do so, take either edge of the clip and drag it inward.

And just like that, your files are trimmed.
Quick tip: If two files are grouped together, changes made to one of them will be made to both. If you want to ungroup a file, simply right-click on it and select Ungroup Clips.

Alternatively, to group files in the timeline, hold down the Shift key and select them, then right-click and select Group Clips.
4. Split files
To do so, firstly, select the clip in the timeline by clicking on it. Then select the razor tool (scissor icon) from the timeline toolbar.

Now click on the spot where you need to trim the file.

The files will now be split at the spot where you clicked with the razor tool. To delete a segment of the clip, mark the beginning and ending with the razor tool. Then click on the Selection tool.

Select the section you want to delete and press Delete.

5. Use the Spacer tool to shift multiple files
Kdenlive has a “Spacer” tool that can shift your files left or right together in the timeline. This can come in quite handy when there’s a space between two files on the same channel and you don’t want to shift them separately. To start using it, click on the spacer tool (to the right of the razor tool).

Then drag a file towards the left to shift it and watch the other files shift with it.

The spacer tool won’t work if you’re dragging the file on the right as that is seen as a separate entity. So, if you have multiple gaps between your files, use the spacer tool on the file from where you want to start shifting the files. The one on the left will stay in its place while the rest move.

6. Add text titles
Next, let us see how we can add some text to our video. Click on Project in the toolbar above.

Then select Add Title Clip…

This will open up the Title clip window. Here, click in the middle of the tile to start typing.

Feel free to check out the tools that the title clip window has to offer. These will let you change the color of the text, its position, font, size, background, etc., and add effects to it. Use them to customize the title as you wish.
Quick tip: If you’re unsure about an option, use your cursor to hover over the option and get a short description of what it does.

Once done, click on Create Title.

The title will appear in the project bin. Drag it to the timeline to add it to your video.

Preview the video to see how it looks. If you want to edit it, simply double-click on the title clip and you can start editing again. You can also shorten or lengthen the title clip by dragging its edges left or right.
7. Add effects to Video
Now, let’s enhance the Video with effects and adjustments. Here are a few video effect options that you may find yourself using time and time again:
Effects
Click on Effects under the project bin.

Now select the Video tab (reel icon) to filter the video effects.

Here you will see a bunch of effect categories to choose from. Expand one category to check out the effects in it. For our example, we’re choosing “Motion”.

Then drag and drop the effect to a video file in the timeline.

Preview your video to see how the effect looks in action.
Transform
Although technically an effect, “Transform” is good to know separately as it can help you change the size, speed, and rotation of a clip and even help you add picture-in-picture (PIP).
To add the transform effect, right-click on a video clip, select Insert an effect, and then click on Transform.

You will see a red border appear around the video clip on the project monitor.

You can drag these red borders to change the size of the clip or the middle marker to change its position.
Alternatively, you can enter the coordinates for the X/Y axis for position change, and width/height values for size change.

If you have another video on a different channel, you can change the size of the current video with “transform” and end up with a PIP effect.
Note: You will need to insert a video channel to the timeline if there are no additional channels available. To do so, right-click in the “Master” section and select Insert track.

In the “Add Track” window, select how many tracks you want, and whether you want the track to be inserted above or below another track. Then click OK.

If you’re adding a video with audio, you will need to add an audio track as well (otherwise you won’t be able to add either track). Then, add the transform effect (to the video on top) to get the PIP effect as shown before.

Adjust Speed
Kdenlive has a quick and easy way of adjusting the speed of a track. To do so, hold down Ctrl and then drag the edges of the track. You will see the change in speed reflected at the bottom.

8. Add effects to Audio
Now that you know the basics of video editing, let’s move on to the audio. Adding effects to an audio track is similar to what we did with the video.
Click on the Effects tab under the project bin.

Then click on the Audio tab (speaker icon).

Here, click on a category to expand it.

Then drag the effect of your choice and drop it onto the track.

To edit the effect, click on your audio track, and then make the changes from within the “Effects” tab to the right of the timeline.

Each effect will have different edit options so there’s room enough to mix and match and tinker with the sound as much as you like.
9. Change Audio levels
To adjust the volume levels of the different tracks, switch to the Audio mixer tab to the right of the timeline.

Here, you can adjust the volume of individual audio tracks as well as the master track with the help of the vertical sliders.

You also get other conventional audio mixer options such as muting, soloing, monitoring, and panning channels (horizontal sliders).

10. Color and Image correction
Color balance is crucial to make your video look inviting and consistent. This is especially true if you’re working with two or more videos from different sources. Everything from lighting to effects makes a difference here and it’s good to know how you can add and work with color and image correction effects.
To start, click on Effects tab under the project bin.

Under the video tab, click on Color and Image correction.

Here, you will find a number of color correction options to choose from. Go through the list and find one that your videos need, then drag and drop one to a video in the timeline.

Then click on the video and the effect will come up for editing in the “Effects” tab to the right of the timeline. Adjust the numbers here to your liking and preview the video to see the changes.

Quick note: If you have split a file in a channel, you will have to add the same effect and change the values to all sections of the clip. Generally speaking, you will also want to add the same to video clips in all channels to ensure color consistency throughout your video.
11. Render or Export video
Though there are a bunch of other advanced options, effects, transitions, etc. that you can use in Kdenlive, for purposes of this tutorial, and for most video editing purposes, these basic tools are more than enough.
So now it’s time to export or render your video. This is a relatively simple thing to do.
Click on Project in the toolbar above and select Render.

The location for your “Output file” will be given towards the top. Click on the icon next to it to change location.

Then, choose from the available render presets to determine the video settings and configuration.

If you want additional options, click on More options at the bottom.

The additional options allow you to render the video at preview resolution, rescale the video, change speed, add your own custom video quality, and even get audio files separately, among other options.

Once you’re satisfied with your render settings, click on Render to File in the bottom left corner.

Wait for the render process to finish.

Once done, your final output file will be saved in your chosen location.

List of basic Kdenlive shortcuts
As you work with Kdenlive and get a hang of the software, you will start to depend on shortcuts to fast-track the process. Here is a brief list of important shortcuts that you should know about:
- Ctrl + N – Create new project.
- Ctrl + O – Open saved project.
- Ctrl + S – Save current state of project.
- Ctrl + Shift + S – Save current save project with a new name/location.
- Ctrl + Z – Undo last action.
- Ctrl + Shift + Z – Redo last action.
- Del – Delete selected item
- Ctrl + C – Copy selection
- Ctrl + V – Paste copied item
- Ctrl + Mouse wheel up – Zoom in
- Ctrl + Mouse wheel down – Zoom out
- Ctrl + G – Group files
- Ctrl + Shift + G – Ungroup files
- X – Razor tool
- S – Selection tool
- M – Spacer tool
- Ctrl + Enter – Render
For a list of every conceivable Kdenlive shortcut key, refer to Kdenlive’s shortcuts document.
FAQs
In this section, we answer a few commonly asked queries about Kdenlive as a video editor.
Is Kdenlive good for beginners?
There definitely are simpler video editing software out there than Kdenlive, such as Clipchamp which is also Windows’ native video editor app. But with the right guidance, you can get up and running with Kdenlive in no time. Refer to the tutorial above to know how to get started with basic editing in Kdenlive.
What is Kdenlive used for?
Kdenlive is a video editing tool, not unlike Adobe Premiere or Sony Vegas, and others of similar ilk. But what separates Kdenlive from the rest is that even though it is rich with features and tools, it is also completely open source, which means it is free, and is relatively light for it to run on low end PCs as well.
Do professionals use Kdenlive?
Yes, professionals do use Kdenlive. Given the variety of editing tools and options that it offers, Kdenlive is professional enough for most creators.
We hope you found this tutorial useful in learning how to use Kdenlive. Feel free to delve deeper into Kdenlive to learn more, edit better, and create content that is a delight to watch.


One response to “How to use Kdenlive on Windows: Step-by-step guide”
I do not use WINDOWS. I use Apple iPhone & computer. Please only send me articles that are on Apple.