
In your first hours of Star Wars Zero Company, the moves that set up your whole run are playing on Hard, unlocking Utilities instead of hoarding Credits, maxing Trick, Kabb, and Jae‘s standout passives, and upgrading the Medbay first.
Star Wars Zero Company is a turn-based tactics game, and like most of the genre your earliest decisions quietly shape the entire campaign. A handful of settings, one or two spending habits, and knowing which abilities to pour points into will make the mid-game feel far smoother than if you learn all of it the hard way. Here are the nine things worth prioritizing before you get too deep.
- The nine early priorities at a glance
- Play on Hard difficulty from the start
- Set up your gameplay options before the first fight
- Push your PC graphics as far as they’ll hold
- Bind Quick Save and Quick Load, then spam them
- Chase Utilities instead of Credits
- Build Focus Points toward the endgame nodes
- Max Trick, Kabb, and Jae’s standout passives
- Upgrade the Den, and put the Medbay first
- Spend Bonds on Max Health and First Movement
- A few more combat habits worth building early
- Frequently Asked Questions
The nine early priorities at a glance
| Early priority | What to do first |
|---|---|
| Play on Hard | Start on Hard; you can change it anytime outside combat |
| Gameplay settings | Turn off Warn for Early End Turn, set Ability Selection Style to Hybrid |
| PC graphics | Enable VSync and DLSS, push presets as far as your hardware holds |
| Quick Save / Quick Load | Bind them (F5/F9) and save before risky plays |
| Utilities over Credits | Run operations that unlock Utilities; use one every battle |
| Focus Points | Build toward the final skill-tree nodes; refund freely |
| Standout passives | Max Trick’s self-revive, Identify Weakness, and Jae’s Final Shot |
| Den upgrades | Upgrade the Medbay first for up to four healing beds |
| Bond upgrades | Spend on Max Health (+4) and First Movement |
Use this as your jump list — every priority below is a scannable one-liner, then each gets its own section further down.
Play on Hard difficulty from the start
The single best early call is to set the difficulty to Hard. The tactics loop — cover, flanking, timing your abilities — simply pays off more when the enemies actually punish sloppy play, and the whole game feels better for it. On easier settings a lot of that texture disappears.
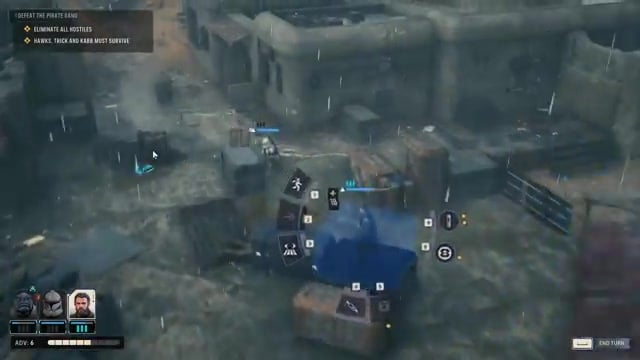
There are four difficulty settings, and you can change them at any time outside of combat, so this is a low-risk experiment. Start on Hard — you lose nothing by trying the harder setting first.
Set up your gameplay options before the first fight
| Setting | Recommended value |
|---|---|
| Warn for Early End Turn | Off |
| Ability Selection Style | Hybrid |
| Quick Save / Quick Load | Bind them (default F5 / F9) |
A couple of default settings are worth changing right away. Turn off Warn for Early End Turn — there are plenty of turns where you have nothing useful left to do with your remaining action points, and the confirmation popup gets old fast. The bigger one is Ability Selection Style, which defaults to the radial menu that appears around a selected operator. Switch it to Hybrid: the radial looks nice, but the moment you pan the camera off to check enemies off-screen, you lose sight of it. Hybrid keeps the action menu pinned at the bottom of the screen so it’s always there.
The ability input is set to hold-the-button by default; some players prefer toggle, so give both a try and keep whichever feels right. If you’re on console, the labels may read slightly differently, but the same options should all be present.
Push your PC graphics as far as they’ll hold
On PC, a few graphics tweaks are worth a minute. Leave the frame rate unlocked but turn on VSync so the game stays in step with your monitor. If you have an NVIDIA card, enable DLSS for extra headroom, and if your hardware can sustain good performance, push the quality presets toward Ultra — it looks gorgeous. None of this is a fixed “best” preset, though; base every choice on what your own machine can actually run smoothly.
Bind Quick Save and Quick Load, then spam them

In the Controls menu, scroll to the bottom and bind Quick Save and Quick Load (they default to F5 and F9). This is one of the best habits you can build early. Because you can save mid-combat, you can drop a save right before a risky play — a coin-flip attack, an aggressive flank — and if it goes wrong, hit F9 and you’re instantly back to try it differently.
Get comfortable with whatever keys you’ve set and use them constantly. The one catch: Quick Save and Quick Load are mouse-and-keyboard only, so controller players don’t get this particular safety net.
Bind Quick Save (F5) and Quick Load (F9) and save right before every risky move — a failed gamble becomes a one-key reload instead of a lost operator.
Chase Utilities instead of Credits
Early on, favor the operations and missions that reward Utility items — grenades, health packs, things like the Impact Bomb. In the first few hours you won’t have many unlocked, and each one you add is a genuine game-changer, especially once you have enough that every operator can carry their own. Later you can even run multiple Utilities per operator, which opens up carrying several grenade types at once and can swing an entire battle.
It’s tempting to chase Credits instead, but Utility items do far more for you in the opening hours, so put your early operations toward unlocking them first. There’s also no reason to hoard your Utilities: grenades and health packs refresh at the start of every battle, even across back-to-back fights in a longer story mission. Use every item every fight; a saved grenade you never threw is wasted.
Build Focus Points toward the endgame nodes

Focus Points are the skill tree, and the mistake early on is spending them on whatever the next cheap unlock happens to be. Instead, look at the final nodes of each character’s tree first and plan backward — those endgame abilities are what you’re actually building toward, and they’re what make the late game click.
The good news is that this costs you nothing to get wrong. Focus Points can be refunded at any time, for free, so spend them freely, experiment, and re-spec whenever you learn something new. Just keep the long-term target in mind rather than optimizing one node at a time.
Max Trick, Kabb, and Jae’s standout passives
| Ability (character) | Base effect | Maxed-out effect |
|---|---|---|
| For My Brothers (Trick) | Self-revives once per battle | Revives at full health, no injury, +1 AP |
| Identify Weakness (Scoundrel class) | Marks one enemy Vulnerable; next shot crits | Vulnerable x2 (next two hits crit), 28.0m range |
| Final Shot (Jae) | Executes enemies at ~6 HP or less for free | Executes at 10 HP or less, up to two per turn |
Three early operators have passives that are worth maxing as fast as your Focus Points allow, because each one snowballs hard once fully upgraded.
Trick’s For My Brothers lets him revive himself the first time he goes down each battle. Even the base version is strong — no ally has to walk over and pick him up. Maxed, it’s absurd: he revives at full health, it doesn’t count as an injury, and he comes back with +1 AP to immediately act again. Stack his health on top and Trick becomes a tank with what amounts to a free extra life.
Identify Weakness is tied to the Scoundrel class rather than being unique to any one operator — Kabb just happens to have it early, but anyone you make a Scoundrel can run it too. It marks an enemy Vulnerable so the next shot lands as a critical hit. Maxed, it applies Vulnerable x2 across a 28.0m range, so the next two hits crit — pair that with an astromech feeding AP back to a heavy hitter and you can dump two crits into a boss in a single turn.
Jae‘s Final Shot executes low-health enemies for free, without spending a move. Early on it triggers on targets at roughly 6 HP or less; fully maxed it fires on enemies at 10 HP or less and can trigger up to twice per turn. Chip two enemies down into that window and Jae simply removes both from the board.
Upgrade the Den, and put the Medbay first
Your base, the Den, should more or less always have something upgrading — a better Medbay, a bonding space for your crew, an expanded roster, and the other core facilities, brought online as early as you can afford them. But the first priority is clear: upgrade the Medbay as soon as possible.
You will rack up injuries in this game, and the count climbs fast on harder difficulties. A better Medbay unlocks up to four medical beds, so if a whole four-operator squad limps home hurt, you can heal all of them at once between missions instead of benching people while they recover. On Hard, that healing throughput matters more than almost anything else you could fund first.
Spend Bonds on Max Health and First Movement

As operators build Bonds, you’ll earn upgrades to spend, and two are worth prioritizing above the rest. Max Health hands out a roughly +4 bump each time — stack it and your key operators turn into genuine tanks (it’s very possible to push someone past 100 health by the endgame). The other is First Movement, which extends how far a character can move; it looks minor at first, but the value compounds, and by late game the difference between an operator who took it and one who didn’t is huge.
To actually generate Bonds, run the same pairs of operators together across your early missions, then follow up with the post-mission conversations back at base. Those inter-mission talks are easy to skip and shouldn’t be — they’re how the Bonds (and the upgrades attached to them) grow.
A few more combat habits worth building early
Beyond the numbered priorities, a handful of tactical habits pay off from your very first deployment. The combat is XCOM-style, so treat cover and cautious positioning as the default — advance methodically, keep everyone tucked behind something, and don’t overextend before your Bonds and talents have filled in.
Two more things. First, don’t play one operator’s whole turn at a time the way the enemy AI does — interleave action points across your squad, clicking around between characters and weighing every option before you commit to anything. Second, before you deploy, do a quick fit check in the prep screen: weapon mods, Utility items, and any unspent Focus Points, since early on you’ll constantly be shuffling your best gear between operators as your teams change. One bonus: there’s no fog of war, so when a bold flank can take out a dangerous enemy early, you can see the whole board and go for it.
Related Star Wars Zero Company guides
Frequently Asked Questions
How long is the Star Wars Zero Company campaign?
A full campaign runs roughly 30 to 40 hours. That’s worth keeping in mind when you weigh early risks — a reckless gamble that nets a small short-term gain but leaves an operator injured or lost is a cost you’ll feel across dozens of hours, so pace yourself rather than swinging for the fences in hour two.
Should I rush to pay off Hawks’ Hutt debt early on?
No. Seeing an 80,000-Credit debt to the Hutts hanging over Hawks early makes it look like a giant farming requirement, but you don’t need to grind Credits to clear it. Keep advancing the main critical-path progression instead — the debt is handled through the story rather than by hoarding currency, and Credits aren’t especially useful in the opening hours anyway.
Is Zero Company beginner-friendly if I’ve never played turn-based tactics?
Yes. The action pauses while you decide what each operator does, so there’s no reaction-speed pressure, and the four difficulty settings give newcomers a gentle onramp. Tutorials and on-screen tips walk you through the systems as you go, and since you can adjust the difficulty at any time outside of combat, you can tune the challenge to your comfort level as you learn.
Video help






Leave a Reply