As we practice social distancing and remote working, it’s hard to decide whether you’re dressed right for a casual video chat with your friends or for a video conference with your colleagues. Wouldn’t it be just good if you could cover up your untidy bedroom or the tee that you’re wearing so that you don’t have to worry about how bad you look or when the surroundings are bad?
Enter – Snap Camera. As you might expect by hearing the word “snap”, Snap Camera is developed by none other than Snapchat, a social media platform that’s known to use several lively looking filters over users’ faces. Snap Camera takes Snapchat’s filters so that you can use them for your PC or laptop’s webcam.
- What is Snap Camera
- What makes it so popular
- How do you download and install Snap Camera
- How to enable Snap Camera
- How to turn yourself into a potato on Snap Camera
- How to use more filters
- How to use Snap Camera Lenses for changing your background
- How to disable Snap Camera Lenses immediately or during a meeting
- How to exit the Snap app
- Why is Snap Camera not working and how to solve it
What is Snap Camera

Snap Camera is a new tool developed by Snapchat and lets you apply Lenses to your face using your computer’s webcam. The software takes the input of the physical webcam present on your computer and applies filters and effects to your face using augmented reality.
You can use Snap Camera with several favorite third party video conferencing and live streaming applications on your desktop. The app offers a plethora of filters and effects to choose from – like making your skin look smoother and clean or if you want to spice things up a little bit, turning yourself into a potato or a pickle. The software offers as many filters and effects as you can find on Snapchat’s mobile app and you can use it all from your PC.
What makes it so popular
As more and more of us are getting confined to our homes, video conference and remote collaboration tools are gaining a significant audience. While video conferencing apps like Zoom, Skype, and Teams are doing the job of helping organizations and employees around the work connect with each other and work in synchronization, sometimes you might just need interesting things when communicating during these times.
Snapchat’s Snap Camera does exactly that. You can try out the thousands of filter options and Lenses that users on Snapchat’s mobile app use to overlay your faces on a potato or a paper roll or the thousand other things that the app offers. As people are relying on enterprise chat service for their work meetings, services like Snap Camera are helping users connect to their loved ones in more interesting ways.
How do you download and install Snap Camera
Step 1: Head over to the Snap Camera download page.
Step 2: In order to proceed with the download, you will have to enter your email address and agree to the Snap Camera License Agreement. Once you do so, you will get download links both Mac and Windows devices which you can choose accordingly.
Step 3: Open the installation package and follow the instructions on the screen to install Snap Camera on your computer.
How to enable Snap Camera
Since Snap Camera is a tool to be used along with your video calling service, you will have to enable it manually inside the app that you use to video conference with your friends, family, and colleagues. The following guide will help you set Snap Camera as the default camera on Skype, Zoom, Microsoft Teams, Google Hangouts, and Cisco Webex.
Enable Snap Camera on Skype
Step 1: Open Skype and go to Settings by clicking the 3-dot icon next to your profile and then hitting the ‘Settings’ option.
Step 2: Select the ‘Audio & Video’ section from the left-hand side and choose Snap Camera as your default camera.
Alternatively, you can also do this while on-call on Skype by clicking the 3-dot button on the bottom right, selecting ‘Audio and Video Settings’ from the menu, and choosing Snap Camera as the default camera.
Enable Snap Camera on Zoom
Step 1: Open the Zoom app on your computer and head over to Preferences. You can do so by:
- On Windows: Hit the profile picture and click on ‘Settings’
- On Mac: Click on Zoom in the menu bar and select ‘Preferences’

Step 2: Select the Video settings tab on the left sidebar.
Step 3: Select Snap Camera as your default camera from the drop-down menu.
Enable Snap Camera on Google Hangouts
Step 1: Open a call in Google Hangout.
Step 2: Hover over the top right corner of the call screen and click on the cogwheel icon to get to the Settings page.
Step 3: Under the General tab, choose Snap Camera as your default camera.
Enable Snap Camera on Microsoft Teams
Step 1: Open the Microsoft Teams app on your computer and head over to the Settings page by pressing the following keyboard shortcut:
Ctrl/Command + , (Comma)
Step 2: When the Settings page pops up, click on the Devices tab from left-hand side and select ‘Snap Camera’ from the drop-down list under the ‘Camera’ section. 
You can also switch to the Snap Camera while on-call inside Teams by clicking the 3-dot icon on the call screen, selecting ‘Show Device Settings’ from the menu, and choosing Snap Camera inside Camera.
Enable Snap Camera on Cisco Webex
Step 1: Open Cisco Webex, click on your profile picture and select Settings. 
Step 2: Click on Video and then select Snap Camera from the ‘Camera’ drop-down list. 
Enable Snap Camera on BlueJeans
Step 1: Open the BlueJeans app on your PC and tap on the Camera section at the bottom to get a list of options you can choose as your camera input for video calling.
Step 2: Select Snap Camera as your default camera from the drop-down menu. 
How to turn yourself into a potato on Snap Camera
Step 1: Open the Snap Camera application on your computer and grant it all the necessary permissions like access to your camera and microphone. 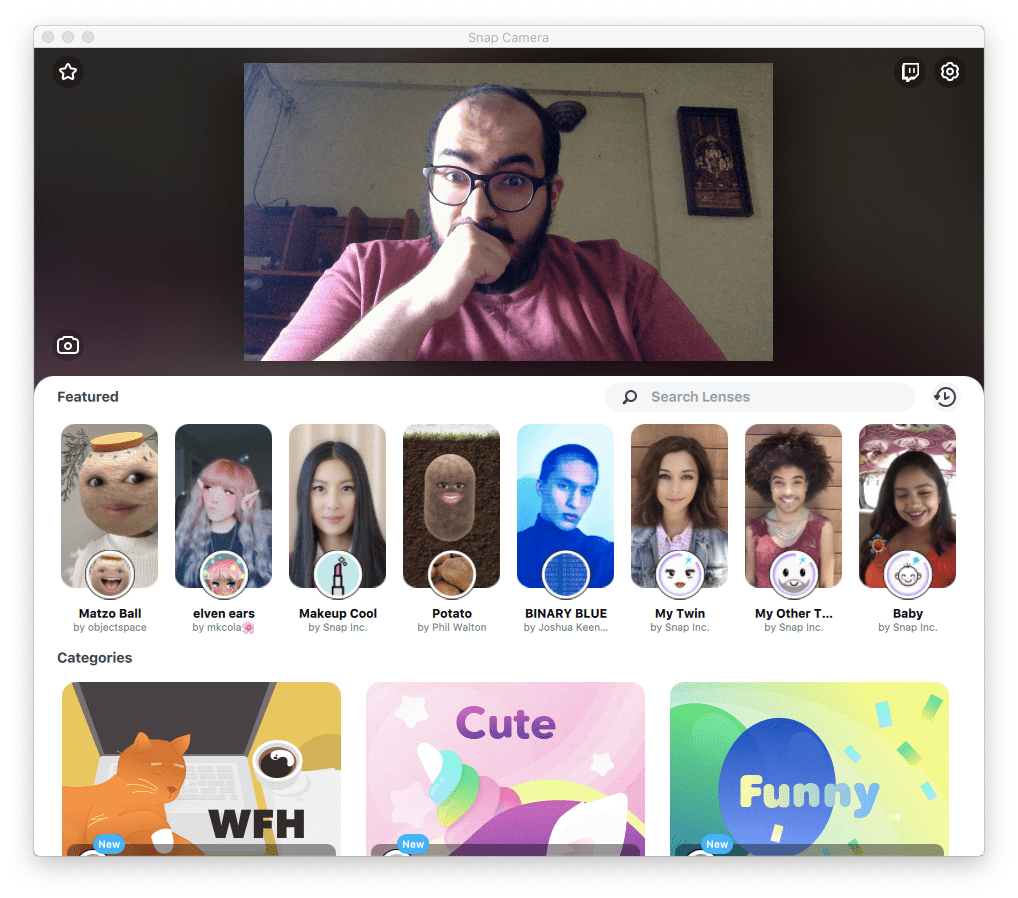
Once you do, you will see a preview of your computer’s physical webcam which is your face and a list of Featured Lenses below it.
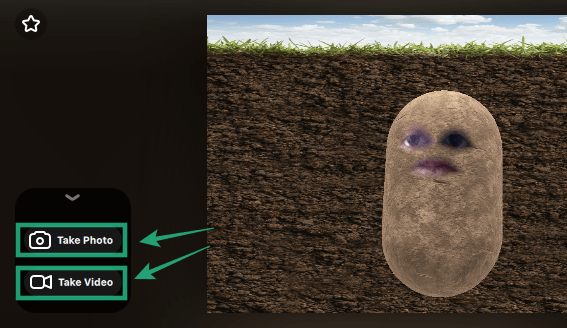
Step 2: If turning yourself into a potato is why you came to read, you can do so by selecting the potato filter from the Featured Lenses list and turn yourself into a potato.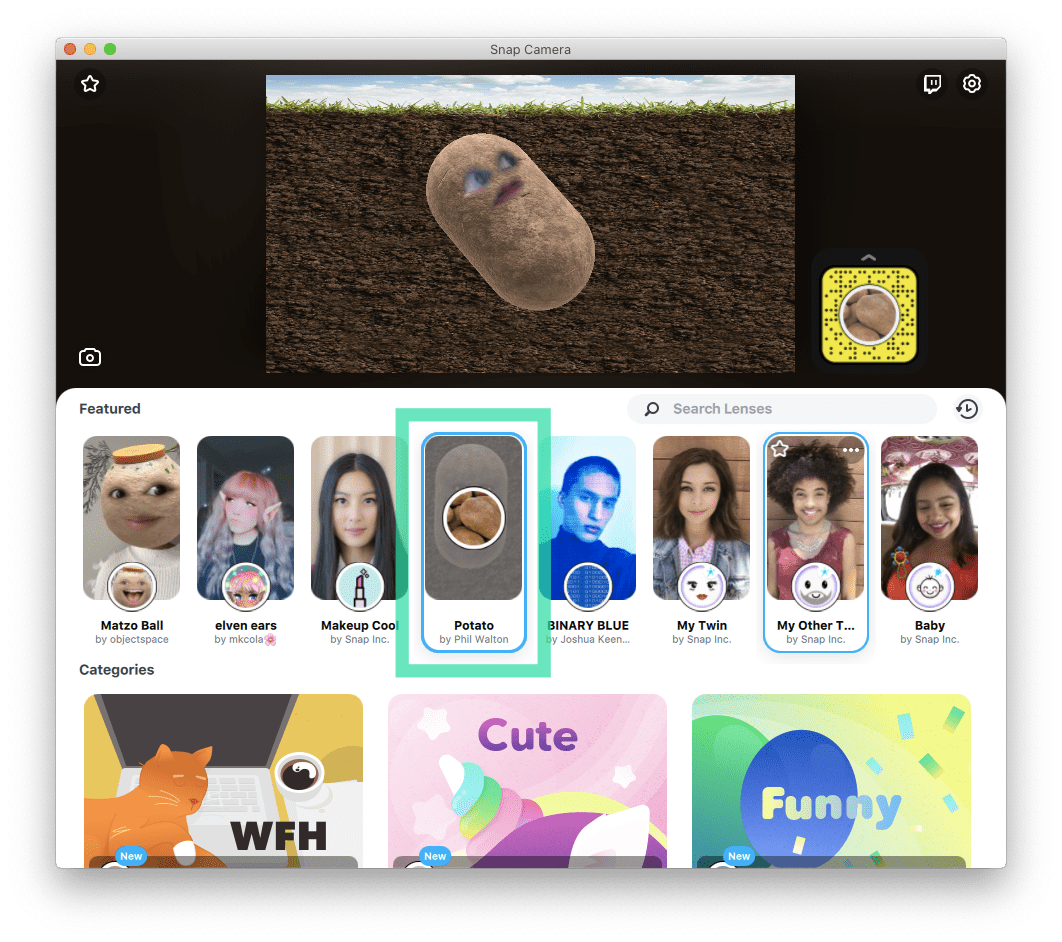
Step 3 (optional): You can either click a picture or a video of your potato face right from the Snap Camera app by clicking on the Camera icon and selecting ‘Take photo’ or ‘Take Video’ accordingly.
Step 4 (optional): To save the picture or video file that you just captured, click on the Download icon from the left-hand side. You can also preview the picture or video or delete it. 
If you turn ON the Potato lens and enabled Snap Camera as your default camera on your desired video conferencing app (Zoom, Skype, Teams, Webex, or Hangouts), your face will now be shown as a potato to anyone who’s viewing you during a video session. 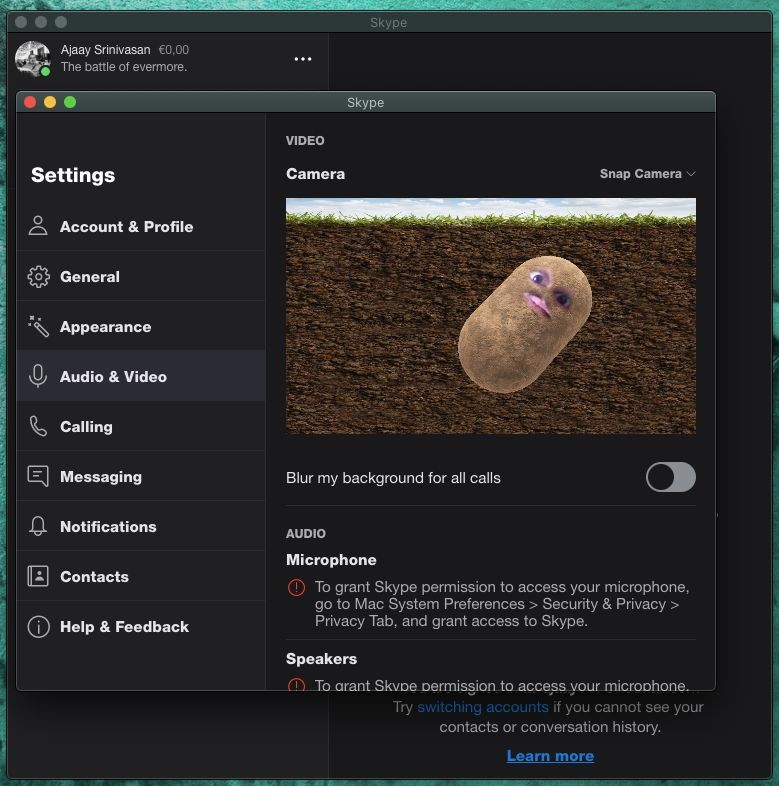
How to use more filters
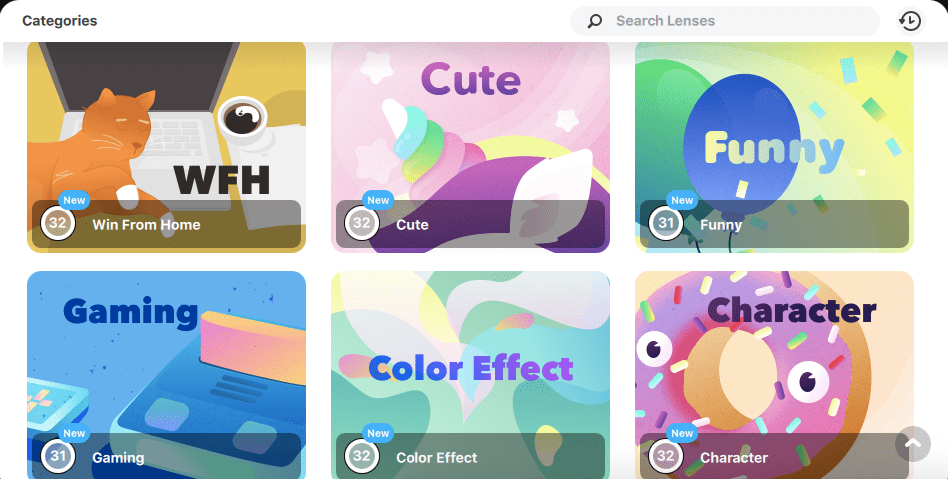
Besides the popular potato face, you can choose other effects from the Featured Lenses section, Top community lenses or from different categories like Win from home, Cute, Gaming, Character, Funny, and Color Effect. You can then opt to keep it selected for further use on a video call app or you can save a picture or capture a video of yourself from within the Snap Camera app.
How to use Snap Camera Lenses for changing your background
Besides turning your face into a potato, some lenses on Snap Camera can also change the background of your video feed. You can choose lenses that only modify your surroundings without adding anything new to your face.
Choose the lens that offers the cleanest background without modifying your face. Some lenses offering clean backgrounds include:
- Glow In The Dark: Offering the cleanest look for your video call, this Lens highlights your face in green color and tones down your surroundings so that only you are visible. Use this when the environment around you is shabby or if you want to spook your friends with a green glow around you. The lens is available inside the Inside ‘Win From Home’ section under ‘Featured Lenses’.

- Work from Garden: Use this when you want to imitate that you’re working from your backyard. It’s available inside the Inside ‘Win From Home’ section under ‘Featured Lenses’.
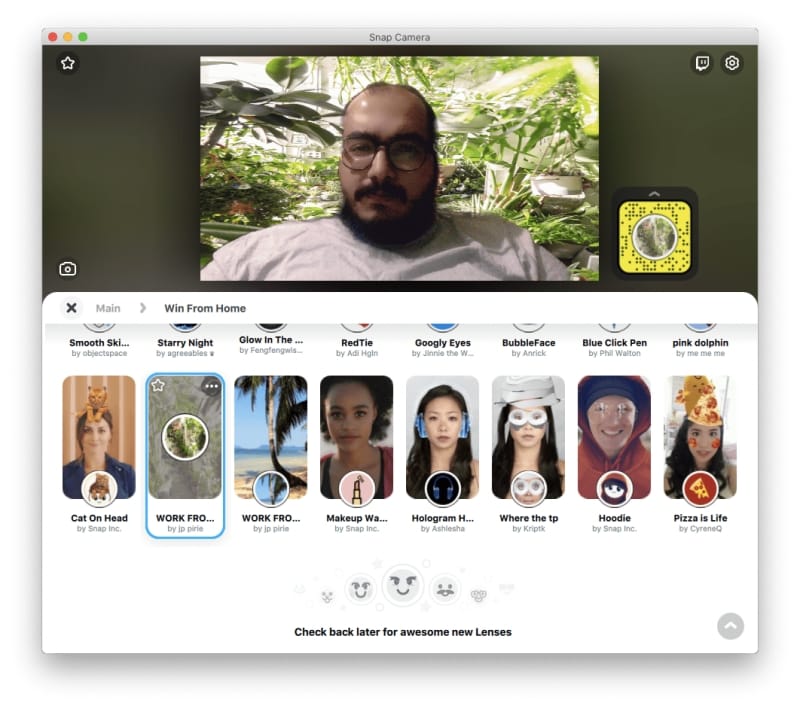
- Work from Bali: Feeling the summer vibes already? ‘Work from Bali’ will paste a picture of Bali in the background. This lens is available inside the Inside ‘Win From Home’ section under ‘Featured Lenses’.
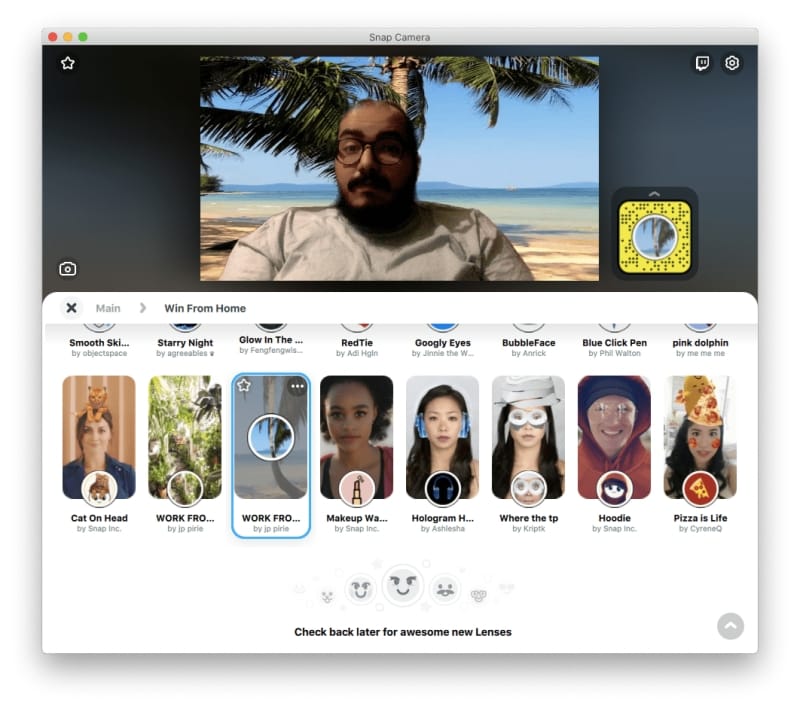
- Work from Space: This lens offers pink clouds in the background. You can search for it using the search bar at the top.

- Work from Beach: A similar to ‘Work from Bali’ but with a different beach.
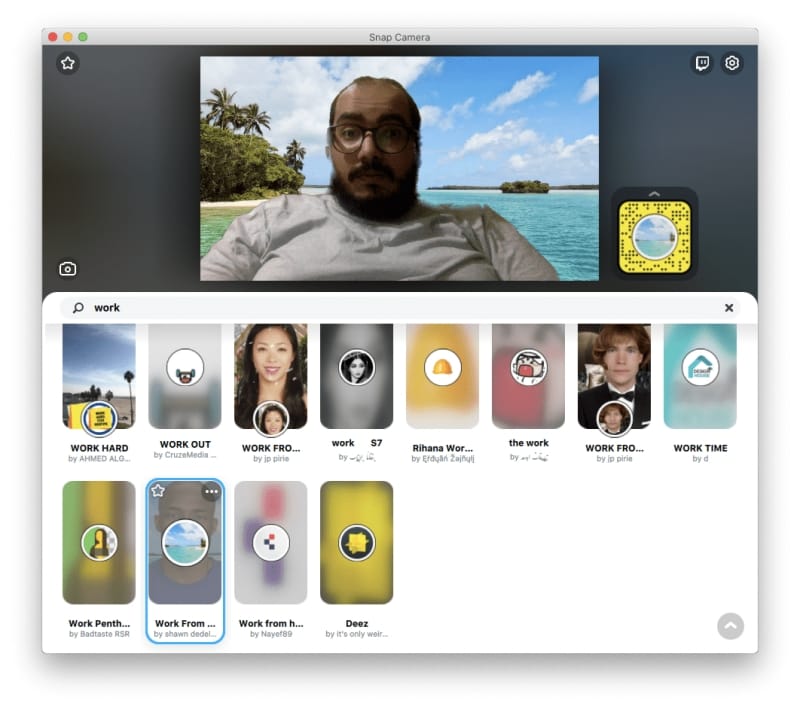
- Virtual-Office 3: One for the workaholics. This lens lets you imitate the feeling as if you’re working from your office.
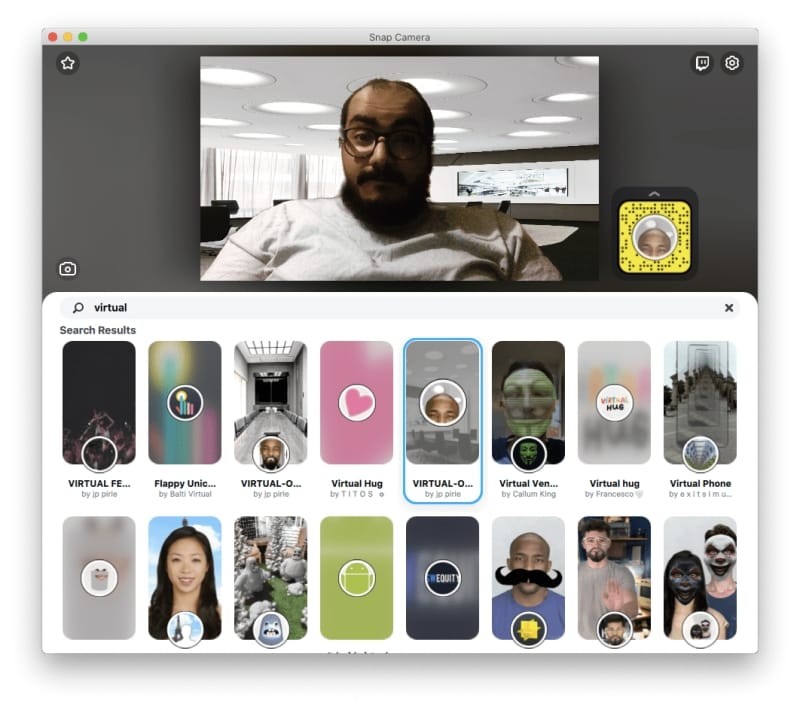
Find more lenses that suit your requirements by scrolling through the lenses available inside the Top community lenses section. Once you select a lens on Snap Camera, the same will be applied to your video conferencing/collaboration app.
How to disable Snap Camera Lenses immediately or during a meeting
While Snap Camera can give you access to dozens of effects, you might want to turn off the effect during a video conference with your colleagues. You can disable the Lens effect on Snap Camera by following the instructions below.
Disable Snap Camera Lenses on Windows
Step 1: Find the Snap Camera icon in the taskbar at the bottom of your screen and right-click on it.
Step 2: Now select ‘Turn off’.

Disable Snap Camera Lenses on Mac
Step 1: Locate and click the Snap Camera icon from the Menu bar at the top.
Step 2: Click ‘Turn OFF’. 
This way you can quickly disable Snap Camera effect during a video call.
How to exit the Snap app
If you want to exit the Snap app and not just disable its effects, you can do so by following the steps below:
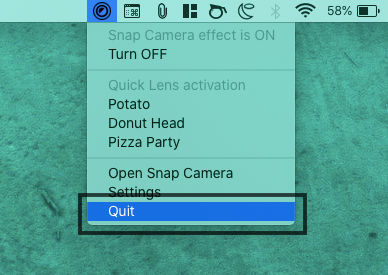
- On Windows: Right-click on the Snap Camera icon in the taskbar and select ‘Quit’.

- On Mac: Click the Snap Camera icon on the Menu bar and select select ‘Quit’.
Why is Snap Camera not working and how to solve it
Snap Camera works by capturing the virtual feed from your webcam and overlaying it with filters. However, like any software, you might have trouble getting Snap Camera to work on your system. You can fix issues with Snap Camera on your computer by following the guide below:
▶ How to fix Snap Camera not working problem
Do you use Snap Camera’s lenses when video calling with your loved ones? Which effect other than the potato face do you use with Snap Camera? Let us know in the comments below.






This seemed to go away as an option for the Desktop App verison for the Mac as of today. Can you confirm that it still works on the Mac for you?
where is link to install?